


You can instantly create realistic virtual networks deploying controllers, switches and hosts using Mininet. And experiment with them to your heart’s content to run real kernel, application and switch code on a single machine, whether on a VM, the cloud or native.
Mininet is open source software that is used to simulate a software defined network (SDN) and its compatible controllers, switches and hosts. It comes in handy for networking enthusiasts and beginners to get some experience in working with the fast growing SDN technology. To put it simply, a SDN separates the control plane from the data forwarding plane, making network devices such as switches and routers fully programmable and, hence, the network behaves according to the users’ requirements. By default, Mininet provides OVS switches and OVS controllers. However, it has the support to install other/preferred SDN controllers and switches instead of the defaults. The primary feature that distinguishes SDN devices from traditional network devices is the scope for customising protocols and functions.
Mininet supports the Openflow protocol, which provides an interface between the control plane and the data forwarding plane. Openflow protocols are used to control the packet flow as per the API written on the controller. Mininet also has support for a variety of topologies and ensures the availability of custom topologies. The CLI (command line interface) provided by Mininet is comfortable to use after a bit of practice.
Installing Mininet on your computer
To install Mininet, open the terminal and issue the following command:
# apt-get install mininet , to install the Mininet packages on your system .
Next, verify the installation by issuing the following command:
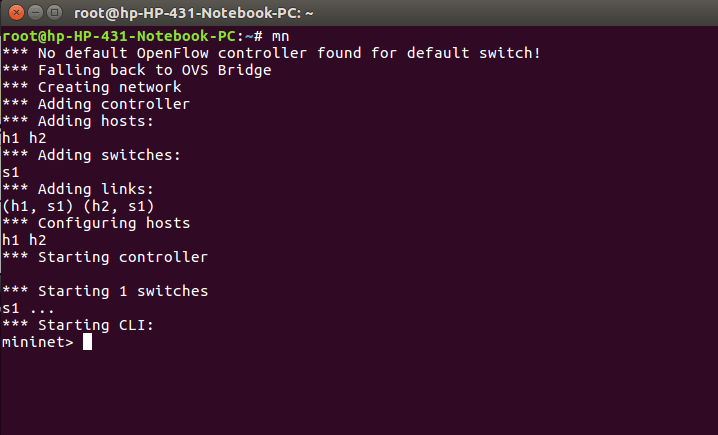
# mn
After a successful installation, you’ll see what’s shown in Figure 1 on the screen.
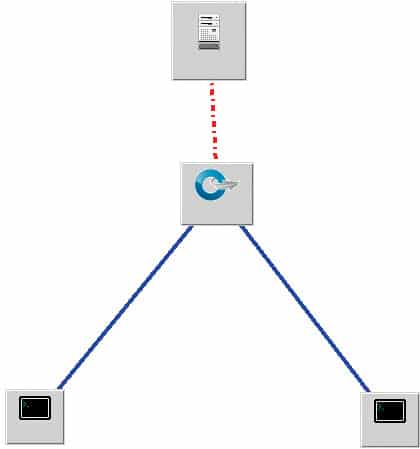
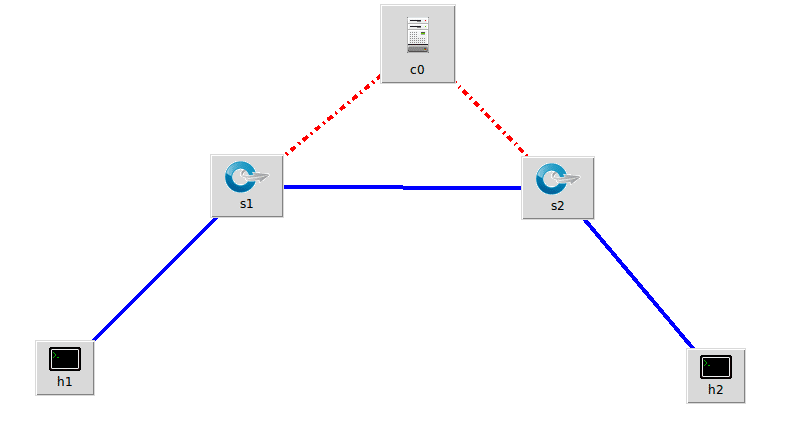
Notice that a network is created with default topology (as shown in Figure 2) and default OVS switches. This network is ready for use and has all the parameters like IP addresses and links pre-configured, based on the default settings.

Getting started with Its commands
The command to display the nodes present in the network is:
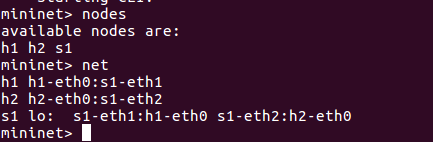
mininet> nodes
The above command will list all the nodes present in the created network. As shown in Figure 3, the nodes s1, h1, h2 are displayed.
The command to display and list the links present in the network is:
Mininet>net
As shown in Figure 3, the interface eth0 of the host h1 is connected to eth1 of switch s1 and the interface eth0 of host h2 is connected to eth2 of switch s2.
The command to display the IP addresses and the process IDs of the nodes is:
Mininet>dump
As seen in Figure 3, h1 is assigned the IP address 10.0.0.1 with the process ID 4403 and h2 is assigned the IP address 10.0.0.2 with the process ID 4407.
- The command to ping a specific host to a targeted host is:
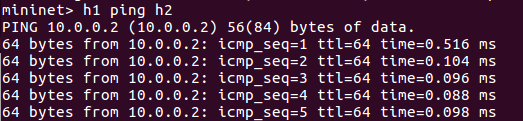
Mininet> h1 ping h2
On inspecting the packets, we can see that the first ping has taken considerably longer (0.805) than the others. This is because ARP tables, MAC tables, etc, are initialised during the first ping.
The command to display the address information of the nodes is:
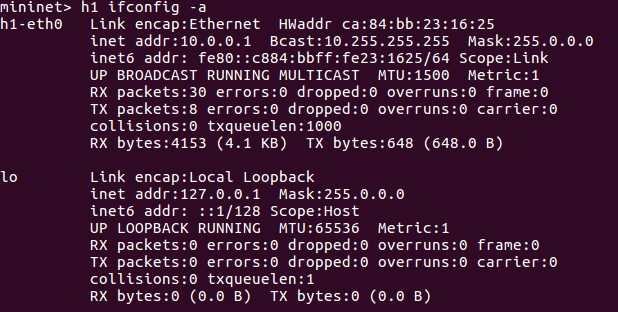
Mininet> h1 ifconfig –a
This command will display the IP address, broadcast address and MAC address of the host h1, as in Figure 6.
- The command to test the connectivity among hosts is:
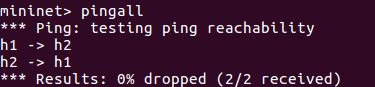
Mininet>pingall
This command will make each host in the network ping every other host in the network. In the network that we have, h1 will ping h2, and h2 will ping h1. As seen in Figure 7, the successful pings indicate that all the links in the network are active.


When we investigate the interface eth1 of switch s1 using Wireshark, we find that both the ping requests are successful (Figure 8).
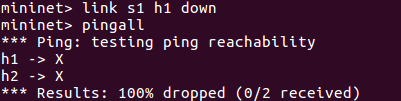
The command to down a link is:
Mininet> link s1 h1 down
The above command will down the link between switch s1 and host h1 (Figure 9). Further, on pinging the hosts using the pingall command, we can see that both the pings are unsuccessful due to the link getting down.
- The command to build custom topology is:
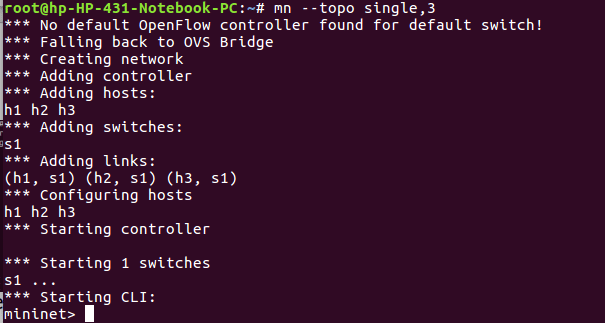
#sudo mn –topo single,3
This command will create a topology as shown in Figure 12, and initialise the links and addresses of hosts and switches.
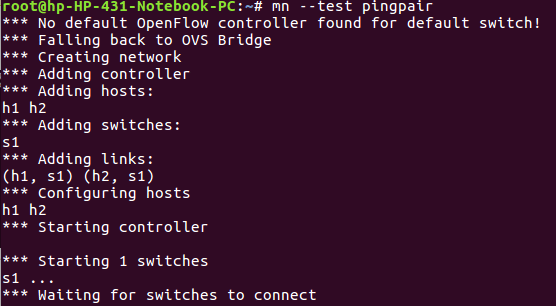
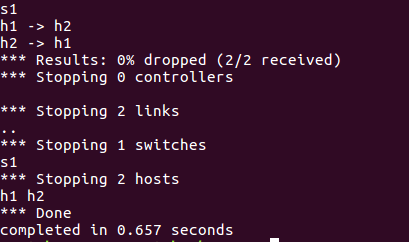
- The command to perform regression testing is:
#sudo mn -- test pingpair
The above command is used to create a network with default topology, perform the pingall function and stop the network. This command is basically used to test how Mininet works.
- The command to open the xterm window is:
Mininet> h1 xterm
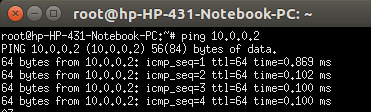
xterm is the command used to initiate an external and separate terminal. The command opens an xterm window, which is specific to a node in the network. Several functionalities specific to a node can be implemented on this window. In the example shown in Figure 14, the h1 xterm window is used to ping h2 (10.0.0.2).
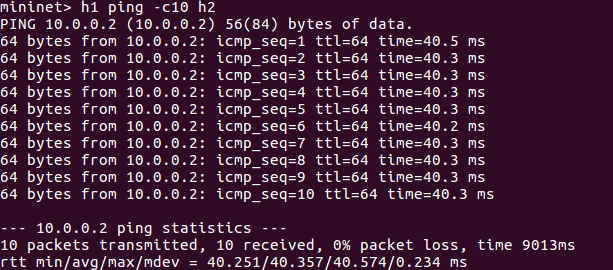
The command to provide a delay of 10ms and set a bandwidth of 10Mbps in all the links is:
#sudo mn –link tc,bw=10,delay=10ms
Notice that h1 pinging h2 takes a total time of 40ms (approximately), since it has to travel through the s1-h1 link.


[…] https://www.opensourceforu.com/2017/04/beginners-guide-mininet/ […]