


This article gives an overview of Jenkins, Bitbucket and Jira. It also includes tutorials on how to install Jenkins and integrate it with Bitbucket and Jira.
Jenkins is a self-contained, open source automation server that can be used to automate all sorts of tasks related to building, testing and delivering or deploying software. As a prerequisite to following the various steps suggested in this article, you would need a public server for installing Jenkins.
Installing Jenkins
Jenkins can be installed through native system packages, Docker, or can even run standalone in any machine with a Java Runtime Environment (JRE) installed. As for now, we are installing Jenkins on a bare Ubuntu system.
The best practice is that whenever you deploy a server, you do an update and an upgrade with the following commands:
sudo apt-get update
sudo apt-get upgrade
Prerequisites
Since Jenkins is a Java application, the first step is to install Java. For that we need to configure the ppa (Personal Package Archive) repository for Java 8 OpenJDK package. Update the package index and install the Java 8 OpenJDK package with the following commands:
sudo add-apt-repository ppa:webupd8team/java
sudo apt-get update
sudo apt-get install openjdk-8-jdk
Installation
Import the GPG keys of the Jenkins repository using the following wget command and after that configure the repository for Jenkins. Update the package index and install the Jenkins package with the following commands:
wget -q -O - https://pkg.jenkins.io/debian-stable/jenkins.io.key | sudo apt-key add -
sudo apt-add-repository “deb https://pkg.jenkins.io/debian-stable binary/”
sudo apt update
sudo apt install jenkins
Enabling and starting Jenkins service
After installing Jenkins, you need to enable Jenkins service using the systemctl command, so that on every reboot, Jenkins is automatically started. You can see the current status of the Jenkins service using the systemctl status jenkins command.
sudo systemctl enable jenkins
// To enable the jenkins service at boot

sudo systemctl start jenkins
// To start the jenkins
sudo systemctl status jenkins
// To see the current status of jenkins
Adjusting the firewall rules (optional)
If your UFW, i.e., universal firewall, is active, allow the port below to be accessible from the intranet:
sudo ufw allow 22
sudo ufw allow 8080
sudo ufw enable
sudo ufw status
Open a Web browser and enter http://IP_Address:8080. To set up your installation, visit http://IP_Address:8080. The Jenkins default port is 8080. You should see the Unlock Jenkins screen, which displays the location of the initial password.

Unlocking Jenkins
Open a terminal and enter the following command to get the password. Using that password, you should be able to log in to Jenkins.
sudo cat /var/lib/jenkins/secrets/initialAdminPassword
Installing suggested plugins or selecting specific plugins for Jenkins
As a beginner, you can go with the ‘Install suggested plugins’ option. But if you know which plugins are required by you, then you can go with the ‘Select plugins to install’ option. Select your required plugins and install them.
Creating a Jenkins user
After installing all plugins, you will see the screen for ‘Create First Admin User’. Fill in the information and click on Save and continue.
Jenkins URL configurations
In this screen, you can configure your Jenkins URL. I am going to configure the Jenkins URL as http://jenkins.linuxgeek.in:8080.
This is all that you need to complete the installation of Jenkins.
Bitbucket
Bitbucket is not just a repository management system but it also gives teams one place to plan projects, collaborate on code, test and deploy.
There are three deployments of Bitbucket:
- Bitbucket Cloud
- Bitbucket Server
- Bitbucket Data Centre
Configuring Bitbucket Cloud
For this tutorial, we are going to use Bitbucket Cloud.
Creating an account: Go to the Bitbucket site and click on ‘Get started for free’. After that, enter your valid email ID and click on ‘Create Account’. Enter your name and password and click on ‘Agree and Sign Up’.
Follow the instructions to verify your email address.
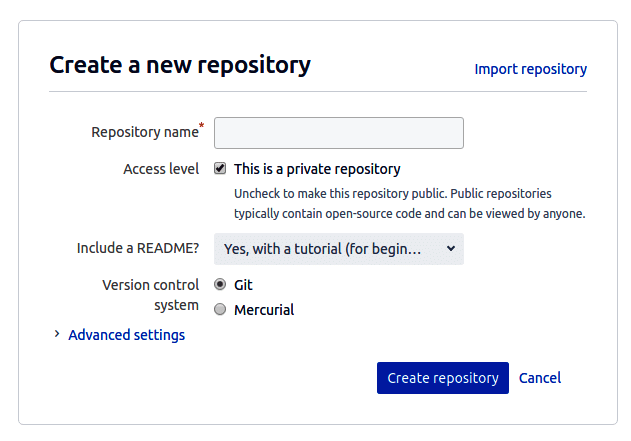
Creating the repository: Just click on the ‘Create repository’ button. After that you will see the screen shown in Figure 1.
Enter the repository’s name, click on the access level (private or public) and choose ‘Version control system’ from Git and Mercurial. After that, click on ‘Create repository’.
Push your code to the repository: First clone the repo, and then copy your code to that repo.
Jira
Jira was designed as a bug and issue tracker. But today, Jira has evolved into a powerful work management tool for all kinds of use cases, from requirements and test case management to agile software development.
The features of Jira are:
- Scrum boards
- Kanban boards
- Roadmaps
- Agile reporting
- Connecting issues to code
How to configure Jira Software Cloud
For this tutorial, we are going to use Jira Software Cloud.
Create an account: Go to the Jira cloud site, choose ‘Jira software’ and click on ‘Try it free’. Fill all the information and create an account.
Choose a classic template: Go to Scrum. Give the project name and click on ‘Create’. After that you will see the Jira dashboard.
Create an issue: Click on ‘Create issue’ and give the issue name. After that, click on ‘Issues and filters’.
After we have done the installations, let’s go about integrating Jenkins with Bitbucket and Jira.


Integrating Jira and Bitbucket
- In Jira, click on the ‘Settings’ button; after that, click on the product integration button.
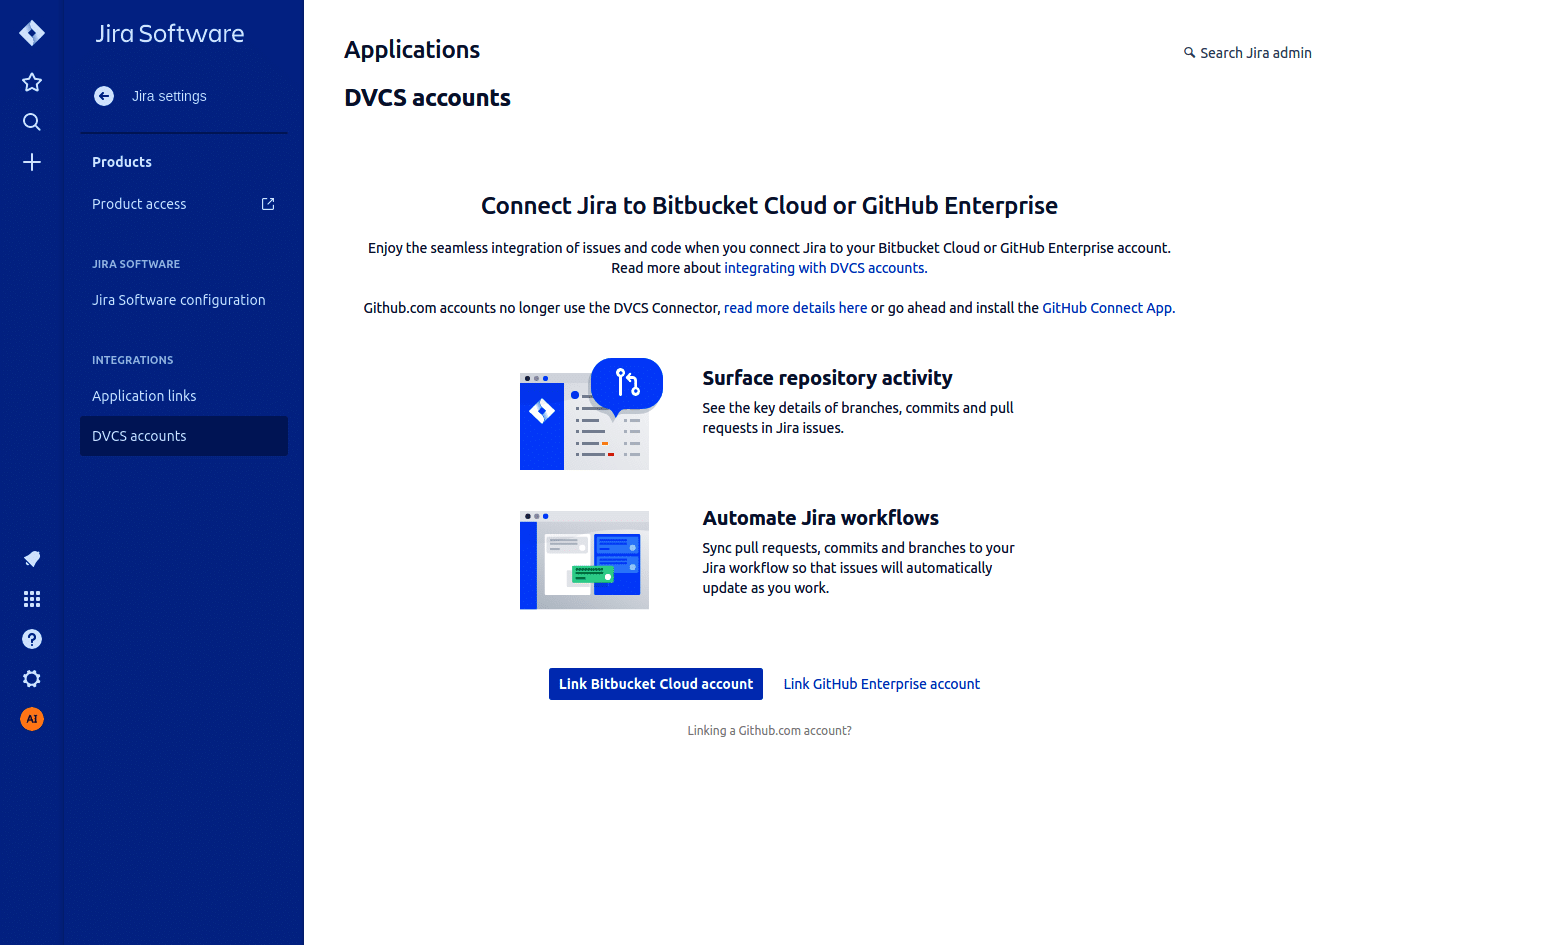
- Next, click on ‘DVCS accounts’.
- Then click on ‘Link Bitbucket Cloud Account’.
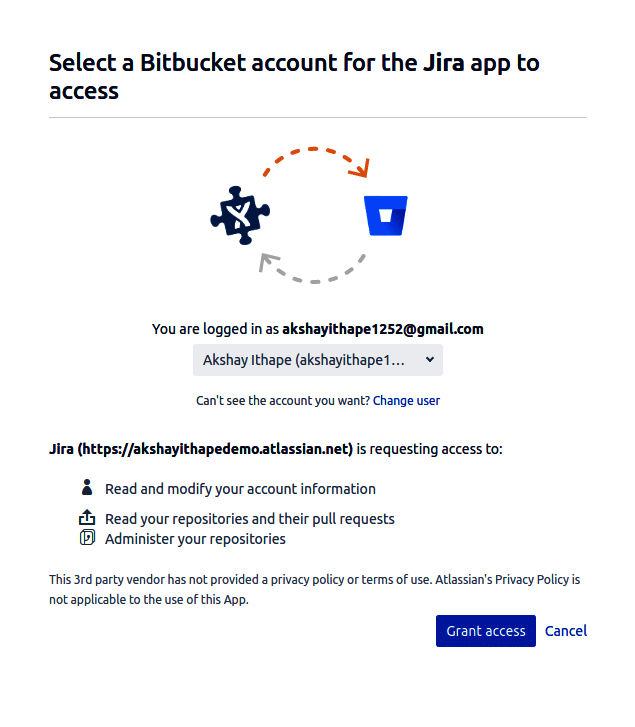
- Click on ‘Grant access’.
- Enable ‘Automatically sync all repositories’ and ‘Smart Commits’ for all repositories. Click on ‘Okay’.
- Go to your particular newly created issue, and you will see there is an option in the development section called ‘+ create branch’. Click on that option.
- In this screen, you can select ‘Repository’. Select Type (Bugfix, feature, release, other) in ‘Branch’, and then give the new branch a name. Click on the ‘Create’ button.
- In that issue, you will see your branch.
Integrating Bitbucket and Jenkins
Take the following steps to install the Jenkins plugin.
- Go to the Jenkins dashboard: Manage Jenkins -> Manage Plugins -> Available Plugins.
- Search for Bitbucket.
- Select ‘Bitbucket Build Status Notifier’ plugins and click on ‘Install’.
- Restart Jenkins.
To create an OAuth consumer, you first need to get an OAuth consumer key/secret from Bitbucket.
- Log in to your Bitbucket account.
- Click your account name and then click on ‘Settings’ from the menu bar.
- Click ‘OAuth’ from the menu bar.
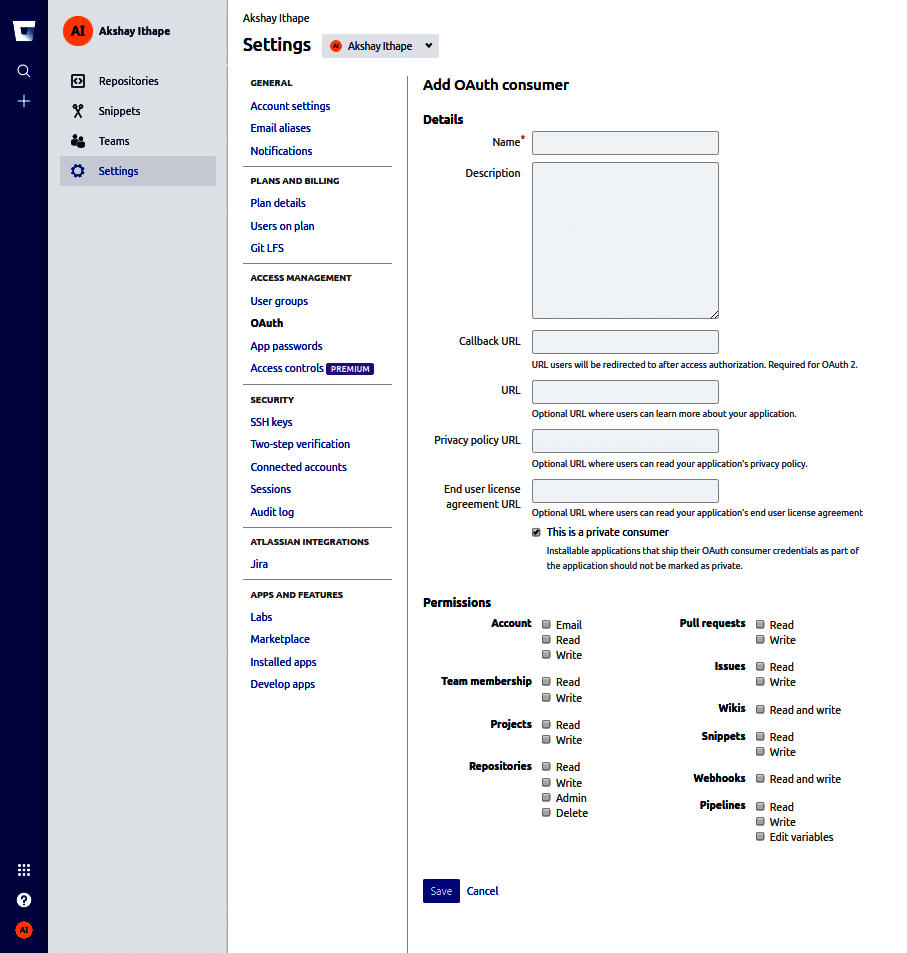
- Press the ‘Add consumer’ button.
- The system requests the following information:
a. Give a representative name to the consumer, e.g., Jenkins build status notifier.
b. Although it is not used, a callback URL must be set, e.g., http://jenkins.linuxgeek.in:8080.
c. Leave the URL field blank.
d. Add read and write permissions to the repositories.
e. Click the ‘Save’ button, and a key and secret will be automatically generated.
To ensure the Jenkins URL is set, take the following steps:
- Open the ‘Manage Jenkins’ page.
- Click on the ‘Configure System’ page.
- Go to the section ‘Jenkins Location’.
- Set the correct URL to Jenkins’ URL.
- Click on the ‘Save’ button.
To add OAuth credentials to Jenkins, take the following steps:
- Open the ‘Manage Jenkins’ page.
- Click on ‘Configure System’.
- Go to the section ‘Bitbucket Build Status Notifier plugin’.
- If you still haven’ t stored the credentials, click ‘Add’, otherwise you can skip this step.
a. Select a user name with password.
b. Set the OAuth consumer key in the user name.
c. Set the OAuth consumer secret in the password.
d. Click the ‘Add’ button. - Select the desired credentials.
- Click the ‘Save’ button.
Integrating Jira and Jenkins
To install the Jenkins plugin, take the following steps.
- Go to the Jenkins dashboard: Manage Jenkins -> Manage Plugins -> Available Plugins.
- Search for Jira.
- Select ‘Atlassian Jira Software Cloud plugins’ and click on ‘Install’.
- Restart Jenkins.
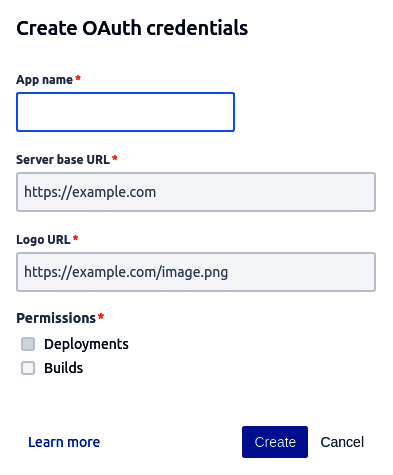
Create OAuth credentials in Jira for Jenkins, as follows.
- Navigate to Jira home > Jira settings > Apps.
- Select OAuth credentials.
- Select ‘Create credentials’.
- Enter the following details:
a. App name: Jenkins
b. App logo: A URL to the Jenkins logo, which will be used as an icon in the list of credentials; e.g., http://jenkins.linuxgeek.in:8080
c. Server base URL: The URL to your Jenkins server; e.g., http://jenkins.linuxgeek.in:8080
d. Permissions: Click on both deployments and builds
e. Create credentials
Setting up Jenkins credentials
- In Jenkins, go to the Manage Jenkins > Configure System screen and scroll to the ‘Jira Software Cloud integration’ section.
- Select Add Jira Cloud Site > Jira Cloud Site. The site’s name, client ID and secret fields are displayed.
- Enter the following details:
a. Site name: This is the URL for your Jira Cloud site; e.g., https://akshayithapedemo.atlassian.net/.
b. Client ID: Copy from the OAuth credentials screen (Client ID column).
c. Secret: Select Add > Jenkins.
For Kind, select Secret text.
For Secret, copy from the OAuth credentials screen (Secret column).
For Description, provide a helpful description. - Select ‘Test connection’ to make sure your credentials are valid for your Jira site.
For Jenkins multi-branch pipeline job configuration, take the following steps.
1. In Jenkins, click on ‘New Item’.
2. Enter the job name and select ‘Multi-branch Pipeline’. Click on ‘Okay’.
3. In General, you give the name and description.
4. In Branch Sources, click on ‘Git’.
a. Add the repository URL.
b. Add the credentials (user name and password of your Bitbucket account).
c. Behaviours -> Select ‘Discover branches’
d. Property strategy -> Select ‘All branches get the same properties’
5. In ‘Build Configuration’,
a. Mode -> Select ‘By Jenkinsfile’
b. Jenkinsfile name -> jenkinsfile
6. Just Save and Apply.
7. Click on ‘Scan Multibranch Pipeline Log’.
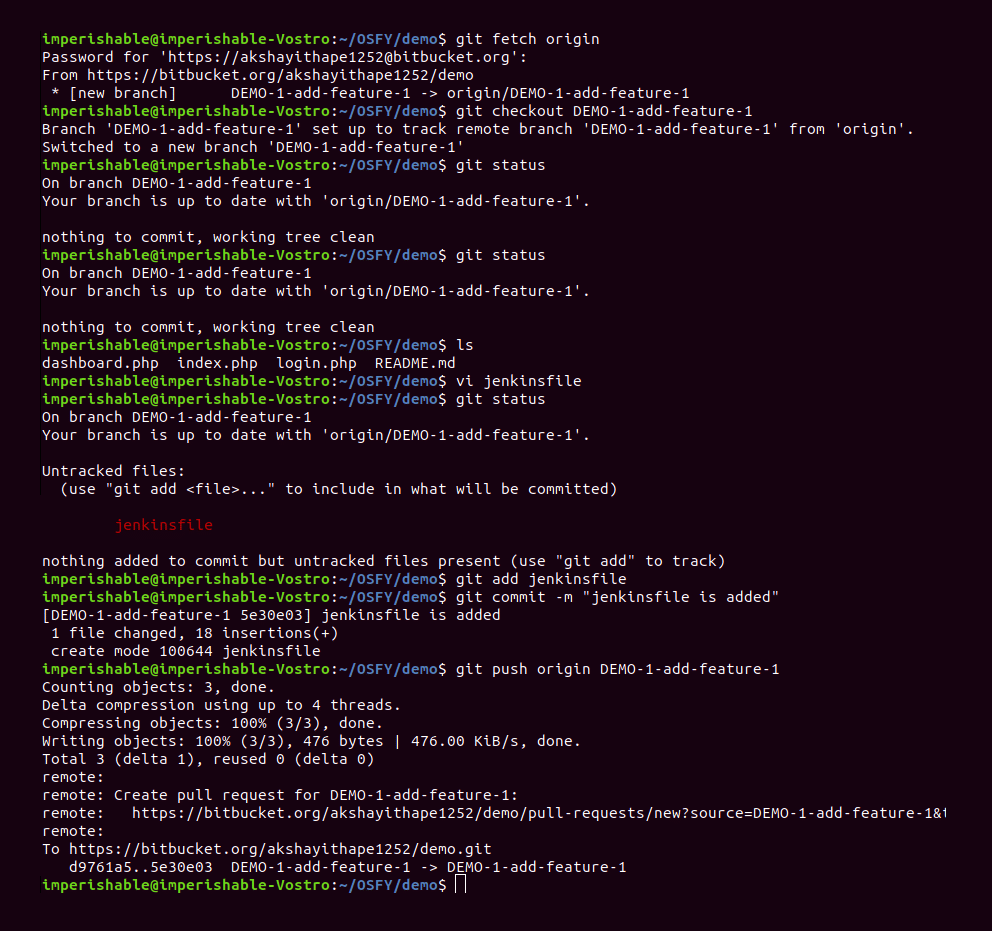
8. We have run our job but it couldn’t find jenkinsfile. So we create the ‘jenkinsfile’ and push it to our repository, jenkinsfile code as follows:
pipeline {
agent any

stages {
stage('Build') {
steps {
bitbucketStatusNotify(buildState: 'INPROGRESS')
echo "hello"
bitbucketStatusNotify(buildState: 'SUCCESSFUL')
}
post {
always {
jiraSendBuildInfo site: 'akshayithapedemo.atlassian.net'
}
}
}
}
}
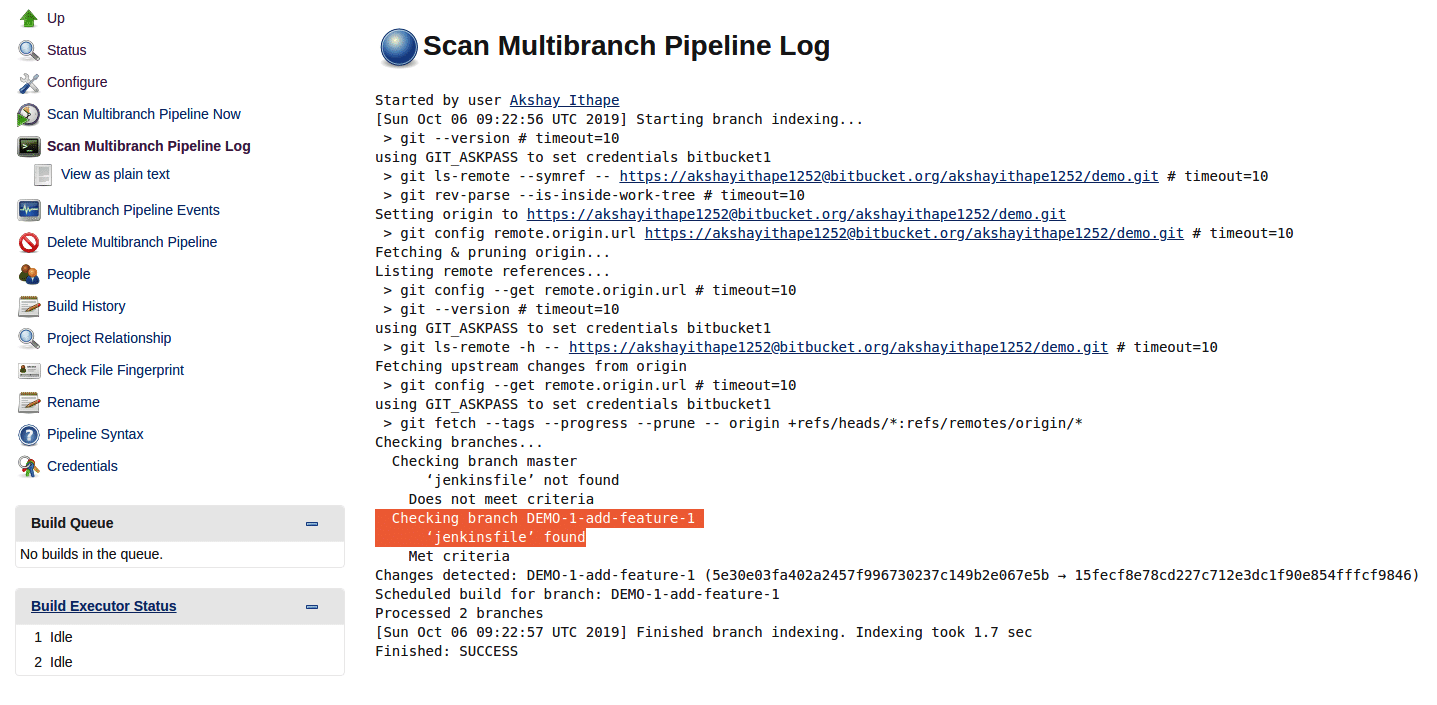
9. Click on ‘Scan Multibranch Pipeline Now’.
10. Click on ‘Scan Multibranch Pipeline Log’.
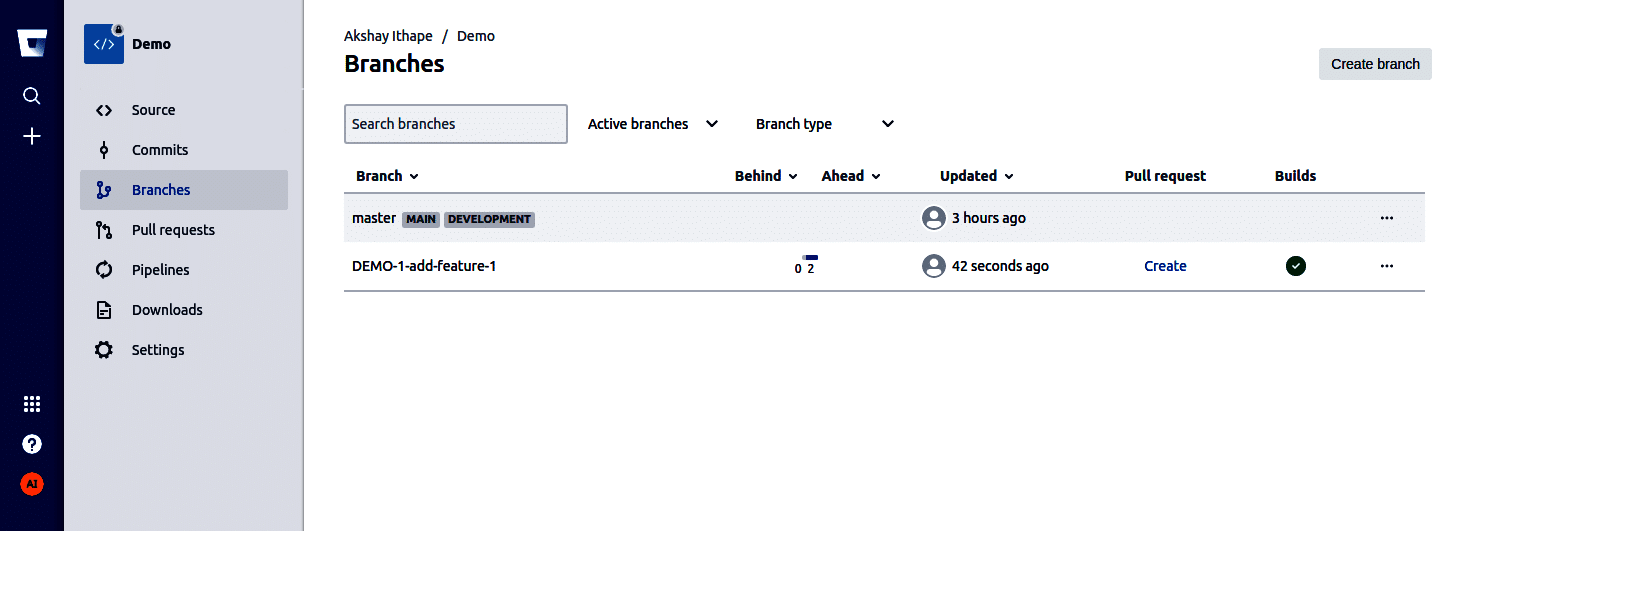
11. Go to your Bitbucket, and click on ‘Branches’ where you will see that build status.
12. Go to Jira, open your issue and in the development section, you will get the build status.


