


The GIMP (GNU Image Manipulation Program) is a free and open source raster graphics editor used for image retouching and editing, free-form drawing, resizing, cropping, photo-montages, conversion to different image formats and more specialised tasks. It is the open source equivalent of Adobe Photoshop and can be used effectively to increase the productivity of your business.
Businesses that restrict themselves to proprietary software like Microsoft Office and Adobe Photoshop get a raw deal. Not only do they have to pay for the software but they have to factor in the cost incurred every time the software becomes corrupt. This includes the fee to be paid to the computer technician to re-install the software. It should be the primary aim of every business to develop a system that automates maintenance to the maximum possible extent. This is where open source software like LibreOffice, the GIMP, Inkscape, Firefox, etc, come in.
The GIMP is primarily developed by volunteers as a free and open source software project associated with both the GNU and GNOME projects. Development takes place in a public Git source code repository, on public mailing lists and in public chat channels on the GIMPNET IRC network. New features are held in separate public source code branches and merged into the main (or development) branch when the GIMP team is sure they won’t damage existing functions. Sometimes this means that features that appear complete do not get merged or take months or years before they become available in the GIMP.
The version number used in the GIMP is expressed in a major-minor-micro format, with each number carrying a specific meaning. The first (major) number is incremented only for major developments (and is currently 2). The second (minor) number is incremented with each release of new features, with odd numbers reserved for in-progress development versions and even numbers assigned to stable releases. The third (micro) number is incremented before and after each release (resulting in even numbers for releases and odd numbers for development snapshots), with any bug fixes subsequently applied and released for a stable version. The user interface of the GIMP is created by a dedicated design and usability team. The GIMP itself is released as source code, after which, installers and packages are made for different operating systems by developers who might not be in contact with the maintainers of the GIMP.
The current version of the GIMP works with various operating systems including Microsoft Windows, Linux and Mac OS. Many Linux distributions have the GIMP as a part of their desktop operating systems, including Fedora and Debian.
Features of the GIMP
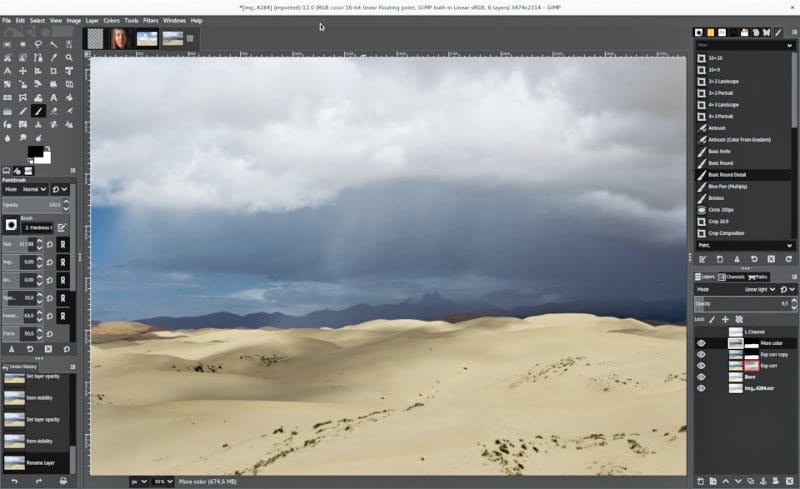
The tools used to perform image editing can be accessed via the toolbox, through menus and dialogue windows. They include filters and brushes, as well as transformation, selection, layer and masking tools.
Colour
There are several ways of selecting colours, including palettes, colour choosers, and using an eyedropper tool to select a colour on the canvas. The built-in colour choosers include RGB/HSV selector or scales, the water-colour selector, CMYK selector and a colour-wheel selector. Colours can also be selected using hexadecimal colour codes as used in HTML colour selection. The GIMP has native support for indexed colour and RGB colour spaces; other colour spaces are supported using decomposition, with which each channel of the new colour space becomes a black-and-white image. CMYK, LAB and HSV (hue, saturation and value) are supported this way. Colour blending can be achieved using the blend tool, by applying a gradient to the surface of an image and using the GIMP’s colour modes. Gradients are also integrated into tools such as the brush tool, so when the user paints this way, the output colour slowly changes. There are a number of default gradients included with the GIMP; a user can also create custom gradients with the tools provided. Gradient plugins are also available.
Selections and paths
The GIMP offers a rectangular and circular selection tool, a free select tool, and fuzzy select tool (also known as magic wand). More advanced options include the ‘select by colour’ tool for selecting contiguous regions of colour, and the ‘scissors select’ tool, which creates selections semi-automatically between areas of highly contrasting colours. The GIMP also supports a quick mask mode with which you can use a brush to paint the area of a selection. This looks like a red coloured overlay being added or removed. The foreground select tool is an implementation of Simple Interactive Object Extraction (SIOX), a method to extract foreground elements, such as a person or a tree that is in focus. The ‘paths’ tool allows you to create vectors (also known as Bézier curves). You can use paths to create complex selections, including around natural curves. You can then paint (or ‘stroke’) the paths with brushes, patterns, or various line styles; and name and save paths for reuse.
Image editing
There are many tools that can be used for editing images in the GIMP. The more common tools include a paint brush, pencil, air brush, eraser and ink tools to create new or blended pixels. The bucket filling tool can be used to fill a selected area with a colour or pattern. The blend tool can be used to fill a selected area with a colour gradient. These colour transitions can be applied to large regions or smaller custom path selections.
The GIMP also provides ‘smart’ tools that use a more complex algorithm to do things that otherwise would be time consuming or impossible. These include:
- Clone tool, which copies pixels using a brush
- Healing brush, which copies pixels from an area and corrects the tone and colour
- Perspective clone tool, which works like the clone tool but corrects for distance changes
- Blur and sharpen tool, which blurs and sharpens images using a brush
- Smudge tool, which can be used to subtly smear a selection
- Dodge and burn tool, which is a brush that makes target pixels lighter (dodges) or darker (burns)
Layers, layer masks and channels
An image being edited in the GIMP can consist of many layers in a stack. The user manual suggests that, “A good way to visualise a GIMP image is as a stack of transparencies.” In GIMP terminology, each level (analogous to a transparency) is called a layer. Each layer in an image is made up of several channels. In an RGB image, there are normally three or four channels, each consisting of a red, green and blue channel. Colour sub-layers look like slightly different grey images, but when put together they make a complete image. The fourth channel that may be part of a layer is the alpha channel (or layer mask). It measures opacity, where a whole or part of an image can be completely visible, partially visible or invisible. Each layer has a layer mode that can be set to change the colours in the image.
There is support for several methods of sharpening and blurring images, including the ‘blur’ and ‘sharpen’ tools. The ‘unsharp mask’ tool is used to sharpen an image selectively — it sharpens only those areas of an image that are sufficiently detailed. This tool is believed to give more targeted results for photographs than a normal sharpening filter. The ‘selective Gaussian blur’ tool works in a similar way, except that it blurs areas of an image with little detail.
The latest version is GIMP 2.10, which is the result of six years of work that originally focused on porting the program to a new image processing engine, GEGL. However, the new version ships with far more new features, including new and improved tools, better support for file formats, various usability improvements, revamped colour management support, a plethora of improvements targeted at digital painters and photographers, metadata editing and much more, including an updated user interface and initial HiDPI support.
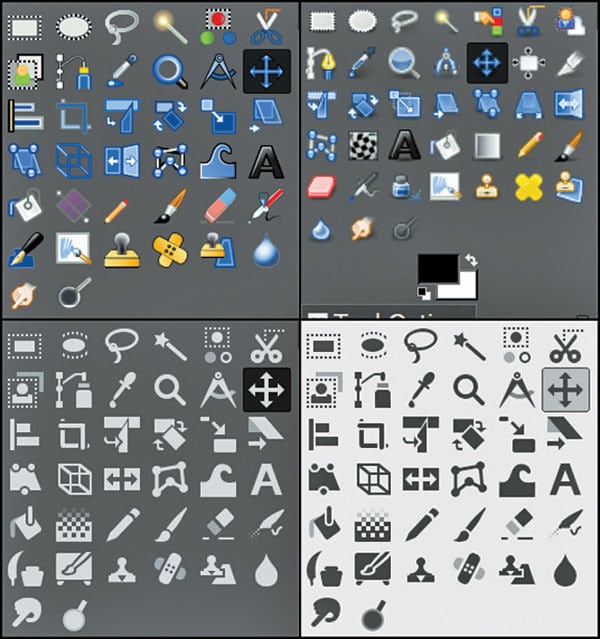
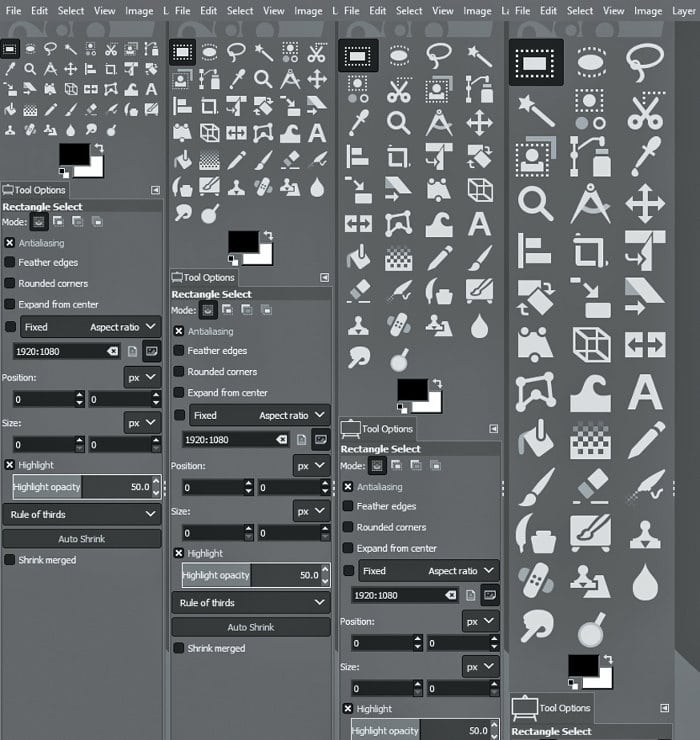
One thing immediately noticeable about GIMP 2.10 is the new dark theme and symbolic icons enabled by default. This is meant to somewhat dim the environment and shift the focus towards content.
There are now four user interface themes available in the GIMP—dark (default), grey, light, and system. Icons are now separate from themes, and both colour and symbolic icons are present, so the GIMP can be configured to have the system theme with coloured icons if the old look is preferred.
Further, icons are available in four sizes now, so that GIMP looks better on HiDPI displays. The GIMP will do its best to detect which size to use, but one can manually override that selection as follows: Edit > Preferences > Interface > Icon Themes.
The ultimate goal for v2.10 was completing the port to the GEGL image processing library, which had started with v2.6 (when the optional use of GEGL for colour tools and an experimental GEGL tool were introduced) and continued with v2.8 (when GEGL based projection of layers was added).
Now, the GIMP uses GEGL for all tile management and builds an acyclic graph for every project. This is a prerequisite for adding the non-destructive editing planned for v3.2.
There are many benefits that accrue from using GEGL, and some of them can already be enjoyed in GIMP 2.10.
High bit depth support allows the processing of images with up to 32-bit per colour channel precision and of open/export PSD, TIFF, PNG, EXR and RGBE files in their native fidelity. Additionally, FITS images can be opened with up to 64-bit per channel precision.
Multi-threading allows making use of multiple cores for processing. Not all features in the GIMP make use of that, though. A point of interest is that multi-threading happens through GEGL processing, but also in core GIMP itself —for instance, to separate painting from display code.
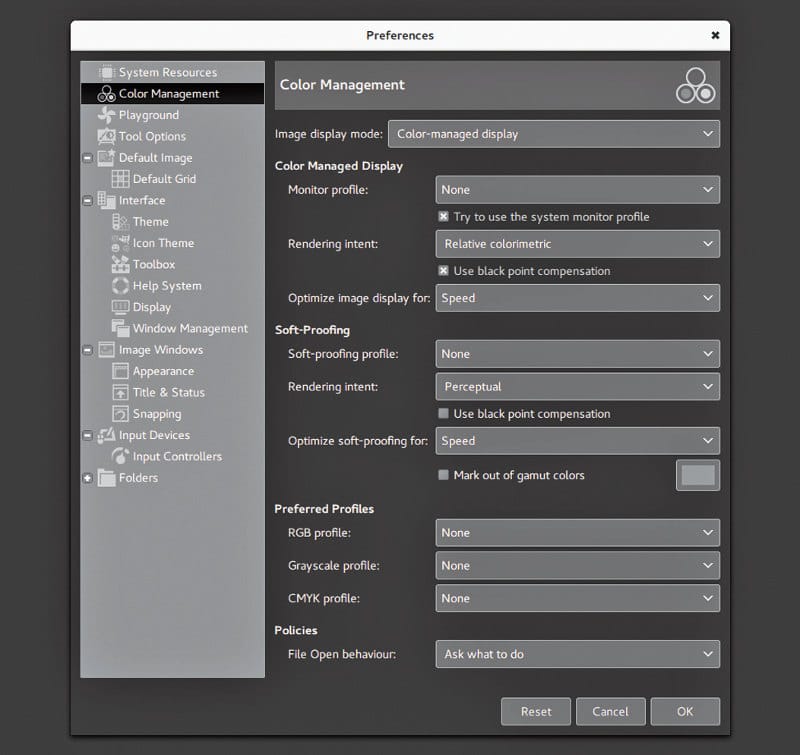
GPU-side processing is still optional but available for systems with stable OpenCL drivers. One can find configuration options for multi-threading and hardware acceleration by following Edit > Preferences > System Resources.
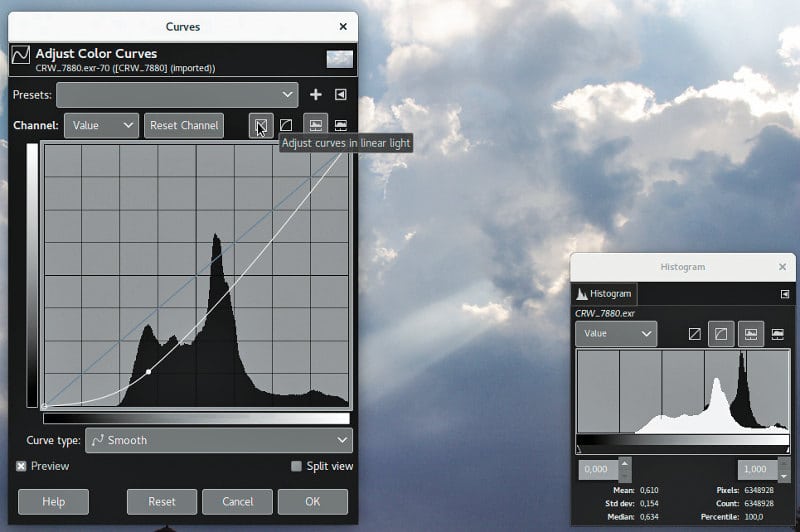
Another benefit of using GEGL is being able to work on images in a linear RGB colour space as opposed to a gamma-corrected (perceptual) RGB colour space.
Here is what it boils down to—you now have both linear and perceptual versions of most blending modes. There is now a linear version of the colour invert command. You can freely switch between the two at any time via the Image > Precision sub-menu. You can choose which mode is displayed in the Histogram docker. You can apply filters for levels and curves in either perceptual or linear mode. When higher than 8-bit per channel precision is used, all channel data is linear. You can choose whether the gradient tool should work in perceptual RGB, linear RGB or CIE LAB colour space.
Colour management is now a core feature of the GIMP rather than a plugin. This has made it possible to introduce colour management to all custom widgets—image previews, colour and pattern previews, etc.
The GIMP now uses LittleCMS v2, which allows it to use ICC v4 colour profiles. It also partially relies on the babl library for handling colour transforms, since babl is up to ten times faster than LCMS2. Eventually, babl could replace LittleCMS in the GIMP. The latter now ships with two groups of blending modes—legacy (perceptual, mostly to make old XCF files look exactly as before) and default (mostly linear).
The new blend modes are:
- LCH layer modes—Hue, Chroma, Colour, and Lightness
- Pass-Through mode for layer groups
- Linear Burn, Vivid Light, Linear Light, Pin Light, Hard Mix, Exclusion, Merge and Split
Layers, paths and channels can also be tagged with colour labels to improve project organisation. Compositing options for layers are exposed to users now, and all layer-related settings are finally available in the Layer Attributes dialogue box.
Moreover, if you always need alpha in your layers, you can enable the automatic generation of the alpha channel in imported images upon opening them. See Edit > Preferences > Image Import and Export page for this and more policies. Layer groups can finally put on masks.
Colour dialogue boxes now have an LCH colour selector that you can use instead of HSV. The LCH selector also displays out-of-gamut warnings. A new Hue-Chroma filter in the Colours menu works much like Hue-Saturation but operates in the CIE LCH colour space. The Fuzzy Select and Bucket Fill tools can now select colours by their values in CIE L, C, and H channels. Both the Colour Picker and the Sample Points dialogue boxes now display pixel values in CIE LAB and CIE LCH as per your preference.
The New Unified Transform tool simplifies making multiple transforms, such as scaling, rotating, and correcting perspective in one go.
The new Warp Transform tool allows you to do localised transforms like growing or shifting pixels with a soft brush and undo support. As such, the new tool replaces the old iWarp filter that was innovative at the time of its inception (and pre-dated Photoshop’s Liquify filter), but was ultimately cumbersome to use.
The Warp Transform tool also features an Eraser mode to selectively remove changes, previously unavailable in the iWarp filter.
The new Handle Transform tool provides an interesting approach at applying scaling, rotating and perspective correction using handles placed on the canvas. People who are used to editing on touch surfaces might find this tool surprisingly easy to grasp.
The Blend tool has been renamed the Gradient tool and its default shortcut changed to G. But this pales in comparison to what the tool can actually do now, which is a lot. The new tool pretty much makes the old Gradient Editor dialogue box obsolete. Now, you can create and delete colour stops, select and shift them, assign colours to colour stops, change blending and colouring for segments between colour stops, and create new colour stops from midpoints right on the canvas.
All gradients available by default are also editable now, which means that when you try to change an existing gradient from a system folder, the GIMP will create a copy of it, call it a custom gradient and preserve it across sessions—unless, of course, you edit another ‘system’ gradient, in which case it will become the new custom gradient.
The Foreground Select tool can finally make sub-pixel selections in complex cases such as strands of hair on a textured background. Two new masking methods are now available for that.
Both the Select by Colour and Fuzzy Select tools now feature a Draw mask option to display future selection areas with a magenta fill. The latter tool also has a Diagonal neighbours option to select diagonally neighbouring pixels.
For the Free Select tool, closing a polygonal/free selection now does not confirm the selection automatically. Instead, one can still tweak positions of nodes (where applicable), then press Enter, and double-click inside the selection or switch to another tool to confirm the selection.
The Intelligent Scissors tool finally allows you to remove the last added segment with the Backspace key, and the GIMP now checks whether the first and the last segments are distinct before closing the curve.
All colour tools have been refactored to become GEGL based filters. Hence, the Colour sub-menu in the Tools menu has been removed, and these filters are now mostly unavailable in the toolbox.
The Text tool now fully supports advanced input methods for CJK (Chinese, Japanese, Korean) and other non-Western languages. The pre-edit text is now displayed just as expected, depending on your platform and the input method engine. Several input method-related bugs and crashes have also been fixed.
The N-Point Deformation tool introduces the kind of smooth (and as little rigid as possible) warping one would expect physical objects to have.
The Seamless Clone tool is aimed at simplifying the making of layered compositions. Typically, when one pastes one image into another, there are all sorts of mismatches—in colour temperature, brightness, etc. This new experimental tool tries to adapt various properties of a pasted image to its backdrop.
To enable these tools, you need to first enable the Playground page of the Preferences dialogue. This is done by running GIMP with a ‘—show-playground.’ switch (for Windows, one might want to tweak the path to the GIMP in the shortcut properties, accordingly). Then go to Edit -> Preferences -> Playground and enable the respective options so that the tools show up in the toolbox.
In this article, we have explored just the basic tools of the GIMP. Stay tuned for an article on more advanced tools soon.


