Many of you who are interested in security may have used Jxnet, which is a library in Java for creating and using data packets. In this article, we will discuss how we can do the same using Python.
Let us use a library called Scapy for creating and modifying data packets. Scapy is basically a very powerful manipulation tool and library in Python. It is one of the most famous packet manipulation tools. It can be used to modify, create, capture and send network packets, and can be used on Linux, Windows and MacOS X. It can be directly used through the command line or by writing simple scripts in Python. Here, I will use Jupyter notebook to show you the outputs.
Scapy is one of the most powerful packet manipulation tools with a really simple syntax. Using it to create new packets may help clear the basic concepts of many people regarding the transfer of packets, and things like TCP and UDP stacks. (It definitely did clear mine.) Scapy is allowed by Python to control all levels of data packet handling and can be used for purposes like network state verification, Web application unit testing, etc. It can also be used for stuff like Web application testing on the HTTP protocol. The main aim of this article is to show you what fun networking is using Python.
It sounds interesting to create and modify network packets and send them using just simple Python scripts, isn’t it? Yes, it indeed is. Let us start now.
Install Scapy
For installing Scapy, just open a terminal and enter the following command:
sudo apt-get install scapy
The installation is done. We can now use Scapy to create, modify and send packets!
Open up a Jupyter notebook. If you don’t have it installed, just use the following commands:
pip install notebook
Jupyter notebook
Your Jupyter notebook will open up in a browser and we can now start.
Creating a network packet
We can create any kind of packets like IP, TCP, UDP or ARP, etc. Here, I will be showing you how to create and use these packets, and then send them. First, in your Jupyter notebook, import Scapy using the command given below:
from scapy.all import*
Now, you can use the following commands to create the packets, based on the type of packet.
Ethernet packet (does not require any parameters):
packet = Ether()
TCP packet (requires the destination port and the flag value):
packet=TCP(dport=53,flags=’S’)
IP packet (requires just the destination IP address):
packet = IP(dst=’8.8.8.8’)
ARP packet(requires destination address and apparent source address):
PacketARP=ARP(op=2,pdst=’172.16.67.1’,psrc=”172.16.67.129”)
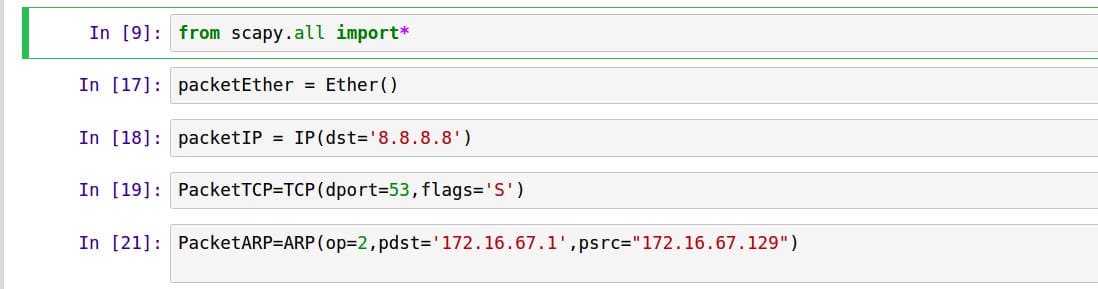
Our packets are now created.
Sending your packets
To send your packets, you can simply use the following send command:
send(packet)

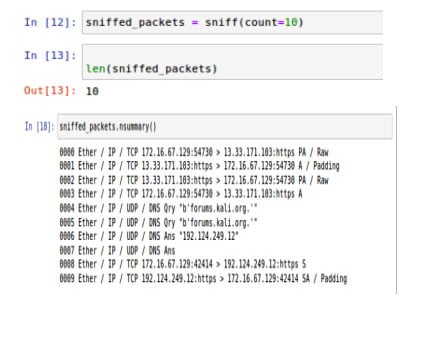
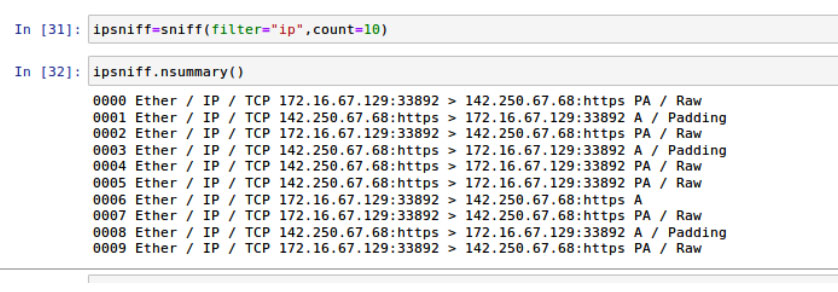
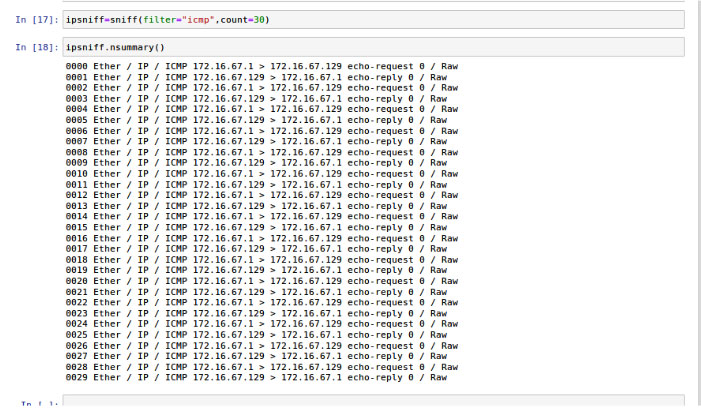
We can also sniff for any type of packet, as depicted in Figures 4 to 7.

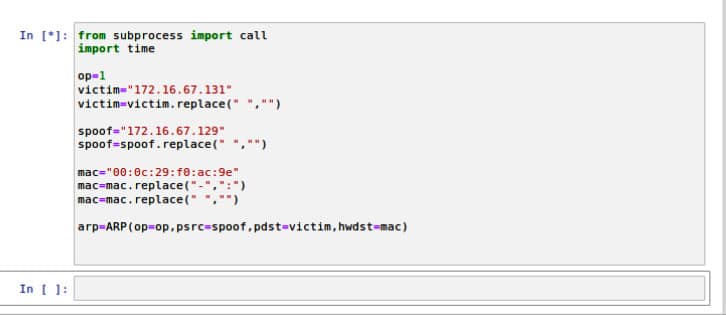
We can also create a simple ARP spoofing attack using Scapy, as shown in Figure 8.
Do give it a try!