


The Android Open Accessory (AOA) protocol allows simple USB communication with two bulk end points between two nodes, which are:
- An external hardware device with USB host capabilities and peripheral support known as an Accessory Development Kit (ADK) or Accessory Host, from now onwards.
- An Android gadget, which works in device mode.
The ADK host should be capable of supplying 500mA at 5V power to the device. We know that most Android gadgets come with USB device capabilities in order to support data transfer and debugging (adb); so this protocol chooses external hardware in the host mode and an Android machine in device mode. This eliminates the need for host support on the Android side as very few gadgets come with such capabilities. Also, there is no need to root the device for any changes to the Android kernel, as peripheral support is taken care of by external hardware.
History
AOA version 1.0 was launched at Google I/O 2011 with support from Android versions 3.1 onwards, and with an add-on library for the Android versions 2.3.4 and above. This was demonstrated with a custom shield on top of an Atmega-based Arduino Mega board.
Later in 2012, version 2.0 of this protocol was released at Google I/O 2012 with additional support for communication over Bluetooth, apart from USB. Also, two new features were added with Audio and Human Interface Devices (HID) capabilities from the ADK side. This was demonstrated with a custom kit made from the ARM Cortex-m3-based Arduino Due board with open hardware specs, popularly known as the ADK 2012 kit.
Supporting hardware
Here is a list of some boards which can act like ADK, with the availability of sample code or libraries:
- Arduino Mega board
- Arduino Due board
- AOA kit from Embedded Artists
- Microchip PIC24F series MCUs
- Sparkfun IOIO
- FTDI Vinculum – II
- BeagleBone powered with TI Starterware
- And currently, any hardware with USB host capabilities powered by Linux.
So we decided to add external hardware as the ADK host to an Android device. Lets see how ADK can initialise the Android device in the accessory mode.
Initialising the Android device
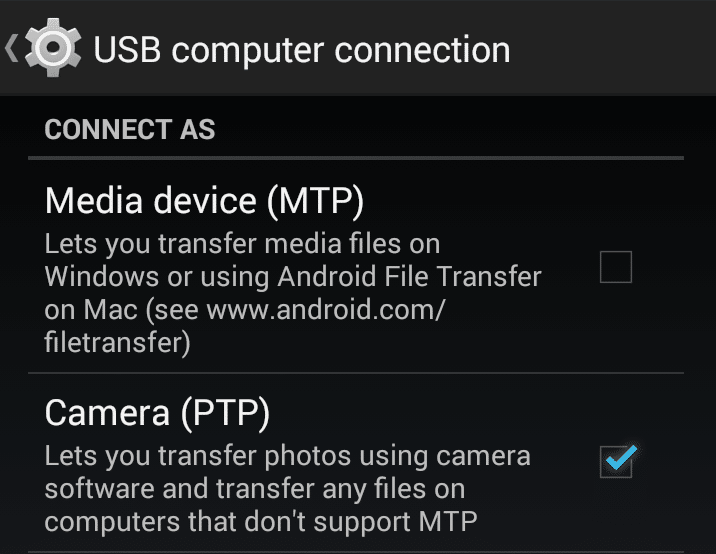
Once the Android device is connected to the ADK host, the device will enumerate with its original configuration, which may vary for each device. Initially, the device may be connected in the camera (PTP support) or media device (MTP support) mode to the host. Now, ADK should initialise the device to turn into the accessory mode. This can be done in the following few steps by sending various vendor (Google) specific control requests through the control endpoint whose address is zero.
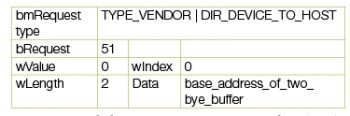
Step 1: Query the protocol using request code 51(0x33), which returns 1 for AOA and 1.0 or 2 for AOA 2.0; other attributes as per USB specifications are listed here.
Step 2: Send identity strings using request code 52(0x34) with the suitable value for each string ID.

Here, string id is a value between 0 to 5, which represents each type of identity string as listed below.
![]()
Step 3: The final step is to start the device in the accessory mode using the request code 53(0x35) as follows:
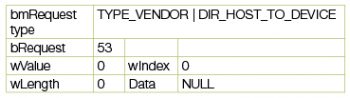
At this point, if essential identity strings (manufacturer, model) are not sent, the device can start in the accessory mode without associating with any application as allowed in AOA 2.0.This is useful to start the device just in audio or HID mode.
ADK can act as an audio accessory as supported in AOA 2.0, where audio output from the Android device is streamed to the ADK host without the need of any application in two-channel 16-bit PCM format, i.e., the Android device can be identified as a capture device by an audio sub-system like ALSA on the Linux side. So if you are planning to use ADK as an audio dock for your Android device, you can send another request with the following attributes, and if you do, this must be sent before starting in the accessory mode (53) as per AOA specs.
bRequest =58(0x3A), wValue=1
The rest is the same as above.
Also, the ADK host can act as an HID event generator or HID proxy as supported in AOA 2.0, for that the following request codes are available:
54(0x36) register ADK as HID source 55(0x37) unregister the ADK
56(0x38) set hid report descriptor 57(0x39) send a hid event
But in this article, we’ll focus more on the bulk transfer between an Android app and accessory host, which is known as custom accessory mode.
Re-enumeration of the device after initialisation
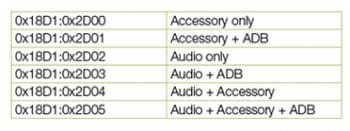
Upon initialising the device as mentioned above, it will re-enumerate in the accessory mode with a unified configuration, in which interface 0 comes with two end points meant for bulk transfer operations. If the device is in audio or ADB mode, a few more interfaces will be detected. The re-enumerated configuration can come with one of the following vendor ID-product ID combinations, depending on the initialisation (accessory, audio support) and ADB mode of the device.
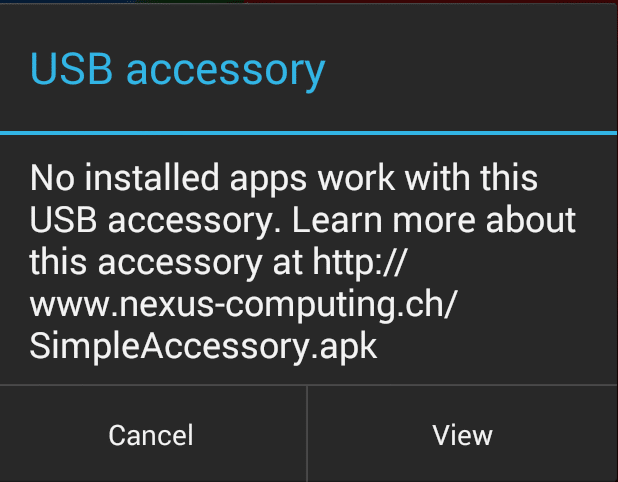
Then the device will try to launch suitable applications that match with the manufacturer, model, and the version identity strings specified as intent filters in the manifest files of the Android app. If no suitable application is installed, a pop-up will be shown with a specific URL (if any) pointing to the APK file or with details of the application.
Device side API and code flow
Here is a brief discussion on APIs and codeflow on the Android side with a sample code from Google I/O 2012, which may be helpful to develop new apps or customise existing ones.
Once ADK initialises the device, the USB manager tries to match the sent identity strings with intent-filter content as mentioned in the manifest resource of an app. Upon verification and user permissions, the application’s activity starts with USB_ACCESSORY_ATTACHED intent; and similarly, USB_ACCESSORY_DETACHED intent will be sent when ADK is disconnected.
import android.hardware.usb.UsbAccessory;
import android.hardware.usb.UsbManager;
mUSBManager = (UsbManager) getSystemService(Context.USB_SERVICE );
UsbAccessory acc; acc=(UsbAccessory)intent.getParcelableExtra( UsbManager.EXTRA_ACCESSORY );
if (!mUSBManager.hasPermission(acc)) return;
ParcelFileDescriptor mFD = mUSBManager.openAccessory(acc);
if (mFD != null) {
FileDescripter fd = mFD.getFileDescriptor();
mIS = new FileInputStream(fd);
mOS = new FileOutputStream(fd);
}
Once we obtain references for input and output streams as illustrated above, the rest of the flow depends on the communication between the app and ADK.
Sample Android applications
Here is a listing of some applications designed to work with various embedded targets as ADK,once your Android device is turned into open accessory mode. You may use one of these applications for initial work until you start designing your own Android apps like me, or customise those apps for which source code is available.
From the Google Play store
- ADK 2012 by Google, https://dl- ssl.google.com/android/adk/adk_release_20120606.zip
- Standard Android ADK Demo Ki t(ADK 2011) by DIY Phone Gadgets
- Basic accessory demo from Microchip
From other sources
- TI-ADKDemo from https://code.google.com/p/rowboat/
- http://www.embeddedartists.com/products/app/aoa_kit.php
- Few apps from http://www.ftdichip.com/Android.htm
Note: Some of these applications not starting or stop responding in few devices, some debugging and fixing may be required.
A case studyLinux as ADK
To turn a Linux machine to an ADK, I have written a skeleton driver code, hosted at github.com/rajeshsola/adk-driver-skeleton based on Gary Bissons Linux ADK code. One can write user space apps on top of this driver or customise the skeleton code for specific needs.
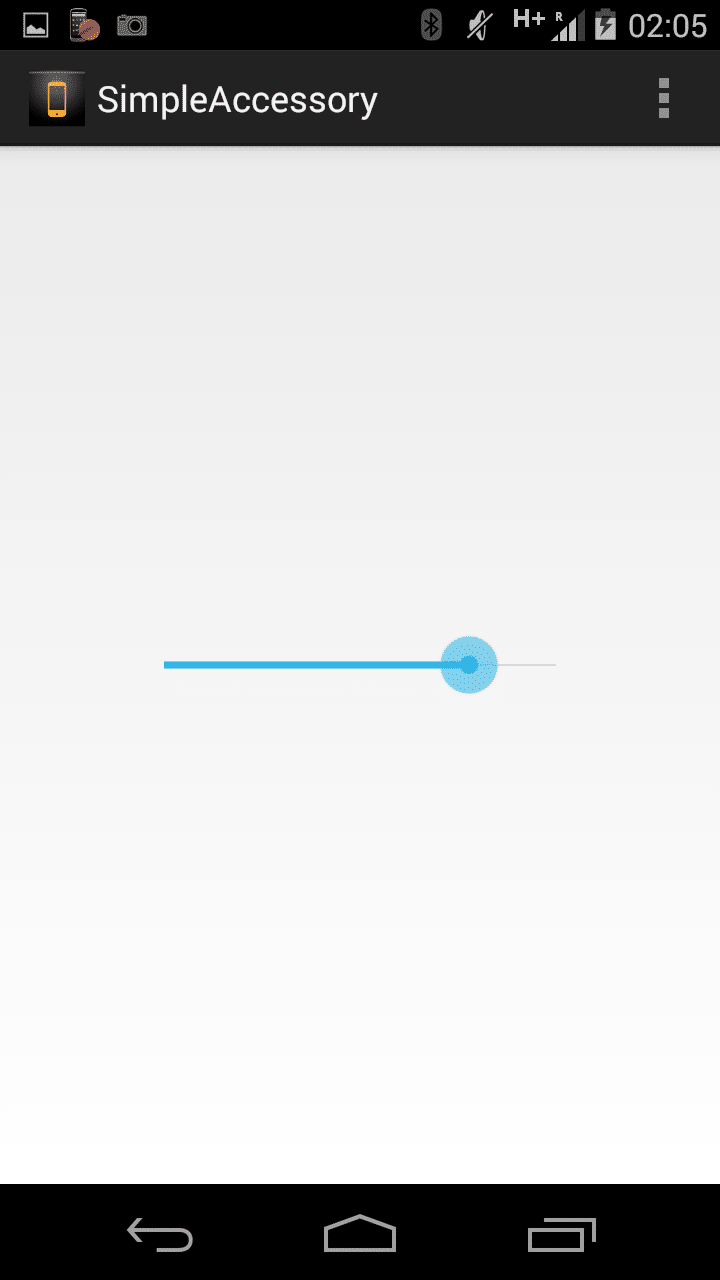
As a case study, I’ve chosen the SimpleAccessory app available from nexus-computing.ch to test with Linux as the ADK. By changing the simple slider in this app, you can change some properties of ADK like volume, brightness, etc.
Load the driver adk-aoa-skeleton.ko using insmod or modprobe. Preferably, you can use module params my_device_vid,my_device_pid with vendor ID and product ID of the device in order to probe the device on detection, or you can use the necessary udev rules to load the module on connecting the device. Stop any storage related services and unload other modules that prevent association between this driver and the device, before connecting.
Once the device has been probed, sysfs operations are enabled under /sys/kernel/adk_linux/aoa_init/ for initialisation purposes; so, lets use simple commands to initialise the device.
To query the version, type:
cat /sys/kernel/adk_linux/aoa_init/version
Send the identity strings as follows:
echo manufacturer=Nexus-Computing GmbH > /sys/kernel/adk_linux/aoa_init/identity echo model=Simple Slider > /sys/kernel/adk_linux/aoa_init/identity echo version=0.1 > /sys/kernel/adk_linux/aoa_init/identity likewise you can also send description=A Simple Slider, URL=http://www.nexuscomputing.ch/SimpleAccessory.apk and serial=1337, but optional
Start the device in audio/accessory mode:
echo audio > /sys/kernel/adk_linux/aoa_init/start echo accessory > /sys/kernel/adk_linux/aoa_init/start
This driver also supports initialisation through ioctl operations with custom strings,or with module parameter init_on_probe=1 with default identity strings. Please refer to the wiki page of gitrepo for more details about the driver.
At this moment, if a suitable app is installed, a pop-up will be shown asking permission to open the specified app; otherwise, another pop-up will be shown with a URL pointing to APK or with app details.
Once initialised, you can communicate with the app using simple file operations like read and write from userspace with the help of the device file (/dev/aoa-skel0) created by this driver.
This application comes with a slider. You can control the brightness of your Linux machine by changing the value of /sys/class/backlight/acpi_video0/brightness, as an example. A sample code (backlight-demo.c) to work with a skeleton driver is kept under the Examples section of gitrepo. Also, with other examples like aoa-read-dump.c, simple-demo.c, etc, you can read raw data coming from the app. In this case, a value between 0 to 255 will be printed each time slider moves.
Similarly, to work with the ADK 2012 app, you can send Manufacturer=Google, Inc., Model=DemoKit, Version=2.0 as identity strings.
If you have any difficulties in building or loading the kernel space module, you can customise libusb-based user space codes like linux-adk by Gary Bisson or usbAccReadWrite.c by Jeremy Rosen, according to the requirements of your own Android apps.
References
[1] http://source.android.com/accessories/
[2] Leveraging the Android Accessory Protocol by Gary Bisson,
http://github.com/gibsson/linux-adk
[3] Chapter 5: USB Accessory from the book Unboxing Android USB by Rajaram Regupathy
[4] Contents of Google I/O 2011 and 2012


