But C++ is still the king, I insisted to my friends, in the midst of a discussion on programming languages. C++ was the first language I had learned, but I soon moved away to the scripting world to discover the pleasures of Rubys syntax and Pythons usability; yet something was missing. Much as I was enjoying programming, it never felt like home. After some months, I picked C++ up again and boy, it was different! In the words of Bjarne Stroustrup, C++11 feels like a new language. C++ 11 and 14 introduced many new features to make C++ more efficient and readable, but one thing that is not a cakewalk in C++ is the dependency manager. In this article, we will explore BiiCode, an open source dependency manager for C/C++. Although it supports other platforms, we will discuss only the C++ domain.

About BiiCode
BiiCode is open source with both the server as well as the client site hosted on GitHub. It uses Cmake as its building system. BiiCode provides free hosting for personal open source projects and charges for closed projects, much like GitHub. Since the code is open, if you want hosting for an in-house project, you can always do it.
Installation
Setting up a development environment is equal to winning half the battle. With BiiCode, we can quickly experiment with technologies without cluttering the system. But a few tools are required for building a C++ project like a compiler (GCC) and Cmake (for building). I will use Arch Linux as my OS to demonstrate installation and use cases.
Installing BiiCode
Head to BiiCodes download link https://www.biicode.com/downloads to download it, following the steps required for your particular OS. Since I am using Arch, I can exploit its amazing ecosystem. To install, I used the following command:
yaourt -S biicode
To check the version, use:
bii -v
which gives the following output:
[jatin@linuxlappy ~]$ bii --version
INFO: There is a new version of biicode. Download it at https://www.biicode.com/downloads
3.1.1
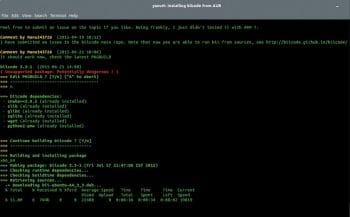
Strangely, my version is outdated. This happens sometimes while using AUR. I have subsequently found out that AUR is switching to a new Git based system called AUR4, which will replace the existing system on August 8, 2015. So, for now, to get new packages for BiiCode which is updated only for AUR4 and not AUR, tell yaourt to use AUR4 instead, as follows:
yaourt --aur-url https://aur4.archlinux.org biicode
After the transition is complete, there is no need to supply the aur-url parameter. Now that I have the latest BiiCode version, we can proceed further. BiiCode will install the necessary tools for development, but as a developer, it is considered good practice to have all the necessary tools pre- installed and configured.
Next, check if the necessary building tools like the compiler (GCC) and Cmake are installed. If not, you can either install them manually or BiiCode can install them automatically for you.
bii setup:cpp
First, install the necessary tools for basic building. In Arch Linux, this is called base-devel. Ubuntu has build-essentials as an equivalent, followed by Cmake.
sudo pacman -S base-devel cmake
We now have all the necessary tools.

Usage
Lets try BiiCode by using the same example that is written in BiiCode docs. Use Googles GTest library without installing it, as follows:
bii init unit_test -L #Creates an empty project inside a folder named unit_test
cd unit_test # cd into the testing project folder
vim main.cpp #Create and edit the main.cpp , use any editor you love
Now, create a file named main.cpp using your favourite text editor and place the following code inside it the same example can be found at http://docs.biicode.com/c++/gettingstarted.html#create-your-first-project for easy pasting.
# include google/gtest/include/gtest/gtest.h
int sum(int a,int b) { return a+b;}
TEST(Sum,Normal)
{
EXPECT_EQ(5,sum(2,3));
}
int main(int argc, char **argv)
{
testing::InitGoogleTest(&argc,argv);
return RUN_ALL_TESTS();
}
The BiiCode method of resolution is quite intuitive. Like in a normal C++ project, we include a library by its name, followed by the sub-module.
// CPP way
# include <Library_Name/Submodule.h/hpp>
//Example
# include <opencv2/highgui.hpp>
BiiCode header files give you a hint of the projects location and are an easy way for Biicode to resolve project dependencies.
According to BiiCode docs, The #include is composed as #include <biicode_user>/<block_name>/path/to/file. In this case, it #includes the include/gtest/gtest.h header from the GTest block and user google.
So if I publish a project under the block named example, with many files, it will be available as:
# include jatindhankhar/example/filename_with_path
After we have included the dependency in the project, the next step is to find and retrieve the appropriate files:
bii find
This will create a bii.conf file and will download the dependencies into bii/deps.
To build the project, run the following command:
bii build
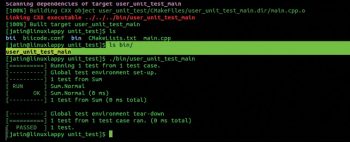
This will produce a folder bin containing the executable of the following format user_name_project_name_main where the project name in this case is unit_test; so the file will be named unit_test_main and if you are not logged in, the username will be replaced by the user.
Run it by:
./bin/user_unit_test_main
# or
bin/user_unit_test_main
and the output will be similar to what follows:
[==========] Running 1 test from 1 test case.
[----------] Global test environment set-up.
[----------] 1 test from Sum
[ RUN ] Sum.Normal
[ OK ] Sum.Normal (0 ms)
[----------] 1 test from Sum (0 ms total)
[----------] Global test environment tear-down
[==========] 1 test from 1 test case ran. (0 ms total)
[ PASSED ] 1 test.
So the basic workflow with BiiCode will be:
- Making a project with bii init project_name -L
- Including the header file in the project
- Resolving dependencies with bii find
- Building the project with bii build and running it

Optionally, you can save your work for others to reuse by publishing it with bii publish. Note that there is free publishing for solo open source projectsthose without collaborators.
So lets try publishing it by running the following command:
bii publish #Run it inside the project directory
This will prompt you for your BiiCode accounts username and password and, after authentication, your block will be publicly available under your profile. If you get a publishing error like whats shown below
INFO: ***************************** INFO: ***** Publishing public **** INFO: ***************************** ERROR: You dont have permission to publish in user/unit_test: -1
run the following:
bii user your_username #Replace with your username
and then publish again with bii publish. If everything goes well, the output will be similar to what follows:
INFO: *****************************
INFO: ***** Publishing public ****
INFO: *****************************
INFO: Successfully published jatindhankhar/unit_test: 0
Your code will now be available under your profile to be reused by others just by including it as # include your_user_name/block.
Enabling C++11 support
Enabling C++11 support is easy; just uncomment the following code in the CMakeLists.txt:
# > EXAMPLE: how to activate C++11
#
IF(APPLE)
TARGET_COMPILE_OPTIONS(${BII_BLOCK_TARGET} INTERFACE -std=c++11 -stdlib=libc++)
ELSEIF (WIN32 OR UNIX)
TARGET_COMPILE_OPTIONS(${BII_BLOCK_TARGET} INTERFACE -std=c++11)
ENDIF(APPLE)
#
…and C++11 features like auto, range based for loops, smart pointers and thread library are available for use.
Use cases
BiiCode can be used as an easy way to test new technologies, setting up dev environments and managing CI builds. We will explore other use cases and advanced usage in subsequent articles.
References
[1] http://docs.biicode.com/ – BiiCode documentation
[2] https://wiki.archlinux.org/index.php/Yaourt#Yaourt_not_using_new_AUR4 – Yaourt AUR4 flag
[3] https://wiki.archlinux.org/index.php/Arch_User_Repository#AUR_4 – AUR4 announcement


