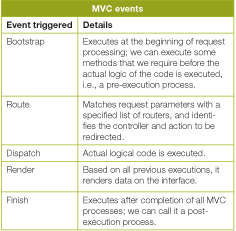
The main advantage of the Zend Framework is its modular structure, which is not dependent on any other part of the system. So you can replace and remove modules without affecting the whole system. We can say that the Zend Framework is a loosely coupled modular structure.
All about routing
Routing compares the request against all routes that have been defined in the configuration and returns a matched route array configuration. It also matches hosts, segments, literals and regular expressions and wildcard schemes. We can create parent and child route configurations. In Zend Framework 2, we need to specify all routes in module.config.php of each module.

Types of routers
1. Literal: This matches the exact URI path of the request. Each router has a default array that will be returned when the router is matched.
The code below shows a sample route with a literal route.
router => array( routes => array( home => array( type => Zend\Mvc\Router\Http\Literal, options => array( route => /, defaults => array( controller => Application\Controller\Index, action => index, ), ), ) ) )
2. Segment: This matches a segment of the router. It is specified using a colon and alphanumeric characters. In the code below, userId is the segment parameter that must be present in the requested URI. So, the URL will be http://yourdomain.com/user/edit/5, where 5 is the user ID that we want to edit. These types of routers have option parameters named constraints, which consist of validation using the regex of each segment. In this example, userId should be an integer.
router => array( routes => array( user-edit => array( type => Zend\Mvc\Router\Http\Segment, options => array( route => /user/edit/:userId, constraints => array( userId => [0-9]+, ), defaults => array( controller => Application\Controller\User, action => index, ), ), ) ) )
The optional segment is surrounded by brackets. For example, pageId is optional in the listing page.
route => users/list[/:pageId]
3. Hostname: This router is used to match the requested hostname. It returns matched router data if the hostname is matched. As shown in code below, only http://admin.too-local.com will be able to access this action page.
router => array( routes => array( home => array( type => Zend\Mvc\Router\Http\Hostname, options => array( route => admin.todo-local.com, defaults = controller => Application\Controller\Admin, action => index, ), ), ) ) )
4. Regex: You can match the request URI by using the regex router also. As shown in the host router code, the route is defined in the regex route configuration. You need to specify spec, which is used while assembling the URI from the router. This route will match URLs like http://todo-local.com/blog/11.html.
# Host router router => array( routes => array( home => array( type => Zend\Mvc\Router\Http\Regex, options => array( regex => /blog/(?<blogId>[0-9]+).html, spec => /blog/%blogId%, defaults => array( controller => Application\Controller\Blog, action => index, format => html ), ), ) ) )
5. Method: This router checks for valid requested methods in the requested URI.
router => array( routes => array( method-route => array( type => Literal, options => array( route => /add, defaults => array( __NAMESPACE__ =>Application\ Controller\Index, action => index, ), ), may_terminate => true, child_routes => array( default => array( type => Method, options => array( verb => post, defaults => array( action => post ), ), ), ), ), ) )
6. Part: Part routers are nothing but parent-child routes. In any router type, parent-child routing becomes a part router.
7. Scheme: This is like literal routing but only matches the scheme part of the URI.
router => array( routes => array( scheme-route => array( type => Zend\Mvc\Router\Http\Scheme, scheme => https, options => array( route => admin.todo-local.com, defaults => array( https => true ), ), ) ) )

Matched routes
In Module.php, we can get a matched router definition based on a request. We can attach an event listener that is executed after routing. The code below is for getting matched router information:
public function onBootstrap(MvcEvent $e)
{
$eventManager = $e->getApplication()->getEventManager();
$routeMatch = $e->getRouteMatch();
$controller = $routeMatch->getParam(controller);
$action = $routeMatch->getParam(action);
$namespace = $routeMatch->getParam(__NAMESPACE__);
}
Using routes in a controller
You can get route parameters as follows:
public function indexAction(){
$id = $this->params()->fromRoute(id); //specific parameter name
$all = $this->params()->fromRoute(); //all parameters
}
To redirect to route, type:
public function indexAction(){
return $this->redirect()->toRoute(home-route);
}
To use routes in View, type:
<a href=<?php echo $this->url(home);?>></a>
Now lets implement this in our application.

Creating an admin module
All master admin related tasks will be implemented here. To create modules and controllers, the developer community provides ZFToola command line tool to generate the module, controller, action and more. You can find ZFTool at the URL https://github.com/zendframework/ZFTool. You can install it either manually or by using the composer. The instruction manual can be found at http://framework.zend.com/manual/current/en/modules/zendtool.introduction.html.

Creating an admin host router
As described earlier, we will create an admin host router to access admin related tasks only.
router => array( routes => array( admin => array( type => Zend\Mvc\Router\Http\Hostname, options => array( route => admin.todo-local.com, defaults => array( controller => Application\Controller\Auth, action => index, ), ), ) ) )
If you have shared hosting and there is no option to create a virtual host on the existing path, then you can change the route type as below. You can access the admin interface using http://todo-local.com/admin url.
router => array( routes => array( admin => array( type => Segment, options => array( route => /admin, defaults => array( controller => Application\Controller\Auth, action => index, ), ), ) ) )
You can view the entire code at module/Admin/config/module.config.php.
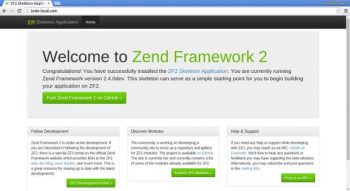
For this, you need to create a new virtual host admin.todo-local.com on your server, which will point to the same directory that is pointed by todo-local.com. So, at last, both interfaces will look as shown in the screenshots in Figures 1, 2 and 3.
Common misconceptions about routers
Many developers have one common misconception about routing. They follow the rule of http://siteurl.com/<module>/<controller>/<action>. But we can specify any route URL that we need. For example, if the login action is in the Auth controller of the admin module, then the misconceived URL will be http://todo-local.com/admin/auth/index. But we can make a route like http://todo-local.com/admin/login, as this can be a more user-friendly URL.


