


AI and ML have become household terms today and have permeated our lives. This article tells us how to use Google Colab to start working with machine learning and deep learning projects.
In the field of artificial intelligence (AI), machine learning (ML) provides a set of algorithms and approaches that enable machines to learn from their experience. Deep learning (DL) is a sub-field of ML and provides the architectures that are used to learn from the experience gained from massive data sets. To start working with ML and DL projects, it is essential to have certain libraries, APIs and environments set up. Google is actively contributing towards AI research, and is offering a cloud development environment called Colaboratory, known as Google Colab, which is free for public use. This browser based cloud platform makes it possible to build complex models on large data sets using Jupyter notebooks. These notebooks offer a Python shell for the execution of Python code. The different functionalities provided by Google Colab are listed below.
Free service to use GPUs and TPUs (tensor processing units): ML and DL programs have high computation needs and require high powered machines called GPUs or TPUs for adequate execution. However, these machines are expensive. Google Colab offers free usage of a GPU that can be run constantly for 12 hours.
Development environment: Most of the popular libraries like NumPy, Pandas, Matplotlib, Scikit-learn are pre-installed with Google Colab. It also offers support for TensorFlow and Keras along with PyTorch and Caffe. Moreover, any other Python library can be installed in Google Colab using the command !pip install <library_name>.

Uploading/importing data sets: ML and DL applications require a large data set for training. These can be publicly available data sets or created specifically for analysis and training. Google Colab offers a functionality to mount Google Drive using an authorisation code. A data set can also be loaded from GitHub or Kaggle.
Storing and sharing notebooks: Google Colab offers a functionality to create a new notebook and store it in Google Drive. Also, a notebook is automatically saved after a certain period of time. This notebook can be downloaded and shared with others by clicking on the Share button. It can also be shared on GitHub using a commit message.
Terminal commands: A set of terminal commands can be directly executed with a Google Colab cell. An exclamation (!) sign is required to be put as a prefix before each command — for example, !ls, !pwd, etc.
The following are the steps to be taken to start working with Google Colab.
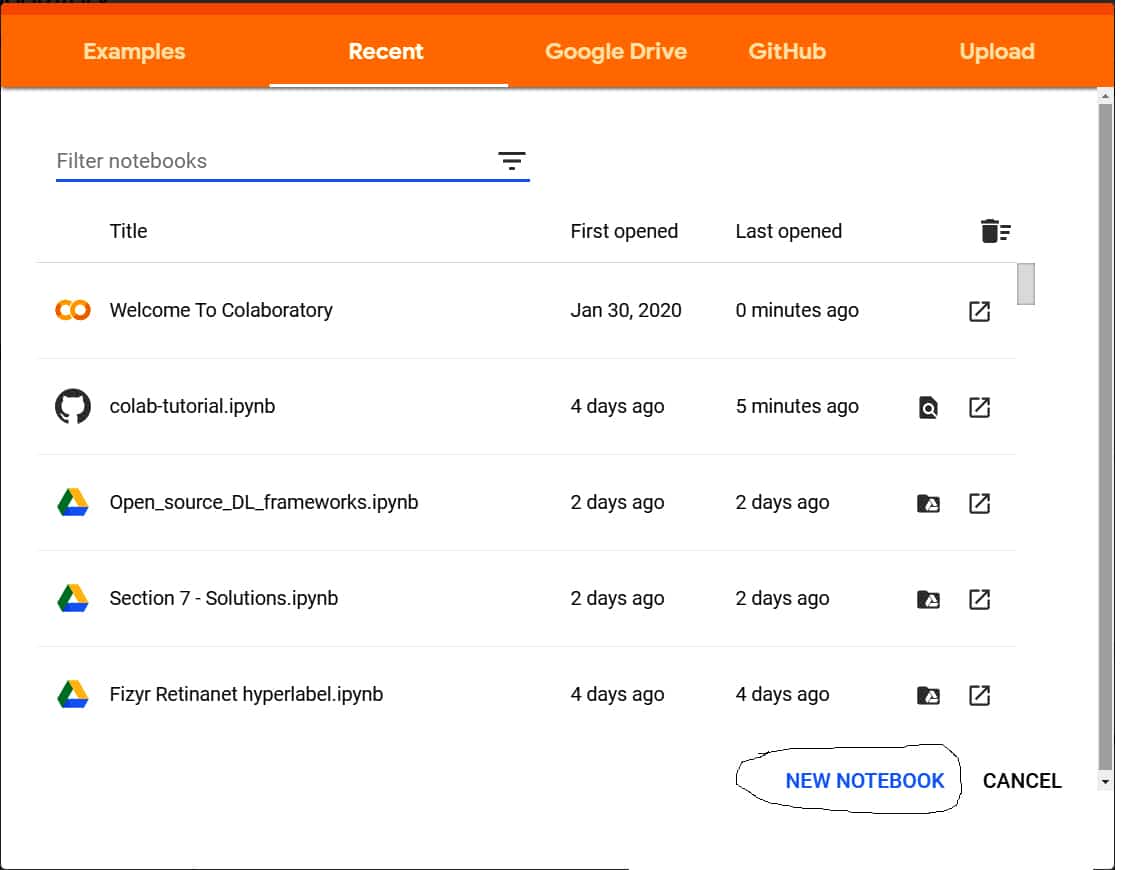
1. Log into your Google Drive. After that, enter the URL https://colab.research.google.com in the browser. Click on NEW NOTEBOOK.
2. A new Python notebook (as shown in Figure 2) is opened. A notebook name can be set up by changing the default name. Moreover, it offers a Python cell to enter and execute the code.
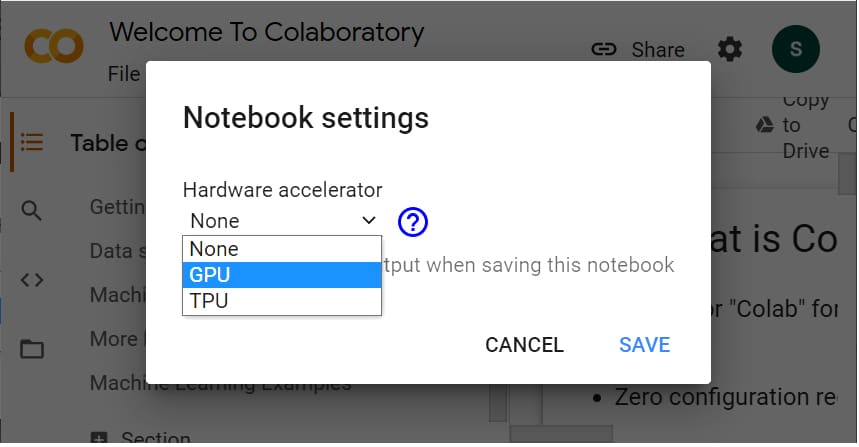
3. To access the free GPU, click on Menu -> Edit -> Notebook settings. Choose GPU as a hardware accelerator.
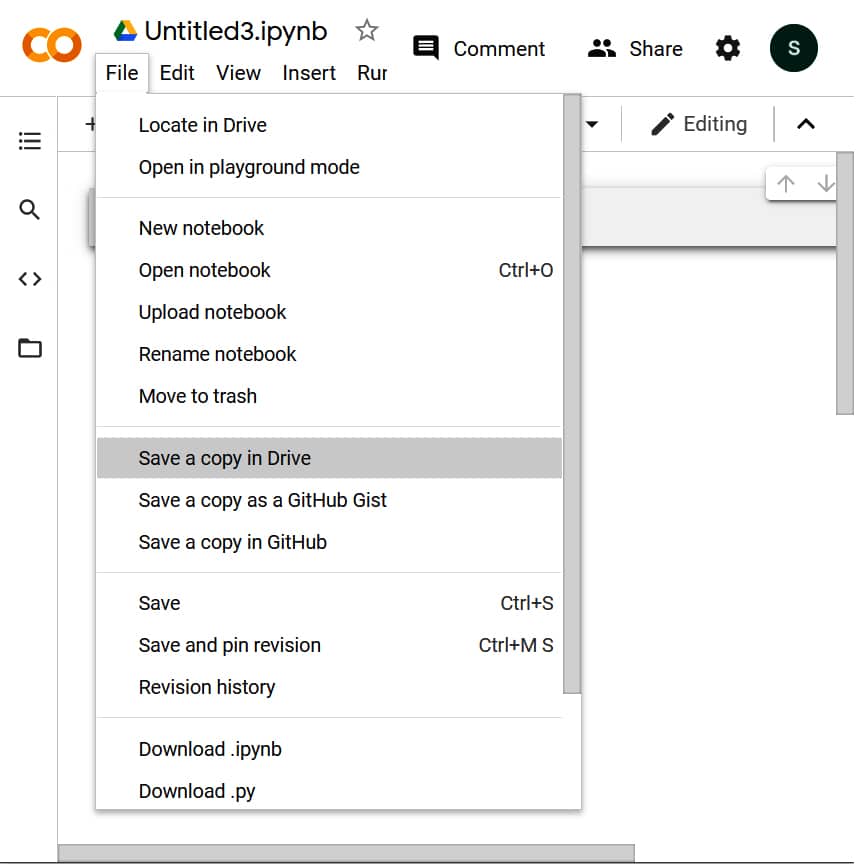
4. Google Colab offers options to save the notebook in Drive or GitHub.
A few limitations observed while using Google Colab are:
- A Google account is required to work with notebook in Colab.
- It provides support for computations up to 12 hours only. This is sometimes insufficient for longer executions.
- It is difficult to work with very big data sets due to storage limitations in Google Drive.


