


The successful rollout of an application entails several essential steps. If the developer misses any of these in the development stage, it could make the application susceptible to problems later, leading to rework and wastage of the developer’s time. Skaffold automates these steps and assists developers in a hassle-free rollout of their applications.
In a developer’s workflow, a wide variety of changes are first made to the code. Then container images are built, which are pushed to a registry till the application is eventually deployed. This entire process can entail a lot of inefficiencies. This is where Skaffold comes in – it helps to manage the developer workflow.
Understanding the developer workflow
This is what the developer workflow looks like.
- Code changes: The first step simply involves changing the code. While you are working on your code, you will simply make changes to it as per your own requirements and save it.
- Containerise: Once you are done making changes to your code, you will containerise it to see it actually work. You may use Docker and a build command to make a sample Docker file, then use that file to build the Docker image, and tag that image with a specific version.
- Push: After you have containerised the image, you are supposed to push it into a registry.
- Deploy: If you have got a Kubernetes deployment YAML, you can apply it to the particular environment of the Kubernetes cluster that you are pointing to, using the kubectl command that you can see in Figure 1. Once that is done, your application will be deployed.
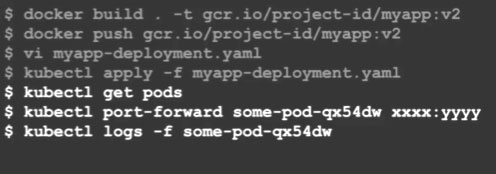
- Connect and view logs: The next thing is to check if everything is working or not. So you will connect to that particular cluster, check the pod forwarding, and then stream the logs to see if everything is working well or not.
All in all, you will have to keep repeating the same steps as per the number of changes you make and the number of changes you want to look at. So we now need a tool like Skaffold that can detect the activities that are common in nature, and automate and take care of these behind the scenes. Let us understand this from a developer workflow perspective.
Automating common activities
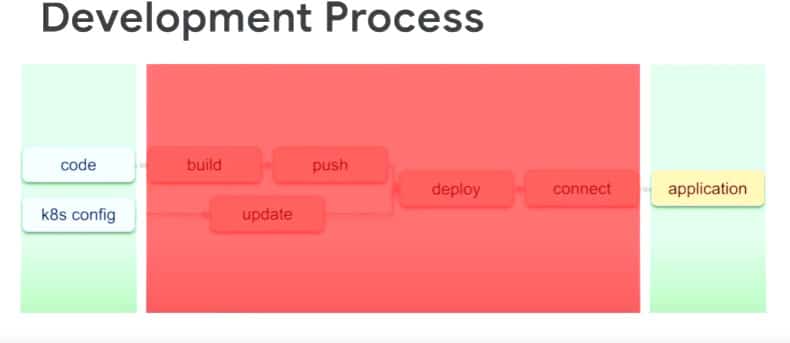
In Figure 2, you can see some key activities marked in green that developers care about – things like coding and configuring the application to make it run. Marked in red are the things that they hope will just get done automatically by a tool to avoid the repetitive work that they are doing as part of the developer workflow. Skaffold allows developers to work on what they care about and takes care of the rest of the things.
Skaffold’s end-to-end development pipelines are as follows.
- $ skaffold dev: Whenever you make a change to your code, the dev cycle automatically gets activated.
- $ skaffold run: Run allows you to run your particular application.
- $ skaffold debug: As the name suggests, debug helps in debugging a particular application that you want as a part of this process.
Once Skaffold has sensed the changes being made to the code and to the application’s configuration, it will perform all the steps — building the code, filling the containers, pushing it to the registry, applying any configuration deployment and bringing the pods up on its own. It will then stream the logs to you so you can actually see that. It is capable of working with various clusters and registries.
A demo
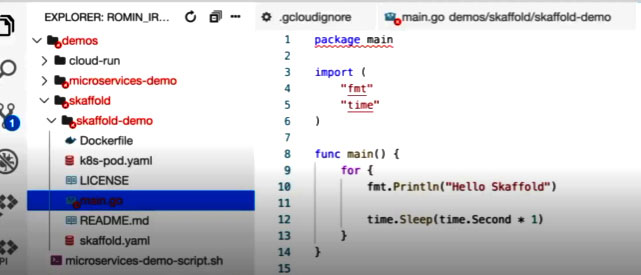
Here we have got a very straightforward go file (Figure 3). This file contains one main file and one main function, and it is printing out ‘Hello Skaffold’.
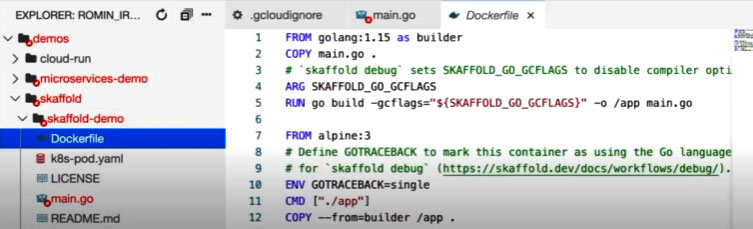
In the same folder, we have got a Dockerfile that you can see in Figure 4. This is a multi-staged Dockerfile. We are essentially just creating an executable for this file in the app, and in the next step we are going to set the default command to run when the container is up, which will in turn generate the output file. This is from a build perspective, as Skaffold really knows what it is supposed to build.
In the pod.yaml file (Figure 5), it is just stated that the image that is needed to be created is Skaffold-example. The Skaffold.yaml file will also show you the image that is needed to be built along with the deployment steps. All these steps will let Skaffold pretty much understand and detect the configuration.

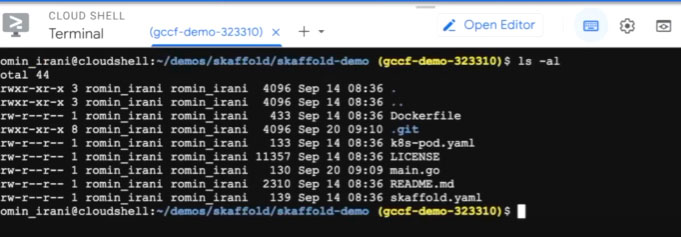
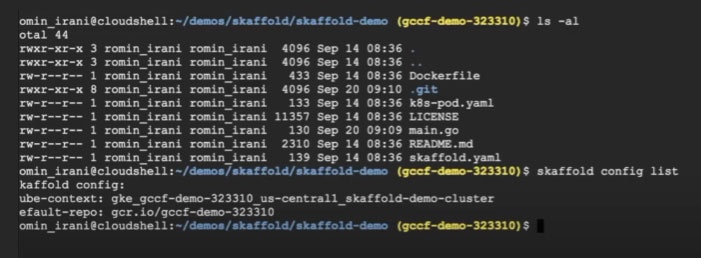
In Figure 6, you can see that in the terminal inside the demo folder we have the Skaffold.yaml files, the k8s-pod.yaml and the main.go. Since the Skaffold tool is already installed as part of Google Cloud Shell, on typing $skaffold config list you can see (Figure 7) that the current cube context is set to that demo cluster, and the default-repo is also set to the Google container registry.
Now, we have a folder in which we have got our configuration file. All we need to do is run the developer end-to-end pipeline in Skaffold by using the $skaffold dev command. It will build everything up for the first time, and will begin with the deployment process. It will then provide you the relevant output and will wait for the code changes as well.
Skaffold is just like any other command-line tool that can be deployed on your machine or any other server that you desire; it comes preconfigured with Google Cloud Shell. All in all, Skaffold can automate a lot of steps that you would need to go through manually otherwise. Automating these steps will not only save time so that you can focus on other important things, but also make the application less prone to unwanted bugs and errors.


