


In this first part of a series of articles on network troubleshooting, the author covers the basics of networking, such as testing connectivity, scanning the network ports of other servers, communication with a remote service, and a few other networking concepts.
The Internet Control Message Protocol (ICMP) is a low-level protocol used to test host availability and send error messages. One of the first steps in testing for connectivity is to send ICMP echo requests to the remote host. Hosts, by default, are configured to send an ICMP echo reply to indicate that they are present and running. This is accomplished with the ping command.
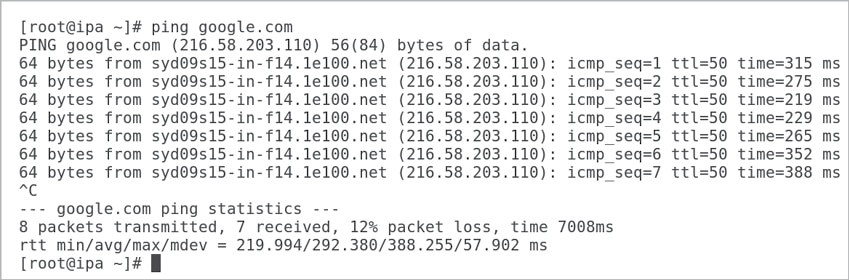
The ping command takes the host name, or IP address, of the host of interest as an argument. When the -b option is used, the command argument specified is a broadcast address. By default, the ping will continuously send ICMP echo requests every second. All responses that are received are displayed with their packet sequence number and latency time. When the user interrupts the command with a Ctrl+C, then the ping command displays a summary. You can refer to the output in Figure 1 for the ping command output.
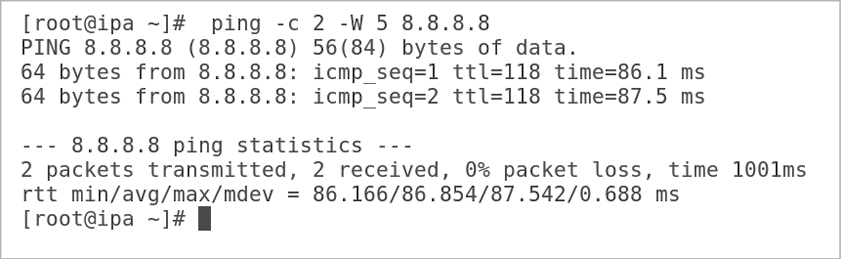
There are a couple of options that make the ping command very useful in a shell program. The -c counts the number of echo requests to send out. The -W timeout specifies how many seconds it has to wait before timing out. The ping command in Figure 2 is sending two echo requests and is waiting five seconds for a reply.
Ping returns a zero exit status when the target host responds and returns a non-zero exit status when the target is not reachable.
The ping6 command is used to send echo requests to an IPv6 address. For IPv6, when doing a ping to a link-local scope address, a link specification using the -I option is required. View the following command for the same:
# ping6 -I eth0 <IPv6-address>
Table 1 lists some of the important options of the ping command.

For more options with detailed explanations, refer to the manual page of the ping command.
Scanning network ports
Nmap is an open source port scanner tool that administrators use to rapidly scan large networks; it can also do more intensive port scans on individual hosts.
What does Nmap do?
Nmap uses raw IP packets in novel ways to determine what hosts are available on the network, what services (application name and version) those hosts are offering, what operating systems (and OS versions) they are running, what type of packet filters/firewalls are in use, and dozens of other characteristics.
The Nmap executable is provided by the Nmap package. You can install the Nmap package by executing the following command:
# yum -y install nmap or # rpm -ivh nmap
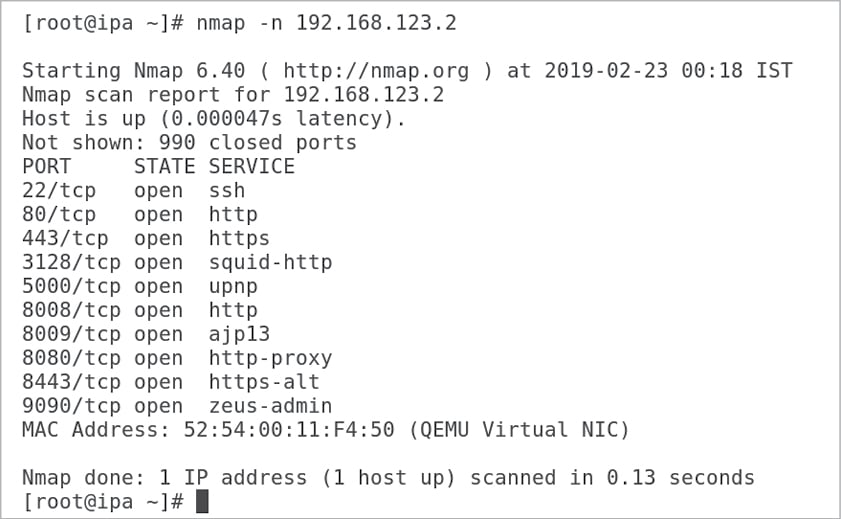
Figure 3 shows Nmap scanning 192.168.123.2 (a local virtual machine). The -n option tells Nmap to display host information numerically, not using DNS. As Nmap discovers each host, it scans privileged TCP ports looking for services. It displays the MAC address, with the corresponding network adapter manufacturer, of each host. Nmap is generally used to scan the complete network.
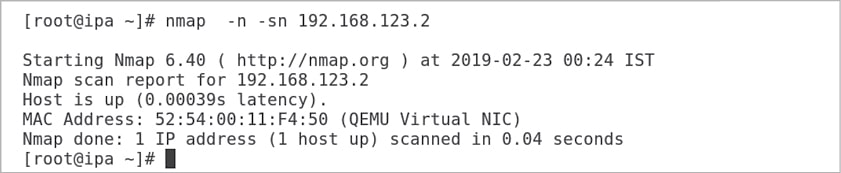
A port scan can be disabled by using the -sN option. Administrators use this option when they want to quickly see which hosts are running on a network. You can refer to Figure 4, in which Nmap is scanning the virtual machine without scanning the port. This option is very useful when you just want to check which machines are up in your network.
There is one more interesting option, the -sU option, that tells Nmap to perform a UDP port scan. This scan takes substantially more time to run than the default TCP port scan. It is useful when an administrator wants a more complete picture of what services a host exposes to the network.
There are many other Nmap options that you can go through from the manual page.
Communicating with a remote service
Ncat is a troubleshooting tool that allows administrators to communicate directly with a port. Ncat can use either TCP or UDP to communicate with a network service, and it also supports SSL communication. Ncat is invoked as either the nc or ncat commands. To use this utility, download the nmap-ncat package on your Linux systems.
Ncat acts as a server when it is invoked with the -l option. This is known as ‘listen mode’ for Ncat. The -k option allows Ncat to keep the port open to listen for more connections when used in this mode.
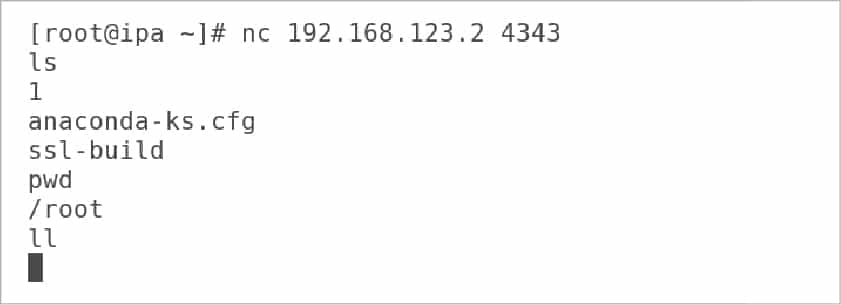
The default behaviour of Ncat in listen mode is to display any text that it receives over the network to the screen. The -e argument causes Ncat to pass incoming network traffic to the command specified with this option, as shown below. The following command will launch Ncat to listen on port 4343. It will pass the traffic on the bash shell. On my test remote system, the following command has been executed:
# nc -l 4343 -e /bin/bash
The output in Figure 5 shows what happens when an Ncat connect mode session is used to communicate with the preceding listener.
Each line of text sent to the server is executed by /bin/bash. The resulting output of the commands is sent back to the network client.
Note: Ideally, -e is not the recommended option as the shell should never be directly connected to a network port for obvious security reasons. I have just shown it to explain the feature of the -e option.
Ncat supports both IPv4 and IPv6. The -4 and -6 options force Ncat to use either IPv4 or IPv6 respectively.
Monitoring network traffic
IPTraf is a network monitoring software originally developed in the mid-1990s. This tool can be installed by downloading the iptraf-ng package.
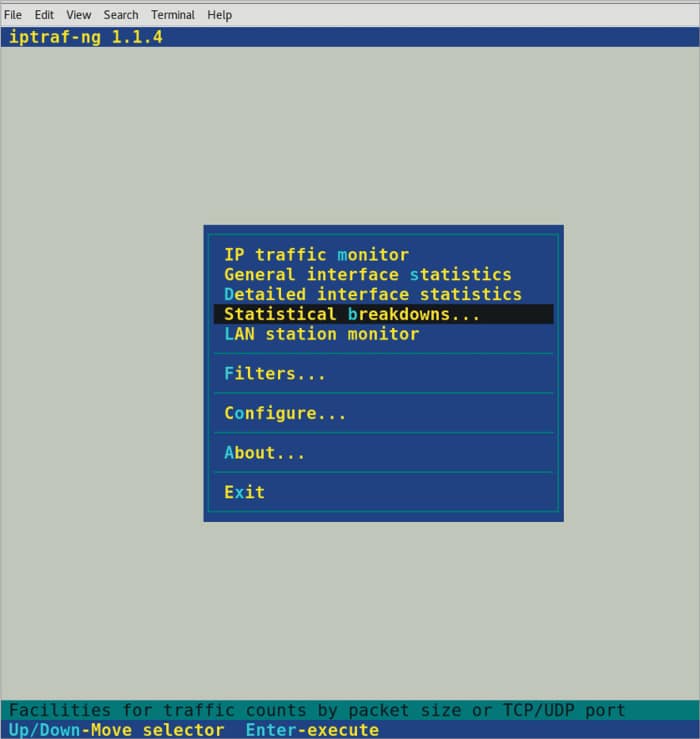
The iptraf-ng command launches the application. The program requires super user access, so it must be executed by the root. IPtraf-ng has a curses menu interface. The screen shot (Figure 6) shows the main menu that is displayed when the tool is first launched.
Selections are made with the up and down arrow keys; then, pressing Enter executes the current selection. Alternatively, typing the highlighted single character can also execute a command.
IPtraf-ng can monitor the current network connections. It can display detailed or summary counts about the network interfaces on the local system. It can also display UDP and ICMP packet information.
The Filters main menu selection allows an administrator to create filters to include (or exclude) specific types of network traffic. Each filter is a collection of rules that can select packets based on the source (or destination), address, port, and IP protocol type.
This article has only covered how to test network connectivity and some important networking tools. It is the first part of a series on troubleshooting network issues.


