


This article describes how to share a local running website (services) in your system with the external world and map it with a domain. You can use your local system as a Web server without static IP, using reverse tunnelling.
Reverse tunnelling is a method of tunnelling from a mobile host (cloud server) to a home agent (local system), which makes it possible for everyone to communicate via the network. For example, http://<IP>:9033 will access the website running on your laptop without static IP by using an EC2 instance configured as a reverse tunnelling server.
Phase I: Create an EC2 instance with elastic IP and open port 9033 in the security settings
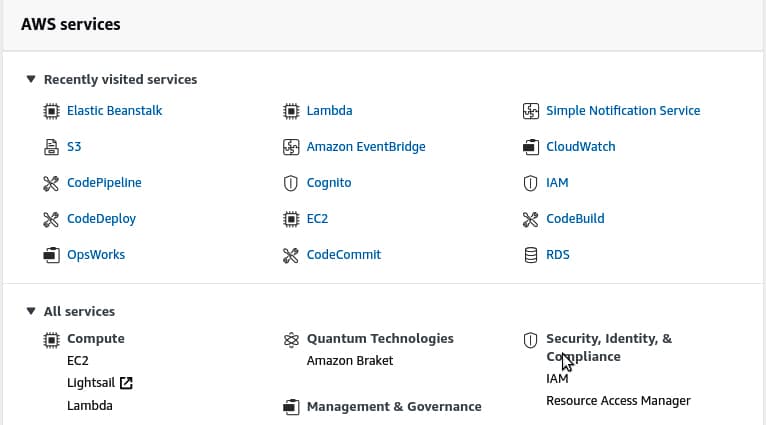
Log in to your AWS account; you will land on the ‘AWS services’ page.
Now select All Services >> Compute >> EC2.
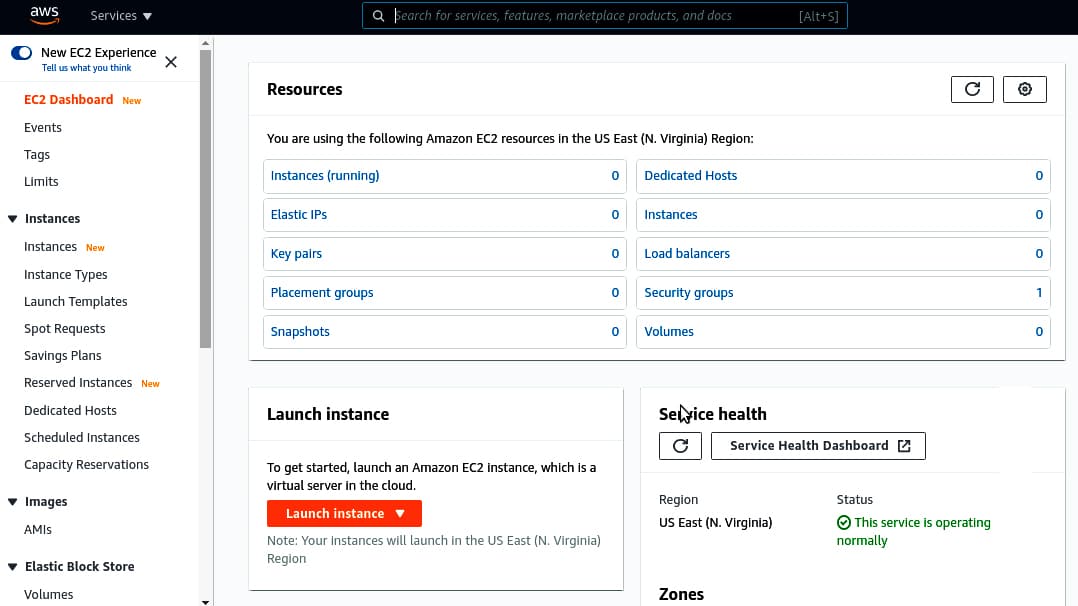
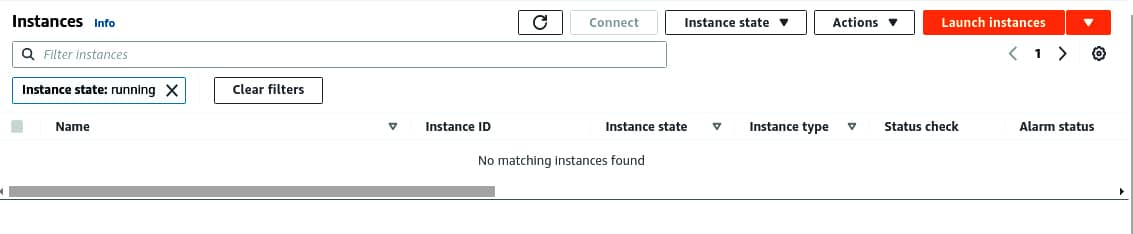
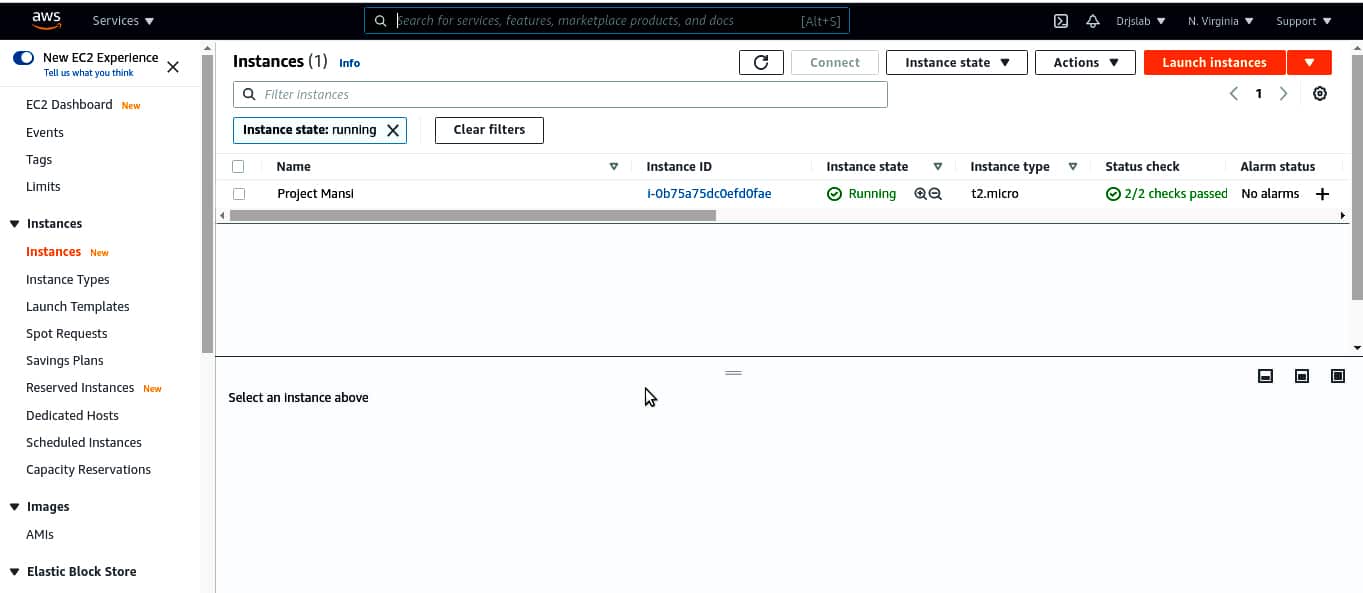
You will see ‘Resources’ as shown in Figure 3; select ‘instance (running)’.
Here you can see all your instances. No instance is running at present, and we are going to create one. Click on the top right corner on ‘Launch instances’.
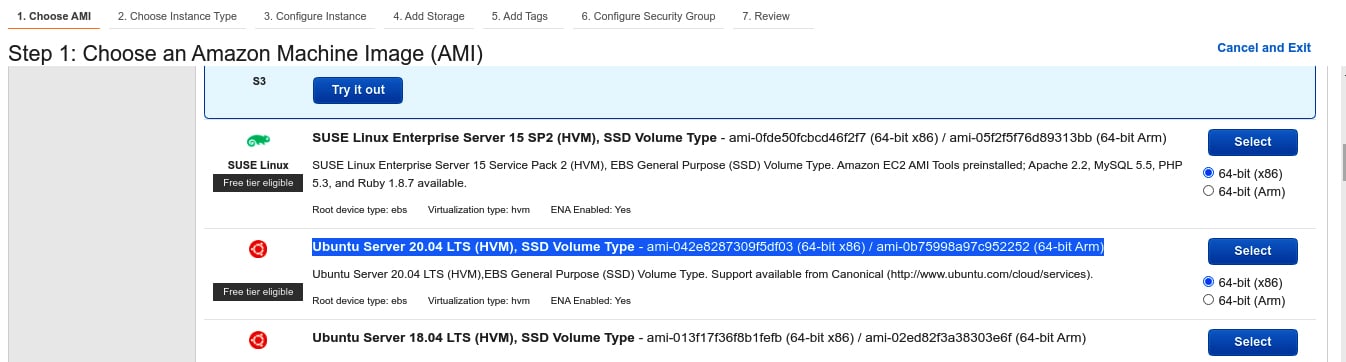
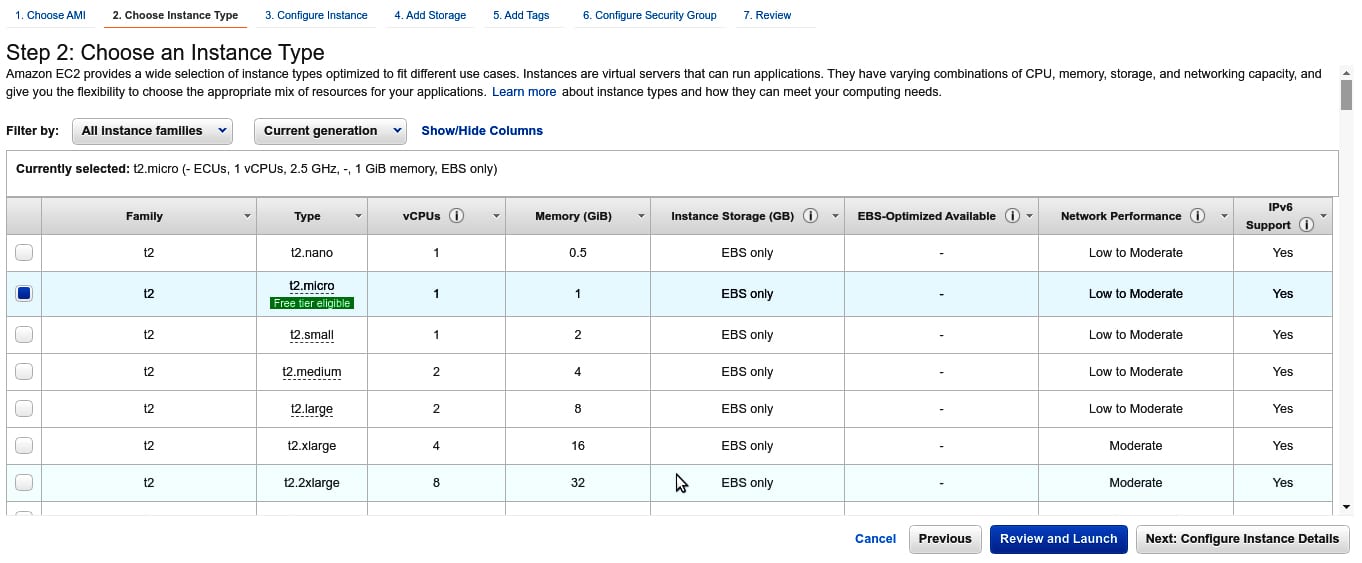
Now, We have to follow seven steps to configure the instance. I am selecting the Ubuntu 20.04 server (which comes under the free tier) for demonstration purposes. Click Next to select the instance type.
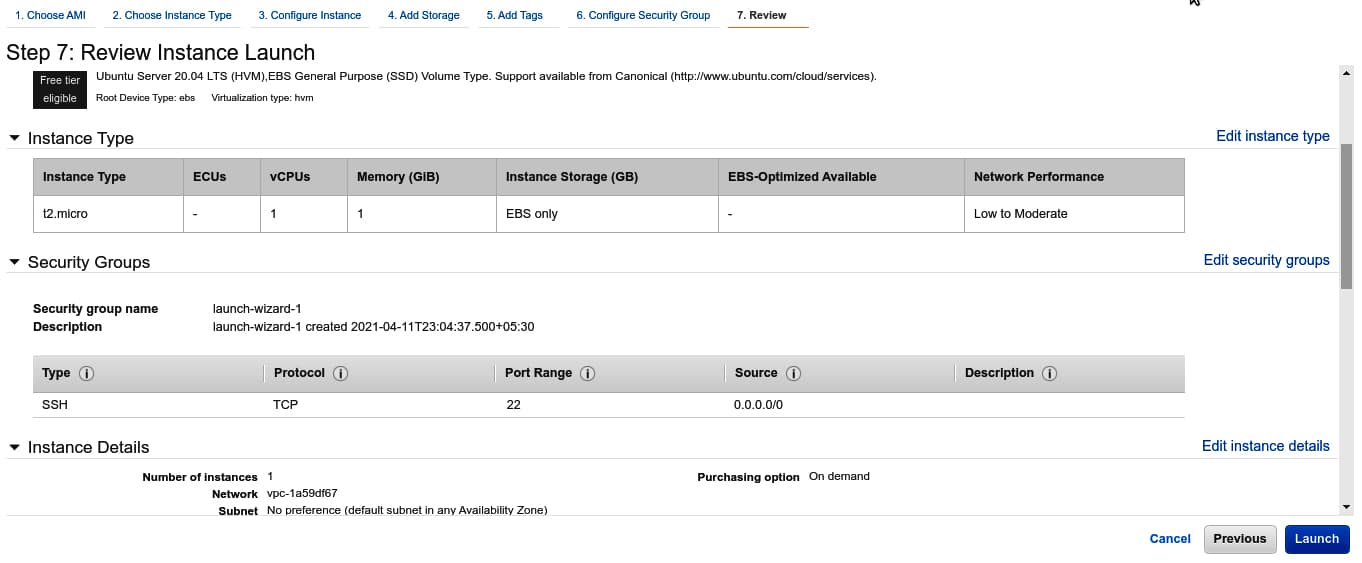
As per Figure 5, I have selected the t2.micro instance. Now, Click Next till Step 7 for review and click the no Launch button.
You need to create a new key pair to save your <name>.pem to your local system for future reference (Figure 7).
AWS will take time to create the new instance. Next, come to the Instance page shown in Figure 3, and wait for Status Check to become 2/2 check Passed. Once that is done, your instance is ready.
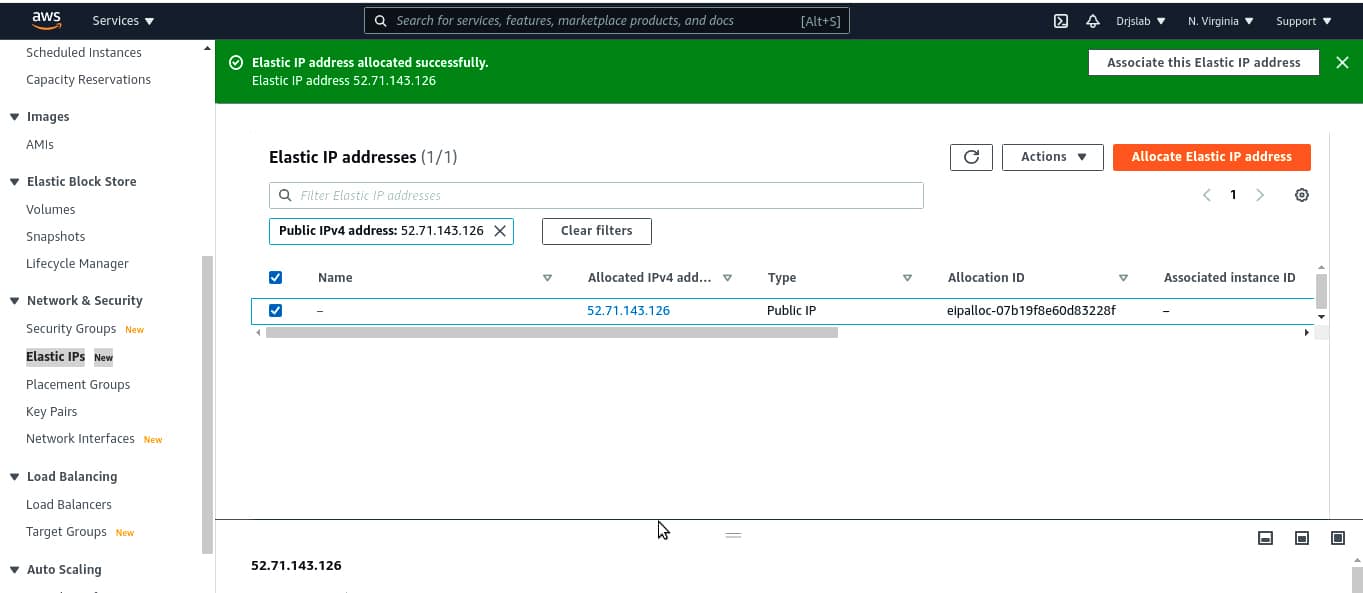
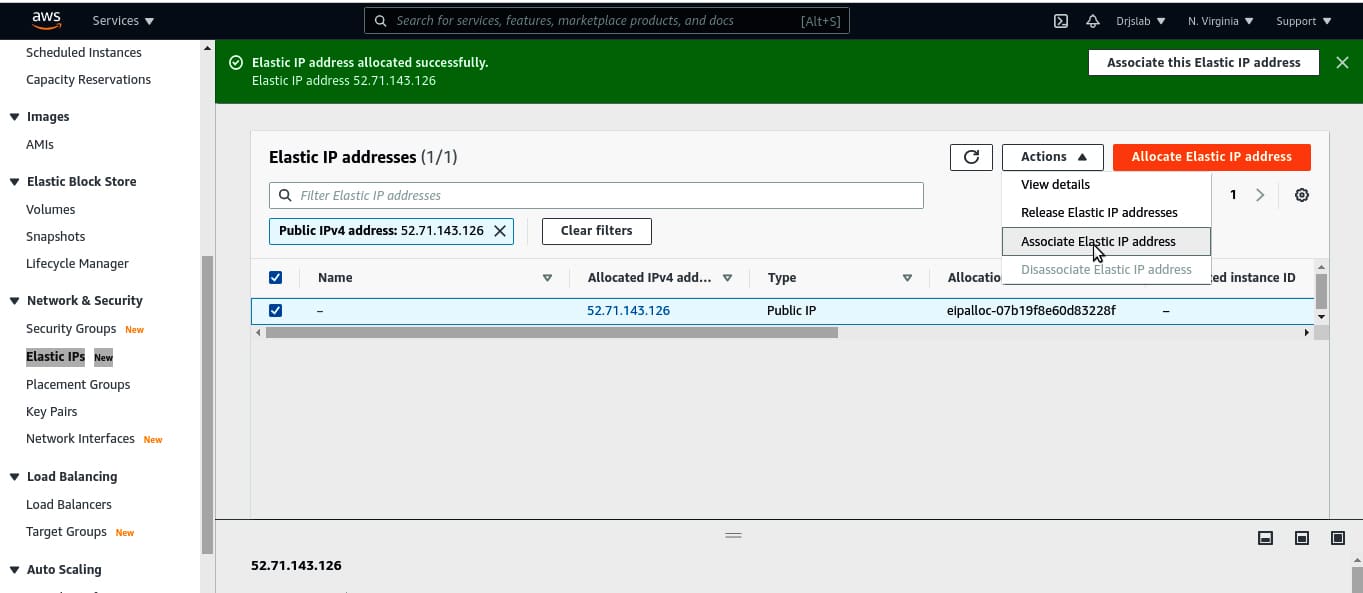
Now go to Network Security >> Elastic IP and click on the top right corner on Allocate Elastic IP Address. Your elastic IP will be created, which will be accessible from everywhere.
Next, in the top right corner select Action>> Associate Elastic IP address.
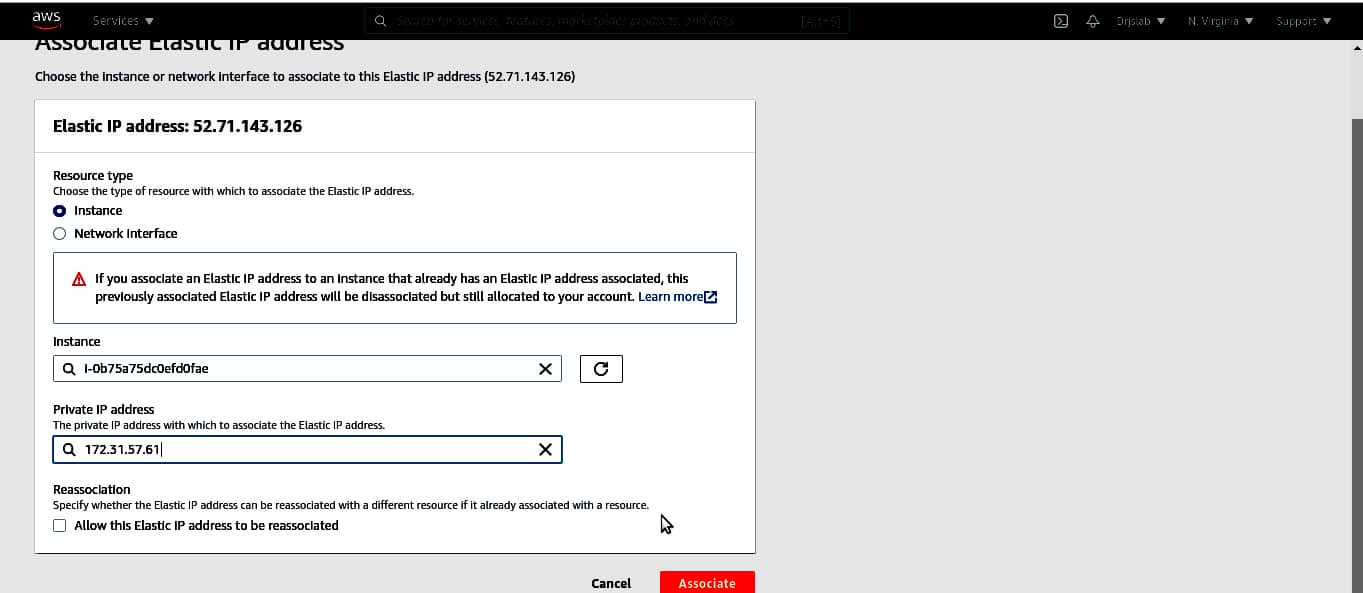
Provide your instance ID and private address for the same, and associate it.
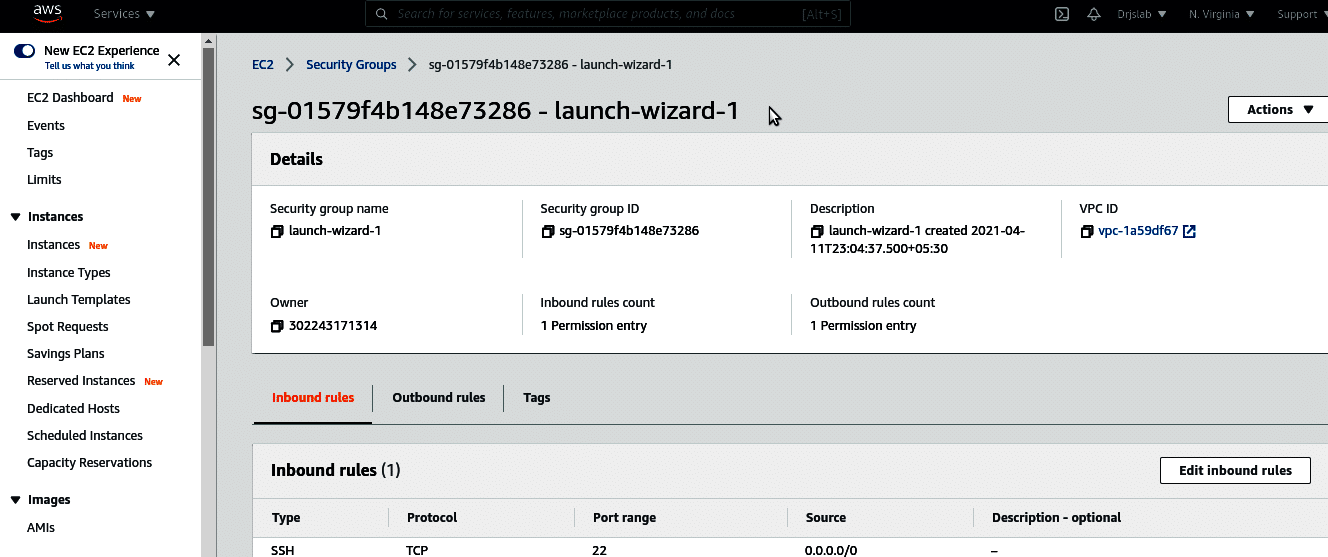
Till now, we have created an instance and associated it with an elastic IP address. Next, we are going to open port 9033 to the public. Come back to the Instance page and click on instance Id. You will see Instance Summary for <yourInstanceId>. Click on Security >> Security Groups.
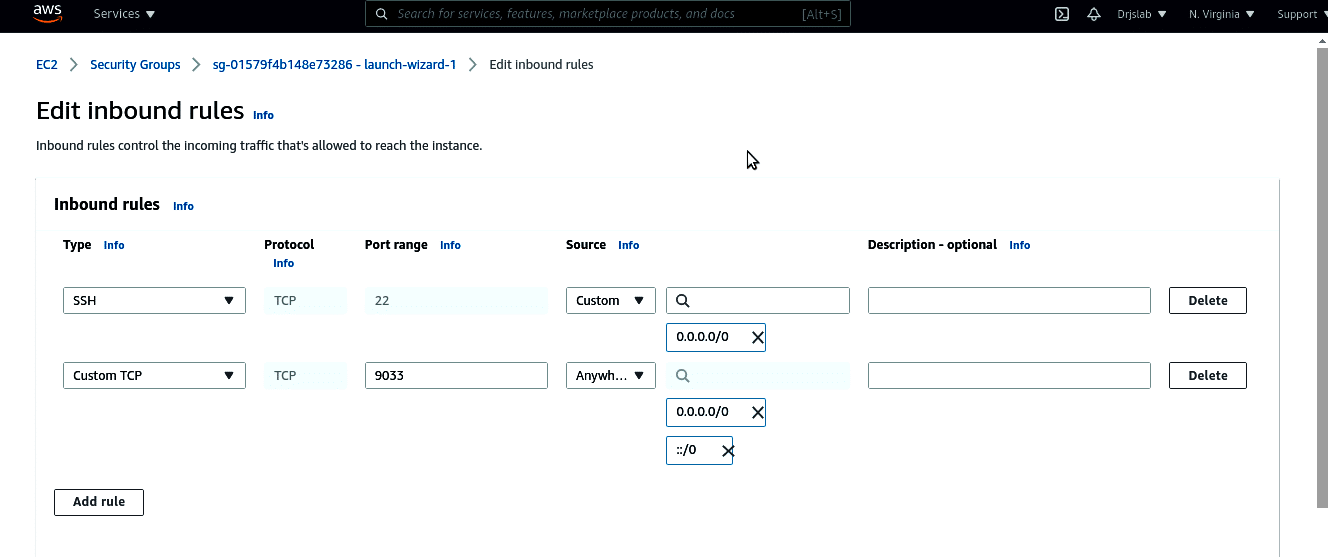
You will land on the security group. Now go to Inbound rules >> Edit inbound rules.

Provide details as given 1. Type custom TCP 2. port range: 9033 3. source: Anywhere, Save these changes.
Now we are going to update some config files. Open the terminal in Local System to connect the AWS EC2 instance. Type the following command:
ssh -i <you_pem_file>.pem ubuntu@<elastic_ip>
Here we have created an instance with Elastic IP and port 9033. We can make a request using http://<elastic_ip>>:9033, but it will not work because the instance does not have any running services (or Web server) on 9033.
We are now going to forward this port to our local system.
Phase II: Local system configuration and command for reverse tunnelling
In EC2 Instance, open /etc/ssh/sshd_config and type the command:
GatewayPorts yes
Log in to your EC2 Instance:
ssh -i hand.pem ec2-user@52.66.1XX.35
Update the sshd config file:
cat /etc/ssh/sshd_config
Paste the following at the bottom of the file:

GatewayPorts yes
Restart SSH:
sudo /etc/init.d/ssh start
Local system
In your local system, start the Web server. I have started a localhost server on port 4000 by installing the Node.js and Express.js packages:
const express= require(‘express’)
const app = express()
const port = 4000;

app.get(‘/’, (req, res) => {
res.send(‘Hello World!’)
})
app.listen(port, () => {
console.log(`Example app listening at http://localhost:${port}`)
})
It is now time for the final command in your system which will map your node server to the AWS instance. Open the terminal in a local computer, and type the following command:
ssh ec2-user@52.66.1XX.35 -R 9033:localhost:4000
Now open your browser and type in the URL: http://52.66.1XX.335:9033.
Bingo! You will see ‘Hello World!’ there. That’s a response from your local system.


