


Here’s how you can use Google Colab to bring cloud computing to your PC.
IaaS (Infrastructure as a Service), PaaS (Platform as a Service) and SaaS (Software as a Service) have been the three major cloud computing services for a while now. However, the growing needs of computing, including faster connectivity, have given rise to a new cloud computing model called DaaS or Desktop as a Service. Though this model has been around as virtual desktop infrastructure (VDI) for some time, it was formalised in 2021 with the introduction of Windows 365 cloud PCs by Microsoft.
Fast forward to today. Cloud PCs are still relatively expensive for the average user. Also, Windows 365 is built for business and enterprise customers only. This is where Google Colab comes in. It offers temporary access to containers using IPython notebooks. The free tier offers around 12 hours of runtime, which is usually enough for most purposes. It also offers around 1 Gbps internet speed and can be used for temporary tasks. For persistent file storage, a Google Drive can be mounted, with the free tier providing around 15GB of storage.

Hence, it makes good sense to use Colab containers as virtual machines for cloud PC. This can be achieved by installing the essential applications and a desktop environment on the container.
Let us start by creating an IPython Notebook and installing the required applications, which are: a web browser, a desktop environment, and a remote desktop server. Since the goal is to run the notebook inside Colab, which is on the browser, a proxy is needed to render the remote desktop on the browser itself.
Start by installing Firefox as the browser, XFCE as the desktop environment, VNC server for remote desktop, Websockify as the proxy and noVNC for rendering on websites. The following commands can be added to the cell:
!echo “deb [trusted=yes] https://packages.mozilla.org/apt mozilla main” | sudo tee -a /etc/apt/sources.list.d/mozilla.list

!sudo apt-get update

!printf “49\n1\n17\n” | apt-get install -y xfce4 xfce4-goodies tightvncserver novnc websockify firefox/mozilla
Next, set a password for the VNC server for the root user. The vncpasswd command is used for this. A default password ‘password’ can be set as:
!printf “password\npassword\nn\n” | vncpasswd
Now start the VNC server for display 1.
!sudo vncserver
!export display=:1
It runs on port 5091 by default for display 1. Websockify is used to proxy it to port 6080 (or any other port).
!websockify -D --web=/usr/share/novnc/ 6080 localhost:5901
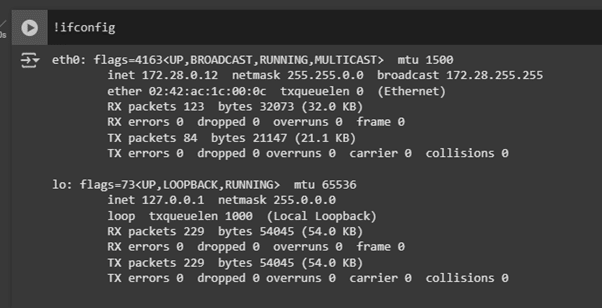
This port is to be exposed to the public internet. Since Colab runs on a container, it is likely that it is behind a NAT and is not routable over the internet. This is confirmed by checking the IP addresses of the container by running ifconfig (Figure 2).


There are a few options for NAT (network address translation) traversal and exposing the port to the internet, with Ngrok and Localtunnel being prominent ones. Ngrok is a good one, but it has recently added credit card verification. Hence, we are going to use Localtunnel. It can be installed from ‘npm’ using the following command:
!npm install -g localtunnel
It is run by a Python subprocess so that we can take out the hosted URL easily:
import subprocess

process = subprocess.Popen(‘lt --port 6080’.split(), stdout=subprocess.PIPE, stderr=subprocess.PIPE, bufsize=0)

output = process.stdout.readline().decode(‘utf-8’).strip()+’/vnc.html’

url = output[output.find(‘https’):]
Unlike Ngrok, Localtunnel needs a password to be opened. The password can be fetched using an http request. Python does this by using the requests library.
import requests

ltpassword=requests.get(‘https://loca.lt/mytunnelpassword’).text
Ultimately, it is rendered as an iframe from Colab after clearing the current output.
from IPython import display

display.clear_output()

display.HTML(f’<h1>LT Password: {ltpassword}</h1><br><h1>VNC Password: {vncpassword}</h1><br><iframe style=”border: 0; width: 100%; aspect-ratio: 16/9; overflow: auto;” src=”{url}”></iframe>’)
The complete code in the cell can be summarised as:
!echo “deb [trusted=yes] https://packages.mozilla.org/apt mozilla main” | sudo tee -a /etc/apt/sources.list.d/mozilla.list

!sudo apt-get update

!printf “49\n1\n17\n” | apt-get install -y xfce4 xfce4-goodies tightvncserver novnc websockify firefox/mozilla

!export USER=root

!printf “password\npassword\nn\n” | vncpasswd

!sudo vncserver

!export display=:1

!websockify -D --web=/usr/share/novnc/ 6080 localhost:5901

!npm install -g localtunnel

import subprocess

process = subprocess.Popen(‘lt --port 6080’.split(), stdout=subprocess.PIPE, stderr=subprocess.PIPE, bufsize=0)

output = process.stdout.readline().decode(‘utf-8’).strip()+’/vnc.html’

url = output[output.find(‘https’):]

vncpassword=’password’

import requests

ltpassword=requests.get(‘https://loca.lt/mytunnelpassword’).text

from IPython import display

display.clear_output()

display.HTML(f’<h1>LT Password: {ltpassword}</h1><br><h1>VNC Password: {vncpassword}</h1><br><iframe style=”border: 0; width: 100%; aspect-ratio: 16/9; overflow: auto;” src=”{url}”></iframe>’)
When this code is run, we are presented with the desktop environment.
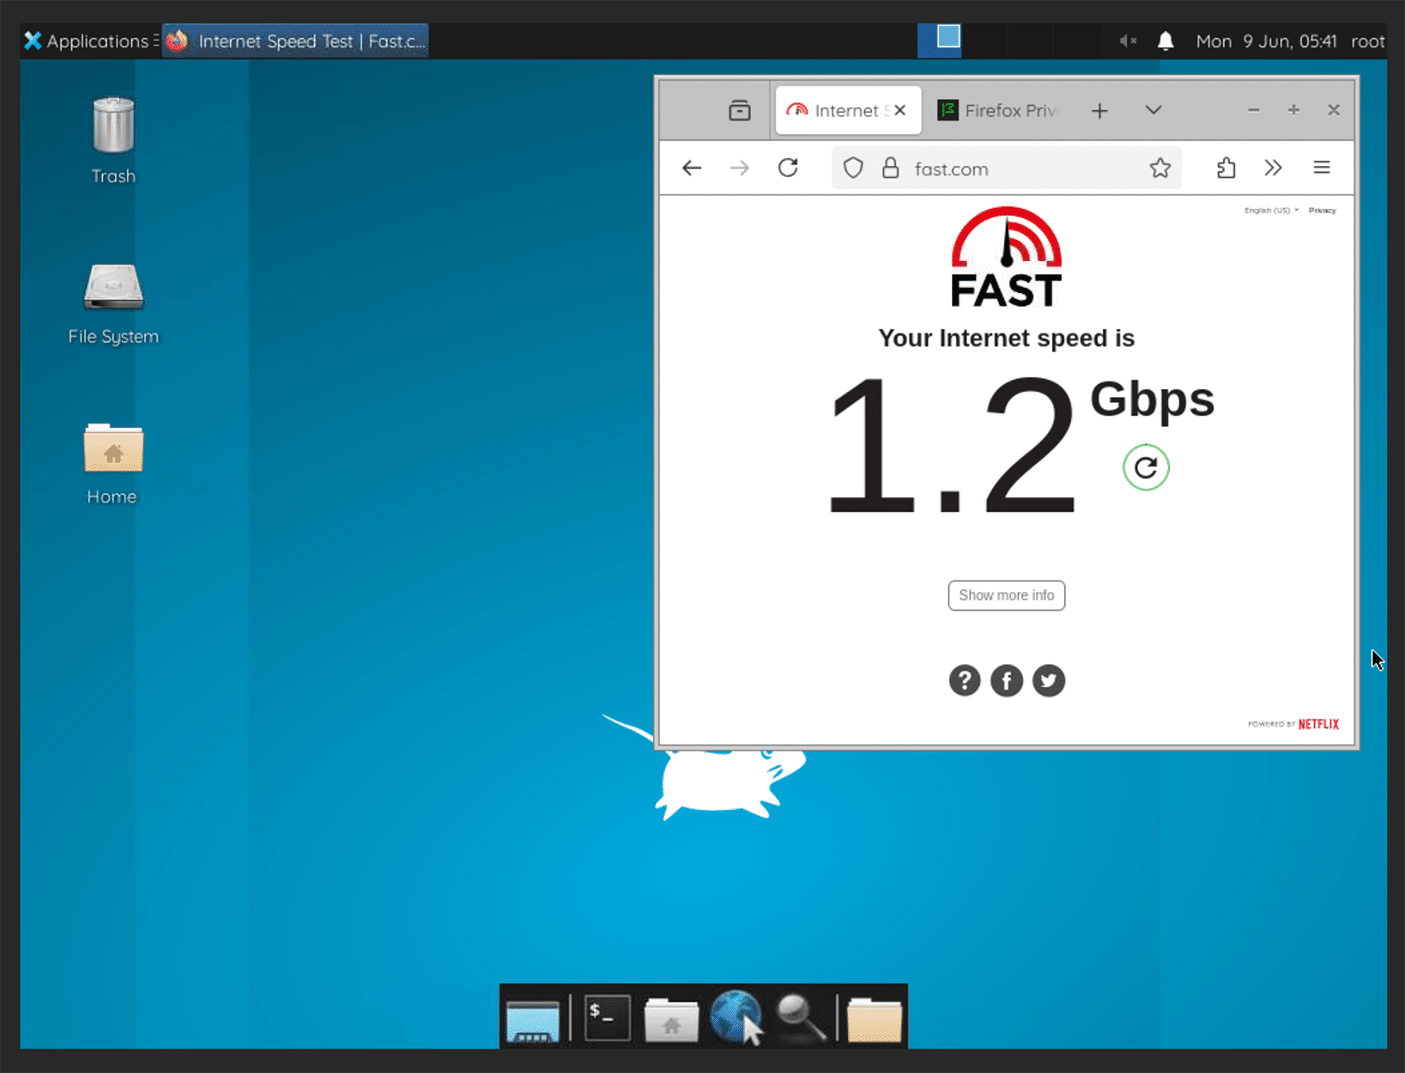
This is how we can use a container on Google Colab as an ephemeral cloud PC that can be accessed from any device including tablets and smartphones.


