


Modern enterprises need IT for smooth and efficient functioning. The almost universal use of the Internet has spawned many bad actors and malicious agents. There are hackers out there waiting to break into computer systems for espionage, theft of industrial secrets and for information. Intrusion detection systems help address this problem.
An intrusion detection system (IDS) is a network security technology built to detect vulnerabilities and has the ability to block threats. According to Brian Rexroad, vice president of security platforms for AT&T, “The overall purpose of an IDS is to inform IT personnel that a network intrusion may be taking place. Alerts will generally include information about the source address of the intrusion, the target’s/victim’s address, and the type of attack that is suspected.”
What is involved in network intrusion?
To detect and to prevent hackers and attackers from penetrating a system, we need to have a basic understanding of the attacks that can be possibly performed on it.
Scanning attack: This involves sending packets/information to a network in an attempt to gather data about the network, e.g., blind SQL injection.

Buffer overflow attack: This is an attempt to penetrate sections of the memory in the devices connected to the network, replacing the normal data with malicious code. This can cause the entire system to crash and create chaos, which helps in hiding an attack on another point in the system.
Protocol-specific attack: This targets specific protocols such as ICMP, TCP and ARP.
- ICMP stands for Internet Control Message Protocol; ping floods attack can be performed, which overwhelm the device with ICMP echo-request packets. There are also smurf attacks and port scanning.
- TCP stands for Transmission Control Protocol, which is vulnerable to TCP syn attacks in which a port stays open as the ACK message is never received; the open port can be used to send malicious packets.
- ARP stands for Address Resolution Protocol, in which the attack takes place by ARP Poisoning where false ARP messages are sent to link the attacker’s MAC address with the IP address of a legit device.
Malware: This includes worms, trojans, viruses and bots. Basically, as the word itself says, this software is designed to damage or disrupt the system.
Traffic flooding: This is also known as DDoS attack.
Types of intrusion detection systems
Network-based intrusion detection systems (NIDS) are deployed at strategic points throughout the network, basically to keep a watch over places where the traffic is most likely to be vulnerable. They are relatively easy to secure and thus, an intruder may not realise that an attack is being detected. NIDS analyses a large volume of network traffic, which means it has low specificity. So, there are chances of it missing an attack or not detecting something in encrypted traffic.
A host intrusion detection system (HIDS) is established on all devices in the network. It works as a second line of defence against malicious data if NIDS fails to detect something. It looks at the entire system’s file set and compares it to previous logs of the file set.
Approaches to detecting intrusion
Signature based IDS: This focuses on searching for ‘signature’ patterns, or an identity of an intrusion, or a specific intrusion event. Signature-based IDS is only as good as how up-to-date its database is at that given moment. But it is very easy to bypass it by making tiny changes to the code. As the database increases, the processing load increases and so the system takes time to analyse each connection and verify it.
Anomaly based IDS: This uses machine learning to detect intrusions by comparing trustworthy models with new models. As a result, strange looking anomalies are flagged. However, the problem is that even a legitimate model can be flagged, depending on the network’s response. Anomaly-based IDS is good for determining when someone is probing a network prior to an attack taking place. These probes create signals in the network that the anomaly based IDS will pick up.
Challenges of managing an IDS
- False positives are a major problem with an IDS. This refers to the generation of alerts even when there is no real problem or any issue.
- Staffing means that an IDS cannot work as a one-for-all system — it changes from enterprise to enterprise.
- There are chances that an IDS may miss a legitimate risk.
Snort
Snort is a free and open source network intrusion prevention and detection system. It uses a rule-based language combining signature, protocol and anomaly inspection methods to detect any kind of malicious activity. Snort is also capable of performing real-time traffic analysis and packet logging on IP networks. It was developed in 1999 but it went on to become so popular that it was purchased by Cisco in 2014.
Anyone, a novice or an experienced person, who wants to head out into the world of security must be familiar with Kali Linux. This is a Debian based distribution, which has been specifically made keeping in mind network analysts and penetration testers. A Linux distribution is a bundle which contains the Linux kernel, a collection of core utilities and applications, and some default settings. Kali comes pre-installed with a palette of tools to choose from, making it the Swiss knife for hackers. We will now use Snort on Kali.
Installing Snort
Let us install Snort from the repositories. You can first directly try running it from the terminal, by using the following command — if your machine is properly configured with the repositories, then Snort will be installed.
kali > sudo apt-get install snort
Now let us suppose that your machine does not have the required repositories listed, so we may edit them by using the following command:
kali > sudo mousepad /etc/apt/sources.list
Once done, install Snort. You may verify the installation by running the following command:
kali > sudo snort -V
As we can see in Figure 1, Snort responds with its currently installed version number.
Basic configuration of Snort
Like all Linux commands and applications, Snort also has the help of the command line, which can be invoked by using the following code:
kali > sudo snort –-help
I have highlighted a few switches from the Help section of Snort:
- -c gives us the location of the Snort rules and tells it to use its rules. They are the signature against which the new packets are verified.
- -d tells Snort to show the application layer of data.
- –e displays the Data Link layer of information, which contains the MAC address of the system.
- –i allows the user to designate the interface we want to use. By default, Snort uses eth0.
- –k allows the users to define how they want to store the details of the data capture performed by Snort.
- -v is like in most of the programs — verbose, providing all the information.
Starting Snort
Let’s get to know some of the basic switches of Snort, by first running iy. What makes Snort fabulous is that it can be run as a sniffer, packet logger, or even as a NIDS. In this article, we will look at Snort as a packet sniffer and NIDS.
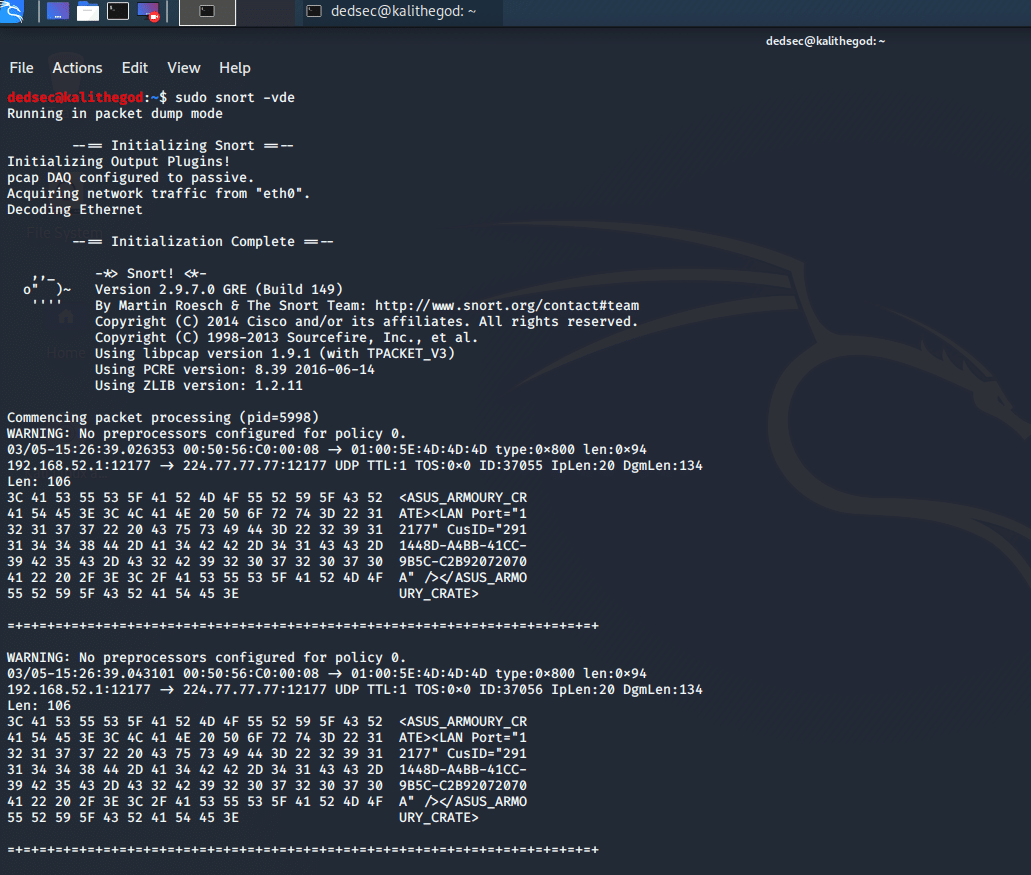
To run Snort in packet dump mode, use the following command:
kali > sudo snort -vde
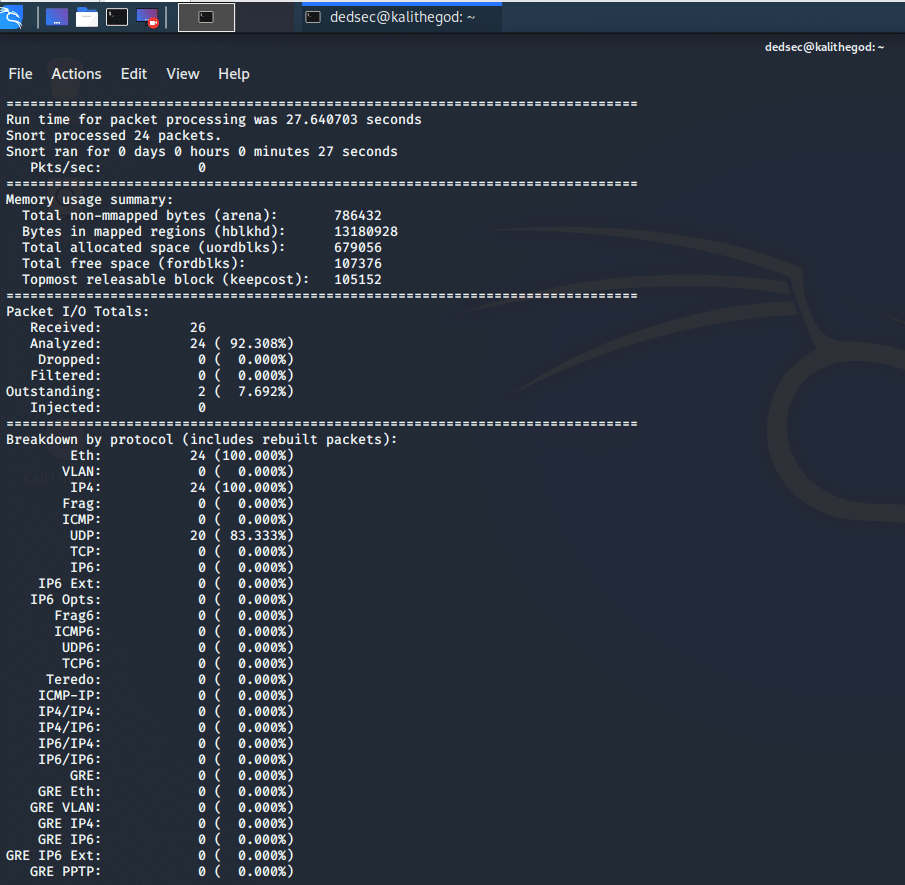
The output we get is pretty self-explanatory (Figures 2). For using Snort as a NIDS, we need to instruct Snort to include the configuration file and rules. Generally, we can find the conf file at /etc/snort/snort.conf and that file will point to Snort rules. We need to give the -c switch and then the location.
kali > sudo snort -vde -c /etc/snort/snort.conf
We can also customise the rules to suit our needs.
Snort — rules and configuration
Like all general Linux applications, Snort is configured via a conf file, which can be opened as a simple text file. Edit this text file, restart the application and we have a new working configuration.
Before going any further, let’s take a brief look into the syntax of Snort rules.
- Snort rules must be contained in a single line or we can use the multi-line character \. For example:
log tcp !x.x.x/xx     OR

log tcp !x.x.x/xx any -> xxx \

(msg: “some command”)
- All rules should contain a rule header (which identifies the actions) and rule options (which identify the rule’s alert messages).
- The rules must describe situations like a violation of the security policy of the company, or correctly detect the exploitable vulnerabilities.
There are three kinds of rules in Snort:
- Alert rules: This generates alerts using the alert method.
- Log rules: Upon generation of any alert, it logs that specific alert.
- Pass rules: Ignores the packet if deemed malicious and drops it.
Now we can move on to the configuration file, which can be opened using the following command:
kali > mousepad /etc/snort/snort.conf
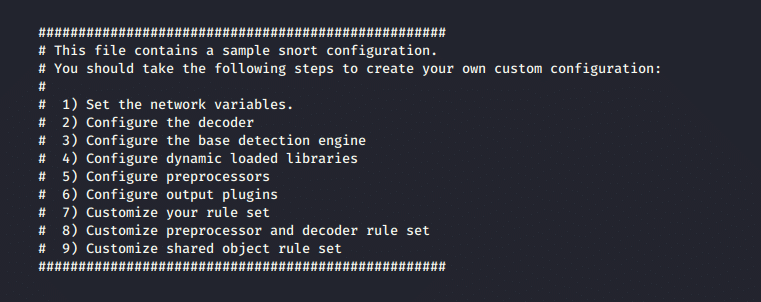
In the Snort configuration file, we may see nine sections, as shown in Figure 4.
For the most basic configuration, we will address only Sections 1, 6 and 7 as seen in Figure 5, 6, 7.

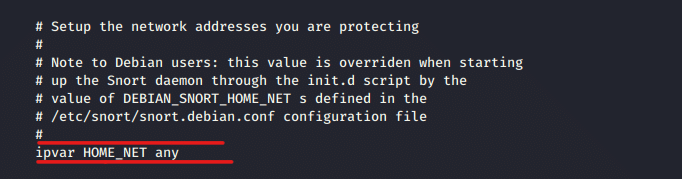
Setting variables
In the screenshot in Figure 5, we can see the highlighted line ‘ipvar HOME_NET’. This variable denotes the network is protected. ‘HOME_NET’ is the variable name to which the IP address is assigned. This can be a single IP address, a list of IP addresses, or a subnet in CIDR notation, or even can be left as any.
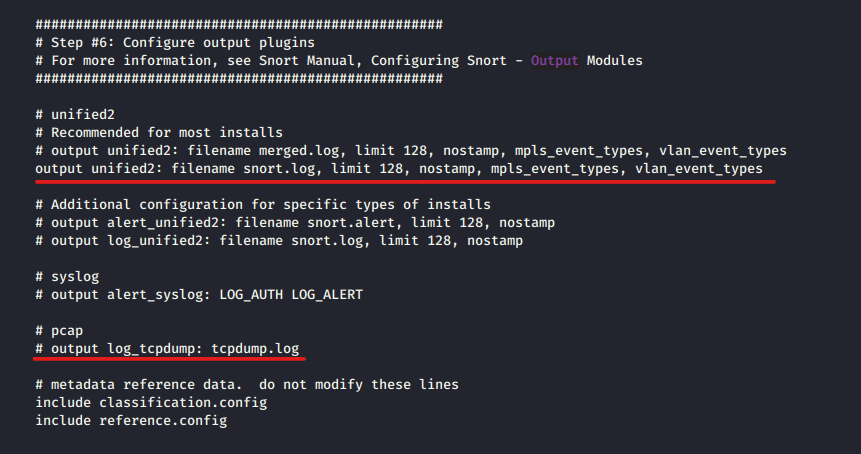
Checking the output
Using Ctrl+F, we then move on to output plugins (Figure 6). By default, Snort sends the output in log format. But if we want, we can comment out that line (unified2) and uncomment the bottom line (log_tcpdump), enabling the output in tcpdump format, which is saved in the /var/log/snort directory.
Disable rules
Depending on your enterprise, we may need to change the rules that Snort relies upon, and customise them in Section 7, as shown in Figure 7.
To not let Snort use a given set, simply comment out the include part.
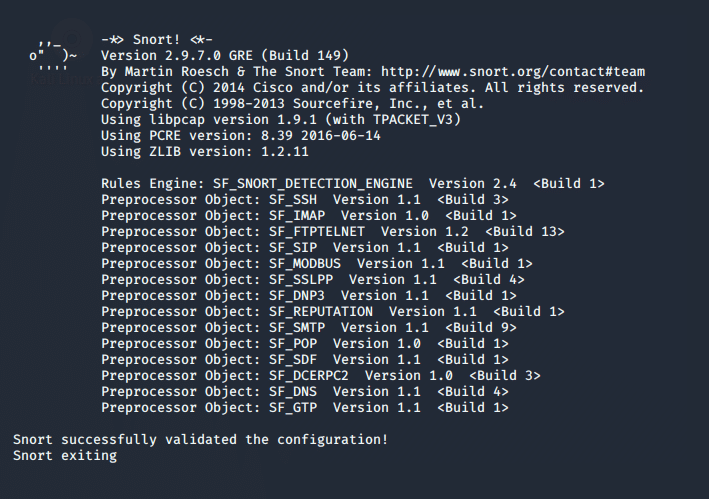
After making any change, simply save the file and test the configuration using the -T switch.
kali > sudo snort -T -c /etc/snort/snort.conf
The output can be seen in Figure 8.
So, is that all?
Well, we have not even scratched the surface of Snort. For the geeks out there, think of this as just the beginning to a Cristopher Nolan or a Quentin Tarantino movie — it still has many layers to go through. We can write our own rules, create our own NIDS for the enterprise and even sniff packets.


