This article introduces the reader to ownCloud, which is a free and open source private cloud platform to help you access, sync and share data.
Ever thought about having your own cloud? Well, now you can, thanks to ownCloud, which is an open source, self-hosted app platform that enables you to share and sync your files across multiple devices and with many people. With dozens of apps available, it gives you access to a rich set of functions.
What is ownCloud?
ownCloud is an open source ‘file sync and share’ software for everyone—from individuals using the free ownCloud Server edition, to large enterprises and service providers subscribing to the ownCloud Enterprise edition. You can share one or more files and folders on your computer, and synchronise them with your ownCloud server. If you place files in your local shared directories, they get immediately synchronised to the server and to other devices using the ownCloud Desktop Sync client, the Android app, or the iOS app.

What makes ownCloud different?
The one thing that sets ownCloud apart is that it’s open source and freely available to anyone who wants to set up ownCloud on a local server. The open source nature of ownCloud means that there is a community ready to help with any issue that you might encounter. The app store is one of the most important aspects of ownCloud, with a wide variety of apps that let you personalise your cloud.
System requirements
- ownCloud can run with a minimum of 128MB of RAM, but 512MB is recommended.
- Ubuntu 14.04 LTS+ or Debian 7+
- MySQL/MariaDB
- PHP 5.4+
- Apache 2.4 with mod_php
Set-up and configuration
The ownCloud server package is not available within Ubuntu’s default repositories. However, ownCloud maintains a dedicated repository for Ubuntu 16.04. A release key should be added to apt and the repo link should be specified in the sources.list file to install ownCloud and its dependencies.
To add the release key, download it using wget and import it using the apt-key command, as follows:
$ wget -nv https://download.owncloud.org/download/repositories/9.1/Ubuntu_16.04/Release.key -O Release.key
$ sudo apt-key add - < Release.key
The ‘Release.key’ is an encrypted public key which apt will use to verify the authenticity of ownCloud packages. In addition to that, add the ownCloud repository in a file called owncloud.list and save it in the sources.list.d folder as shown below:
$ sudo sh -c “echo ‘deb http://download.owncloud.org/download/repositories/9.1/Ubuntu_16.04/ /’ >> /etc/apt/sources.list.d/owncloud.list”
Use the apt-get update command to make apt aware of the change, as follows:
$ sudo apt-get update
Install the LAMP (Linux, Apache, MySQL and PHP) server:
$ sudo apt-get install lamp-server^
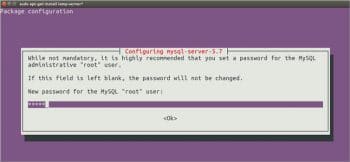
You will be prompted with a window to create a password for the MySQL root user. Enter a secure password, and use the tab key and the space bar to select the OK button.
Add a MySQL database
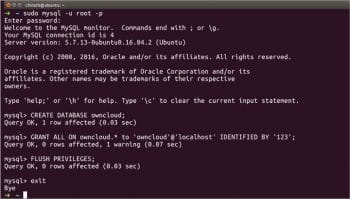
The next step is to create a MySQL database for ownCloud. Log in to MySQL by using the following command:
mysql --defaults-file=/etc/mysql/debian.cnf
This opens up the MySQL command line prompt. Enter the following SQL commands to create a user with the name ‘owncloud’ and a database of the same name. Replace the word ‘mysecurepassword’ with your own password in the commands, as shown below:
-> CREATE DATABASE owncloud;
-> CREATE USER owncloud@localhost IDENTIFIED BY 'mysecurepassword';
-> GRANT ALL PRIVILEGES ON owncloud.* TO owncloud@localhost;
-> flush privileges;
-> quit
Install ownCloud using the apt-get install command. The ‘owncloud’ package will install all the required dependencies.
$ sudo apt-get install owncloud
Restart the Apache server to update the changes made to Apache’s config directory.
$ sudo service apache2 restart
A quick start and set-up of the admin account
Open the Web interface of ownCloud by navigating to http://localhost/owncloud/.
If ownCloud is hosted in a server, you can get to the Web interface using the server domain or the IP address of the server (https://server_domain_or_IP/owncloud).
If a self-signed certificate is being used, you are likely to be presented with a warning because the certificate is not signed by one of your browser’s trusted authorities. This is expected and normal. We are only interested in the encryption aspect of the certificate, not the third-party validation of our host’s authenticity. Click the appropriate button or link to proceed to the ownCloud admin page.
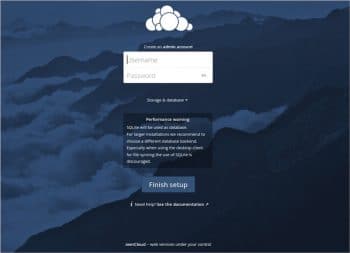
You should see something like what is shown in Figure 4.
When the page loads, you will be prompted with a form to enter a user name (for security reasons, it is recommended that you do not use admin as the user name) and password to create an admin account.
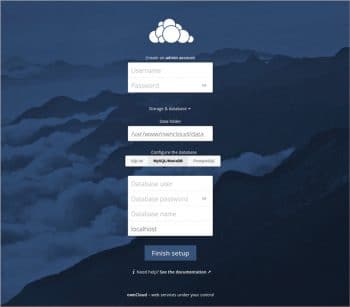
The default database used by ownCloud is SQlite, which should not be used in production. To change it to MySQL, click on the Storage & database link. Leave the Data folder settings as they are and click on the MySQL/MariaDB tab to use MySQL. Enter the database information that you configured while installing the LAMP server.
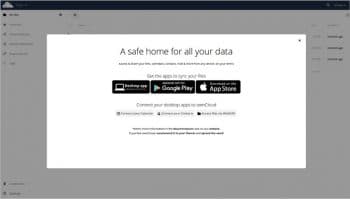
Click on the Finish setup button to create the admin user and log in. A splash screen with the words, ‘A safe home for all your data’ should appear.
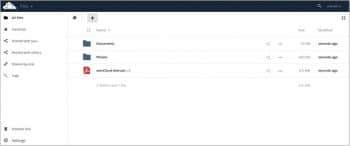
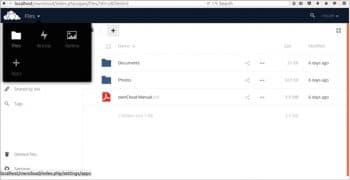
Close the splash screen to access the main interface. Here, you can create or upload files to your personal cloud. Share files with others, view the files shared with you and share files via links.
Extending ownCloud with apps
ownCloud has a rich ecosystem of apps, which provide access to a variety of functionality. Usually, an app offers a distinct function like a mail client or music player, but even core functionalities of ownCloud, like sharing and external storage, are implemented as apps. A large selection of apps is available at apps.owncloud.com and if you want to install one that is not available in the app manager, you can download it from the app store and install it by hand (this process is manual because there is a risk associated with downloading and running code from the Internet).
Open the Apps menu by clicking the drop-down menu at the top left corner near the logo.
You will see which apps are enabled, not enabled and recommended. You’ll also see additional filters, such as Multimedia, Productivity and Tools for finding more apps quickly. Add the app that you want by clicking the Enable button.


