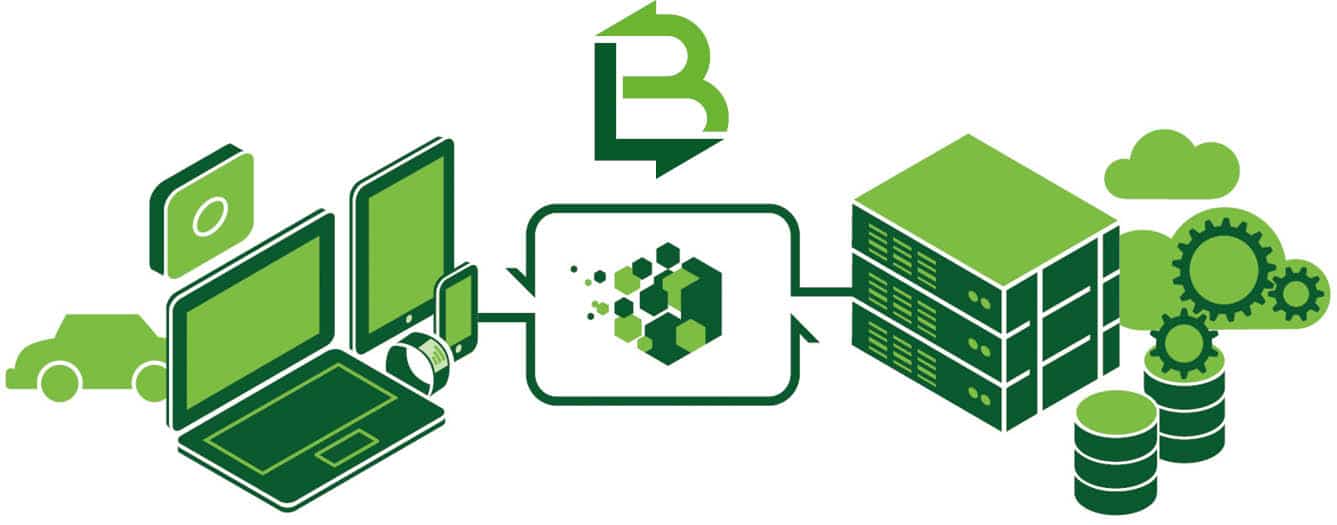
LoopBack is an open source Node.js framework, with which you can quickly create REST APIs, and connect devices and browsers to data and services. LoopBack helps to easily create client apps with Android, iOS and AngularJS SDKs, and comes with add-on components for file management, third-party login and OAuth support.
LoopBack is a Node.js framework that is used to design highly-extensible, powerful back-end services for mobile and Web applications. It enables dynamic end-to-end REST APIs with little or zero coding effort through its user-friendly wizard support. It is built on the top of Express.js and adapts most of its functionality like models, routing, middleware, etc, but with minimal coding requirements. It was introduced by StrongLoop and is currently maintained jointly by StrongLoop and IBM. It also comes with good integration support for client-side application development with the available SDKs. This article covers some LoopBack concepts and takes you through the few steps to build a small server application for a weather station.
Installation and building your first application
The current production release is LoopBack v3.0, with long term support (LTS) for v2.x. Install the LoopBack CLI tool, which provides various wizards for generating applications, models, data sources, access control rules, etc, as follows. Choose any LTS verions of Node.js and a compatible npm utility for the current work.
npm install loopback-cli -g
The IBM API Connect Developer Kit is another solution which uses LoopBack internally. In this article, we’ll focus on the LoopBack CLI tool and v2.x LTS. Let’s follow the steps shown below to create a simple app using the application generator.
lb app

? What’s the name of your application? (osfy-demo)

? Which version of LoopBack would you like to use?

2.x (long term support)

? What kind of application do you have in mind? api-server
Alternatively, you could also choose hello-world or notes as initial templates. After completing this wizard, all the required modules will be installed in the node_modules sub-directory.
Then run the server as follows:
node . (or)

npm start
…which will prompt the following URLs to the launch home page and a Swagger UI for the REST interface.
Web server listening at: http://0.0.0.0:3000

Browse your REST API at: http://0.0.0.0:3000/explorer
You may choose any process manager like pm2 for better management of the server.

Working with models
Models, which represent back-end data sources or services, are the heart of LoopBack. They come with full-featured REST APIs. Built-in models are created implicitly as per the application template; users add custom models with the help of generation wizards.
Let’s add a model using a generator for this app, which represents some environmental parameters like temperature, humidity, pressure, etc.
lb model

? Enter the model name: Weather

? Select the datasource to attach weather to: db (memory)

? Select model’s base class : PersistedModel

? Expose weather via the REST API? Yes

? Custom plural form (used to build REST URL): Weather

? Common model or server only? common
You can identify the generated file for the created model as weather.json in the common/models sub-directory. The default plural form is mostly suitable for model names, e.g., ‘Devices’ is applicable if the model name is ‘Device’. But for the current model, we’ll use the custom plural form, as ‘Weathers’ is not a suitable plural form. Let’s add a few properties to this model, say device-id as the string, and temperature, humidity, pressure as the number with a suitable choice for Required fields and Default values. You can also add more properties after completing the wizard using the following command or by manually editing weather.json:
lb property
Connecting with data sources
Model instances (property values) are stored under the in-memory database, by default. You can opt for better persistency support with suitable connectors for popular SQL and NoSQL based databases like MySQL, MongoDB, etc.
Let’s use the following steps to create a new data source and attach the model to it:
lb datasource

? Enter the datasource name: mydb

? Select the connector for mydb: MySQL

? Connection String url to override other settings:

? host: localhost

? port: 3306

? user: root

? password: ****

? database: loopback

? Install loopback-connector-mysql@^2.2 (Y/n)Yes
This will install loopback-connector-mysql in node_modules and generate JSON content for the data source in server/datasources.json. This file can be edited for further changes once the wizard completes its tasks. To attach this data source to our ‘weather’ model, edit server/model-config.json as follows, replacing db with mydb:
“Weather”: {

“dataSource”: “mydb”,

“public”: true

}
LoopBack comes with support for preparing schema with applicable tables or collections in chosen databases; so, let’s add a script in server/boot, say prepare-schema.js with the following content:
module.exports = function(app) {

app.dataSources.mydb.autoupdate(‘Weather’, function(err) {

if (err) throw err;

console.log(‘Schema created for Weather model: \n’);

});
Create the database loopback in MySQL and launch the server. You can observe that any updation in model instances is reflected in the chosen database under the table with the same name as the model. You can follow similar steps for other databases like MongoDB, with suitable connectors.
Exploring REST APIs
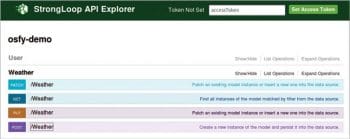
Each generated model comes with full-featured REST APIs with ‘create, read, update and delete’ (CRUD) operational support on model instances. You can explore these APIs using the Swagger UI available at hostname:3000/explorer. Let’s perform the following REST operations to add a new instance:
POST /api/Weather

{

“device-id”:”rpi123”

“temperature”: 18,

“humidity”: 72,

“pressure”: 1060

}
And to retrieve all model instances, use the following command:
GET /api/Weather
You can also add filters to retrieve specific instances in a particular order. Examples are given below.
To list instances with a specific device ID, type:
{“where” : {“device-id”: “rpi3”}}
To retrieve instances matching certain criteria, give the following command:
{“where” : {“temperature”: {“gt”:”20”}}}
To list in an ascending order, type:
{“order” : “temperature ASC”}
These filters are encoded in the URL query string as ‘filter=<url-encoded-criteria>’ with HTTP requests.
You can play around with other REST endpoints and verbs exposed on the current model through this UI, and also observe the equivalent Curl command usage for making requests using any other client.

Adding a Web template
You can add some static Web content as the home page. For this, edit the files section in server/middleware.json as follows, to define the static middleware:
“files”: {

“loopback#static”: {

“params”: “$!../client”

}

},
Then disable server/boot/root.js by removing or renaming it with an extension other than .js.
Now place any static pages with HTML, CSS and client-side scripting content under the client sub-directory, which will serve as a home page for your application.
Authentication and authorisation
LoopBack comes with good support for authentication and access controls through its built-in models — User, AccessToken, ACL, RoleMapping and Role. To create database schema for these models, add a small procedure in a .js file and execute it once.
To create a new user, do a POST operation on /api/Users with the following payload:
{

“email”: “abc@strongloop.com”,

“password”: “hello123”,

“emailVerified”:true

}
You may add other properties like realm for real name, and username in the above payload. Now log in with a POST operation on /api/Users/login using the payload with a registered email ID and password, which returns a response with accessToken, with property name id and a ttl value for validity. The default validity period for accessToken is two weeks.
{

“id”:”xxxxxxxxxxxxxxxxxxxxxxxxxxxxxxxxx”,

“ttl”: 1209600,

}
You can use this generated token for further authentication. In the Swagger UI, this token can be set in the field which appears at the top right corner, which adds a name-value pair to query string for authentication. For example, to retrieve the list of instances, the following REST operation is used.
GET /api/Weather?access_token=xxxxxxxxxxxxxxxxxxxxxxx
You can perform a POST operation on /Users/logout to invalidate the token explicitly.
ACL rules specify the access privileges on created models for users. Let’s deny access to all properties of the current model to all users, initially.
lb acl

? Select the model to apply the ACL entry to: Weather

? Select the ACL scope: All methods and properties

? Select the access type: All (match all types)

? Select the role All users

? Select the permission to apply Explicitly deny access
Now, let’s grant access to any authenticated user:
? Select the role : Any authenticated user

? Select the permission to apply : Explicitly grant access
You can observe these generated ACL rules under the model-specific JSON file in common/models, i.e., weather.json in our example. With these rules, you can observe that only authenticated users can perform CRUD operations via REST on the Weather model.
Feature summary
Here is the summary of some more features of LoopBack, which do prove that it can be the perfect choice for a ‘Backend as a Service’ (BaaS) for Web applications, and for connected smart devices in IoT applications.
- Extends REST API using remote methods, remote hooks and operational hooks.
- Model hierarchy and relationships for real world object mapping.
- Data validation mechanism for model instances before storing in data source.
- Routing and middleware similar to Express.js.
- Real-time ‘server sent events’ (SSE) support for live updates.
- Client-side SDKs for Android, iOS, Xamarian and Angular.JS apps to interact with models in an elegant mode, eliminating clunky HTTP interfaces and complex data formats.
- Sends push notifications using Apple Push Notification Service (APNS) for iOS and Google Cloud Messaging (GCM) services for Android apps.
- Auto generation of Angular services for client-side representation of models.
- OAuth2.0 and Passport based authentication for third party logins.
- Components for content management on popular cloud storage providers.
- Offline synchronisation support.
- Ease of deployment on PaaS platforms like Bluemix, OpenShift, Heroku, etc.
LoopBack can also be a perfect choice for ‘Mobile Backend as a Service’ (MBaas), especially with its support for client SDKs, push notifications, offline synchronisation and cloud deployment.


