


In this 24th article in the DevOps series, we will learn how to set up HAProxy as a load balancer for multiple Nginx Web servers using Ansible.
HAProxy is free, open source, highly available, load balancer software written by Willy Tarreau in 2000. It is implemented in the C programming language. It is known for its high performance and is extremely reliable and secure. It supports both Layer 4 (TCP) and Layer 7 (HTTP) based application load balancing, and is released under the GPLv2 licence. Nginx is a Web server created by Igor Sysoev, and is also written in the C programming language. It can be used as a reverse proxy, mail proxy and as an HTTP cache. It was first released in 2004 and uses the 2-clause BSD licence.
Setup
The HAProxy and Nginx installations use CentOS 7 (x86_64) as their base operating system. A single instance is launched using KVM for running HAProxy. A couple of CentOS VMs are provisioned to install and configure Nginx. The centos users in all the VMs are given sudo access using the visudo command. SELinux is disabled for the exercise.
The host system is a Parabola GNU/Linux-libre x86_64 system and Ansible is installed using the distribution package manager. The version of Ansible used is 2.6.0 as indicated below:
$ ansible --version

ansible 2.6.0

config file = /etc/ansible/ansible.cfg

configured module search path = [‘/home/guest/.ansible/plugins/modules’, ‘/usr/share/ansible/plugins/modules’]

ansible python module location = /usr/lib/python3.6/site-packages/ansible

executable location = /usr/bin/ansible

python version = 3.6.5 (default, May 11 2018, 04:00:52) [GCC 8.1.0]
The Ansible inventory, files and playbook directories are created on the host system as follows:
ansible/inventory/kvm/

/playbooks/configuration/

/files/
The inventory/kvm/inventory file contains the following:
[front]

haproxy ansible_host=192.168.122.113 ansible_connection=ssh ansible_user=centos ansible_password=password

[web1]

nginx1 ansible_host=192.168.122.248 ansible_connection=ssh ansible_user=centos ansible_password=password

[web2]

nginx2 ansible_host=192.168.122.147 ansible_connection=ssh ansible_user=centos ansible_password=password

[web:children]

web1

web2
The ‘front’ group contains the HAProxy instance information. The couple of Nginx Web servers are grouped together under a ‘web’ group, and can also be accessed individually. You can test connectivity from Ansible to the CentOS guest VMs using the following Ansible commands:
$ ansible -i inventory/kvm/inventory haproxy -m ping

haproxy | SUCCESS => {

“changed”: false,

“ping”: “pong”

}

$ ansible -i inventory/kvm/inventory nginx1 -m ping

nginx1 | SUCCESS => {

“changed”: false,

“ping”: “pong”

}

$ ansible -i inventory/kvm/inventory nginx2 -m ping

nginx2 | SUCCESS => {

“changed”: false,

“ping”: “pong”

}

$ ansible -i inventory/kvm/inventory web -m ping

nginx1 | SUCCESS => {

“changed”: false,

“ping”: “pong”

}

nginx2 | SUCCESS => {

“changed”: false,

“ping”: “pong”

}
Nginx
We will first set up the Nginx Web servers. The EPEL release RPM is installed and the HAProxy server IP address is added to /etc/hosts file on the instances. The YUM package manager is used to install Nginx, and then Port 80 is allowed through the firewall. We then start the Nginx Web server and wait for the server to listen on port 80. The Ansible playbook to install and set up Nginx is as follows:
---

- name: Setup Nginx web server

hosts: web

become: yes

become_method: sudo

gather_facts: yes

tags: [web]

tasks:

- name: Install EPEL Release

package:

name: epel-release

state: present

- name: Add HAProxy server to /etc/hosts

lineinfile:

path: /etc/hosts

line: “{{ hostvars[‘haproxy’].ansible_host }} haproxy”

state: present

- name: Install Nginx

package:

name: nginx

state: present

- name: Allow port 80

shell: iptables -I INPUT -p tcp --dport 80 -m state --state NEW,ESTABLISHED -j ACCEPT

- name: Start Nginx server

systemd:

name: nginx

enabled: yes

state: started

- name: Wait for server to start

wait_for:

port: 80
The above playbook can be invoked using the following command:
$ ansible-playbook -i inventory/kvm/inventory playbooks/configuration/frontend.yml --tags web -vv -K
The -vv represents the verbosity in the Ansible output. You can use up to four ‘v’ s for a more detailed output. The -K option prompts for the sudo password for the guest CentOS user account.
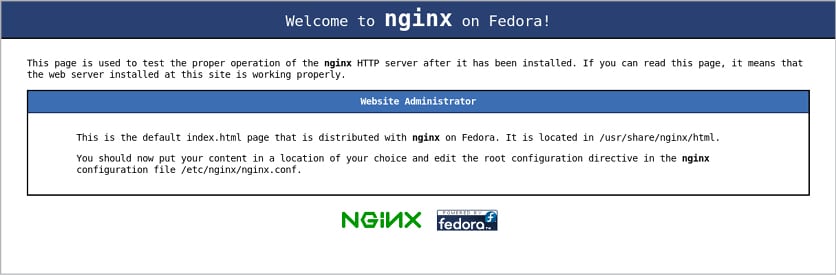
You can now open the Nginx Web server URLs (http://192.168.122.248 and http://192.168.122.147) in a browser to see the default Nginx home page as shown in Figure 1.
HAProxy
The YUM package repository needs to be updated before proceeding to install HAProxy. The Nginx server IP addresses and hostnames are added to the /etc/hosts file on the instances. The default /etc/haproxy/haproxy.cfg directory is backed up and a new haproxy.cfg file is created, whose file contents are shown below:
global

log 127.0.0.1 local2

chroot /var/lib/haproxy

pidfile /var/run/haproxy.pid

maxconn 4000

user haproxy

group haproxy

daemon

stats socket /var/lib/haproxy/stats

defaults

mode http

log global

option httplog

option dontlognull

option http-server-close

option forwardfor except 127.0.0.0/8

option redispatch

retries 3

timeout http-request 10s

timeout queue 1m

timeout connect 10s

timeout client 1m

timeout server 1m

timeout http-keep-alive 10s

timeout check 10s

maxconn 3000

listen haproxy-monitoring *:8080

mode http

option forwardfor

option httpclose

stats enable

stats show-legends

stats refresh 5s

stats uri /stats

stats realm Haproxy\ Statistics

stats auth admin:password

stats admin if TRUE

default_backend app-main

frontend main

bind *:80

option http-server-close

option forwardfor

default_backend app-main

backend app-main

balance roundrobin

option httpchk HEAD / HTTP/1.1\r\nHost:\ localhost

{% for item in groups[‘web’] %}

server {{ hostvars[item][‘inventory_hostname’] }} {{ hostvars[item][‘ansible_default_ipv4’][‘address’] }}:80 check

{% endfor %}
The rsyslog software will be used to collect the HAProxy logs. The /etc/rsyslog.conf configuration is updated to load the UDP Syslog Input Module (imudp) and to run a UDP server on Port 514. A /etc/rsyslog.d/haproxy.conf configuration file is created, the contents of which are as follows:
local2.=info /var/log/haproxy-access.log

local2.notice /var/log/haproxy-info.log
The firewall is updated to allow Port 8080, and the rsyslog server is restarted. The final step is to start the HAProxy server and wait for it to listen on Port 8080. The complete Ansible playbook to install and configure HAProxy is given below:
- name: Setup HAProxy

hosts: front

become: yes

become_method: sudo

gather_facts: yes

tags: [haproxy]

tasks:

- name: Yum update

yum: name=* update_cache=yes state=present

- name: Install HAProxy

package:

name: haproxy

state: present

- name: Add Nginx servers to /etc/hosts

lineinfile:

path: /etc/hosts

line: “{{ hostvars[item][‘ansible_default_ipv4’][‘address’] }} {{ hostvars[item][‘inventory_hostname’] }}”

state: present

with_items: “{{ groups[‘web’] }}”

- name: Backup default haproxy.cfg

command: mv haproxy.cfg haproxy.cfg.orig

args:

chdir: /etc/haproxy

- name: Create new haproxy.cfg

template:

src: ../../files/haproxy.cfg.j2

dest: /etc/haproxy/haproxy.cfg

mode: 0644

- name: Update /etc/rsyslog.conf

lineinfile:

path: /etc/rsyslog.conf

regexp: “{{ item.regexp }}”

line: “{{ item.line }}”

with_items:

- { regexp: ‘#\$ModLoad imudp’, line: ‘$ModLoad imudp’ }

- { regexp: ‘#\$UDPServerRun 514’, line: ‘$UDPServerRun 514’ }

- name: Create /etc/rsyslog.d/haproxy.conf

copy:

src: ../../files/haproxy.conf

dest: /etc/rsyslog.d/haproxy.conf

mode: 0644

- name: Allow port 8080

shell: iptables -I INPUT -p tcp --dport 8080 -m state --state NEW,ESTABLISHED -j ACCEPT

- name: Restart rsyslog

systemd:

name: rsyslog

state: restarted

- name: Start HAProxy server

systemd:

name: haproxy

enabled: yes

state: started

- name: Wait for server to start

wait_for:

port: 8080
A sample execution of the above playbook is as follows:
$ ansible-playbook -i inventory/kvm/inventory playbooks/configuration/frontend.yml --tags haproxy -K

SUDO password:

PLAY [Setup Nginx web server] *******************************

TASK [Gathering Facts] **************************************

ok: [nginx1]

ok: [nginx2]

PLAY [Setup HAProxy] ****************************************

TASK [Gathering Facts] **************************************

ok: [haproxy]

TASK [Yum update] *******************************************

ok: [haproxy]

TASK [Install HAProxy] **************************************

changed: [haproxy]

TASK [Add Nginx servers to /etc/hosts] **********************

changed: [haproxy] => (item=nginx2)

changed: [haproxy] => (item=nginx1)

TASK [Backup default haproxy.cfg] ***************************

changed: [haproxy]

TASK [Create new haproxy.cfg] *******************************

changed: [haproxy]

TASK [Update /etc/rsyslog.conf] *****************************

changed: [haproxy] => (item={‘regexp’: ‘#\\$ModLoad imudp’, ‘line’: ‘$ModLoad imudp’})

changed: [haproxy] => (item={‘regexp’: ‘#\\$UDPServerRun 514’, ‘line’: ‘$UDPServerRun 514’})

TASK [Create /etc/rsyslog.d/haproxy.conf] *******************

changed: [haproxy]

TASK [Allow port 8080] **************************************

changed: [haproxy]

TASK [Restart rsyslog] **************************************

changed: [haproxy]

TASK [Start HAProxy server] *********************************

changed: [haproxy]

TASK [Wait for server to start] *****************************

ok: [haproxy]

PLAY RECAP **************************************************

haproxy : ok=12 changed=9 unreachable=0 failed=0

nginx1 : ok=1 changed=0 unreachable=0 failed=0

nginx2 : ok=1 changed=0 unreachable=0 failed=0
Testing
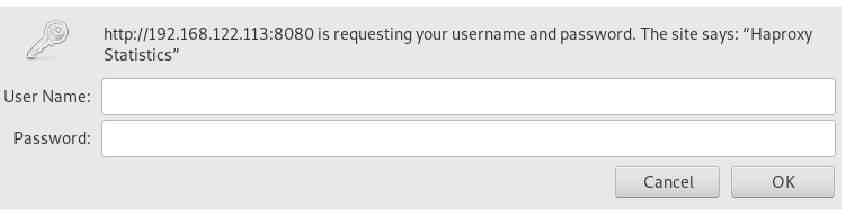
You can open the HAProxy Web page using http://192.168.122.113:8080/stats and you will be prompted to log in as shown in Figure 2.
You can use the credentials (admin:password) as specified in /etc/haproxy/haproxy.cfg to log in, and you will see the HAProxy stats page as shown in Figure 3.
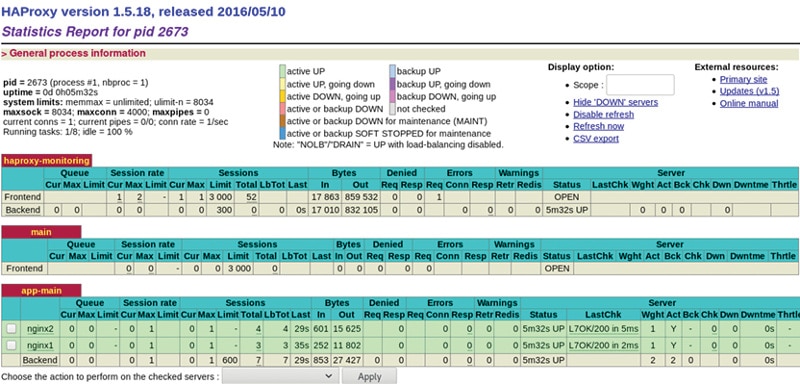
You can make multiple requests to the HAProxy front-end server in the browser or using curl http://192.168.122.113:8080 from the command line. You will observe that the requests are being sent to both the Nginx Web servers in a round-robin fashion, which can be seen in the app-main section of the HAProxy stats page.


