This is the second article in the series of articles on Moodle plugins for online education. For those readers joining in now, the earlier article was published in OSFY in September 2020. For the sake of continuity, we strongly advise those who have missed out the previous article to go through it.
The previous article referred to in the introduction described Interactive Content – H5P, a plugin used to include H5P content to your courses running on Moodle. H5P is a JavaScript based free and open source collaborative framework. We also discussed how to install a local copy of Moodle in your system and to add users and courses.
We assume that you have a local copy of Moodle installed in your system and that you know how to add users and courses. Let us try to address yet another problem faced by teachers while running online courses – “How to conduct Web conferences for live discussions?”
Nowadays, it is relatively easy to record videos of your classes and upload them to YouTube so that the students can watch them at their convenience. If uploading video lectures was the only requirement of conducting online classes, teachers would soon become jobless. The most challenging aspect of conducting online classes is making sure that the students in the class are following the lectures in the videos, from the toppers to the back-benchers. For this, a teacher has to conduct frequent reviews, tests, doubt clearing sessions, etc, most of which would be very difficult to automate – making teaching a safe profession until the arrival of true AI.
Thus, a mandatory requirement for conducting an effective online course is the availability of a good Web/video conferencing application. Of course, the world is full of such applications that we don’t even want to list them. A few of the popular Web conferencing apps are proprietary and some of them were even in the news for their alleged security breaches. So, as always, we can depend on free and open-source alternatives.
In this article, we discuss a Moodle plugin to conduct Web conferencing — the BigBlueButtonBN. This plugin maintained by Fred Dixon and Jesus Federico, allows us to integrate the application BigBlueButton into Moodle. BigBlueButton is a free and open source Web conferencing application. Notice the difference between the BigBlueButtonBN and the BigBlueButton, as the former is a plugin that allows the use of the latter in Moodle. A similar difference applies to Interactive Content – H5P plugin and H5P as discussed in the previous article.
Let us begin by installing the BigBlueButtonBN plugin in Moodle. The zipped installation file of the BigBlueButtonBN plugin called mod_bigbluebuttonbn_moodle39_2019042009.zip is available for download at https://moodle.org/plugins/mod_bigbluebuttonbn.
As usual, we will try the installation steps first in the local copy of Moodle installed in our system, so as to avoid any potential harm to your up and running Moodle server. Log in as admin user and then go to Dashboard > Site administration > Plugins > Install plugins in Moodle. Now, drag and drop the zipped installation file of the BigBlueButtonBN plugin downloaded earlier. Click on the button Install plugin from the ZIP file, and you will be taken to the installation window of the BigBlueButtonBN plugin.
In the installation window, click on the button ‘continue’ whenever prompted; then press the button ‘Upgrade Moodle database now’ and save the changes. The BigBlueButtonBN plugin will be successfully installed in your Moodle.
In the previous article in this series, we had created a course called H5P101 and three users — an admin user, a user called Guru (a teacher) and a user called Shishya (a student) in the local copy of our Moodle. This time we will create a new course called BBB101 and add the user Guru as a teacher to this course and the user Shishya as a student to the course. As mentioned earlier, all this can be done by following the simple steps provided in the previous article.
Now let us try to set up a Web conference between our teacher and student of the course BBB101 using the BigBlueButtonBN plugin. Login as the user Guru, so that Web conferencing can be done as an activity in the course BBB101. Notice that a user with the privilege Student cannot add or edit any activity in a course in Moodle.
You can get the course page by going to Dashboard > Courses > BBB101 in Moodle. On this course page, click the button ‘Turn editing on’. On the right side of the general beginning block and all the blocks corresponding to each week of the course (since we have chosen a weekly format for the course BBB101), you can see a link named ‘Add an activity or resource’, which allows us to add activities and resources to this Moodle course.
Let us enable video conferencing between the participants of this course by using the BigBlueButtonBN plugin. To set up the Web conferencing in the general block at the beginning itself, click on the link named ‘Add an activity or resource’ and we will get the selection window shown in Figure 1, listing a lot of Moodle activities and resources.The plugin for the activity of our current interest, the BigBlueButtonBN, is marked with a bold green circle in Figure 1.
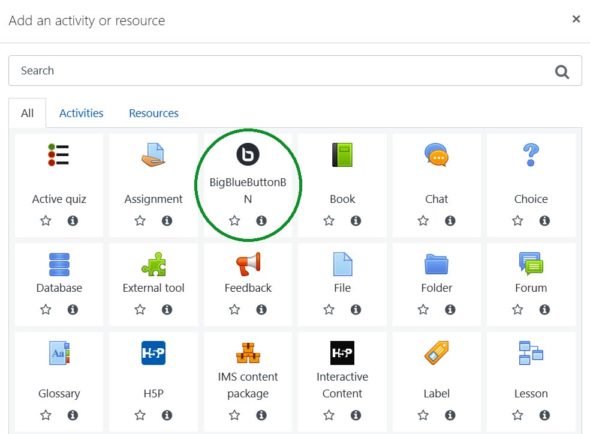
Click on the button shown in Figure 1 and you will be taken to a window to set up the Web conference by providing some essential details. Figure 2 shows a part of this window to set up a Web conference.
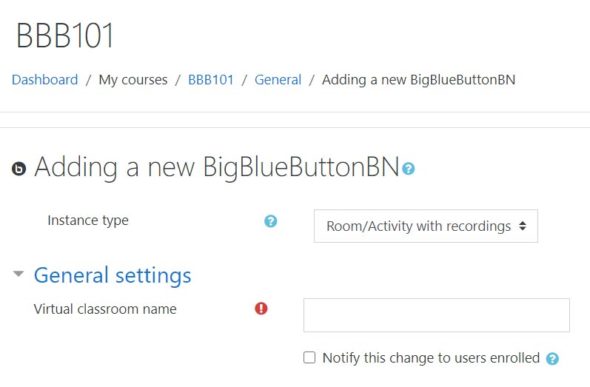
You need to provide some essential details like instance type (you can decide whether you need activities and/or recording), virtual classroom name (we chose Class OSFY), participants (you can add participants and assign roles to them), and a schedule for the session (opening and closing time). Of course, there are a lot of other options as well, so that you can control the Web conference to suit your particular needs. But we will only provide the above-mentioned mandatory details to set up a Web conference so that even absolute beginners of Moodle can test the features of the BigBlueButtonBN plugin.
We have added two participants to this Web conference, Guru and Shishya. We have assigned the role of moderator to Guru and the role of a viewer to Shishya. Notice that the moderator can use a lot of features provided by the BigBlueButtonBN plugin, like sharing the content of his computer screen, using a virtual whiteboard, etc. The user with the role viewer can also use certain features like using the public chatroom.
With those essential details filled, we can go down the page and click on any one of the two buttons to save the details — ‘Save and return to course’ (which will take you to the course page) or ‘Save and display’ (which will take you to the Web conference link just created). Go to the course page of BBB101 and press the button ‘Turn editing off’. Now you will see a link to the Web conference we have just created, as shown in Figure 3.

The user called Guru can now start the Web conference by clicking on this link and pressing the button ‘Join session’. He or she will then be taken to the BigBlueButton Web conferencing application. Users might be asked to test their microphones on entry, and they have the option to mute/unmute their microphones and share/stop their webcams.
But now we have a problem. Remember, we are testing this plugin in our local copy of Moodle and right now there is just one user in the conference. How can we test a Web conference with just one user? Well, BigBlueButton has a test server which allows us to test the plugin even with the local copy of Moodle. Open an incognito window on your browser (incognito window is very essential) and open one more copy of your local Moodle by typing the URL http://127.0.0.1/moodle/login/index.php.
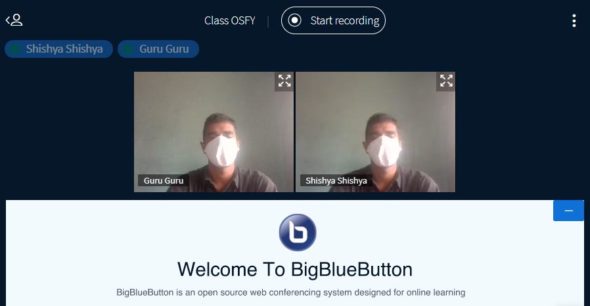
Now login as the user Shishya to Moodle. Go to the course page of BBB101; you will see a link similar to the one shown in Figure 3. Click on this link and press the button ‘Join session’; now both Guru and Shishya are part of the Web conference we had set up earlier. Figure 4 shows one of the authors (Deepu) logged in as both Guru and Shishya. Move your hand in front of the webcam and you will see one of the videos trailing behind the other, proving that this indeed is a Web conference.
Now, we can test some of the features of BigBlueButton.
BigBlueButton offers a lot of features to make online teaching effective, like note sharing, computer screen sharing, shared virtual whiteboards, breakout rooms, public chats, etc. Note sharing allows a teacher to share notes prepared to the students during the live Web conference. Computer screen sharing allows the teacher to show Web pages and other documents opened in his or her computer to the students, if required. Shared virtual whiteboards allow people to perform collaborative work by drawing and writing on a single white screen.
‘Breakout rooms’ is another important feature provided by the BigBlueButton. Assume you are a teacher in a class with 50 students. In a real classroom, often these students can be divided into say, 10 groups of 5 members each, so that they can be assigned with problems to work on. Breakout rooms allow us to simulate the same in virtual classrooms.
BigBlueButton allows the creation of groups so that communication is possible only between the members of a group and not the entire class.
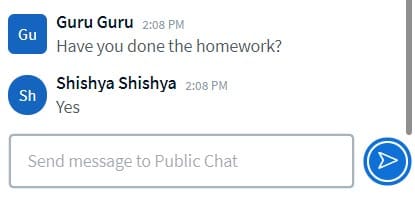
Public chat is also quite useful as students can pose questions during live tutorial sessions. Figure 5 shows a public chat between Guru and Shishya. Public chat is one of the few features of BigBlueButton available to a user assigned with the role of a viewer. Though the chat in Figure 5 looks simple, notice that you have to send messages from the two different logins to get this effect, not just from a single login.
BigBlueButton also allows you to conduct instant polls so that the presence and attentiveness of participants can be assessed. If a teacher conducts random polls during online sessions, then no student will have the courage to attend to matters of lesser importance — say, play some online game. BigBlueButton also allows you to record the sessions so that participants can review them later. It allows you to share your presentations with the participants.
An essential part of online courses is the ability to play pre-recorded videos and audios. This is one feature where the use of BigBlueButton makes your day a lot easier. With BigBlueButton, it is very easy to play pre-recorded videos and audios in the middle of live online sessions. On the bottom left corner of the BigBlueButton window, you will see a plus symbol (+). Click on it and you will get the following three options to choose from: start a poll, upload a presentation, and share an external video.
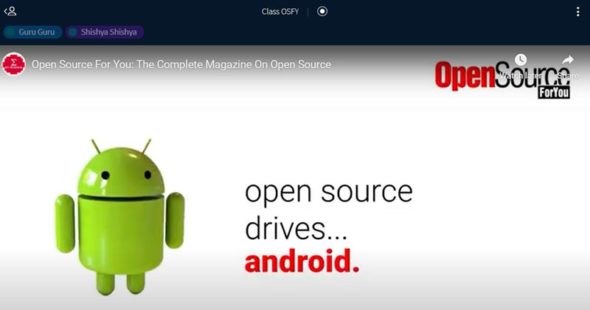
Click on the option ‘share an external video’. You will see a window popping up with a text-box to enter the external video link. In this text-box, copy and paste the link to the video you want to show during the online session and click on the button ‘Share a new video’. The participants will be able to see the video on the presentation area of BigBlueButton. Figure 6 shows the playback of a video about OSFY we found on YouTube.
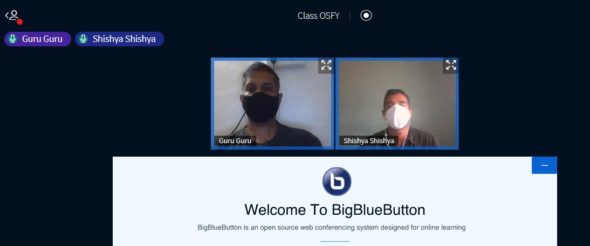
Now that we tested our BigBlueButtonBN plugin in the local copy of Moodle, let us go to the next level. How can we use BigBlueButtonBN plugin in a real scenario? For this, we need to host a BigBlueButton server. One of the authors (Manoj) hosted a BigBlueButton server to run a real remote Web conference, not just in the two windows of a Web browser in our own systems. Figure 7 shows a real Web conference between Guru and Shishya, from Kottayam and Kannur in Kerala, approximately 350 kilometres apart.
Since our aim is to introduce the BigBlueButtonBN plugin and list out its features, we refrain from including the details for setting up the BigBlueButton server. An easy option is to use a shell script called bbb-install.sh to automate the installation of BigBlueButton server. However, if you are interested in further details about setting up such a server, you can download the detailed installation steps compiled by one of the authors (Manoj) from the following link: opensourceforu.com/article_source_code/Oct20Moodleplugins.zip.
If you have any doubts regarding these installation steps, we will be glad to address them. But what is the need for such a step-by-step installation, if there is an easy way? For one thing, hosting servers is always tedious and anything could go wrong if you solely depend on a shell script. But that is not the only reason why you should try setting up the server using a step-by-step process. Learning management systems like Moodle are often developed to simulate real world classrooms where the strength is usually between 10 and 100. They are not meant to run MOOCs (Massive Open Online Courses). Therefore, when you try to run Web conferences with BigBlueButton on Moodle, the usual upper limit for concurrent users is around 200. If you want to go much beyond this limit, you need to have multiple servers in parallel. In such situations, you need a load balancer called Scalelite, which makes a number of BigBlueButton servers appear at the front-end as a single powerful BigBlueButton server. We believe that the first step to any such expansion is a manual setting up of a single normal BigBlueButton server.
We are sure that our readers are convinced about the abilities of Moodle and BigBlueButton to provide ample services for setting up Web conferences to conduct online classes effectively. With some effort and patience, the combined might of Moodle and BigBlueButton will allow you to simulate a real class environment to a great extent.
In the next article in this series, we plan to address teachers of a younger audience where we will discuss Moodle plugins like MooTyper, which can be used to create interactive online content for school-level courses.


