


Cockpit is free and open source software offered by Red Hat. It is a new graphical interface for handling Linux server administration tasks. The Cockpit project was launched at the start of 2014 and is currently undergoing heavy development. Cockpit offers a wide variety of features such as LVM administration, journal logging, Docker integration, etc. It is not the first Web interface to manage Linux servers, but it is now attracting those who are interested in administrating Linux from a Web interface rather than the command line.
Cockpit is a user-friendly Web UI that can be run via any browser. It also supports multi-server administration, which means that admins or users can manage multiple servers at the same time.

Installation on Fedora
As Cockpit is undergoing heavy development, there is no stable release for the OS except for Fedora 20 and Fedora 21. There are two ways to install Cockpit – the first is by using the YUM repository and the other by using the GitHub repository. It is recommended that you install Cockpit on a virtual machine since it is not yet production ready.
Using YUM
For the official stable release of Cockpit, use Fedora 21 server:
$ sudo yum install cockpit
$ sudo systemctl enable cockpit.socket
$ sudo systemctl start cockpit
$ sudo firewall-cmd --add-service=cockpit
To install Cockpit on Fedora 20, type:
$ sudo yum install --enablerepo=updates-testing cockpit
$ sudo systemctl enable cockpit.socket
$ sudo systemctl start cockpit
$ sudo firewall-cmd --add-service=cockpit
$ sudo setenforce 0 # fixed in rawhide
Using the GitHub repository
Cockpit can be also installed using the official source repository available on github.com -https://github.com/cockpit-project/cockpit
First check out the code from the Cockpit repository, as follows:
$ git clone https://github.com/cockpit-project/cockpit.git
Then, install the dependencies required for Cockpit, as shown below:
$ cd cockpit
$ sudo yum-builddep tools/cockpit.spec
$ sudo yum install nodejs npm
$ $ sudo yum install trickle nbd-server python-libguestfs qemu \
mock qemu-kvm python curl libvirt-client libvirtd qemu-nbd \
krb5-workstation krb5-server
$ npm install phantomjs
For building and installing Cockpit, use the following code inside the Cockpit directory:
$ cd ~/cockpit $ mkdir build $ cd build $ ../autogen.sh - -prefix=/usr - -enable-maintainer-mode - -enable-debug $ make $ sudo make install $ sudo cp ../src/bridge/cockpit.pam.insecure /etc/pam.d/cockpit $ sudo sh -c cat ../src/bridge/sshd-reauthorize.pam >> /etc/pam.d/sshd
This will install Cockpit and its support files with the required components.
Running Cockpit
Cockpit can be started using systemd commands, as follows:
$ systemctl start cockpit.socket
Cockpit can be also started as a daemon, using the command below:
$ /usr/libexec/cockpit-ws
Go to the Web browser and type the following:
https://<YOUR_IP_ADDRESS>:9090
Cockpit can be stopped using the systemd command, as follows:
$ systemctl stop cockpit.socket cockpit
Working with Cockpit
On pointing your Web browser to https://<COCKPIT_IP>:9090, you can follow the login prompt (Figure 1).
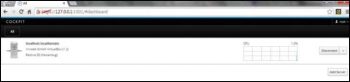
Provide the username as root and the root password, after which you will see a dashboard (Figure 2).
This dashboard is the main page where the administrator can view all the individual servers and machines. There is an Add server button to add a new server.
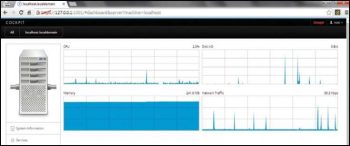
After the default server (the machine on which Cockpit is installed), the user is directed to details of the server.
Here, the administrator can monitor the CPU, disk, memory and network activities of the server.
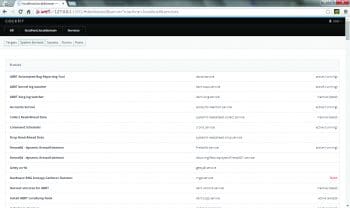
One can control services using the Service tab in the left hand side column.
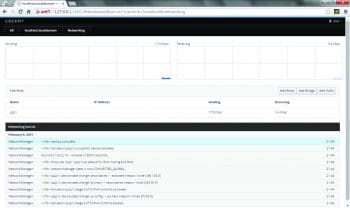
Cockpit views services using systemd. The administrator can get all network related information using Networking (Figure 5).
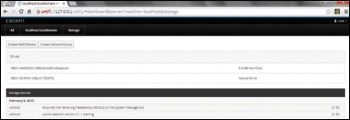
Cockpit provides a way to control hardware and perform various storage related tasks such as creating a RAID device, creating a volume group, etc, using the storage section, where the administrator can view the basic details of the storage hardware connected to the server as well as the storage journal logs (Figure 6).
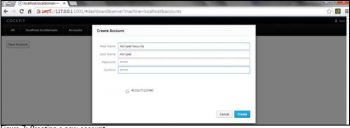
User management can be also done using User Accounts. Adding a new user is very simplejust click New Account and a modal form is presented.
To create a UNIX user, fill in the details as required and click Create (Figure 7).
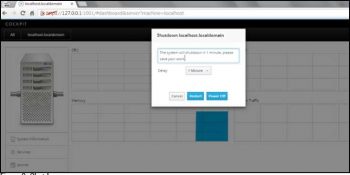
The administrator can also perform a shutdown or reboot from the Cockpit UI (Figure 8).
More reading and hacking
You can learn more about Cockpit at Cockpit-Project.org. You can also contribute to the Cockpit project using GitHub – https://github.com/cockpit-project/cockpit/blob/master/HACKING.md


