KDE users, beware. We’re fast losing sniggering rights—if we ever had them—to GNOME. The dumb user’s desktop environment, as we called it, stole a march on us with Orca, the blind-friendly screen-reader. Now, the SCIM application on GNOME is threatening to do so on the Indian-language front, particularly in the case of the Devanagari script—I can personally attest that it includes the additional letters that the Marathi script uses, which is an indicator. Now SCIM does have stability issues on some distributions, but the remedy is only a matter of time, and it’s stable on the major distros—besides being as easy to use as KDE’s keyboard tool. Where the GNOME application lags behind is that it requires the download of fonts and code before it can use Indian languages. Unlike most KDE distros, it isn’t ready out-of-the-box. But this is easily solved.
Downloading fonts
The process of downloading and installing Indian language fonts, indeed any fonts, differs from distribution to distribution. Mandriva does this from the Mandriva Control Centre, and, in Ubuntu 8.10, which we’ve used for this article, this is as easily accomplished from the top panel menu thus: System—>Administration—>Language Support.
In the Language Support window that now appears, make your selection. Ubuntu should download the fonts and other files required. This can take a while, but the language support application shows you the download progress.
Setting up SCIM
Next, as explained in the earlier article, you have to change your keyboard layout—the map of relationships between your keyboard keys and the alphabet. Use an application called the keyboard layout changer. The changer has a fancy name in GNOME: the Smart Common Input Method platform. You open it thus: System—>Preferences—>SCIM Input Method Setup.
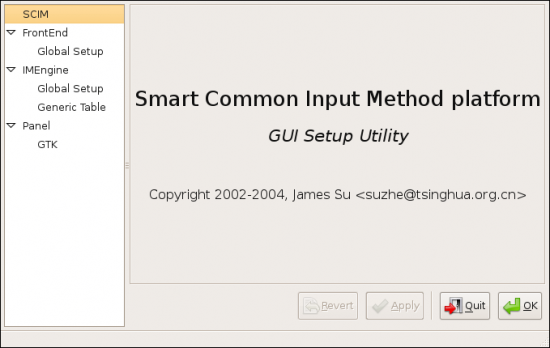
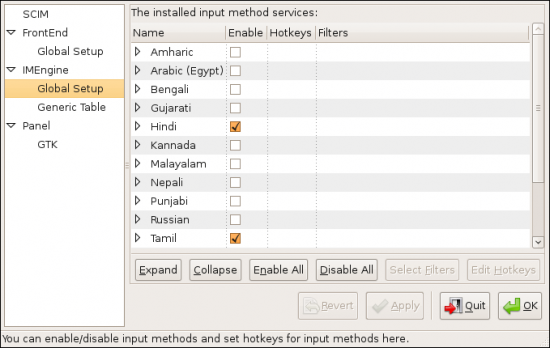
The SCIM window should display a main panel with its name, and a side panel (Figure 1). This is where you will configure SCIM. From its side-panel, select IMEngine—>Global Setup—which shows you a list of input methods in the main window (Figure 2). Select the method, or methods, that you want from the profuse list. And save your changes, of course.


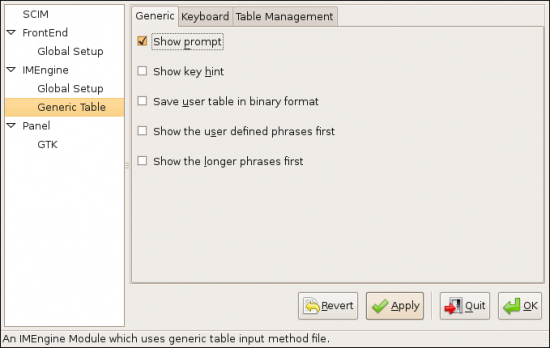
Now, for some more configuration to ease up your experience. From the SCIM application’s side panel, select IMEngine—>Generic Table (see Figure 3). The main window here should show you three tabs in a stack. Here, in the ‘Generic’ tab, you’ll see five options that you can toggle to have SCIM complete your words as you type, and display key combinations for your words. This feature is not available for all the languages you installed, and didn’t work in my SCIM set-up, although was shown as installed in IMEngine—>Generic Table—>Table Management tab. Huh!

You can also configure keyboard shortcuts in this window. A tip: if you must use them, do change the defaults that involve the Ctrl+Shift key combination—it conflicts with the paragraph selection shortcut of OpenOffice.org.
Finally, when you use SCIM, it’ll display the SCIM ToolBar. This bar floats in the bottom right corner of your desktop, displaying the active layout. You can choose to turn this off if you like—Panel—>GTK—>ToolBar—>Show:Never option.
We’re now done configuring. Take a look at the tray of the panel on the top edge of your desktop. You’ll see a keyboard icon there. That’s the SCIM switcher. Click once on it to see the list of language layouts you chose earlier. Choose your language from the list. And you’re ready to begin typing in your word processor or text editor.
The layouts
When you enable Indian language support in SCIM, you currently get eight Indian languages—Kannada, Telugu, Malayalam, Bengali, Gujarati, Hindi, Punjabi and Tamil. For the last five languages, you also have phonetic layouts (Hindi also includes Marathi). The phonetic layout is best for most users, as explained last month, while for very long sessions you would prefer the more ergonomic non-phonetic layouts. In Hindi, the non-phonetic users can choose between the Inscript and Remington layouts. These layouts are also available in KDE, by the way, so there’s nothing to choose between the two desktops here.
In GNOME’s SCIM, though, the Devanagari phonetic layout is—I hate to admit—better in at least some languages than KDE’s Bolnagri, because it includes the ‘Lla’ (press Shift+L), and ‘dnya’ (Shift+6) alphabets as used in some Devanagari scripts such as Marathi. A difference of style from KDE’s Bolnagri is that, in the SCIM input here, the key F is used to join two alphabets together. So, for example, the name Partha, which includes the r-th sound, is produced thus: p+a+r+f+[shift+T]. Easy enough!
What’s more, there is yet another phonetic layout under development, primarily on the Ubuntu-India forum. I tried finding the source and installing it, but couldn’t. It is said to mimic the layouts used by Baraha (the very competent and free-for-use, but sadly closed-source, Windows word processor). See if you can locate the source. You’ll have to download and compile it in your terminal and configure it through a short and easy, though manual, process.
Sign-off
GNOME’s undoubtedly superlative accessibility features are almost matched by its increasing competence in Indian language support through SCIM. Time was when you either loved or hated GNOME—but it’ll soon be pretty difficult to do the latter.


While following your instructions I faced a problem. My SCIM setup , in IMEngine —> Global Setup shows only three options namely Other , English/European and Raw Code.
So how do I get the list over here consisting of all the Indic language options from where I can select hindi and punjabi as options.