This is one of those projects to be done on a lazy afternoon when creativity is bubbling up. In this article, I will introduce the core concept of animation, and how you could go about creating a short film, using free and open source software.
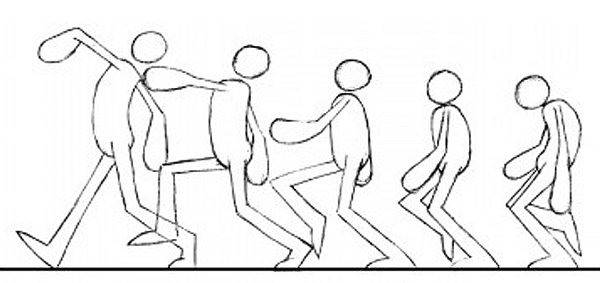
The fundamental concept of animation revolves around the movement of frames (images) at a minimum rate of 12 frames per second (fps). This is scientifically called “persistence of vision”. So, an animated film is fundamentally a bunch of images changing rapidly on-screen, at a fixed frame rate — usually 24fps (though any rate above 12 fps would do the trick).
The equipment needed
The equipment needed for this little endeavour is pretty modest. You don’t need expensive and professional photographic or processing hardware and software. All you need is the following:
- A PC
- A webcam (whatever quality you can afford; a simple VGA resolution would suffice)
- Ubuntu (that’s what I used while dashing off this article)
- Additional software — Stopmotion
- Some creativity :-)
Here we go!
Step 1: Create the storyboard
The first step in creating a film is to make a storyboard. This is a very simple thing. You don’t have to be a storyboard artist to make it happen.
By definition, a storyboard is a depiction of the film’s structure using images and text. It shows the overall flow of how each scene would take place. Similar to theatre, the film is shot in scenes — each scene is a setting with its props and context in the story.
Of course, before a storyboard is drawn up, you need to come up with a story for your film. It could be as simple as a fruit-bowl forming itself. You can make a simple metaphor like the fruit-bowl communicate a larger concept.
There are whole books dedicated to every aspect of animation, including this one, so I will stop here as far as storyboarding goes. For this example, let’s keep it fundamental. I am going to make a fruit-bowl form on-screen, beginning from a blank sheet of paper.
Step 2: Ready the props
The props are the materials used to create the scene and compose it in front of the camera. I used a sheet of paper, pencils, erasers and wax crayons for this experiment.
Step 3: Prepare the stage and setup
Since this is a home-brewed setup, using some plastic pieces and old boxes, fix the camera in a position that gives you a top-view, as indicated in Figure 1.

For a more professional feel, you can use something called a lightbox to illuminate your stage from below. Place a paper on the stage below the camera. We will have to calibrate the view from the Preview window in Stopmotion; I will come to that in a moment. First of all, let’s install Stopmotion. Before we begin, connect your camera.
Installing Stopmotion
Go to System –> Administration –> Synaptic Package Manager. Click the Search button and look for Stopmotion. Select the Stopmotion package from the results that show up, and install it.

Once installation is done, fire up Stopmotion from Applications –> Sound and Video. Click the Video Camera button to activate the Live Preview of your webcam. If you are unable to see the preview at this point, verify that your camera is installed properly.

Once you get the preview, use a pencil and mark out the preview window on the paper that is on the stage. Tape that paper down, since the markings will be used for reference later on. In other words, what you see in the software must be marked out on the stage — set a boundary or frame on the stage, within which the rest of the props for the film will have to be positioned during the shoot.
The calibration is now complete. All further steps will have to be done within the marked border.
Step 4: Begin shooting
In Stopmotion, make sure the preview is active. Now begin by drawing a small stroke on the paper, and hit the space-bar to record the frame. Draw another stroke, and press space-bar to record the frame. Go on like this until the scene is over (in our case, till the fruit bowl is complete). Look at Figure 4, which shows the first, 10th, 30th and last frames.

You will notice that at every frame captured, the preview window will show a ghost of the last capture. This is for easy drawing of the next frame. The technical term for this concept is “onion-skinning”.
Keep saving your work from time to time. Animation requires a lot of patience and rigour — you wouldn’t want your efforts to be lost just because you didn’t save the file, right?
Step 5: Post production
Once all the frames have been captured, set the frame-rate to 12 fps, and click the Play button to preview your animation clip!
Step 6: 3-2-1-Play!
If the preview is satisfactory, you can now export the film as a video file using File –> Export –> Video. Optionally, you can insert sound too. Once the export is done, you can attach an audio file using your favourite video editor, such as PiTiVi.
That’s how easy it has become to do simple animation, thanks to the wonderful world of open source software. The beauty of stop-motion animation lies in its rawness. So, go ahead and create cool films — and most of all, have fun doing it! :-)


