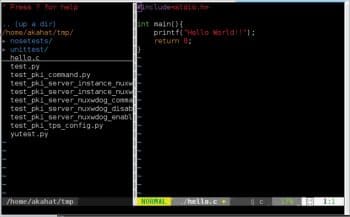
Vim is an improved version of the Vi editor. It has evolved from its simple origins and is now a powerful cross-platform text editing tool that works from the command line and as a standalone GUI. The full potential of Vim becomes evident when using its plugins, and this article tells you how to install them.
Vim is an improved version of the Vi editor. Many Linux OSs support it by default. Vim is a lightweight, flexible and easy-to-use command line editor. Many developers do use Vim, but not always to its full potential.
Vim is much more powerful than we think. It has a variety of open source plugins that are available for free. Vim can be easily installed in your OS, for which you will need to know the basics.
For a better understanding of this article, the reader should be familiar with the basics of Linux and Vim.
Vimawesome.com provides all types of plugins. It shows the following six options:
- The first option is with regard to language, allowing you to select plugins for your language of choice.
- The second option is for completion, which gives you a plugin for code completion.
- The third option is code display, which gives you code colour display plugins.
- The fourth option is for colourful interface plugins.
- The fifth option is for commands—it gives you command related plugins.
- The sixth option provides you different utilities like a library for Vim, a plugin manager, code review, etc.


Installation
The following three different and simple steps are suggested for installing plugins for Vim.
1) Using Vandle
Clone the repository into ~/.vim/bundle/ by default:
$ git clone https://github.com/VundleVim/Vundle.vim.git ~/.vim/bundle/Vundle.vim
Once you clone it, set up your ~/.vimrc file, as follows:
set nocompatible
filetype off
set rtp+=~/.vim/bundle/Vandle.vim
call vundle#begin()


# We are hadling vandle in vim. It is required for enable plugin in vim.
Plugin ‘VandleVim/Vandle.vim’

# Write plugin names here.
# Keep your plugins in between begin() and end() tag.

# you have to give git repo to install plugins. Like:
Plugin ‘tpope/vim-fugitive’

# If plugin is not on github then write it as:
Plugin ‘L9’
call vundle#end()
#Vandle plugin end tag
# Required for Ignore plugin indent changes.
filetype plugin indent on
To install the plugins, launch Vim and run PluginInstall.
You can install the plugins using the command line:
$ vim +PluginInstall +qall
PluginInstall is for the plugin install; append ‘!’ to the update or just click on PluginUpdate.
PluginList is for the plugin list. Append ‘!’ to refresh the local cache.
PluginSearch foo is to search for the foo plugin.
PluginClean confirms the removal of unused plugins. Append ‘!’ for auto-removal approval.
2) Using NeoBundle
Clone the repo in your directory, as follows:
git clone https://github.com/Shougo/neobundle.vim ~/.vim/bundle/neobundle.vim
Configure vimrc:
 if 0 | endif
 if &compatible
   set nocompatible
 endif

 set runtimepath^=~/.vim/bundle/neobundle.vim/

 call neobundle#begin(expand(‘~/.vim/bundle/’))
 “ Let NeoBundle manage NeoBundle
 “ Required:
 NeoBundleFetch ‘Shougo/neobundle.vim’

 call neobundle#end()
 “ Required:
 filetype plugin indent on

 “ If there are uninstalled bundles found on startup,
 “ this will conveniently prompt you to install them.
 NeoBundleCheck
Note: Don’t set the neobundle setting in .gvimrc!
You can install the plugins in the following two ways:
- Launch vim run: NeoBundleInstall
- Using the command vim +NeoBundleInstall +qall
3) Using Vim Plug
Clone it in your PC, as follows:
curl -fLo ~/.vim/autoload/plug.vim --create-dirs \
    https://raw.githubusercontent.com/junegunn/vim-plug/master/plug.vim
Set up the .vimrc file:
call plug#begin(‘~/.vim/plugged’)
Plug ‘scrooloose/nerdtree’, { ‘on’:  ‘NERDTreeToggle’ }
Plug ‘tpope/vim-fireplace’, { ‘for’: ‘clojure’ }
Plug ‘bling/vim-airline’, { ‘for’: [‘clojure’, ‘scheme’], ‘rtp’: ‘vim’ }


call plug#end()
I recommend the use of Vim Plug as it is easy and simple to use.


Installation of NERDTree
Try to install NERDTree by using the Vim Plug configuration. With your plugins installed, restart Vim and type :NERDTree.
This gives the current directory window. NERDTree shows the current files in the Documents directory (Figure 1). You can shift between the tree and file using the Ctrl+ww keys.
By default, Vim has three modes (see Figures 2 to 4). Sometimes it is very difficult to identify which mode you are in. Vim Airline provides a colourful GUI. This not only helps you to identify the mode, but also to change the colour in different modes.


