


Jenkins is an open source tool that can integrate with the tools used in application life cycle management to automate the entire software development process. In this article, we will discuss different types of pipelines that we can create using Jenkins.
Jenkins installation is easy with different platform-agnostic options such as Java package (.war), Docker, FreeBSD, Gentoo, Arch Linux, macOS, Red Hat/Fedora/CentOS, Ubuntu/Debian, OpenBSD, OpenSuse, OpenIndiana Hipster, and Windows. Arguably, it supports all languages and tools as it provides plugin-based architecture. In case plugins are not available, CLI or command execution helps to set up continuous practices.
The installation and configuration processes in Jenkins are different since the release of Jenkins 2.0. Suggested plugins can be installed now. Jenkins 2.0 and later versions have built-in support for pipeline as code. Jenkins 2.x has improved usability and is fully backward-compatible. Let’s understand the traditional pipeline using the build pipeline plugin.
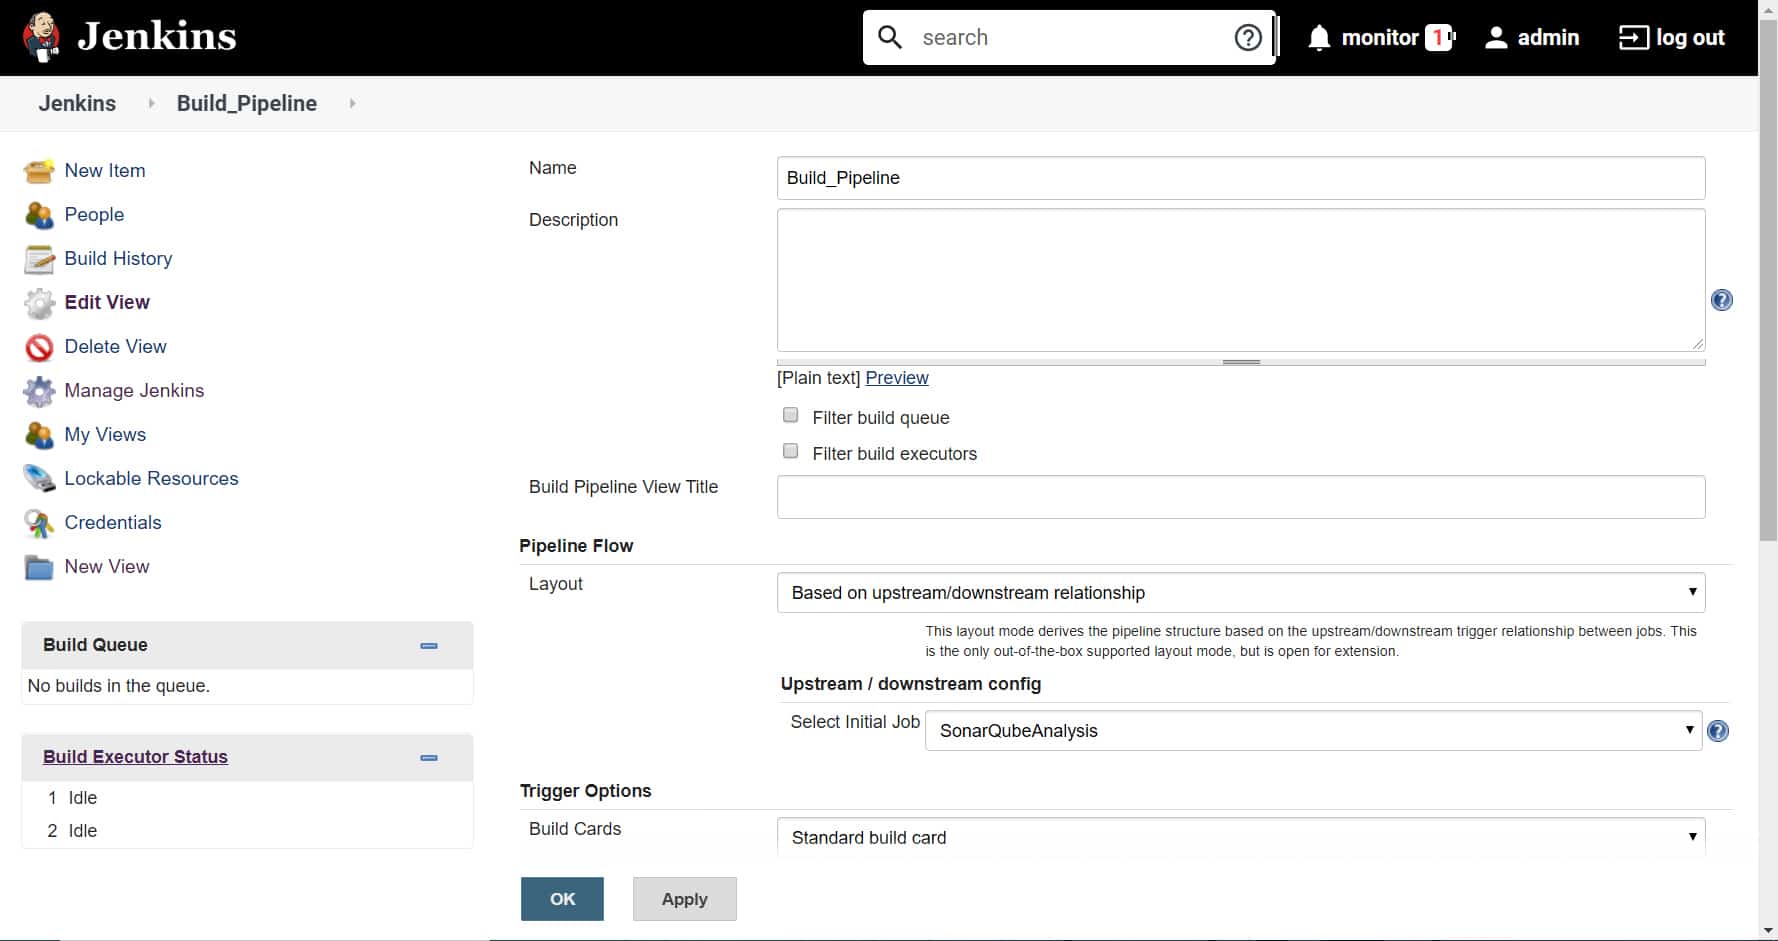
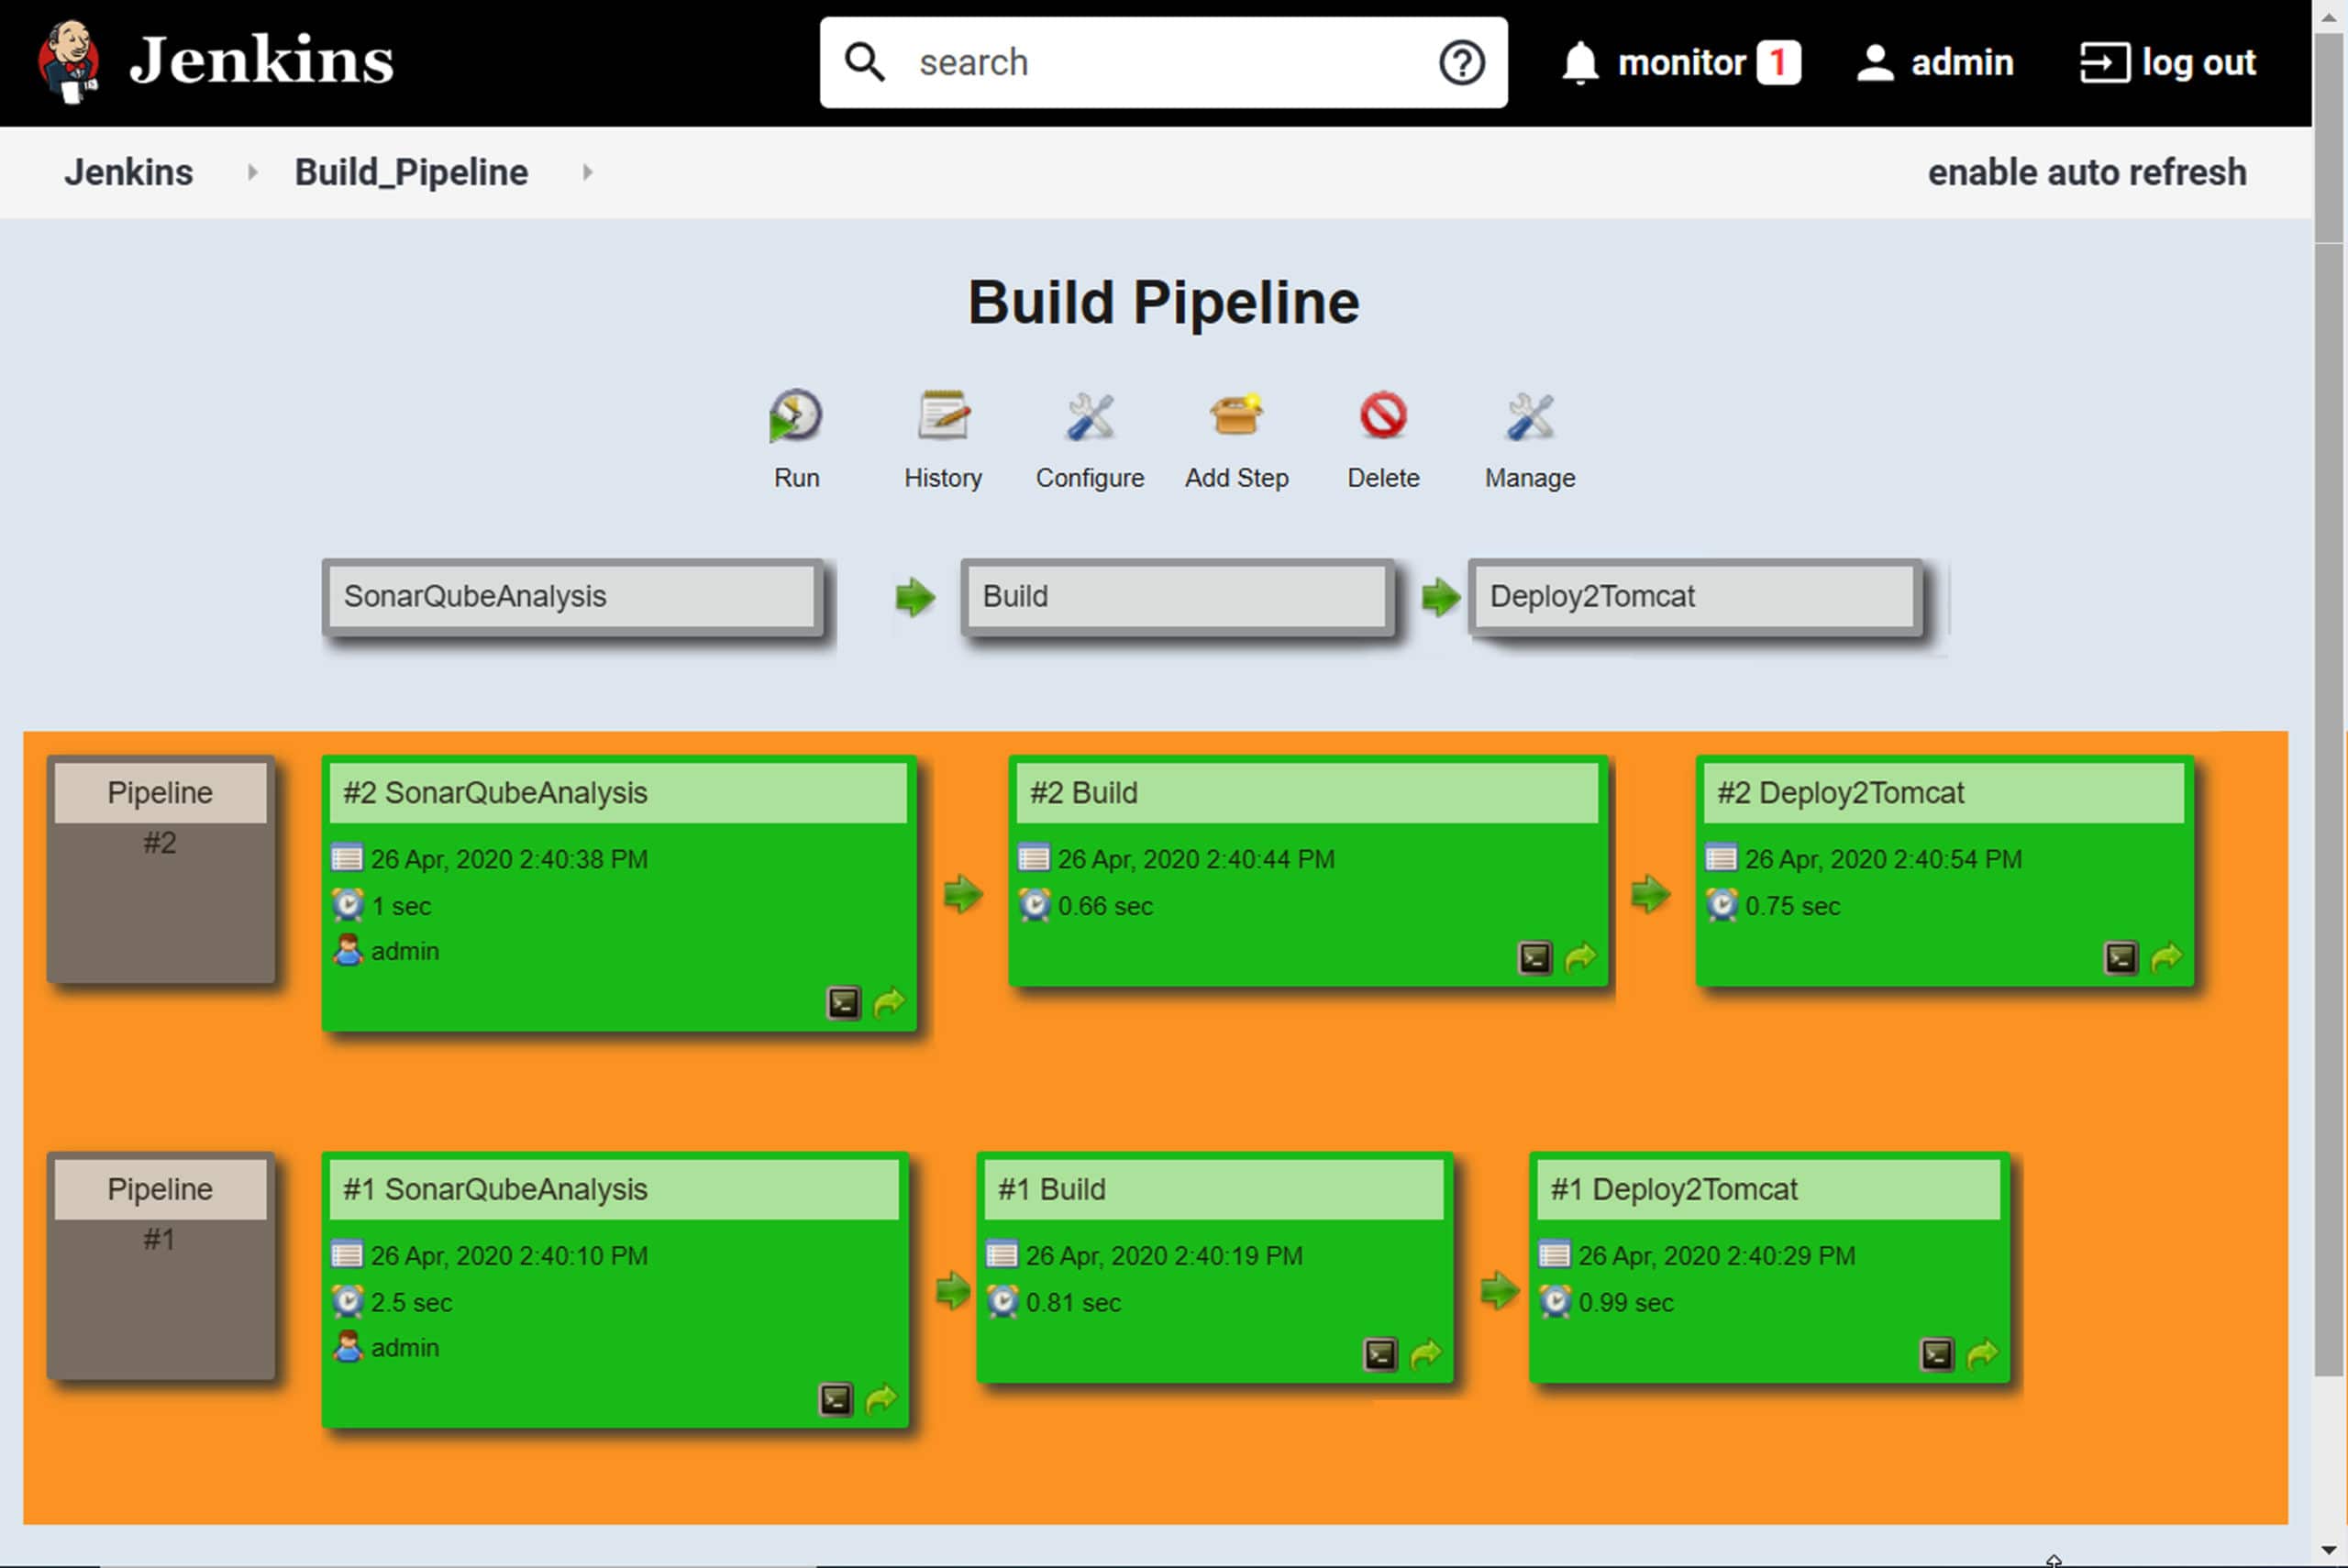
Build pipeline
Pipeline as code is preferred over the traditional approach of using upstream and downstream jobs for a number of reasons. In the traditional approach:
- Each task has a corresponding unique build job or project; hence, there are too many jobs to create and manage.
- A business unit or organisation manages multiple projects.
- Build pipeline configuration is in Jenkins itself, and in case of failure it is a rework.
- It is difficult to track changes in the pipeline created using the build pipeline.
Pipeline as code helps you fix the above issues as it supports the following:
- Domain-specific language (DSL) helps to create pipelines through the DSL or Jenkinsfile.
- Pipeline as a code can utilise all programming concepts.
- Has a common approach and standards for all teams.
- Version control of the pipelines, as it is also a script and managed in version control systems such as SVN or Git.
The pipeline helps to define and implement continuous integration, continuous testing (automated functional testing, load testing, security testing) and continuous delivery using DSL in Jenkins. Jenkinsfile contains the script to automate continuous integration, continuous testing, and continuous delivery or it is available in the Jenkins pipeline job.
There are two ways to create a pipeline — Jenkins dashboard and Jenkinsfile. It is a best practice, however, to use Jenkinsfile. Table 1 explains some basic pipeline concepts.
| Pipeline (declarative) | This models a CI/CD pipeline, or it contains stages and phases of application life cycle management. |
| Agent or node | This is a system utilised in the controller/master agent architecture of Jenkins. Jenkins execution takes place on the controller/master or agent node. |
| Stage | This is a collection of tasks; e.g., compilation of source files, unit test execution, and publishing Junit test reports. |
| Step | This is a task. Multiple tasks make a stage. |
There are two types of pipelines in Jenkins as of today. This means that Jenkinsfile can contain two different types of style/syntax.
Scripted pipelines
Scripted pipelines follow the imperative programming model. These pipelines are written in Groovy script in Jenkins. They require Groovy programming skills and hence are not easy to learn for a non-programmer. They are not easy to understand, manage and maintain. The structure of the scripted pipeline is as follows:
node {
/* Stages and Steps */
}

node {
stage(‘SCA’) {
// steps
}
stage(‘CI’) {
// steps
}
stage(‘CD’) {
// steps
}
}
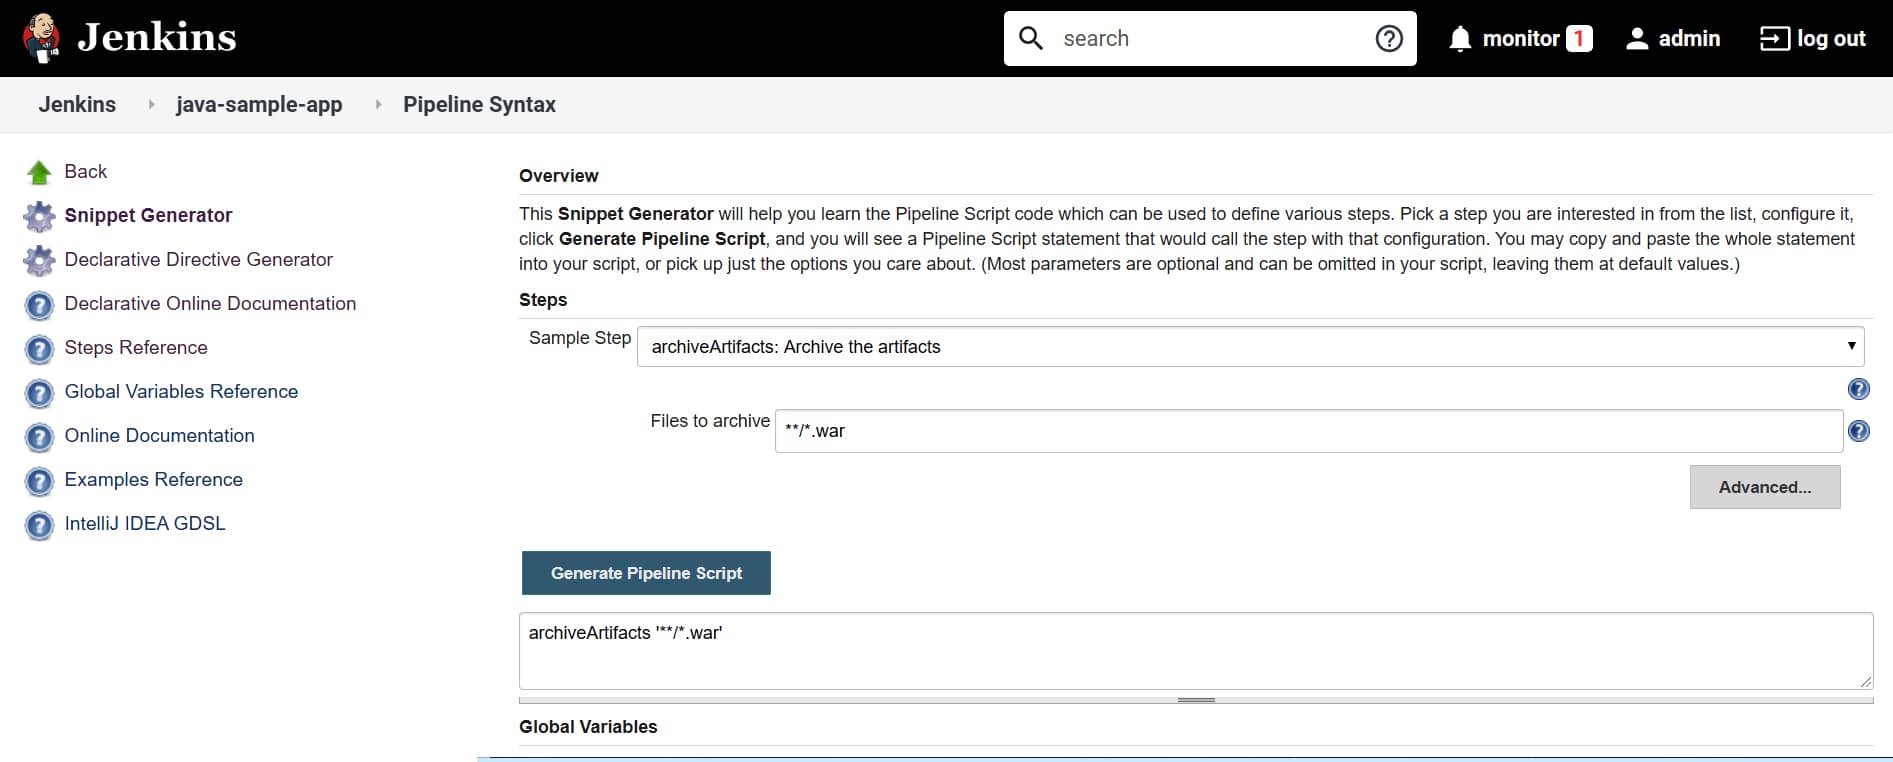
A snippet generator can be employed to create script commands to use in the pipeline.
Similarly, the declarative directive generator section is used to create a script in declarative syntax.
Declarative pipelines
Declarative pipelines follow a declarative programming model. These pipelines are written in the domain-specific language in Jenkins, which is easy to understand. The following is a sample declarative pipeline:
pipeline {
/* Stages and Steps */
}
pipeline {
agent any
stages {
stage(‘SCA’) {
steps {
//
}
}
stage(‘CI’) {
steps {
//
}
}
stage(‘CD’) {
steps {
//
}
}
}
}
Blue Ocean
Blue Ocean offers an easy way to create a declarative pipeline, with a new user experience available in its dashboard. It provides a pipeline editor where you can directly enter the script or add stages and steps using UI elements. Go to Manage Jenkins > Manage Plugins > Available and select Blue Ocean and Install without restart. After the installation of the Blue Ocean plugin, check the left sidebar where the new option emerges. Click on Open Blue Ocean. Verify the Blue Ocean dashboard. It provides a new user interface.
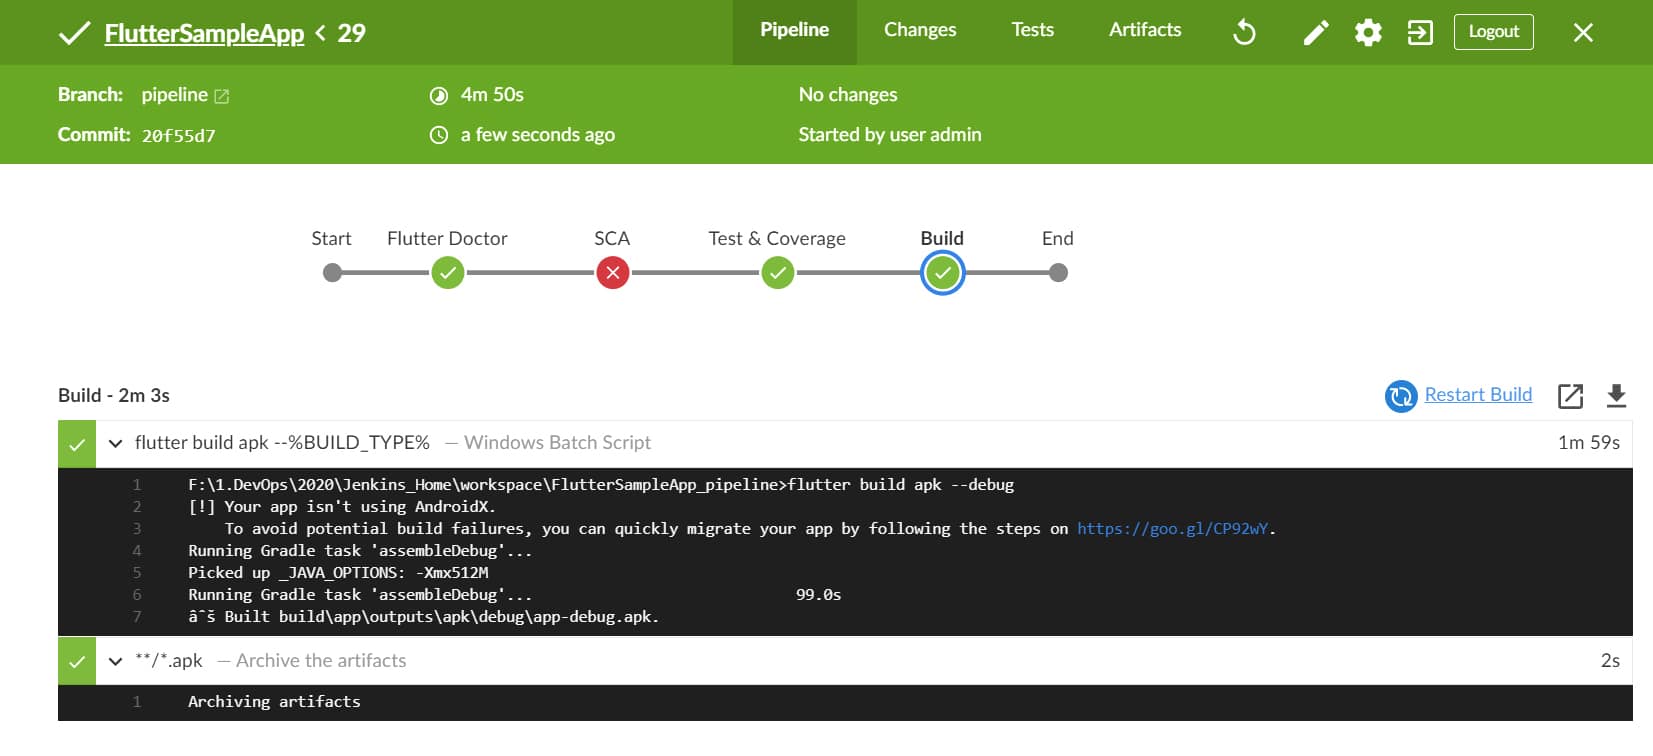
Figure 5 shows a sample pipeline in the Blue Ocean dashboard.
Pipeline as YAML
This concept helps to create a pipeline in Jenkins using the YAML script. It converts the script in the form of a declarative pipeline.
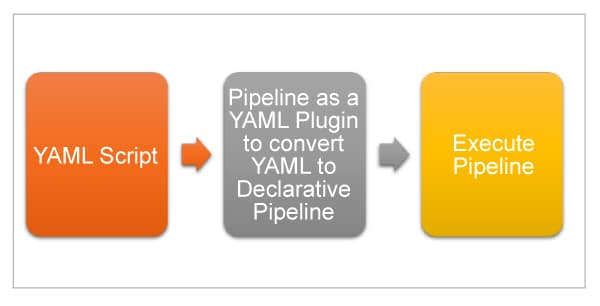
A plugin is used more as, or in place of, a converter. The following is a sample YAML pipeline:
pipeline:
# Define Agent name for this pipeline
agent:
label: ‘master’
# Define tool for Gradle. Define this tool in Jenkins configuration
tools:
*********: *********
# Defines stages
stages:
# Define Code Analysis stage
- stage: SCA
# Define steps
steps:
- *********
# Define CI Stage
- stage: ContinuousIntegration
stages:
- stage: Test
steps:
# Use ‘sh’ step for running gradle commands
- *********
- stage: Build
steps:
script:
- *********
# Define post actions
post:
always:
*********
Let’s write a sample pipeline in YAML with two stages that display on-stage execution of messages.
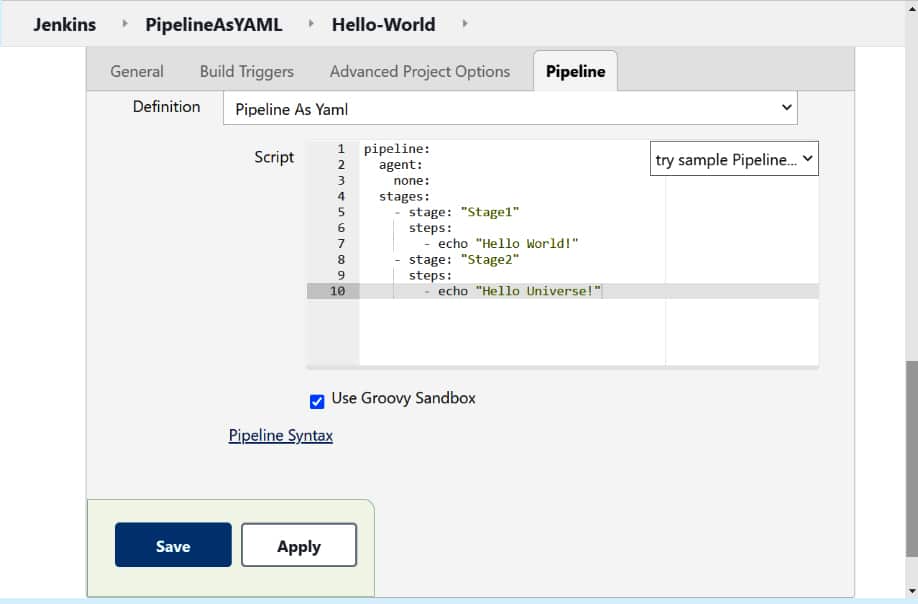
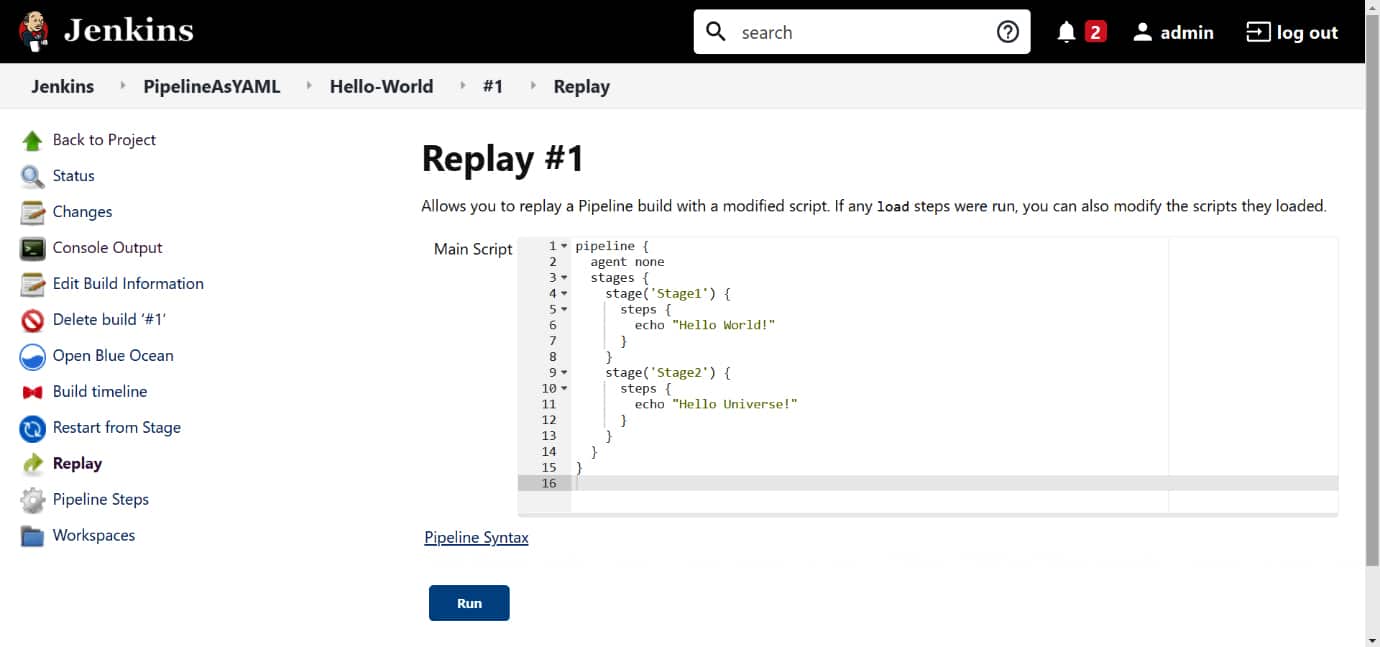
Click on Save and then click on Build Now. Verify the Console Output and the messages based on the stage execution. Verify that the script available is not YAML script but pipeline in declarative syntax.
It is simple to verify the YAML pipeline script. Go to the newly created Pipeline and click on Pipeline Syntax. Next, click on Pipeline As YAML Converter. This helper aims to provide an easy way to convert pipeline as YAML into the pipeline declarative script format and also validate the pipeline declarative script. Enter your YAML script and click on Convert To Pipeline Declarative Script.
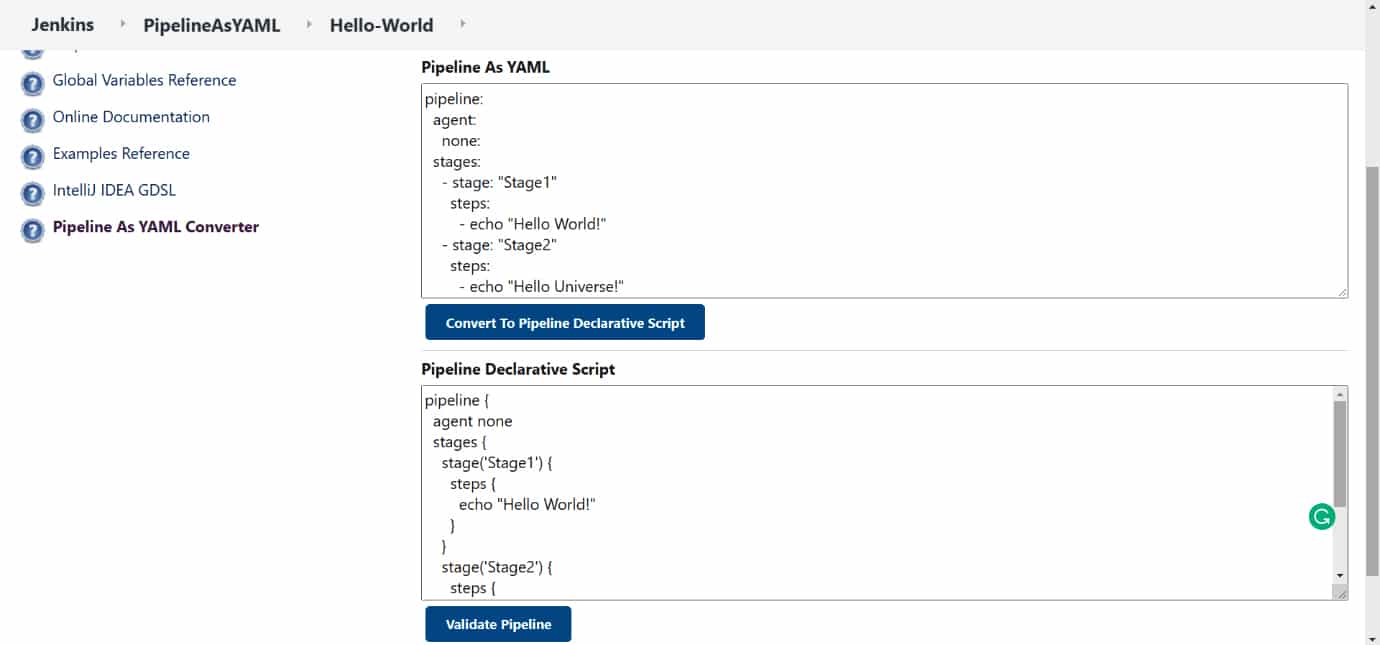
If the script is valid, then it will be converted in the declarative pipeline syntax
(Figure 9).
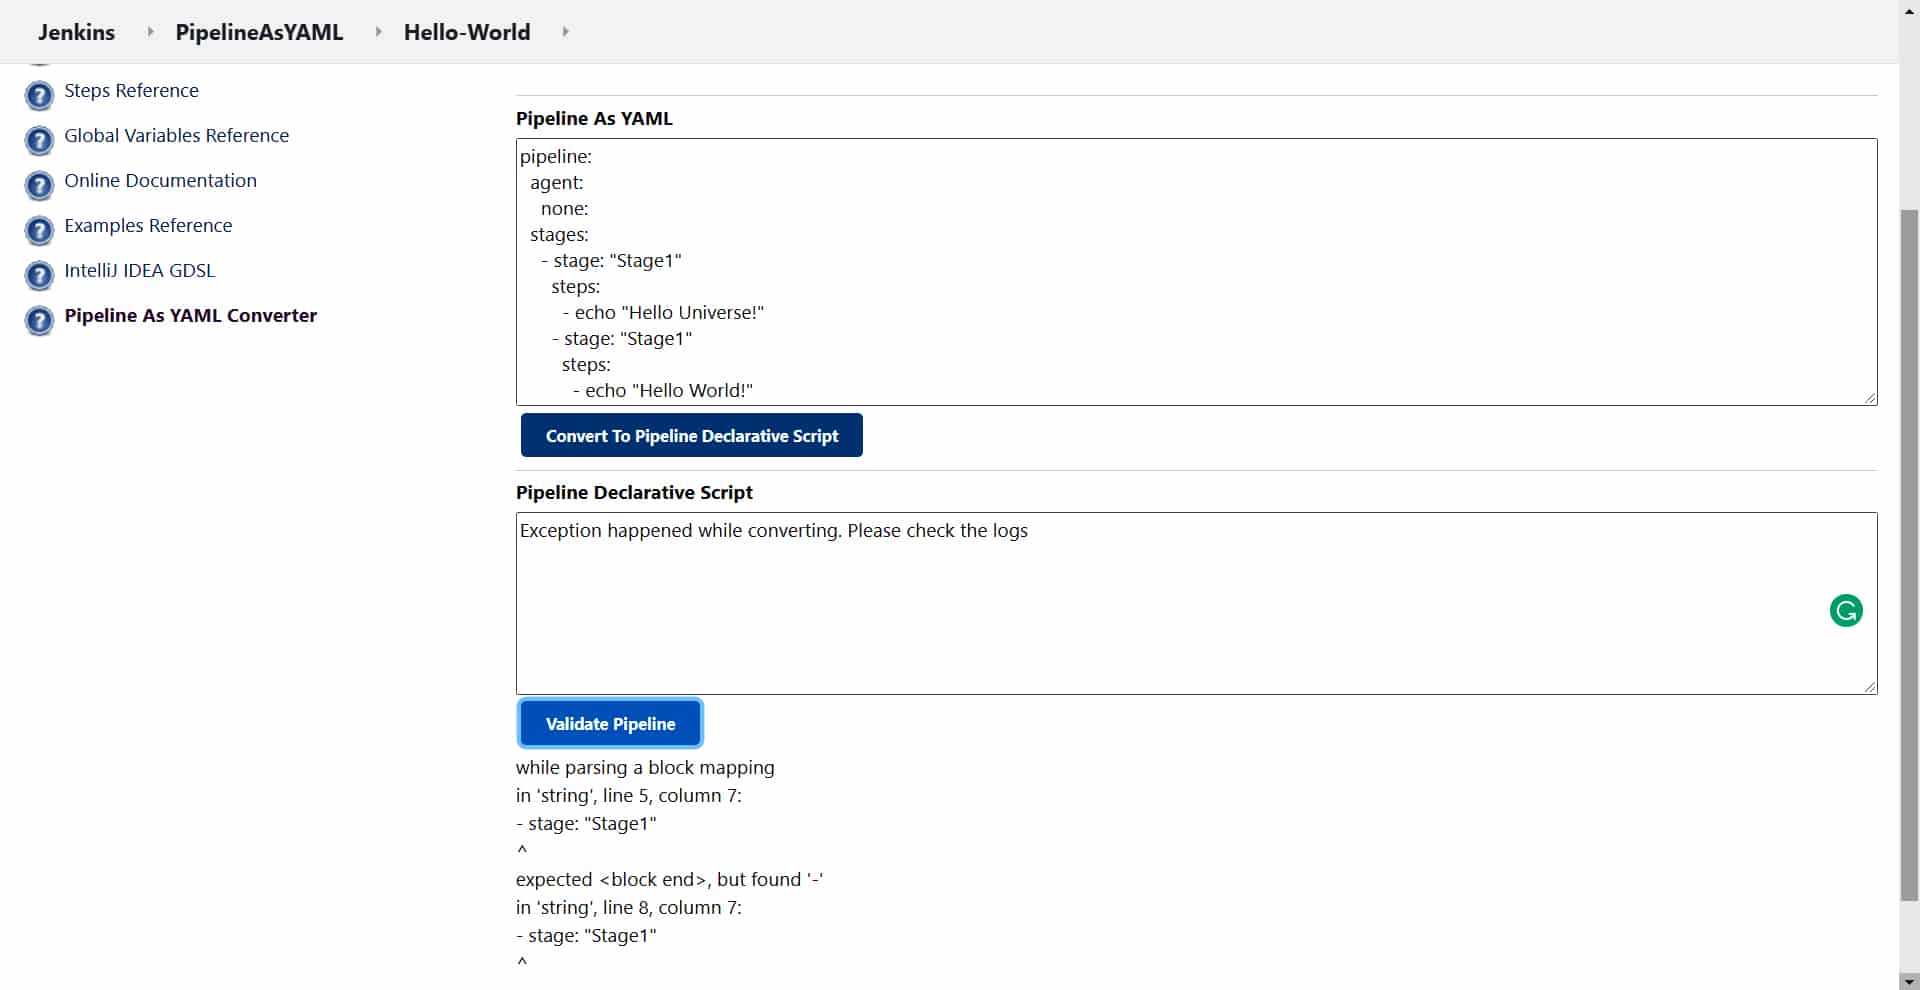
If the YAML script is not valid, then an exception will be thrown. Click on Validate Pipeline to get more details on the exception and to check the issues (Figure 10).
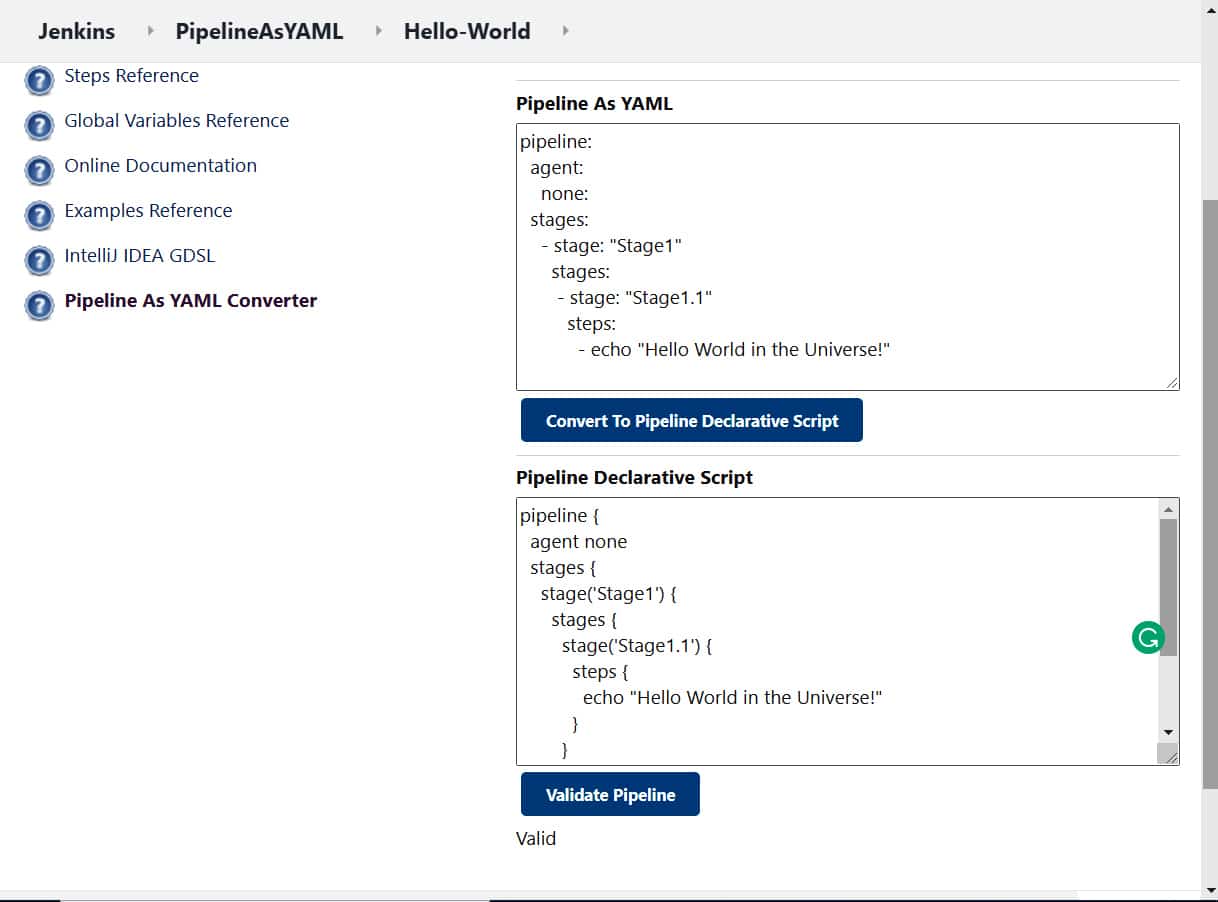
Fix the issues and validate the pipeline again. Bingo! It is a valid YAML pipeline now, as pipeline conversion is successful (Figure 11).
In the Pipeline job, go to Pipeline Steps to find out how the steps have been executed and how much time a specific stage or step took to execute.


