


IoT fleet owners who use numerous connected devices can manage and monitor these with the help of the balena ecosystem. This article outlines how this can be done.
The Internet of Things (IoT) is making the lives of millions of people better every day, whether it is the ease of monitoring your home from the far corners of the world, fitness bands sensing step counts and syncing them with your smartphones, GPS trackers installed inside each truck in a logistics company’s fleet giving updates on package movement, or thousands of tiny sensors distributed over a big farm that continuously report soil health for better crop yields.
IoT has become a subtle part of our lives, but like all other good things, there are challenges to keeping the overall experience natural, seamless and secure.
From a manufacturer or IoT fleet owner’s point-of-view, there are certain challenges that need to be addressed to ensure the end user experience is smooth and secure. This includes providing regular software updates on these devices so that all the security vulnerabilities are patched and new features are continuously rolled out.
Many applications involve receiving data from these edge devices deployed in the field, making it extremely important to monitor them remotely for their health status (battery, network, storage), and update them as and when needed. The last thing a fleet owner would want is to send someone to manually update or fix an IoT device which is deployed out in the wild.
Addressing challenges in IoT fleet management
IoT fleet owners need to build a complete infrastructure to remotely monitor and securely update edge devices. They also need the resources to develop and keep this infrastructure up and running. This can become a pain point when you’re managing heterogeneous devices with different architectures (say, x86 and ARM) and different network connectivity types (Ethernet/Wi-Fi), and when you need to add more devices every now and then. As you grow your fleet, you will have thousands of devices and your infrastructure will need to be scaled accordingly.
Setting up this infrastructure in-house takes your focus away from your main application and the problem you are trying to solve as a fleet owner.
What is balena?
Thankfully, there are solutions like balena.io, which is a collection of tools to address the challenges IoT fleet owners face. The balena ecosystem allows them to manage multiple edge devices straight from a single dashboard (balenaCloud), and adding a new device to an existing fleet is extremely straightforward. So you can focus on your main application rather than worrying about developing and scaling the infrastructure.
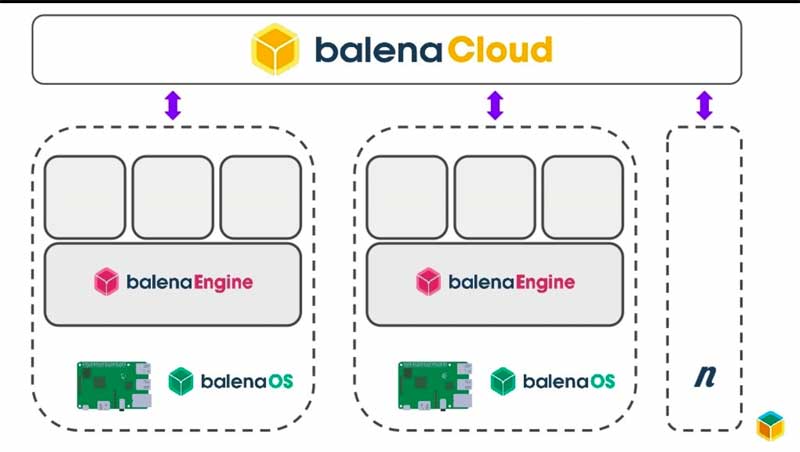
The balena ecosystem provides various tools that enable edge developers to adopt a container based Web-like development workflow, in which your application and supporting pieces reside inside Docker containers, managed by balenaEngine. The latter is similar to dockerEngine but suitably adapted for edge development. It runs on top of balenaOS, a Yocto based rugged embedded Linux operating system meant for single board computers supporting ARM32, ARM64 and x86. A special container called supervisor, which comes baked into balenaOS, manages all the connection, provisioning and updation work from the device itself. A fleet owner can manage all the devices, add more and roll out an update release from balenaCloud, which provides a dashboard to monitor and manage all your devices in the fleet.
The balena ecosystem
Before diving into how you can get started with deploying your own fleet using balena, here’s a quick recap of a few essential utilities.
- balenaOS: A Yocto based Linux operating system meant for edge devices; for example, Raspberry Pi
- balenaEngine: Container manager built into balenaOS, adapted for edge devices
- balenaCloud: Dashboard to monitor, manage, add and update devices in your fleet
- balenaCLI: A command line utility to push releases of your project to balenaCloud. balena also supports Git for this purpose, but for this tutorial we’ll be using balenaCLI
- balenaEtcher: Some of you may already be using this great tool by balena for flashing SD cards/USB drives
It is a good time to mention that most (if not all) of these tools are open source and free to use; they are hosted on the balena GitHub account.
| Note: You can add up to 10 edge devices for free, after which you need to buy the balenaCloud subscription. |
Deploying your first IoT fleet with balena
We will now deploy our first IoT fleet with a sample ‘hello-world’ application.
Here are the steps to do so.
Step 1: Create an account on balenaCloud
Step 2: Create a new fleet
Step 3: Add your device(s)
Step 4: Push your code to the devices in the fleet
Create an account: Visit balenaCloud (https://www.balena.io/cloud/) and create a free account. You can also log in using your Google or GitHub account.
Download balenaCLI: Download balenaCLI for your operating system from https://github.com/balena-io/balena-cli/.
Flash the SD card: Download balenaEtcher for your operating system to flash the SD card (from https://www.balena.io/etcher/,) or you can use build in tools like dd for Linux.
Clone hello-world project: Clone the balena Node.js hello-world example from the GitHub repository at https://github.com/balena-io-examples/balena-node-hello-world using Git clone.
Hardware needed
Since this is a hello-world project with the balena ecosystem, we’ll keep it simple and use minimal hardware. We will be hosting a basic Web page created in Node.js on the Raspberry Pi, but we can always add sensors, actuators and displays as per our requirements. For this project, we’ll need:
- A Raspberry Pi board
- SD card
- Power supply
Setting up the fleet
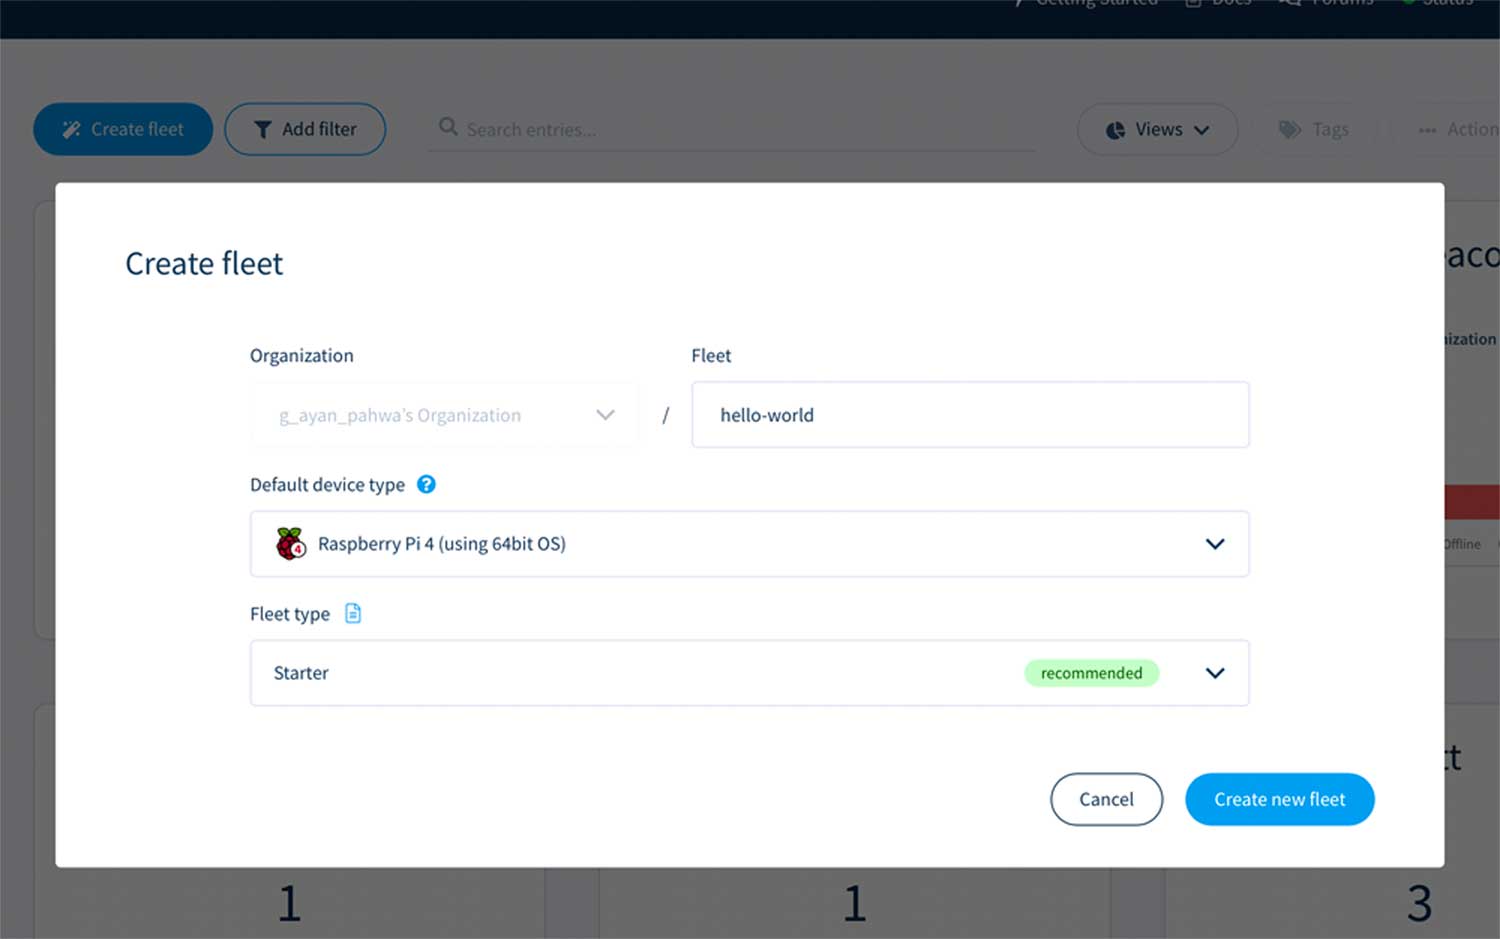
Step 1: Create a new fleet
The first step is to create a fleet on the balena cloud dashboard after logging in.
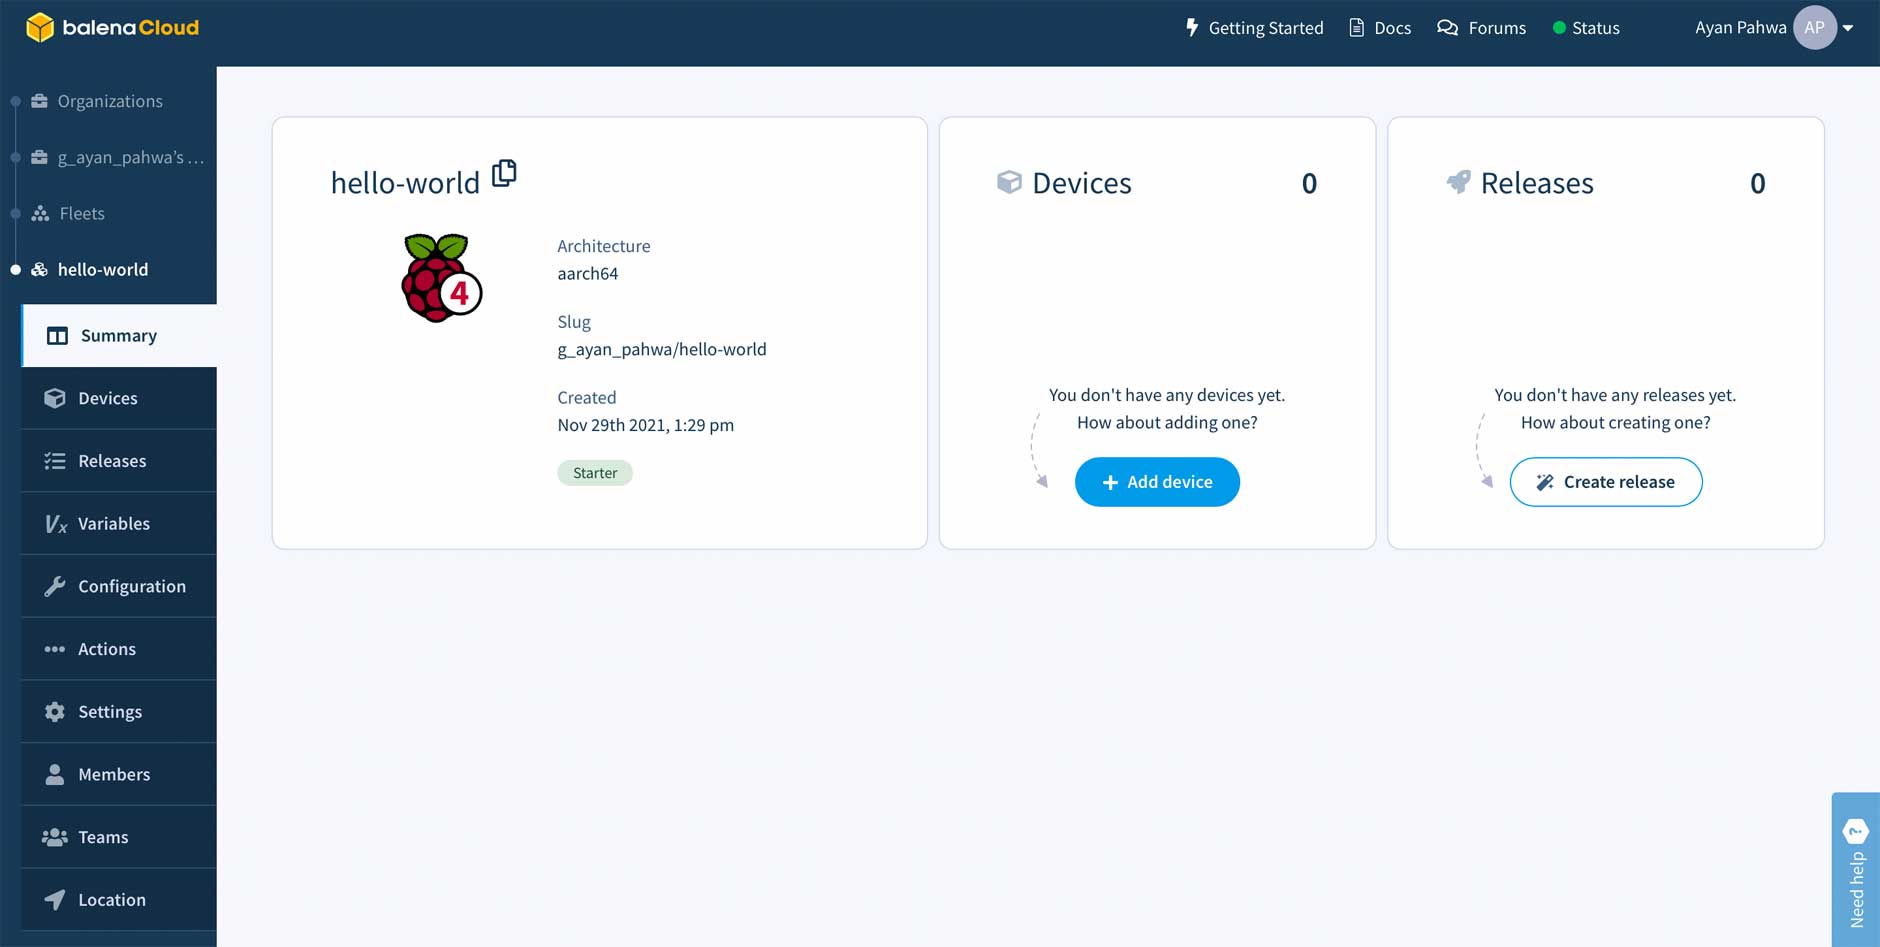
Here, you need to name your fleet; for this example, we’ll call it hello-world. You can also choose a default device type for this fleet, which will be Raspberry Pi 4. We can name the fleet type Starter for now. Click on ‘Create new fleet’ to finish the initial setup. Once a fleet is created, you can add devices to the fleet using the ‘Add device’ button.
Step 2: Add a new device to the fleet
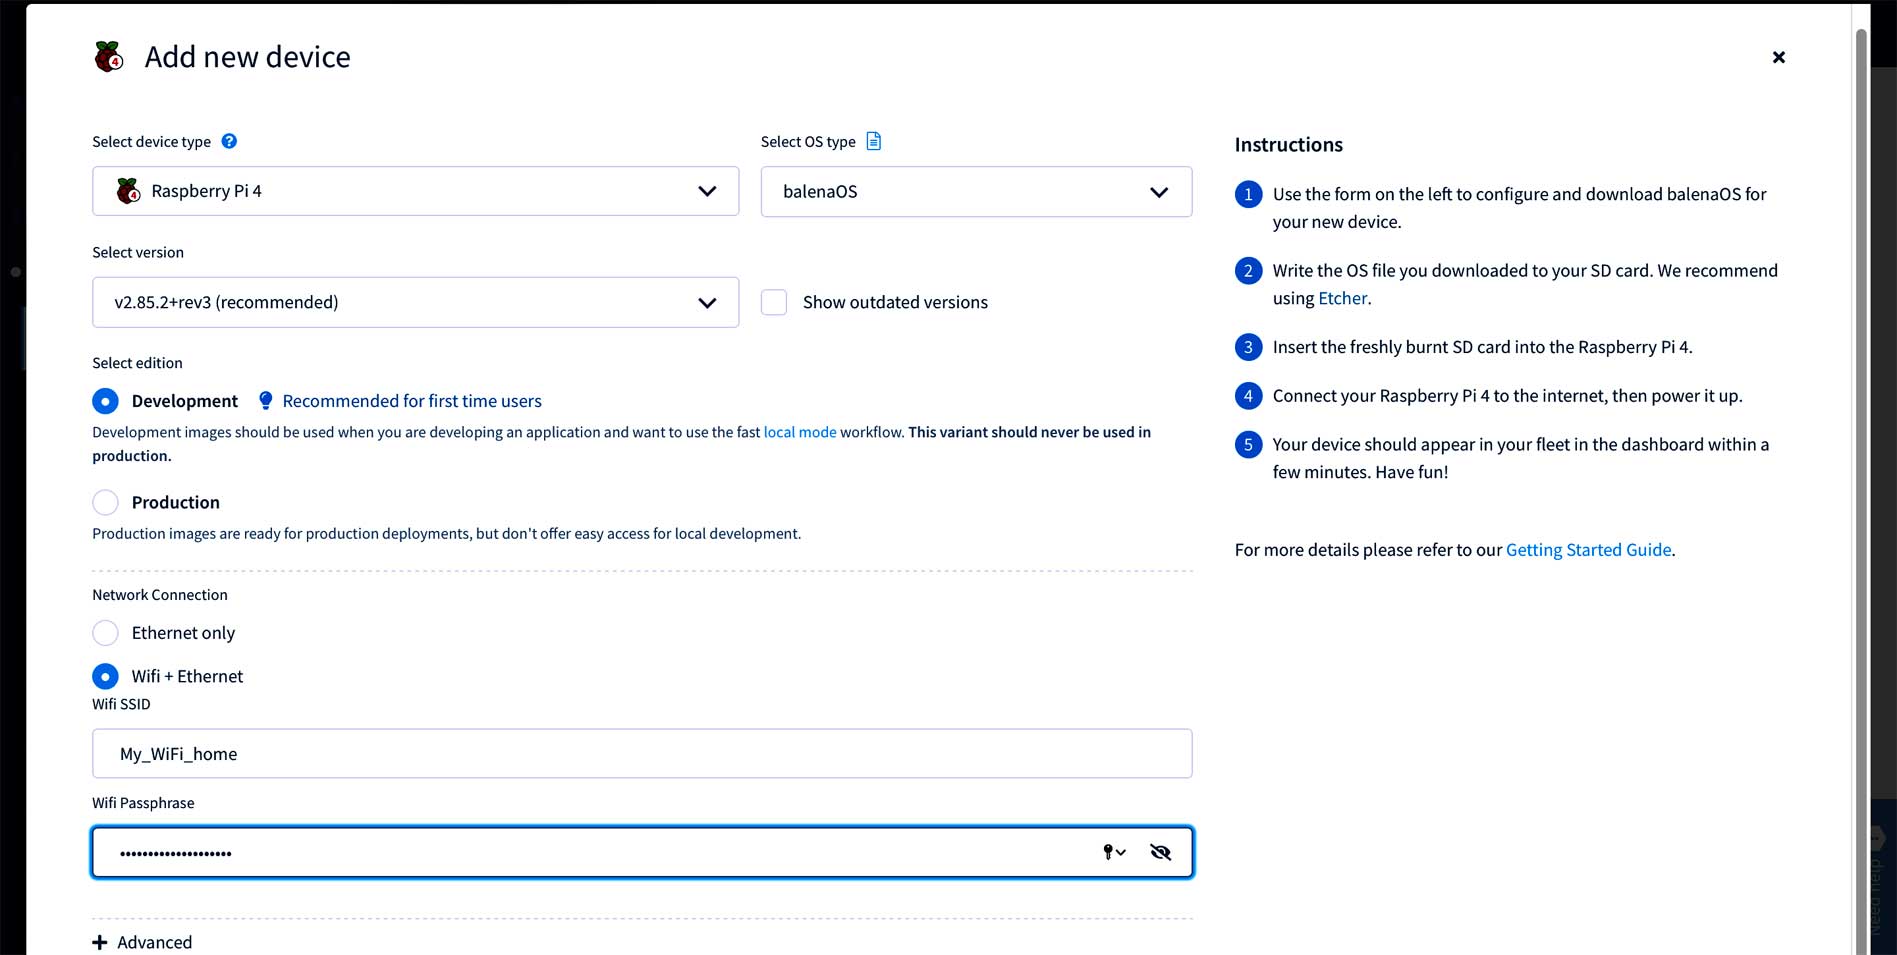
This page will allow us to download balenaOS for our device. Here, we can also select the device you want to add. Raspberry Pi 4 is here by default from the fleet creation step, but you can change it. Choose the recommended version of balenaOS.
We also have the option to choose the balenaOS image for production that is more secure. The locked in version is meant to be deployed in production with ssh disabled, but we’ll choose a development image for this demo since we’re not deploying this device in the field yet. The good thing is that you can also choose how you want to connect the device to the Internet. You can choose only Ethernet or Ethernet + Wi-Fi. You can also add your Wi-Fi credentials on this page, so that the balenaOS image you download here comes baked with these credentials and the device automatically connects with the hotspot. This is quite handy for quick prototyping.
Step 3: Pushing code to the device(s)
After powering on the Raspberry Pi, if you go to the device pane on the balenaCloud dashboard you’ll be able to see your device online. We now need to push the code onto our device, for which we will use balenaCLI.
In the terminal (Linux/Mac) or balenaCLI.exe (Windows), execute the following command:
balena push <fleet name>
To associate your balenaCloud account with balenaCLI, you can choose any available login method. The preferred one is Web authorisation, which will authenticate using a Web browser. Finally, to push the code to the devices in the fleet, we’ll use:
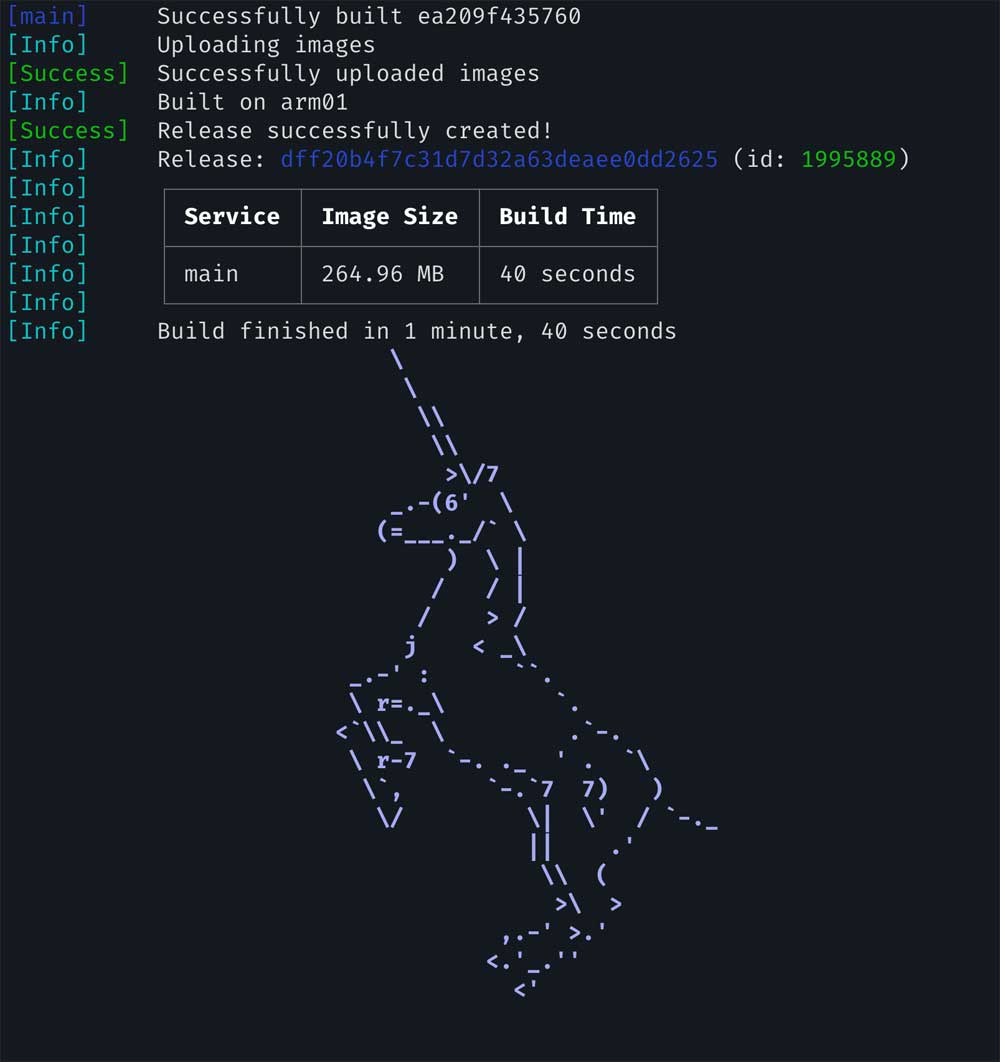
balena push hello-world
This will update the devices with the latest release.
How does this work?
Balena push checks for dockerfile or docker-compose file and build container images for your device architecture, and makes your balenaCloud dashboard available for updating all the devices in the fleet. The images are built on the balena infrastructure, but there’s also a way to build images locally using something called local-mode.
Now let’s verify if our app is working off the Raspberry Pi device. From the balenaCloud dashboard, copy the local device IP address and open it in a new tab. Voila! You’ll be greeted with a Web page hosted off from the Pi itself. The best part is that you can enable the ‘Public Device’ URL and access it from anywhere in the world.
How handy is that!
Digging a little deeper
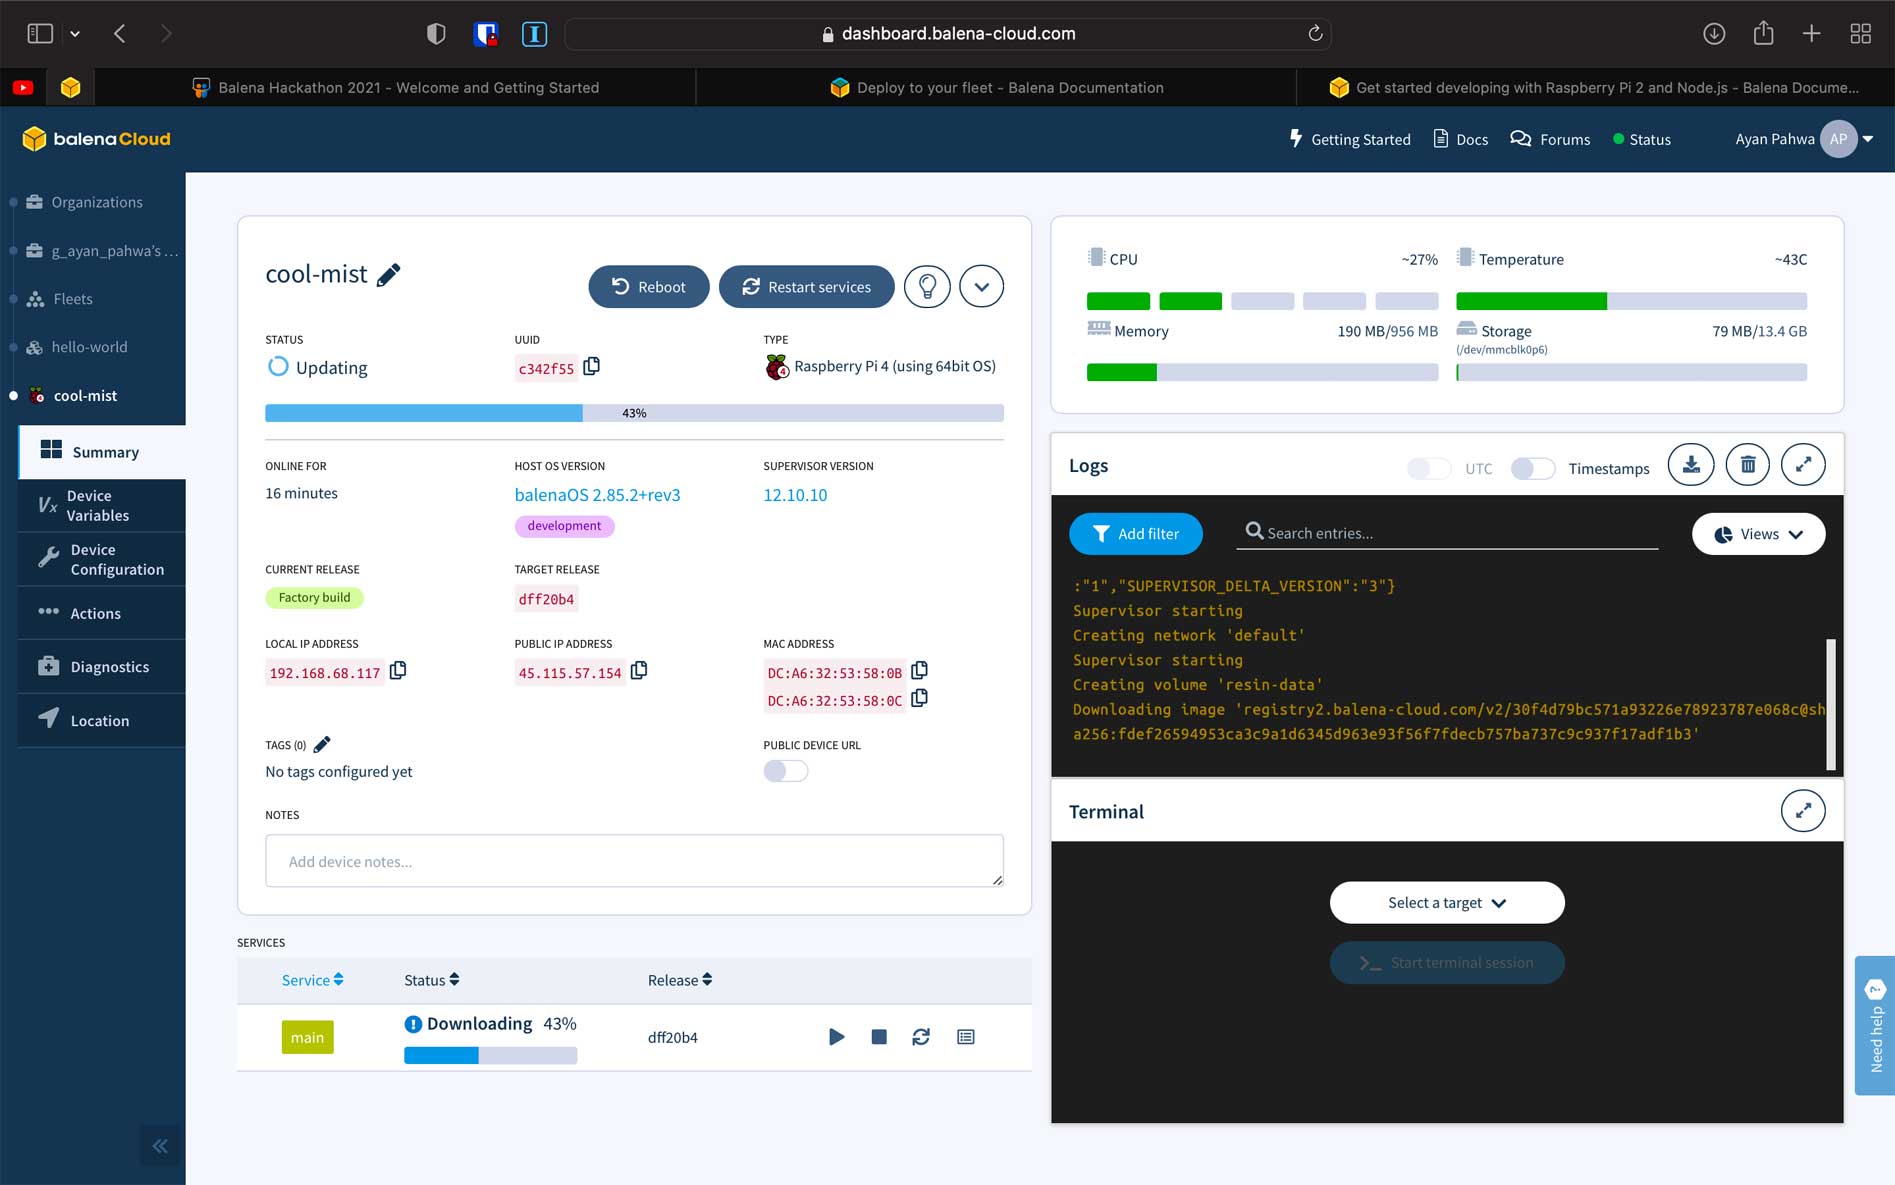
If you check the summary page on the balena dashboard, you will find a lot about your device and fleet. For example, in the service section, you can see there is only one service or one container running called main, but you can also run an application with multiple containers using docker-compose. As an example, an application running the Mosquitto MQTT broker, InfluxDB and Grafana can be achieved using a docker-compose file.
From the same dashboard, you can see the device’s health like CPU utilisation, temperature, memory, and storage. You can also reboot, power-off the device, update balenaOS, supervisor, etc. There is a built-in log viewer, which shows logs coming out of the container, and a terminal window as well to manually run a few commands if and when needed.
All the communication from CLI to the cloud happens over a secured API, which you can also use to develop custom applications for interacting with your fleets and devices.
Where to go from here
The example above is a very basic hello-world example, but there is a lot more that one can do. This includes interfacing sensors, displays, actuators; defining a multi-container app with networking privileges, and exposing ports.
balena has amazing docs which can be found at https://www.balena.io/docs. You can also check out balena masterclasses for different balena tools at https://www.balena.io/docs/learn/more/masterclasses/overview/.
Two great projects made with balena, which you can try, are:
- balena Sense: https://github.com/balenalabs/balena-sense
- balena Dash: https://github.com/balenalabs/balena-dash
Some other great projects can be found at balenaHub, where community members have submitted their fleets, which you can join or fork. You can also learn about balena blocks, which are modular containers to ease functionalities like audio, Bluetooth connections, Chromium Web browser running from a container, and much more. You can check out all of this at hub.balena.io.

You can also join the balena community on the following channels:
- balena forums: https://forums.balena.io
- balena blog: https://balena.io.blog
- balena labs GitHub: https://github.com/balenalabs
Hopefully, this tutorial will serve as a good starting point for anyone who wants to manage their IoT fleet efficiently. In case you have some questions, you can create a post on the balena forum, which is really active.


