This article will help you design a Web based application that automates a smart parking system for cars in a metro station using Node-RED.
A Web application is software that gets executed on a Web server. Every Web application is accessed by the end user through a Web browser. These Web applications are programmed using a client-server architecture, where the user (client) is provided services through a remotely located server that might be hosted by a third-party. A Web API (application programming interface) is available across the Web and can be accessed by the user using the HTTP protocol, as shown in Figure 1.
This article will demonstrate how to design a Web based application for an automated smart parking system for cars in a metro station. It is designed using open source Node-RED. This system creates an interactive and stylish user login form using a template node, where HTML and CSS are coded to get car owner details to automate the parking system. We can see the login and submission form flow diagrams in Figures 2 and 3.
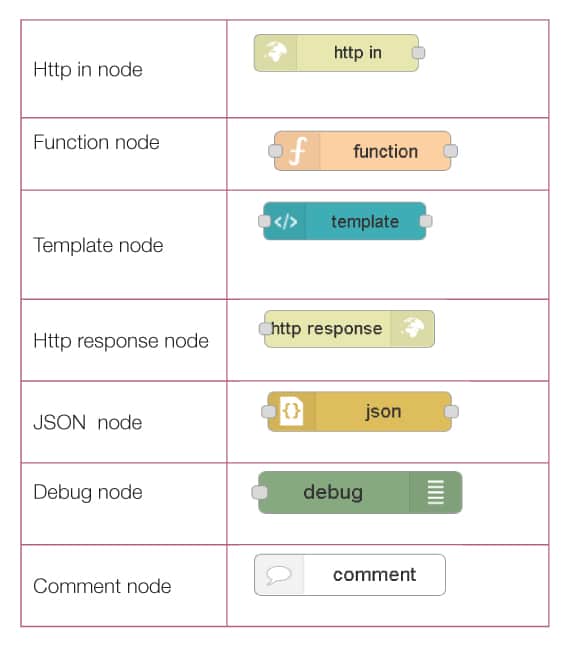
The nodes used are as follows:
 Metro smart parking node flow design
Node-RED is triggered using the command ‘node-red’. Through the URL http://127.0.0.1:1880/, the node-RED UI flow browser is enabled. We have considered that the Node-RED setup is done and working.

Follow the steps given below to create the login and submission forms.

Login form
1) From the node palette, drag and drop http in node, which creates an HTTP end point for creating Web services.
2) Connect http in node to function node. The latter helps to code JavaScript functions to run against the messages being received by the node.
3) Connect function node to template node, where the latter creates a Web API based on the provided template.
4) Connect template node to http response node; the latter sends responses back to requests received from an http input node.
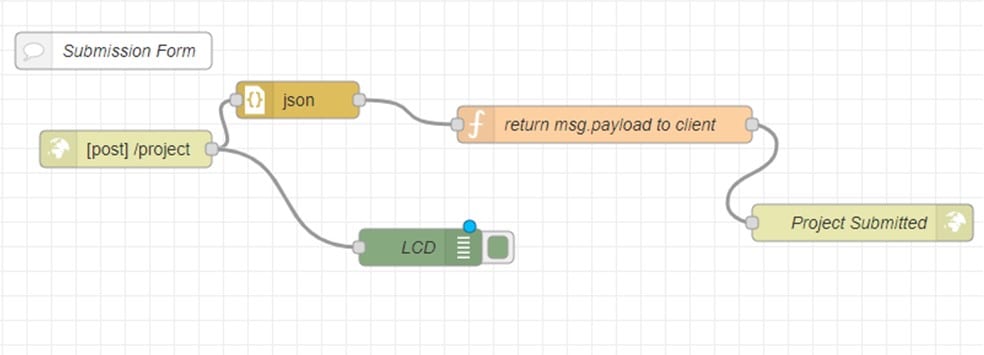
Submission form
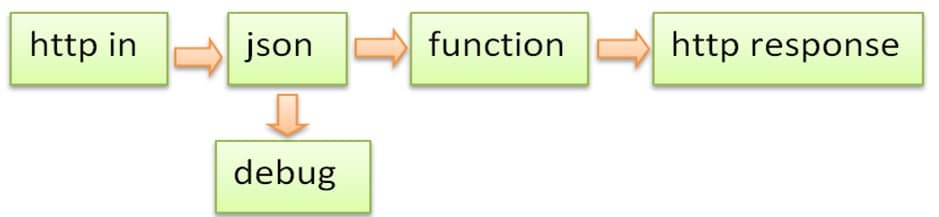
1) Drag and drop http in node and connect it to json node, which converts and communicates the data as JSON string.
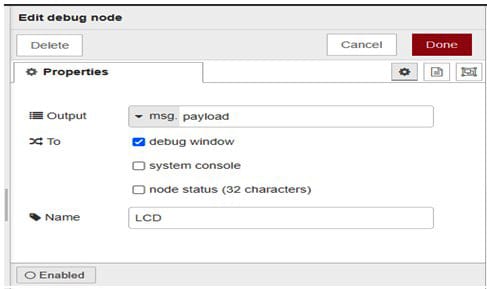
2) Connect http in node to debug node, which gives output in a debug monitor.
3) Place and connect json node to function node and connect the latter to http response node.
After the creation of a complete flow, click on the Deploy button in the top right corner of the Node-RED window. To view the user interface, go to the link 127.0.0.1:1880/ui/.
Once you enter and then click Submit, it will take you to the next page where you can read all the news articles.
Node-RED workflow
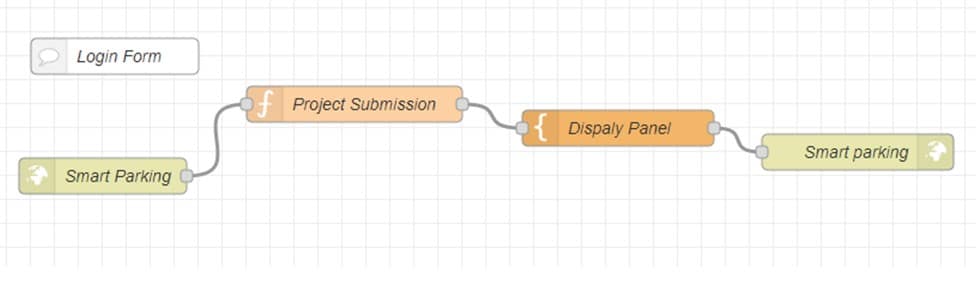
In a single flow of Node-RED, you can create both the login form and submission form, as shown in Figures 4 and 5.
Now we will configure the Node properties.
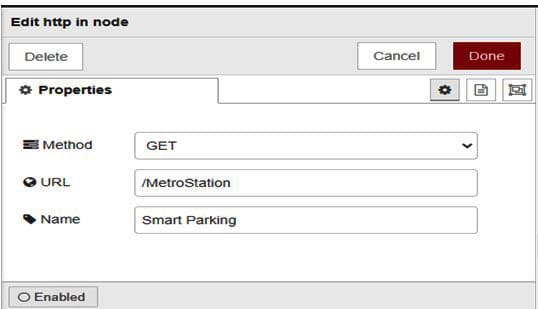
Login form: Edit the http in property by choosing the method ‘Get’ and set the URL to ‘/MetroStation’ and configure the name as ‘Smart Parking’.
| Note: The URL can be any user defined local variable. |
Now select the function node and edit its properties by coding the ‘msg.url = project’ and configure the name field with ‘Project Submission’.

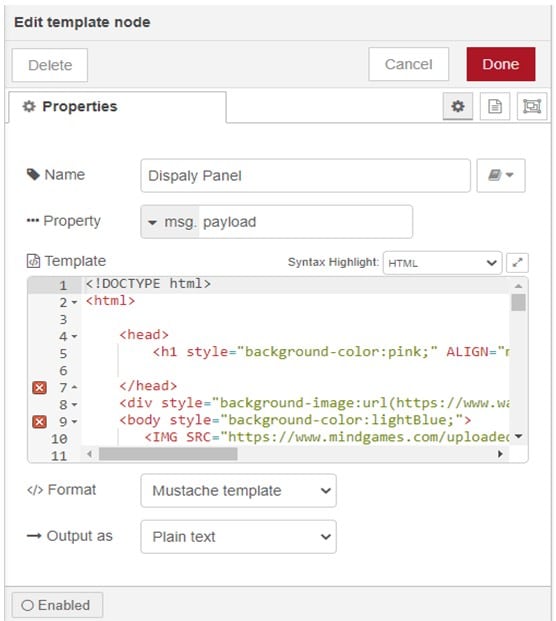
In the Property window of the template node, configure the appropriate HTML code required for the login form and specify the name as ‘Display panel’. The Mustache template format is being used in this flow. Mustache is a simple Web template system that is described as a logicless template engine. It does not have any explicit control flow statements, such as ‘if’ and ‘else’ conditionals or ‘for’ loops. Looping and conditional evaluation can be achieved using section tags processing lists and lambdas.
Configure the edit property of http response node with the name ‘Smart Parking’ (Figure 9).

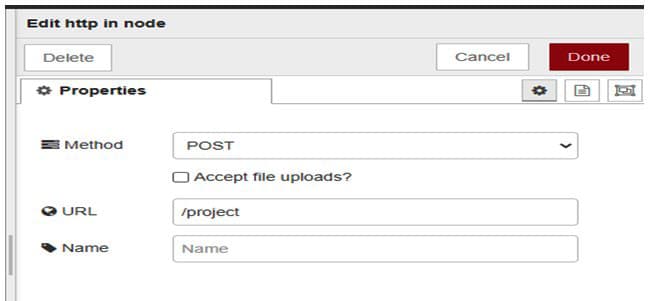
Submission form: In the edit property window of http in node, choose the method ‘POST’ and the URL ‘/project’.
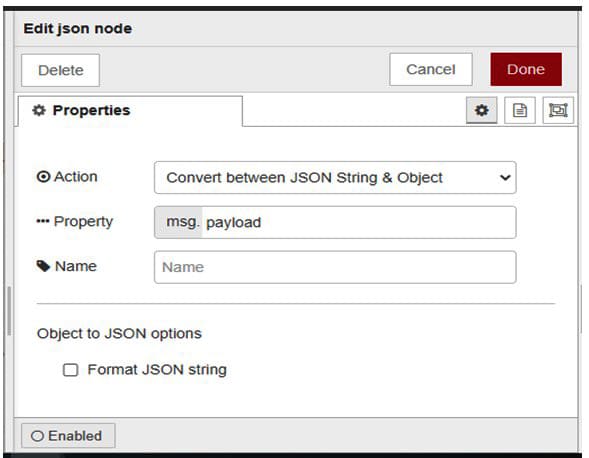
In the JSON node edit window, set Action as ‘Convert between JSON String & Object’. Refer to Figure 11.
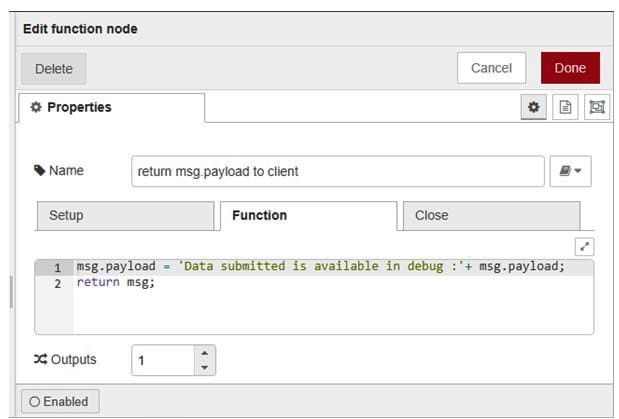
The function node is configured as specified in Figure 12.
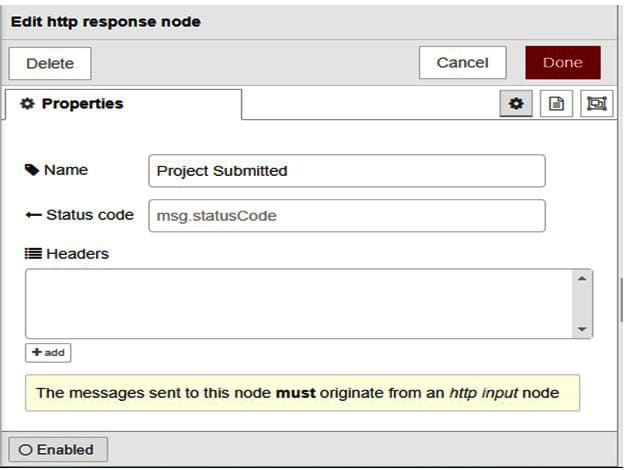
In http response node, edit the property name as ‘Project Submitted’.
| Note: Also add the comment node with comments as ‘Login Form’ and ‘Submission Form’ |
Dashboard UI Web page
When the user clicks on Submit, the data given will be displayed in the UI and the debug node. If Reset is clicked, the details will be cleared, allowing the user to enter new details (Figure 15).
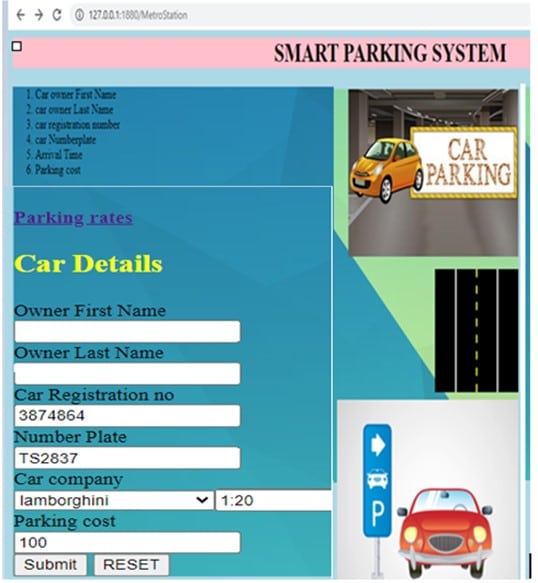
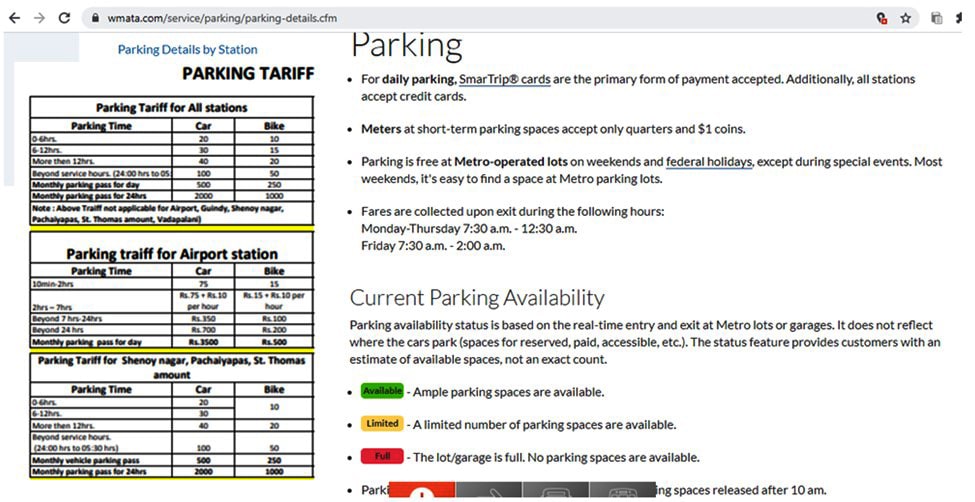
Metro parking rates are provided through a hyperlink, and the tariff output is displayed in the UI. So the smart parking for cars is automated with appropriate hyperlinks to exhibit the parking tariff at the metro station. The final outputs of this automated system are retrieved and displayed in the Node-RED dashboard UI and debug monitor.