


This tutorial will guide you on how to deploy a Python based Flask application using the Apache server. It also demonstrates how to use WSGI to allow Apache to interact with Python.
There are various applications that can work as a local server. Free and open source servers such as XAMPP, WAMP, LAMP and MAMP are a group of tools that run together to make a complete server environment. The ‘P’ in each stands for PHP and ‘A’ for Apache. However, such resources are limited for Python, so developers can take advantage of using Apache to connect to Python in different operating systems. Python’s frameworks are inbuilt with their own server, but this server is just for testing and is not fit for a production environment. Once in production, we need a real server like Apache. This server takes care of the load balancing and scaling for the deployed application.
This tutorial focuses on deploying a Python application along with Apache in a Linux (Ubuntu) based environment. I would suggest you try this out on a development environment and not a production server.
Python
Python is a great, easy-to-learn, and all-powerful programming language, and with frameworks such as Django and Flask, we can use it to create full-fledged web applications. Once we create a web application using libraries and frameworks such as Flask, we need to host it on a server and expose it to the public.
Flask
Flask is a micro web framework for Python. It is provided with its own http server, and is not a native language. It has limited capacity. To prevent overloading, we must use Apache, which will use WSGI files to access Flask applications. This will let Apache interact with Python as if it is a native.
Apache
Apache is a high-performance, free and open source HTTP server software and is ranked to be the second most popular after Nginx. However, Apache doesn’t understand Python script. This is where WSGI is needed.
WSGI
WSGI is the web server gateway interface between web servers and web apps for Python. It is a specification that describes how a web server communicates with web applications, and how web applications can be chained together to process one request.
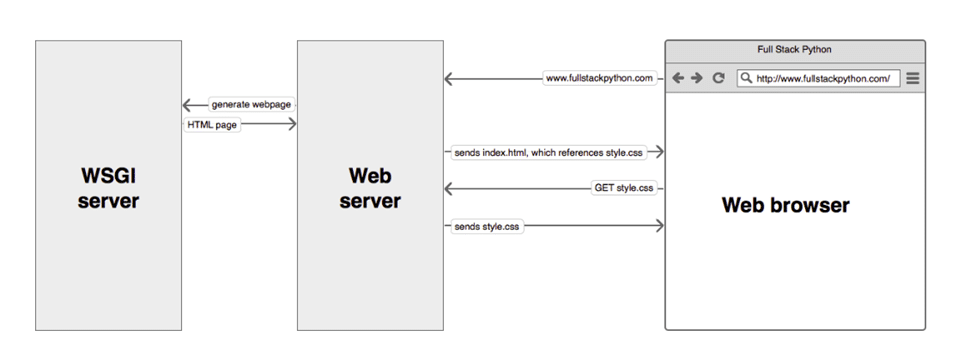
WSGI forwards requests from users received by the web server to the Python script. The output of the Python script is forwarded to WSGI, then to the web server, and finally to the user acting as an interface between the front-end server (Apache) and the Flask application (refer Figure 1).
mod_wsgi
This Apache HTTP server module provides a WSGI-compliant interface for hosting Python based web applications under Apache. The mod_wsgi module embeds the Python application (the Flask app) within the server, and allows communication via the Python WSGI interface.
| Note: We will be using Python3.6 for development, so we should install mod_wsgi (py3). |
Setting up the environment
We will start by installing the Apache 2 server. Use the following command:
$sudo apt install apache2
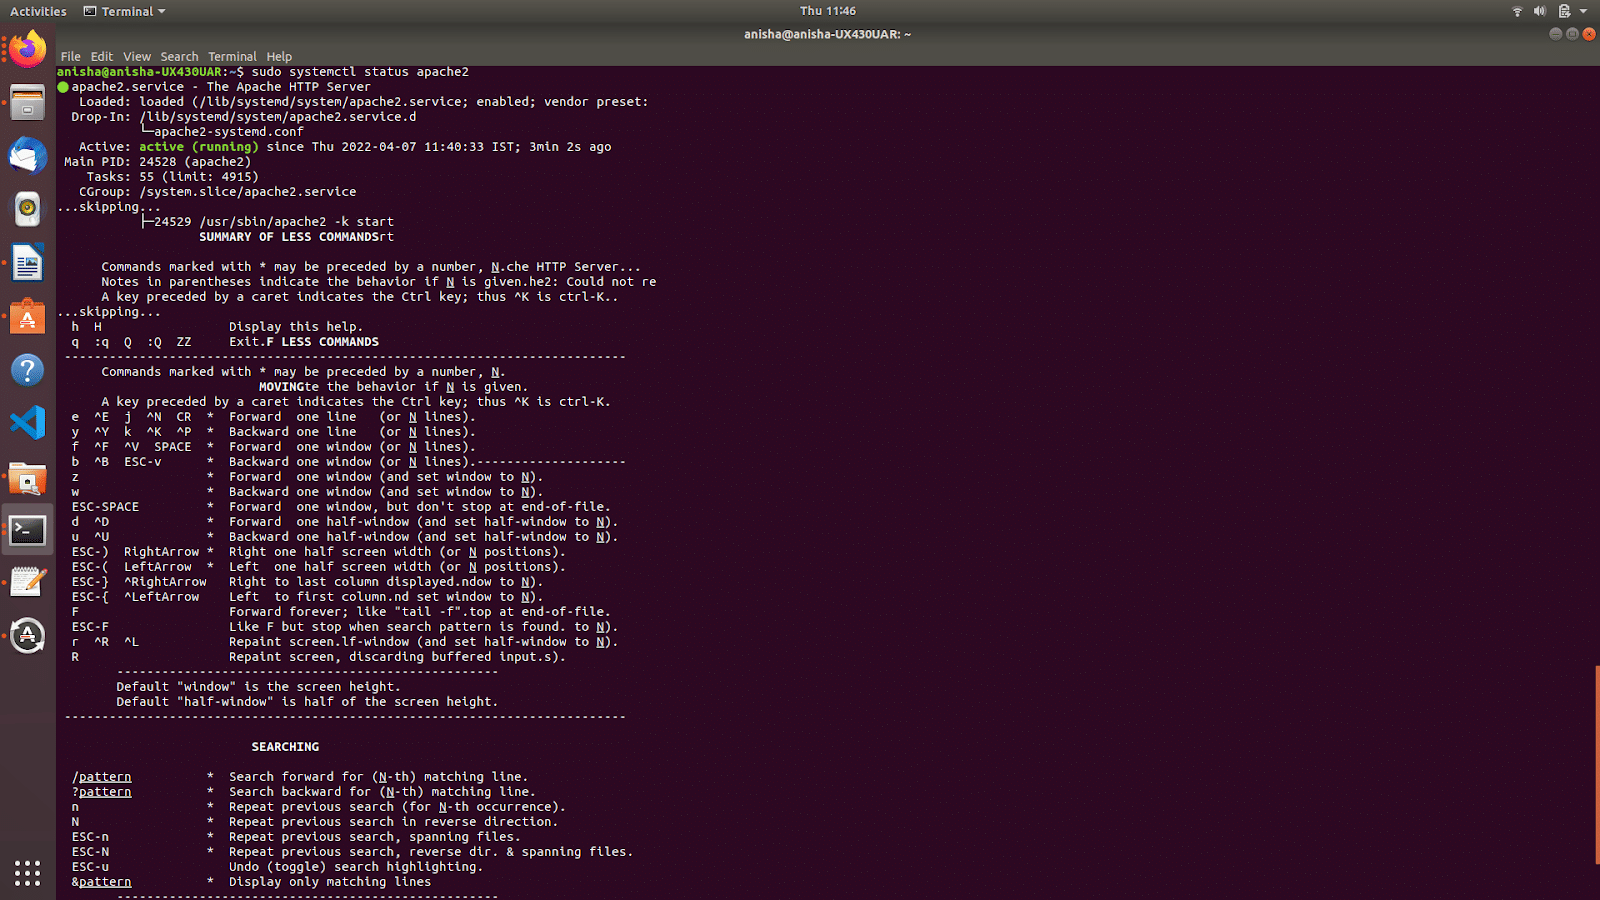
We will use systemctl, a utility for controlling the systemd system and service manager; it is used to start, restart, stop services and beyond. The systemctl status sub-command, as the name states, is used to view the status of a service. You can use it for the above purpose by using the following command:
$sudo systemctl status apache2
The output of the command will confirm the status of Apache and its installation.
After letting the command run, all required packages are installed, and we can test this out by typing in our IP address in the web browser. If the Apache server is running properly, you will see the ‘Apache2 Ubuntu Default Page’.
Installing and setting up Flask
To install Flask, you should be in your applications root directory. Flask, its dependencies, and most Flask extensions support Python 3.
The standard package manager for Python is pip. It allows you to install and manage packages that aren’t part of the Python standard library.
Now we will install Python3 in the next step using the following command:
$sudo apt install python3
$sudo apt install python3-pip
Python3 mainly affects WSGI middleware interacting with the WSGI environ data. Werkzeug, a comprehensive WSGI web application library, wraps that information in high-level helpers, so encoding issues should not affect you. Werkzeug doesn’t enforce any dependencies. It is up to us to choose a template engine, database adapter, and even how to handle requests.
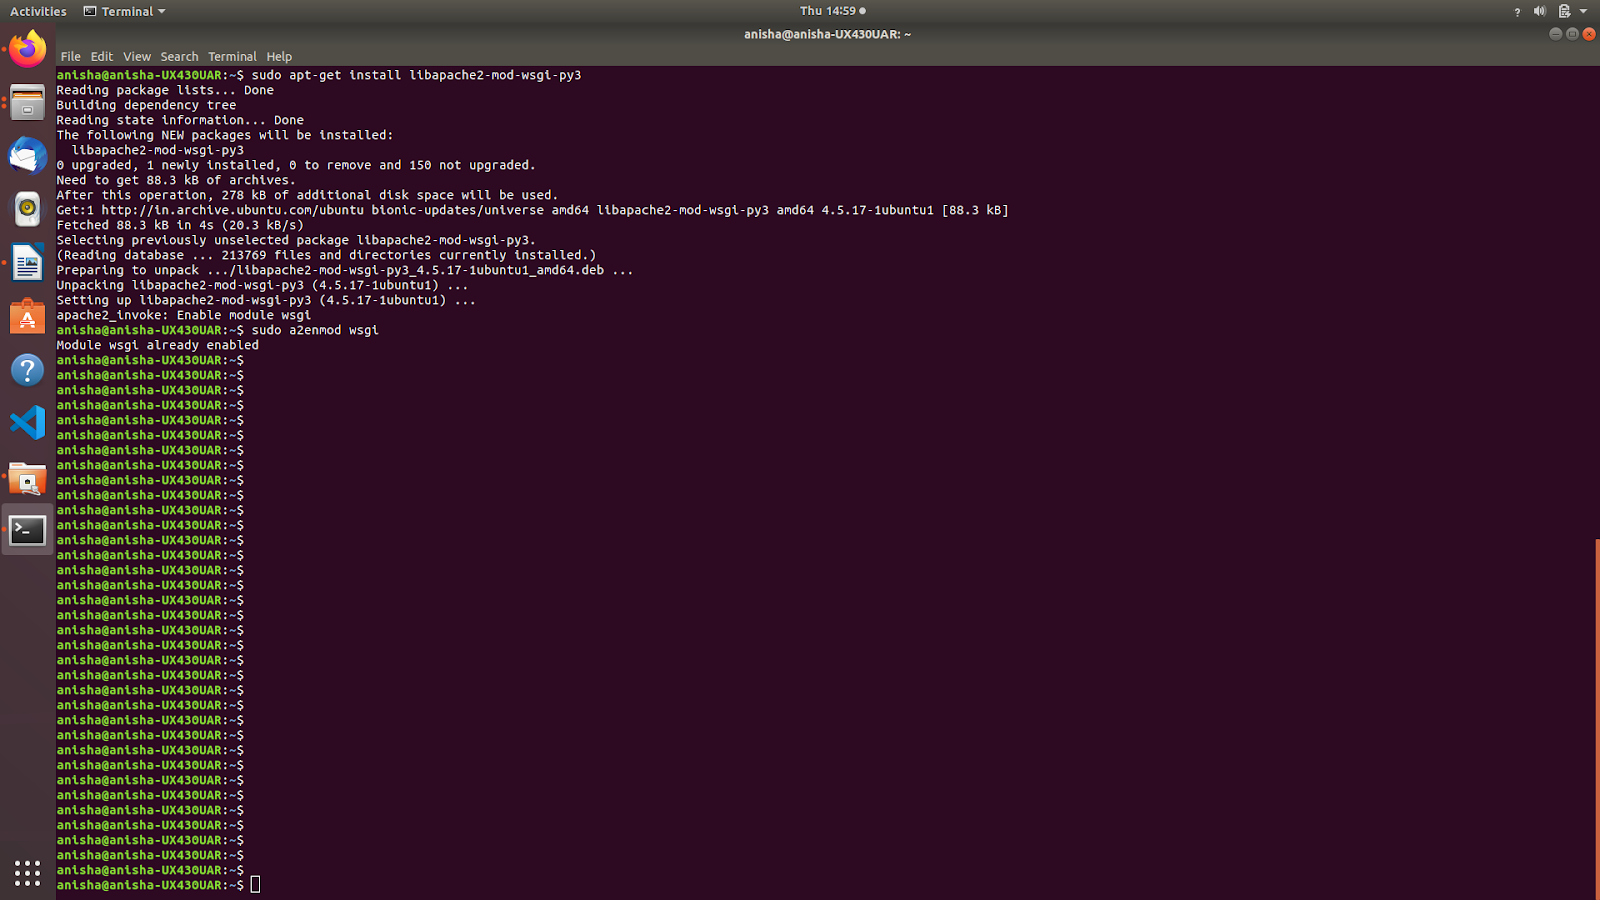
Figure 3 shows how to install mod_wsgi and enable it.
Now you are good to go with setting up the Flask application! To do so we need to create a separate directory and create __init.py file. I will be using nano editor to make a simple ‘Hello World’ Flask app where we add a shebang line to specify which interpreter to use.
#!/bin/usr/python
from flask import Flask
app = Flask(__name__)
@app.route(“/”)
def hello():
	return “Hello world!”
if __name__ == “__main__”:
	app.run()
Next, we need to create a configuration file. Make sure the name of the configuration file is the same as that of nano/etc/apache2/sites-available/flask_Apache.conf and write the configuration file as below. Provide your system IP address.
<VirtualHost *:80>
               ServerName yourdomain.com(yours system ipaddress)
               ServerAdmin youemail@email.com
               WSGIScriptAlias / /var/www/FlaskApp/flaskapp.wsgi
               <Directory /var/www/FlaskApp/FlaskApp/>
                       Order allow,deny
                       Allow from all
               </Directory>
               Alias /static /var/www/FlaskApp/FlaskApp/static
               <Directory /var/www/FlaskApp/FlaskApp/static/>
                       Order allow,deny
                       Allow from all
               </Directory>
               ErrorLog ${APACHE_LOG_DIR}/error.log
               LogLevel warn
               CustomLog ${APACHE_LOG_DIR}/access.log combined
</VirtualHost>
Next, we need to create a flaskapp.wsgi
nano flaskapp.wsgi

#!/usr/bin/python
import sys
import logging
logging.basicConfig(stream=sys.stderr)
sys.path.insert(0,”/var/www/FlaskApp/”)

from FlaskApp import app as application
application.secret_key = ‘fhkjdskjgf(anything)’
a2ensite
a2ensite is a script that enables the specified site (which contains a <VirtualHost> block) within the Apache2 configuration. It does this by creating symlinks within /etc/apache2/sites-enabled. Likewise, a2dissite disables a site by removing those symlinks. It is not an error to enable a site which is already enabled, or to disable one which is already disabled.
The very first virtual host is treated in a special way as every request not matching the actual directive is redirected to this. It is also known as the 000-default due to the same.
Then use a2ensite to enable the Apache server.
sudo a2ensite /etc/apache2/sites-available/flask_.conf
apache2 -f /etc/apache2/apache2.conf -k stop

apache2 -f /etc/apache2/apache2.conf -k start
Use the URL given below on your web browser to start your Flask application.
http://{your IP address}/test Flask/
You will see the ‘Hello world!’ message.
Congratulations, you have successfully deployed a Flask application!


