Once upon a time, there was Sun Microsystems. Not just an IT industry flagship, but also a legendary firm. Famous for SPARC processors, the Java programming language, and for the decades it spent developing its own UNIX OS, Solaris. Solaris’ successor is the OpenIndiana project.
Solaris and Sun
The history of Sun Microsystems is truly amazing. Started in 1982 to further develop the project born in Stanford University, the acronym (SUN) itself stands for Stanford University Network. Over time, the company was involved in many interesting projects. Slogans such as, “A computer is a network” and “Write Once, Run Everywhere” reflect fundamental milestones in the development of modern technologies that we are today so familiar with.
Commercially, Sun marketed SunOS, and later Solaris. Note that another of its achievements, the Berkeley Software Distribution (BSD), has been used not only in Solaris, but in a number of other commercial implementations like AIX/HP-UX, and open systems like FreeBSD/NetBSD/OpenBSD. To some extent, all BSD-derived systems (read, modern *NIX) and Linux share several fundamental concepts and features.

In the first half of the last decade, Sun was too slow in turning Solaris from a closed to an open source product, i.e., OpenSolaris. This lost the company the server segment in enterprise-level deployments. Some studies indicate that if Sun hadn’t been so conservative in the 2000s, it is possible that a large part of the server segment would now be OpenSolaris hosts, rather than Linux.
OpenSolaris took another blow when Sun, in a bad financial condition, was bought by Oracle in 2010. The latter can hardly be called an open source friendly company, so it wasn’t surprising when the OpenSolaris community decided to develop their own fork, independent of Oracle’s corporate games. This resulted in the 2010 announcement of OpenIndiana.
As mentioned, OpenIndiana is the Illumos core from OpenSolaris, which is being independently developed by Oracle, plus GNU user-land tools. It is worth mentioning that in 2007, Sun specially hired Ian Murdock (the Debian founder) for the development of “Project Indiana”, to transform Solaris into OpenSolaris, and combine the latter with a number of open source products, such as GNOME. In general, we can assume that Project Indiana has successfully grown into OpenIndiana.
Installation
Right, so let’s try OpenIndiana. I downloaded the Server ISO with the development release 151 and loaded it on a regular x86_64 machine with 2 GB of RAM (later increased to 4 GB). The server needs you to use the command-line via the console or SSH. However, there’s a desktop version as well — the “Live DVD desktop ISO” for those who love GUIs: a choice of GNOME 2.30/XFCE 4.8/LXDE 0.5/KDE 4.7. I burned the ISO on a DVD and booted it, chose the Installer menu option “Install OpenIndiana” and began.

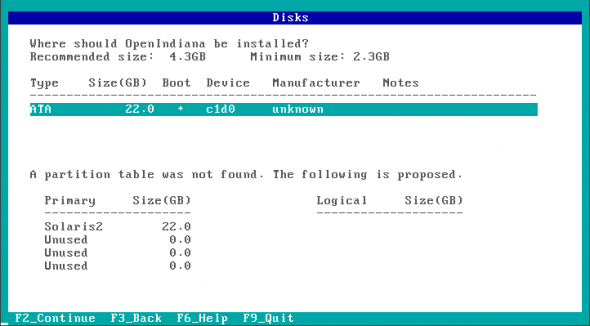
Though the OS needs only about 3 GB, I allocated the entire HDD (22 GB). The rest of the allocated space will be used by /home and swap partitions. Please remember, the swap space consists of three different items!

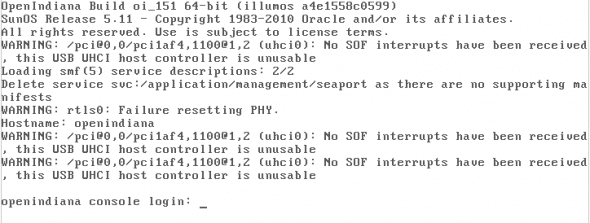
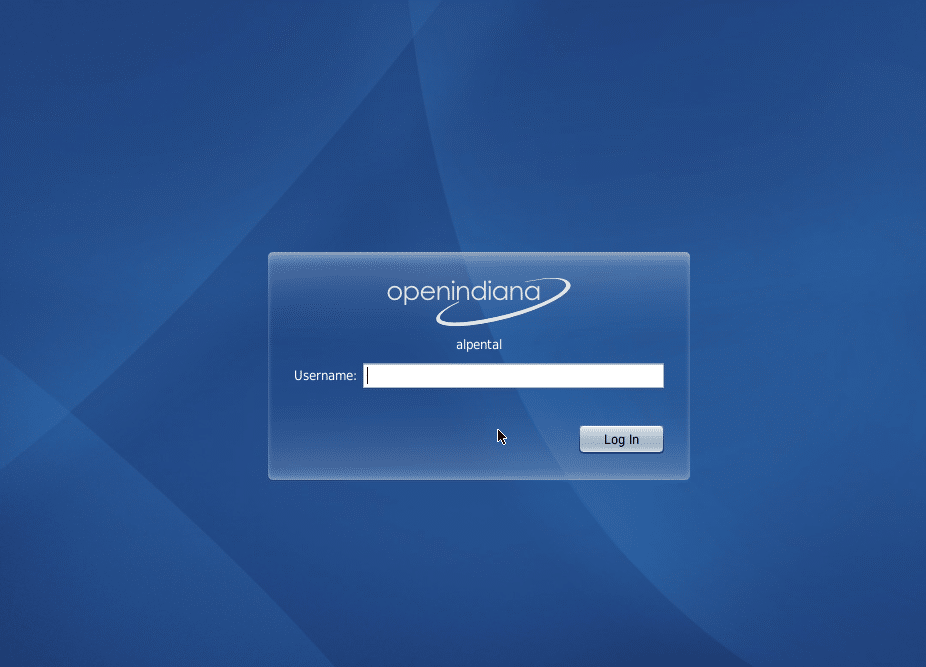
I set the hostname to “openindiana”, set a password for root, and created a single user for myself (“anton”). Network configuration was left as automatic; you can later change settings after logging in. Next, I hit F2 (Install) and waited for the installation to complete. After reviewing the installation log, I chose option “5 Reboot”, to try my very first steps with OpenIndiana!


Post logging in, you can configure a static IP address. First disable nwam (NetWork Auto Magic):
# svcadm disable network/physical:nwam
Add a name server (DNS) IP to /etc/resolv.conf, and add your current gateway to /etc/defaultrouter. Also, manually add the gateway to the routing table (necessary only for the current session) with route -p add default GATEWAY. Assign the static IP address with ifconfig, and start the network service:
# svcadm enable network/physical:default
Now, when you restart you workstation/server, this static network configuration will be applied.
Package management
The first thing that comes to mind is: how does one install extra packages.
Personally, I like Midnight Commander — a simple console file manager. To install it, I relied on the pkg package manager. As root (sudo bash), check if you have registered repositories:
# pkg publisher
PUBLISHER                             TYPE     STATUS   URI
openindiana.org          (preferred)  origin   online   http://pkg.openindiana.org/dev-il/
Yes, we can install new packages. But before that, let’s do a system update:
root@openindiana:/home/anton# pkg image-update
Creating Plan
Packages to update:   332
Create boot environment:   Yes
DOWNLOAD                                  PKGS       FILES    XFER (MB)
system/extended-system-utilities        19/332     57/2077    0.4/103.9
library/libtecla                        39/332    121/2077    0.6/103.9
system/network/ppp/pppdump              65/332    231/2077    2.3/103.9
system/library                          75/332    302/2077    4.0/103.9
system/kernel                          326/332   2063/2077  102.2/103.9
Completed                              332/332   2077/2077  103.9/103.9

PHASE                                        ACTIONS
Removal Phase                                120/120
Install Phase                                114/114
Update Phase                               5868/5868

PHASE                                          ITEMS
Package State Update Phase                   664/664
Package Cache Update Phase                   332/332
Image State Update Phase                         2/2

A clone of openindiana exists and has been updated and activated.
On the next boot the Boot Environment openindiana-1 will be mounted on '/'.
Reboot when ready to switch to this updated BE.
If you want, you can install the mc package (Midnight Commander), after checking if it’s in the repository:
# pkg search mc
INDEX      ACTION VALUE                   PACKAGE
basename   dir    usr/share/doc/mc        pkg:/file/mc@4.7.3-0.151
basename   dir    usr/share/mc            pkg:/file/mc@4.7.3-0.151
basename   file   usr/bin/mc              pkg:/file/mc@4.7.3-0.151
pkg.fmri   set    openindiana.org/file/mc pkg:/file/mc@4.7.3-0.151

root@openindiana:/home/anton# pkg install mc
Creating Plan |
Packages to install:     2
Create boot environment:    No
DOWNLOAD                                  PKGS       FILES    XFER (MB)
runtime/python-24                          0/2    294/2271     1.1/10.6
file/mc                                    1/2   2119/2271     9.3/10.6
Completed                                  2/2   2271/2271    10.6/10.6

PHASE                                        ACTIONS
Install Phase                              2457/2457

PHASE                                          ITEMS
Package State Update Phase                       2/2
Image State Update Phase                         2/2

For a package list, run pkg list; for more verbose output, run pkg info. Searching for, and attempting to install Apache yields the message “No updates necessary for this image”, which means it was already installed in the initial deployment. To check if a package is installed, use the following command:
root@openindiana:/home/anton# pkg list | grep apache
web/server/apache-22                          2.2.16-0.151    installed  -----
Let’s try to install the nginx Web server, which isn’t in the OpenIndiana repository, by downloading the source and compiling it. Create a src folder, set your HTTP proxy if required, and use wget to download the tarball. However, no GCC compiler is installed. What’s the compiler package name?
root@openindiana:/home/anton#  pkg search gcc | grep set
description  set  GCC Runtime libraries   pkg:/system/library/gcc-3-runtime@3.4.3-0.151
pkg.description set  GCC Runtime - Shared libraries used by gcc and other gnu components pkg:/system/library/gcc-3-runtime@3.4.3-0.151
pkg.summary  set  GCC Runtime libraries   pkg:/system/library/gcc-3-runtime@3.4.3-0.151
description  set   gcc - The GNU C compiler  pkg:/developer/gcc-3@3.4.3-0.151
pkg.description set   GCC Runtime - Shared libraries used by gcc and other gnu components pkg:/system/library/gcc-3-runtime@3.4.3-0.151
pkg.summary  set  gcc - The GNU C compiler   pkg:/developer/gcc-3@3.4.3-0.151
The package we need is called “pkg:/developer/gcc-3 @ 3.4.3-0.151”, so we can install it with the following command:
root@openindiana:/home/anton# pkg install pkg:/developer/gcc-3@3.4.3-0.151
Next, compile nginx with the thoroughly familiar ./configure –prefix=/opt/nginx-1.1.0 and make recipe. We can omit the output as unnecessary.
As a hosting platform, OpenIndiana could be surprisingly good. Besides Web servers, you can also find PHP, Python, Ruby, Java and several other packages in the repository, which can be configured or installed with minimum effort. However, some packages need extra care, like PostgreSQL. Let’s see what happens when we install it:
root@openindiana:/home/anton# pkg install pkg:/service/database/postgres-84@8.4.4-0.151
               Packages to install:     2
           Create boot environment:     No
               Services to restart:     1
DOWNLOAD                                PKGS       FILES       XFER (MB)
Completed                               2/2        211/211     9.6/9.6

PHASE                                   ACTIONS
Install Phase                           1/352 The Boot Environment openindiana-2 failed to be updated.
A snapshot was taken before the failed attempt and is mounted here /tmp/tmpfWSs0u. Use 'beadm
unmount openindiana-3' and then 'beadm activate openindiana-3' if you wish to boot to this BE.

pkg: The requested operation cannot be completed due to invalid package metadata.  Details follow:

The action 'dir group=postgres mode=0755 owner=postgres path=var/postgres' in package
'pkg://openindiana.org/service/database/postgres-84@8.4.4,5.11-0.151:20110523T151027Z' has invalid
attribute(s):
  '//var/postgres' cannot be installed; 'postgres' is an unknown or invalid user.
To install PostgreSQL, you need to have created both a user and group named “postgres”. Otherwise, the package simply won’t be able to assign the right permissions to the newly created /var/postgres.
Note the interesting point: the package manager always lets you not just remove the package, but even roll it back, in case it was installed improperly. Because of the underlying ZFS, the package is originally installed into a temporary location, and only after successful installation is the temporary location integrated with the main filesystem, known also as BE (Boot Environment). In the example above, the package has been installed into the temporary location “openindiana-3”.
root@openindiana:/home/anton# beadm list
BE            Active Mountpoint Space Policy Created
openindiana   -      -          5.92M static 2011-07-01 16:11
openindiana-1 -      -          448M  static 2011-08-05 12:10
openindiana-2 NR     /          2.39G static 2011-08-05 12:20
openindiana-3 -      -          56.0K static 2011-08-05 12:45
You can force the integration process, so an unsuccessful package installation would be joined with the main filesystem with something like: beadm activate openindiana-3. However, it’s highly recommended to have proper installation without errors. Create the “postgres” user and group, and then reinstall PostgreSQL.
Service control
It’s time to learn how to control services. The svcs command shows a list of all services. The svcadm command lets you start/stop the desired service. The svccfg and svcprop commands are intended for fine-tuning.
Here’s how to first check service status (disabled == not running), and then start a service:
root@openindiana:/home/anton# svcs apache22
STATE          STIME    FMRI
disabled       Aug_08   svc:/network/http:apache22

root@openindiana:/home/anton# svcadm enable apache22
root@openindiana:/home/anton# svcs apache22
STATE          STIME    FMRI
online         10:02:37 svc:/network/http:apache22
Filesystem organisation
Yes, I’m talking about the structure of ZFS.
root@openindiana:/home/anton# df -h
Filesystem            Size  Used Avail Use% Mounted on
rpool/ROOT/openindiana-2
15G  3.0G   12G  21% /
swap                  2.4G  368K  2.4G   1% /etc/svc/volatile
/usr/lib/libc/libc_hwcap1.so.1
15G  3.0G   12G  21% /lib/libc.so.1
swap                  2.4G   48K  2.4G   1% /tmp
swap                  2.4G   72K  2.4G   1% /var/run
rpool/export           12G   32K   12G   1% /export
rpool/export/home      12G   32K   12G   1% /export/home
rpool/export/home/anton
16G  4.4G   12G  29% /export/home/anton
rpool                  12G   46K   12G   1% /rpool
/dev/dsk/c2t0d0s2     549M  549M     0 100% /media/OpenIndiana_Text_X86
/export/home/anton     16G  4.4G   12G  29% /home/anton
You may recall that we allocated 22 GB of space to OI. However, the root system occupies just 15 GB (the first line). Where is the rest? Note that there are three swap partitions used, mounted at /var/tmp, /tmp, and purely for system usage as /etc/svc/volatile. These swaps “ate” ~7 GB! The rest of the space is dynamically reallocated for the home directory, mounted and seen as /export.
Please keep in mind that ZFS is extremely powerful, in terms of the used features. Briefly, what are these? First, you can see the ZFS sections that are on duty:
root@openindiana:/home/anton# zfs list
NAME                       USED  AVAIL  REFER  MOUNTPOINT
rpool                     10.4G  11.1G    46K  /rpool
rpool/ROOT                3.96G  11.1G    31K  legacy
rpool/ROOT/openindiana    5.92M  11.1G  1.70G  /
rpool/ROOT/openindiana-1   448M  11.1G  1.66G  /
rpool/ROOT/openindiana-2  3.51G  11.1G  2.92G  /
rpool/ROOT/openindiana-3    56K  11.1G  1.90G  /
rpool/ROOT/openindiana-4    91K  11.1G  1.90G  /
rpool/ROOT/openindiana-5    55K  11.1G  1.90G  /
rpool/dump                1.00G  11.1G  1.00G  -
rpool/export              4.36G  11.1G    32K  /export
rpool/export/home         4.36G  11.1G    32K  /export/home
rpool/export/home/anton   4.36G  11.1G  4.36G  /export/home/anton
rpool/swap                1.06G  12.1G   132M  -
Check the history of the changes made to the filesystem:
root@openindiana:/home/anton# zpool history
History for 'rpool':
2011-07-01.16:11:03 zpool create -f rpool c1d0s0
2011-07-01.16:11:04 zfs set org.openindiana.caiman:install=busy rpool
2011-07-01.16:11:07 zfs create -b 4096 -V 1024m rpool/swap
2011-07-01.16:11:10 zfs create -b 131072 -V 1024m rpool/dump
2011-07-01.16:11:32 zfs set mountpoint=/a/export rpool/export
2011-07-01.16:11:33 zfs set mountpoint=/a/export/home rpool/export/home
2011-07-01.16:11:37 zfs set mountpoint=/a/export/home/anton rpool/export/home/anton
2011-07-01.16:22:50 zpool set bootfs=rpool/ROOT/openindiana rpool
2011-07-01.16:24:40 zfs set org.openindiana.caiman:install=ready rpool
2011-07-01.16:24:41 zfs set mountpoint=/export/home/anton rpool/export/home/anton
2011-07-01.16:24:45 zfs set mountpoint=/export/home rpool/export/home
2011-07-01.16:24:49 zfs set mountpoint=/export rpool/export
View the current load on ZFS:
root@openindiana:/home/anton# zpool iostat
capacity     operations    bandwidth
pool        alloc   free   read  write   read  write
----------  -----  -----  -----  -----  -----  -----
rpool       9.45G  12.4G      0      0  1.39K  3.27K
----------  -----  -----  -----  -----  -----  -----
Check the integrity of the filesystem:
root@openindiana:/home/anton# zdb -c rpool

Traversing all blocks to verify metadata checksums and verify nothing leaked ...

        No leaks (block sum matches space maps exactly)

        bp count:          280189
        bp logical:    10321356800      avg:  36837
        bp physical:   10087483904      avg:  36002     compression:   1.02
        bp allocated:  10148575232      avg:  36220     compression:   1.02
        bp deduped:             0    ref>1:      0   deduplication:   1.00
        SPA allocated: 10148575232     used: 43.21%
You can prepare filesystem snapshots (or backups). Decide exactly what parts of the filesystem you want to copy (there’s no reason to snapshot the entire filesystem, especially if the critical parts are stored only in /export/home/anton).
# zfs snapshot -r rpool/export/home/anton@snap4
Later, you will be able to recover it with:
# zfs rollback rpool/export/home/anton@snap4
If a rollback isn’t advisable, but you want to retrieve lost data, you can mount this snapshot at any directory, and copy the required data out:
# zfs clone -o mountpoint=/tmp/snapshot/ rpool/export/home/anton@snap4 rpool/export/home/anton_bak
The possible operations with ZFS, as well as ZFS itself are very promising. It combines backup/restore features, data compression on the fly, LVM manager, etc.
It looks like the Illumos Foundation, responsible for current and future OpenIndiana development, has every chance of bringing, not a rival, but rather, a competitive technology into the Linux world.
In a subsequent article in this series, we will discuss the virtualisation, disk and zone management aspects of OpenIndiana.


