I have installed Linux Mint 17.1 in my system and will show you how to build your custom Linux. You can install the Ubuntu Customization Kit (UCK) from the software manager or from the terminal.
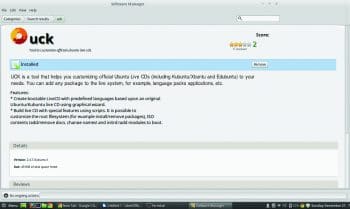
Go to Menu -> Software Manager. Type UCK in the search bar and install it. Refer to Figure 1.
If you want to install it from the terminal, type the following command:
$ sudo apt-get install uck
You need a base ISO image that you can customise. You can download an Ubuntu or Linux Mint ISO image from the website.


Creating a customised ISO
You can launch the Ubuntu Customization Kit from the dashboard or from the terminal.
Go to Menu -> Type UCK and press Enter. From the terminal, type the following command:
$ uck-gui
You will now see a welcome screen (Figure 2).
After you press OK, another screen will ask for your language preference. I chose English. The next screen will ask you to choose the language at the time of booting up. I, again, chose English.
You will then be asked to choose the desktop environment for the customised ISO. Here, I chose Unity and GNOME. You can decide which desktop environment you want as shown in Figure 3.


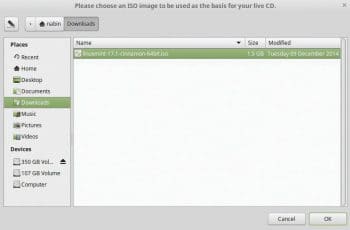
The next screen will prompt you to enter the name for your customised ISO. I entered nabinlinuxmint and pressed OK. You must then choose the base ISO, when prompted. Since I have my base ISO in Downloads, I went to the Downloads folder, selected the base ISO and pressed OK.
The next screen will ask you whether you would like to customise Linux. Select Yes and press OK. Next, you will be asked if you want the Windows option. I selected No but if you select Yes, you can run it under a Windows environment like WUBI.
The next screen will ask you whether to generate a hybrid image. I selected Yes and pressed OK. You will then get a message stating, Now your ISO is ready to build. Your live CD will be created and will be in /home/nabin/tmp/remaster-new-files/livecd.iso.
Now, after you press OK, you will be redirected to your terminal. Here, you have to enter your root password, after which it will start unpacking the ISO that you have chosen. Once the process is over, a screen will prompt you for customisation. Here, you can select Run Console Application and press OK.
Once you press OK, a new terminal window will open. You can now add any number of software that you want. Just use the command apt-get install (name of software).
For example, I installed JDK by issuing the following command:
apt-get install default-jdk
To install the SUMO simulator, the command is:
apt-get install sumo
In this way, you can install any number of software that you want. Once you have finished installing the software, type Exit in the terminal and hit Enter. A screen will pop up and ask you whether you want to run the console application or continue building. If you want to install some other software, select Run console application and press OK, or you can select Continue building and press OK.
After this, a background process will run in the terminal. Here, it will re-build your ISO with all the software and packages that you have installed. Once the building is over, a screen will pop up saying Build Success. After you press OK you will return to your normal terminal.
You can now go to /home/nabin/tmp/remaster-new-files/livecd.iso (in my case) and use the fully loaded ISO.


