The Beaglebone Black is a low-power open source single-board computer. eMMC is short for ‘embedded multi media controller’ which refers to a package integrating Flash memory and a memory controller in the same silicon die. In this article, we flash the eMMC on to the Beaglebone Black using an SD card.
The Beaglebone Black Rev C features a Sitara AM3358BZ100, 1GHz processor and 512MB DDR3L RAM. Its significant features are lower costs, and an increase in both performance and memory size. In this low power device, EEPROM has been reduced from 32KB to 4KB, so that the cost falls. The board features a 4GB NAND (eMMC), and has an HDMI and a USB interface. In addition, it has a GPIO3_21 with a 24.576MHz clock. It also carries a microSD card. On-board Flash memory of 2GB acts as the hard drive for the board to host a Linux operating system and other software development tools.
With a user-friendly, browser-based Bonescript programming environment called Cloud9, a learner can easily program the Beaglebone Black (BBB) board to rapidly prototype electronic systems that interface with real-world applications. As user knowledge develops, the board provides more complicated interfaces including C/C++ functions to access digital and analogue pins aboard the ARM Cortex A8 microprocessor. The full power and capability of the BBB board can be programmed in the underlying onboard Linux operating system, such as Angstrom or Ubuntu.
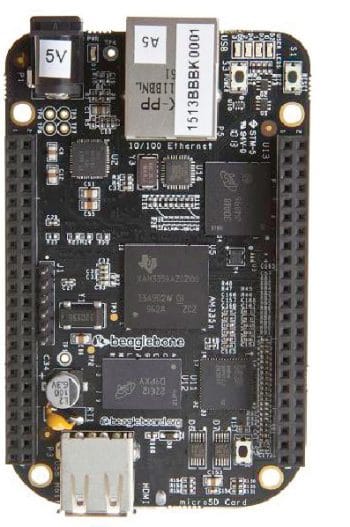
Onboard eMMC
The onboard eMMC uses MMC1 signals. It is also connected to the expansion header. The eMMC device on the Beaglebone Black will need to be disabled by activating the reset line to this device. To do this, you have to write to eMMC first and instruct it to enable the reset. At this point in time, it is not totally clear whether the reset line will do the trick. The best option is not to use the MMC1_CLK and MMC1_CMD signals at all and tie them ‘LOW’.
Note: If the board is powered off without using the onboard power button, then there is a chance of data corruption in the eMMC. The data in the eMMC can be restored by re-flashing the board. It is always recommended to use the latest version of the software.

Steps to flash the board
To flash the board, you need an SD card with a capacity of 4GB or more. Using an SD card smaller than 4GB will not boot the board. Before starting, do remember to take a backup of all the contents of the SD card that you are going to use, as flashing will erase them completely. Now, ensure to download the latest images for the Beaglebone Black from the official Beagleboard website (Figure 2).
The image can also be directly downloaded from the system by using the following command:
$ wget -c http://debian.beagleboard.org/images/BBB-eMMC-flasher-debian-7.5-2014-05-14-2gb.img.xz
After the image is downloaded, unzip it by using the following command:
$ xz -d BBB*.xz
In the above command, BBB* denotes the full name of the downloaded image.
After unzipping the downloaded image, mount the SD card and copy the image on to it.
The command used to mount the SD card is given below:
$ sudo mount /dev/<Device name> E.g. sdb.
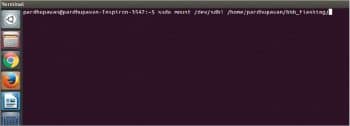
The above command is shown in Figure 3.
In this case, I have created a mount point bbb_flashing and have mounted the SD card. You can go to Devices to confirm whether the SD card has mounted properly or not.
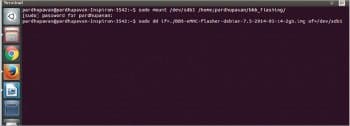
I am going to use the dd command to copy the image file to the SD card. Figure 4 shows the image files being copied to the SD card, in my case.
$sudo dd if=/<path/to/image/file> of=/dev/<SD Cardname>
After the image has been successfully copied on to the SD card, unmount the SD card and insert it into the board, which is in the switched off state.
The command used for unmounting the SD card is as follows:
$sudo umount /dev/(Device name) Eg: sdb1
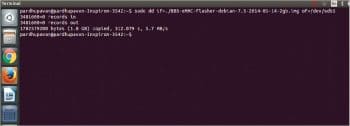
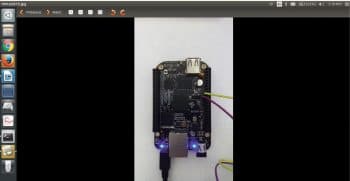
We have to provide an external power supply by holding switch2 on the board. The SD card present in the board functions and tries to flash the board, as shown in Figure 5.
As soon as the LEDs present on the board begin to flash, you can release switch2.
It may take around 45 minutes to one hour to flash the board. When the LEDs present on the board stop blinking and are ON, the board has been flashed completely. In the screenshot (Figure 6), we can see the LEDs glowing constantly after the completion of the flashing process.
As soon as the flashing is over, disconnect the power and try restarting the board by pressing the S2 button.
Finally, press S3 to power up the board and you will have the latest image installed on it.
Beaglebone Black is used in robotics, motor drivers, Twitter printers, data backups, SDR base stations, USB data acquisition and more. It offers great customisation, speed and MATLAB compatibility. It runs Simulink models as standalone applications and the off-course JTAG debugger. The incredible number of pins on the Beaglebone Black and the many bus options allow users to easily interface it with pretty much any device out there.


