Conda, which is included in Anaconda and Miniconda, is an open source package management system and environment management system for installing multiple versions of software packages and their dependencies, and switching easily between them. It is multiplatform, working on Linux, OS X and Windows, and was created for Python programs but can package and distribute any software.
Remember ‘Anaconda’, that horror movie with the tag line “You can’t scream if you can’t breathe.”? Well, a few years ago, Python had an encounter with Anaconda, and today, it acts as the backbone of Anaconda. Confused? I am now referring to Anaconda, the Python distribution that acts both as a package manager and an environment manager. But before we talk a bit more about this Anaconda, here’s a brief introduction to package managers.
Package management
Some applications cannot stand alone. They need the support of other applications to work. The applications that need to be installed for the proper working of an application are considered its dependencies, e.g., IPython needs python-decorator and python-simplegeneric to be installed in a system to work properly.
You can install packages either manually or by using some package managers. If you install a package manually, that package alone will be installed. Its dependencies should, therefore, be installed separately. As the number of dependencies increases, it becomes difficult to install all the packages manually. A package manager deals with this problem. According to Wikipedia, a package manager is a collection of software tools that automates installation, updation, configuration and removal of software in a consistent manner. Thus, a package manager resolves all the dependencies of a given software.
The following are some of the package managers available for Linux distributions.
1. dpkg: A low level package management system, it uses the Debian repository to install packages that come in the .deb format. All the dependencies of the package to be installed will be contained within the .deb file. The command…
dpkg -i <package-name>
…can be used to install a package.
2. apt-get: A more advanced package management system, it makes use of the topological sorting technique to resolve dependencies of the packages, and calls dpkg at the appropriate times for installation or deletion of packages. It uses archives of Ubuntu and Canonical as repositories. The command…
sudo apt-get install <package-name>
…will install the package. sudo is used since package installation requires administrative rights.
3. Aptitude: This provides a graphical interface for apt.
4. pip: pip stands for Pip Installs Packages. It is a Python package manager. Any Python package available in the PyPI repository can be installed using pip. The command for installing this package is:
pip install <package-name>
Though package managers like pip can deal with almost all Python packages, they neglect non-Python packages, which are dependencies of our package of interest.
Package dependencies may differ because package managers differ. This is because different package managers refer to different repositories. Some repositories may contain a lot of packages, and package managers referring to these repositories will install the necessary packages and all the dependencies in that repository.
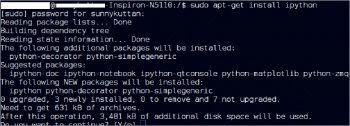
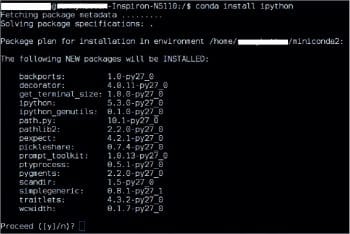
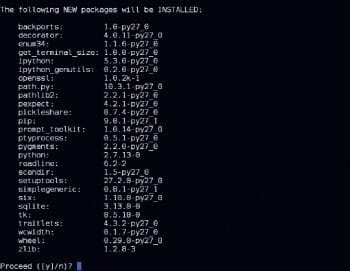
Figure 1, Figure 2 and Figure 3 illustrate the scenario when I tried to install IPython using apt-get, conda and pip. We can see that the list of dependencies is different. Just remember that when more packages are used in a program, they may occupy more space.
Anaconda and Miniconda
A distribution is a collection of pre-compiled and pre-configured packages that work together. Anaconda and Miniconda are free Python distributions that provide both an environment manager and a package manager. They are helpful when you are into deep learning or for data science applications, but are not limited to these domains. Other than the package manager Conda, Conda-build, Python and over 150 packages are automatically downloaded with Anaconda. Miniconda includes Conda, Python and its dependencies only.
The power of Anaconda can be explained with the help of the following example. If you are into deep learning, you may need many packages. Applications using ResNet may require packages like pillow, Keras and Theano for proper working. If you install Anaconda, all these packages are automatically installed. Installation of Miniconda may require us to install many packages as and when required.
According to Continuum Analytics, Conda is an open source environment management system and package management system for installing multiple versions of packages and its dependencies. It was first developed in 2012.
Conda installation
Conda can be installed along with Anaconda or Miniconda. You can also purchase an Anaconda subscription to install Conda. The choice between Anaconda and Miniconda depends on the time available and the disk space. If you have minimum 3GB disk space to spare, and need all the options of Conda, download Anaconda. If you have low disk space and you just need a start with Conda, a minimal version of Anaconda called Miniconda will be the best option, as it takes only 400MB of space. You can download a 32-bit or 64-bit installer. Both the packages are available in Python 2 base and Python 3 base. Installation steps for different operating systems are given below.
Installation in Windows: Download the exe installer for Anaconda or Miniconda. Run the file to get it installed. To open it in a terminal, go to Start button and click on Run, then open the command prompt (cmd).
Installation in Linux: Download the bash installer for Anaconda or Miniconda. Type the following command in a terminal to install 64-bit Python 3 based Miniconda:
bash Miniconda3-latest-Linux-x86_64.sh
…where Miniconda3-latest-Linux-x86_64 is the name of the file you have downloaded.
Once the installation is completed, close the terminal before using Conda. This is done to make sure that the changes made are saved.
Installation in macOS: Anaconda provides a command-line installer and GUI installer for macOS users. If you choose the GUI installer, double click on the .pkg file downloaded, and follow the instructions to get it installed in your system. The GUI installer may take more time. So if you are comfortable with the command-line installer, go for it.
If you download the command-line installer, follow the same procedure as for installation in Linux. You must remember that even if you are not using the bash shell, you must include the bash command for installation.
Miniconda installation is the same as the command-line installation of Anaconda.
Conda without Anaconda or Miniconda: Conda can also be installed using pip, with the following command:
pip install conda
This command will install Conda without Anaconda or Miniconda. This method can be adopted easily in Linux. But it is difficult to install pip in Windows. pip comes along with Python 2.7.9 and above.
To update Conda, type the following command in the terminal:
conda update conda
In Windows, Conda can be uninstalled by following the steps given below:
1. Go to Control Panel.
2. Select Add or Remove Program.
3. Select Python 3.4(Miniconda) and uninstall it.
In Linux and macOS, use the following command to uninstall the Miniconda directory:
rm -rf ~/miniconda
The Miniconda install directory will now be deleted. But you may still be able to access the packages. To delete Miniconda completely from the system, edit ~/.bash_profile and remove the Miniconda directory from the PATH variable. You will no longer have access to Conda packages.
To verify the installation of Conda, type:
conda list
This command will display the installed packages in the terminal if the Conda installation is successful. Otherwise, a message that ‘Conda is not recognised as an internal or external command, operable program or batch file’ will be displayed on the screen.
Why do we need Conda?
Continuum Analytics has developed Conda with a view to supporting data analysis and scientific computing applications. Scientific applications handle huge amounts of data. And a variety of packages may be needed to process such large volumes of data. Conda uses the rich repository of Anaconda, which contains almost all the necessary packages for scientific programming. It is an alternative to the above mentioned package managers.
Another important use of Conda is in creating a virtual environment. You can use virtual box to create a virtual environment. In that case, you are using a separate platform which needs separate resources. But a Conda generated virtual environment doesn’t need a separate platform. It is very easy to get into the environment and to get out of it. You may be familiar with virtualenv, which is a tool similar to Conda.
Conda allows you to install different versions of the same package on the same machine but in different environments. Suppose you need Matplotlib 1.4 to run an application and Matplotlib 1.5 is needed for another application. A single environment cannot accommodate both these versions at the same time. Since Matplotlib 1.5 is the upgraded version of Matplotlib 1.4, you can use Conda to create different environments and install the different versions in them; you can then run the applications in their respective environments without any trouble.
Everything related to an environment is localised. If you install a package in a root directory, its dependencies and related information will be dispersed in different directories in the system and hence deletion may not be possible by using a single command. In case of virtual environments, everything related to an environment will be stored in a single directory. So once the environment is deleted, everything related to that will also be automatically deleted.
Working with Conda
Conda, being a powerful tool, can create environments and can deal with packages. Hence, it is called both an environment manager and a package manager. The general syntax of a Conda command is as follows:
conda [-h] [-V] command.....
… where -h is help and –V gives the Conda version installed in our system.
The following is a list of Conda commands.
- info: Displays current Conda install details including platform, Conda version, Python version, root environment, environment directories, channel URLs and configuration file.
- list: Displays the list of installed packages in a Conda environment.
- help: Shows the list of Conda commands and their options. For example:
conda list -h
…displays the options available for the list command.
- search: Displays a list of packages matching the search string.
- create: Creates a virtual environment for the user to work with.
- install: Installs the specified packages to the Conda environment.
- upgrade: Updates the installed packages to the latest compatible versions.
- remove: Removes the specified packages from the Conda environment.
- config: .condarc can be modified using this command.
- clean: Removes unused packages and caches.
Creating an environment
When you want to experiment with packages, but don’t know their side effects on the system configuration, or you have an application that needs a package version different from the version you have already installed in your system (and the already installed version is needed for working of some other applications), you can create an environment other than the root environment. Such an environment will be virtual, and will work using the existing resources of the platform on which it is created.
The following command will create an environment env_name with no specific packages installed in that environment:
conda create --name env_name
You can alternatively use -n for –name. You can install packages in the environment at the time of creation by modifying the above command as follows:
conda create -n env_name list_of_packages
If you want to install a specific version of a package, you can specify a version number along with the package name. For example, Python 3.4.6 and numpy 1.2 can be installed in an environment named ‘py’ at the time of its creation using the following command:
conda create -n py python=3.4.6 numpy=1.2
It is worth noting that the environment created using Conda is isolated, but not in every sense. Consider the following scenario. You have installed Python 2.7.12 based Miniconda in your system. You are creating a virtual environment without specifying any packages. You may think that, in this condition, a newly created environment cannot serve any purpose because it does not contain any packages. But while installing Miniconda, packages like Python and its dependencies are automatically installed, and the Conda environment created has access to these packages. It has access to the root directory also. In this scenario, if you want to install any other version of Python in the virtual environment, it is advisable to install the package at the time of the creation of the environment itself. The same is true about any package being installed with Miniconda.
Once a virtual environment is created, the command to activate that environment will be automatically displayed in the terminal. In Linux based systems, you can activate it using the following command:
source activate env_name
Installation of packages
Being a package manager, Conda can be used to install or uninstall packages. Packages can be installed in the current environment using the following command:
conda install package_list
If you want to install packages in an environment other than the current environment, use the following command:
conda install -n env_name package_list
As stated earlier, versions can be specified along with the package name.
Other package managers like apt-get and pip can also be used to install packages in a Conda environment. At times, when Conda fails, pip may succeed. This is because some Python packages not available in the Conda repository are available in the PyPI repository.
The following command will uninstall the package and its dependencies from the environment, env_name:
conda remove --name env_name package
The following command will deactivate the environment in Linux based systems:
source deactivate
At the time of creation of an environment, the command to deactivate it will also be displayed to the user. It is unnecessary to specify the name of the environment; the current environment will be automatically deactivated by this command.
The following command will delete the environment and the packages associated with it:
conda remove --name env_name --all
List of packages in an environment
To list the packages installed in a particular environment, use the following command:
conda list --name env_name
If you omit –name env_name, packages in the current environment will be listed.
List of environments
Two commands can be used to get the list of environments. These are:
conda info --env
…or:
conda env list
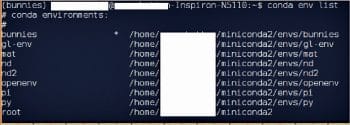
The current environment is distinguished from other environments with a ‘*’ as shown in Figure 4.
Copy an environment
It is possible to copy an environment from one system to another. We can export the configuration of the current environment into a .yml file using the following command:
conda env export > file_name.yml
The yml file generated can be copied to any number of systems. The following code shows the content of a yml file generated when the configuration of an environment f1, which does not have any packages installed in it, is exported to a file:
name: f1
channels:
- defaults
prefix: C:\Users\admin\Miniconda3\envs\f1
The configuration of another environment in which pip is installed looks as follows:
name: n1
channels:
- defaults
dependencies:
- pip=9.0.1=py36_1
- python=3.6.1=0
- setuptools=27.2.0=py36_1
- vs2015_runtime=14.0.25123=0
- wheel=0.29.0=py36_0
prefix: C:\Users\admin\Miniconda3\envs\n1
Packages other than pip in the dependencies list are the dependencies of pip that are automatically installed. Once the file is copied to the destination system, execute the following command to create an environment exactly similar to the one in the source system:
conda env create -f file_name.yml
A folder named n1, which is the name of the environment as specified in the environment file, will be created in the destination system in the path miniconda3/envs. When you execute the above command in the destination system, make sure that your current directory is Miniconda3.
YML file
YAML is an Ansible configuration management language. Every YML file is organised as a list or record containing one or more members. All the members in a list will begin with a ‘-’ (hyphen followed by a single space). A dictionary will be arranged as a ‘key: value’ pair (the colon must be followed by a space). Members of the same list or record will be arranged with the same indentation. This much detail is enough for creating an environment file.
Creating an environment from a file
Just as the configuration of an environment can be copied to a file, it is possible for users to create an environment file themselves. The Conda environment file may contain the following records: name, channels and dependencies. To create an environment using a yml file, the file should contain the name of the environment at least. Channels contain the list of paths or URLs of repositories where Conda should look for the packages to be installed. ‘defaults’ in the channel list indicates that Conda should search in the default repositories while installing packages. Users are allowed to give their priorities for selecting channels. The following code shows a configuration file, in which it is specified that numpy must be installed from the Anaconda repository:
name: e1
channels:
- https://anaconda.org/conda-forge/numpy
dependencies:
- numpy
Dependencies list the packages to be installed in the environment. It is okay if we do not know the dependencies of a particular package. Conda, while creating an environment from the file, will check for the dependencies of the packages specified in the file and resolve them.
Configuration file
The .condarc file is generated by the command:
conda config
This configuration file will help advanced users to set their preferences for Channels, configure proxy servers, set package managers, and much more.
Thus, Conda that comes with Anaconda or Miniconda opens up the magic world of packages for data science applications. It is a powerful alternative to many package managers as well as environment managers.


