


This tutorial takes readers through the process of developing a basic GUI application using JavaFX in Eclipse, and is simple enough for even a beginner to follow.
A graphical user interface or GUI is a computer program that makes it easy to talk to your device. GUIs are used in almost every electronic device worldwide owing to their ease of use, interactive designs and higher accessibility. Even the OS installed in your computer is an example of a GUI. In this tutorial, we will look at developing a basic GUI in Java using the JavaFX library. The only pre-requisite for this tutorial is that you need a basic understanding of the Java language and of the Eclipse IDE. But before that, let’s take an overview of JavaFX.
JavaFX: The future
Oracle defines JavaFX as “…the next step in the evolution of Java as a rich client platform.” JavaFX was first launched by Sun Microsystems in 2007 and JavaFX 1.0 was released in December 2008. The latest release is JavaFX 8 and it comes bundled with JRE/JDK for Java 8; hence, the name. It is widely regarded as the future in developing sophisticated applications – whether Web based, desktop based or for the mobile – and is rapidly replacing Swing owing to its various advantages. These include being lightweight, having CSS styling, sleek design controls, and the use of FXML and Scene Builder.
Scene Builder and its role in GUI development
Oracle.com defines Scene Builder as “… a visual layout tool that lets users quickly design JavaFX application user interfaces, without coding.” That’s right—you can actually design different controls in your application, like textboxes, dropdowns, labels, buttons, etc, without actually coding them in your favourite integrated development environment (IDE). Isn’t that easy and time saving? This is a standalone tool, which can be embedded in your IDE workspace for rapid development. A drag-and-drop feature is available (the same as in the current version of Visual Studio), in which users can select their required controls and add them to their respective work area, modify them and design them by applying CSS stylesheets. An FXML file gets generated automatically in the project you are working on, which is the essence of JavaFX.
After Java 8 update 40, Oracle has stopped providing installers for Scene Builder. They will be provided only as source code. But users need not worry, since an organisation named Gluon has taken up the task of helping the developer community by managing and updating the Scene Builder project. You only have to download it from the Gluon website free of cost, and the installer will install it on your machine.
Configuring JavaFX in Eclipse IDE
In this tutorial, I will use the Eclipse IDE version Neon (4.6) for compiling and running my code, but you can use any version above 3.4. Before we go into the actual coding process with JavaFX, let’s see how we can install the JavaFX plugin in Eclipse because the latter doesn’t provide support for JavaFX, by default. The requisite for this is that you should have Eclipse downloaded on your system and Java 8 installed, because we will use the latest JavaFX 8 to develop our application. If you don’t have Eclipse, you can download it from http://www.eclipse.org/downloads/ and you can also download Java 8 from Oracle’s official website. Once downloaded, start Eclipse and set your workspace for your project. There are two ways in which you can provide support for JavaFX in your project. One is by adding a ‘.jar’ file to your Java project and the other is by installing the JavaFX plugin. Going forward, we will explore both ways.
Adding a JavaFX jar
1. Create a new Java project in your workspace by going to File menu > New and giving the appropriate name.
2. Right-click on your created project and go to the Properties option.
3. Select Java Build Path in the Properties dialogue box.
4. Select the Libraries tab and check whether your JRE system library corresponds to Java version 8. If not, add it.
5. Now click on the Add Library button on the right side and select User Library from the dialogue box that appears. Click Next.
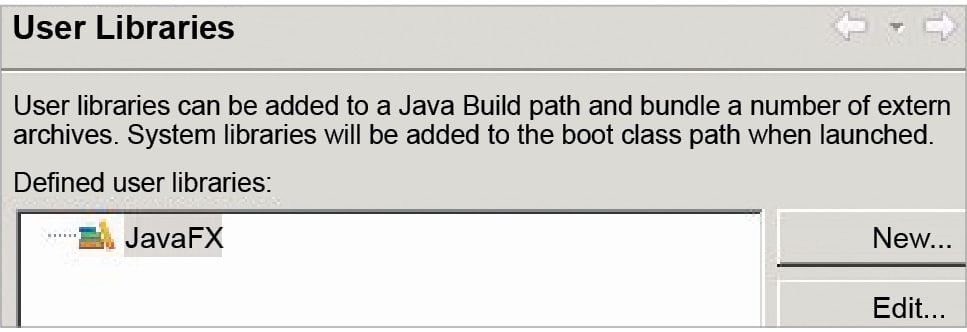
6. Click on the User Libraries button on the Add Library dialogue box and the Preferences window will open.
7. Click New, provide a suitable name for your library and then click OK.
8. Your library will be added to the libraries list as shown in Figure 1. Select that library and click on the Add External JARs button.
9. Now browse the folder where your Java 8 is installed, generally in your C: drive, and select the file jfxswt.jar by going into the folder structure as jdk 1.08_101 > jre > lib.
10. Check the library that you have created and click OK or Apply, wherever applied.
After this, you can start developing your applications in JavaFX. Now, we will take a look at the second way in which we can associate JavaFX with Eclipse. By using this method, you can directly define a JavaFX project, unlike the first method in which we first defined a normal Java project and blended it into JavaFX using the JavaFX JARs.
Installing the JavaFX plugin
1. In the Eclipse IDE, click on the Help menu on the menu bar.
2. Under the Help menu, click on the option to Install New Software.
3. A dialogue box to install new software will open.
4. The Add Repository dialogue box will open. Give any related name to the repository, and in the location textbox copy the above URL again and click OK.
5. Click on Select All to select all the components and click Next.
6. Again click on Next on the next window of the dialogue box.
7. The Review License window will open. Click the I accept terms… radio button or you can also go through the licence agreement if you wish to. Now click the Finish button.
8. It will take some time to install the plugin.
9. After the progress bar shows that Eclipse has completed its installation of the plugin, it will ask you to restart the Eclipse IDE. Click Yes to restart it.
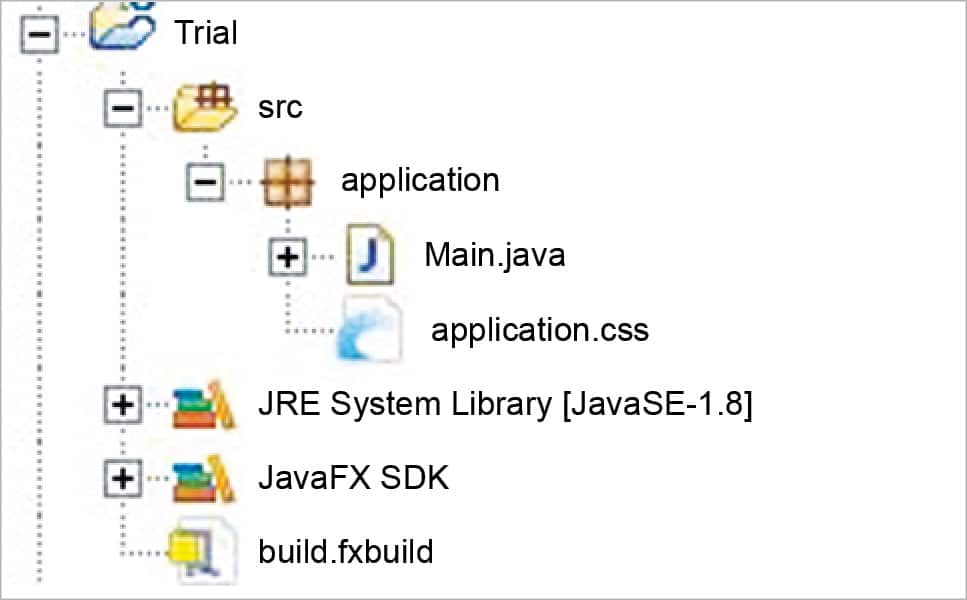
After Eclipse has been restarted, you can verify your installation by creating a new JavaFX project. For this, go to File > New > Project and scroll down to the JavaFX option available in the New Project dialogue box. Expand it, select the JavaFX project and click Next. Give your project an appropriate name, click Next and then Finish. Now you can view a newly created JavaFX project as shown in Figure 2 and you can start working on it.
After having installed the JavaFX plugin and JAR in the Eclipse IDE, we will start off with the coding of our first JavaFX application. This will be a basic GUI with a textbox that will accept any text and a button, which on clicking, will print whatever text you have entered in the textbox. I know it’s a pretty basic implementation, but this will help you to understand how the code works and the different components necessary for the development of multi-tier applications.
Coding your first JavaFX GUI application
I know you must be excited to code your first JavaFX application. You probably know by now that there are two ways to create a project. The first way is to create a normal Java project and associate the necessary JARs with it. The second way is to directly create a JavaFX project. We will use the second method in this tutorial but to develop your application, you can choose any method, based on your convenience. To start off, open the Eclipse IDE, set an appropriate workspace and create a new JavaFX project as mentioned above.
1. After you have created your project, you can view it in your Package Explorer. Expand your project and you will be able to view the src folder and other necessary files, like the JRE system library and the JavaFX SDK attached to it.
2. Expand the src folder and delete the auto-generated package application by choosing the Delete option and right-clicking on it.
3. Now right-click on the src folder and add one package to it.
4. After your defined package has been created, create a new driverClass.java class under that package. Now we can start with the code.
5. Write the code given below in your Java class. This code is without exception handling and I will explain it after running it.
import javafx.application.Application;
import javafx.event.ActionEvent;
import javafx.event.EventHandler;
import javafx.geometry.Insets;
import javafx.scene.Scene;
import javafx.scene.control.Button;
import javafx.scene.control.TextField;
import javafx.scene.layout.BorderPane;
import javafx.scene.layout.VBox;
import javafx.stage.Stage;

public class driverClass extends Application{

public static void main(String[] args) {
// TODO Auto-generated method stub
launch(args);
}

@Override
public void start(Stage primaryStage) throws Exception {
// TODO Auto-generated method stub
primaryStage.setTitle("Open Source For You - First program");
TextField textField = new TextField();
Button btn = new Button("Click me to reveal the above text");
btn.setOnAction(new EventHandler<ActionEvent>() {

@Override
public void handle(ActionEvent event) {
// TODO Auto-generated method stub
System.out.println("Entered text is " + textField.getText());
textField.clear();
}
});
BorderPane pane = new BorderPane();
pane.setPadding(new Insets(70));
VBox paneCenter = new VBox();
paneCenter.setSpacing(10);
pane.setCenter(paneCenter);
paneCenter.getChildren().add(textField);
paneCenter.getChildren().add(btn);
Scene scene= new Scene(pane, 400, 200);
primaryStage.setScene(scene);
primaryStage.show();
}

}

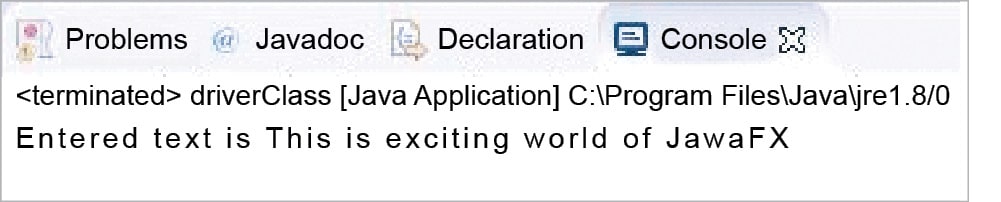
6. Now the coding is complete for your first JavaFX application. Run your project and you will see the window shown in Figure 3.
7. Check your application by typing some text and clicking the button. The output will be printed on the console.
Having coded your application and successfully run it, let’s take a look at the code and how it works.
Every JavaFX application must extend the Application class as done above, and will consist of a Stage which will contain Scene, which will, in turn, contain Layout. Layout will contain all the widgets or controls like buttons, text fields, etc, of your application.
- In the above code, in the Main method, we have called the Launch method, which will launch your application. In the overridden Start method, we have designed our GUI.
- First, we have defined two controls—one text field and one button. To the button, we have added an event handler, which performs the action when we click the button.
- Then we have defined a layout, which is BorderPane in this case; next, we have defined and added VBox to our border pane (through the pane.setCenter() method), which will help us to keep our controls vertically below each other.
- Then, we have added controls to our VBox (through the getChildren() method).
- We have then defined Scene as explained earlier and added our BorderPane to it. Finally, we have added Scene to the Stage, and then we have displayed the Stage using the show() method.
This concludes our tutorial for a basic JavaFX GUI application development through Eclipse. I hope you have got a fair idea about the different components of JavaFX and how to implement them in application development. If you have any doubts, you can reach me at my email.


Great copy-paste. Code is not even complete.