Ubidots is a hosted IoT platform in the cloud that can help to jumpstart your IoT application. It was created in a startup accelerator, and has since powered hundreds of IoT applications across multiple sectors like healthcare, energy, etc, in more than 40 countries.
In this article, we will take a look at the Ubidots platform and understand the process of signing up, ingesting our sensor data into the platform and visualising it.
Features
The platform is available as a service and offers the following features:
- APIs to ingest your sensor data from any device.
- Support for both HTTP and MQTT protocols for data ingestion.
- Dashboards to help you visualise your IoT data.
- Alerts for your users/applications based on your sensor data.
- Integration with more than 20 devices (Adafruit, Arduino, Particle, Tessel and others) to help jumpstart moving your IoT data to the Ubidots platform.
- Free to get started with education and business pricing plans, based on your requirements.
Getting started
The first step in using the Ubidot platform is to sign up for its service. Signing up is free and provides you with the ‘Education plan’, which is sufficient to get started on small projects or proof-of-concept applications. After successfully signing up, you will head to the Ubidots home page, where you can see that you have been provided 5000 credits to use. We will refer to this home page as the Web portal.
Obtaining the Ubidots API Token
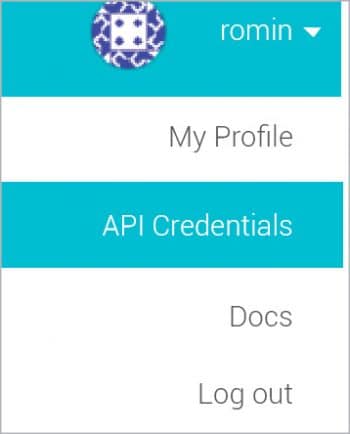
One of the important things to do upfront is to note down your API token. This will be required later in the article when we use the HTTP API as a primary mechanism to ingest our sensor data into the Ubidots platform. The API token is available when you click on your account name on the top right corner of the Web portal and then on the API credentials, as shown in Figure 1.
This will lead to a page where you will be shown an API key and a default API token. Carefully note down the API token and store it. From now, we will refer to this as the API_TOKEN.
Setting up the device
The first thing that we should do is to set up our devices in Ubidots. The ‘Free Plan’ comes with support for 20 devices. Think of these devices as those that collect sensor data like temperature. So let’s assume that we have deployed a device named D1, from which we are capturing temperature data via a standard temperature sensor. You can have up to 20 devices uniquely configured, which will help you filter, track and measure the data that is coming from various devices, by identifying them via the device’s label.
So let’s go ahead and set up a device named D1. Follow the steps given below.
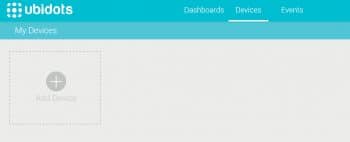
1. From the Web portal, visit the Devices link at the top. By default, when you go to the Devices page, it will show that a default device has been configured. I suggest that you delete it, so that we can start with a clean slate as shown in Figure 2.
2. Click on the Add Device icon. Name the device D1, as shown in Figure 3.
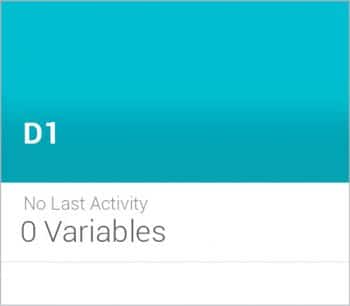
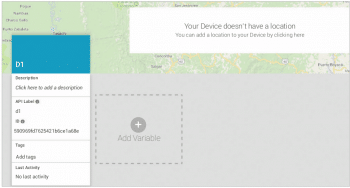
3. Click on device D1. This will lead you to a detailed page, as shown in Figure 4.
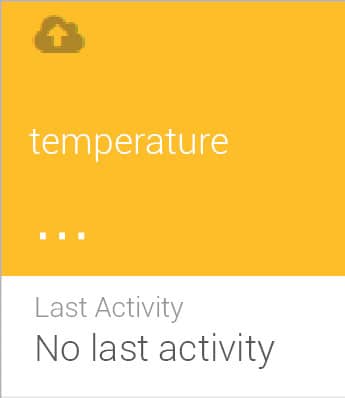
4. Now, we need to add a variable. This variable can be the sensor data that we are tracking — for example, temperature. We can capture more than one variable or sensor data coming from a single device. Click on the Add Variable icon shown in Figure 4. Select Default and then name the variable as Temperature, as shown in Figure 5.
We have successfully created a device D1 that will provide us temperature values, which we will track via the temperature variable that we created and associate with this device. Let us now look at how we can get our sensor values into the system.
The HTTP API
Ubidots supports both the HTTP and MQTT protocols as a way to ingest data into the system. In this article, we will focus on the HTTP API, and demonstrate how you can ingest data into your application. In our case, we will assume that the sensor data is being generated by device D1 and the sensor data is a temperature that is being recorded.
We will need to use the API_TOKEN as well as our device and variable that we have created to push data into the system.
To send values into the system for a specific device and variable, we need to do a HTTP POST to the HTTPs URL, the format of which is given below.
So for our device D1, the {LABEL_DEVICE} will have the value ‘D1’ and for the {VARIABLE_LABEL}, we shall use the value ‘temperature’. In addition, we will need to append the API_TOKEN value to the URL as a request parameter. The variable name to be used for the API_TOKEN is token.
Sample request
For example, if we wish to push the value of 29.5 as the temperature value for device D1, we will need to do a HTTP POST, as follows: https://things.ubidots.com/api/v1.6/devices/D1/temperature/values/?token =API_TOKEN
…with the POST body as follows:
{“value”:”29.5”}
We can also provide the context and timestamp variables that are optional but can be useful for tracking the location of the device, and also the timestamp at which the sensor value was recorded. The data that will be passed in the HTTP POST request body will then be as follows:
{“value”:29.5”,”timestamp”:1464661369000,”context”:{“lat”:19.07,”lon”:72.87}}.
When you send the context, the Ubidots dashboard that we saw earlier will recognise it as a GeoPoint and will plot it on the map.
Sample transactions
We can use the curl utility to do a few sample HTTP POST requests to our endpoint, so that we can see how we can then visualise the data in the Ubidots dashboard.
Here is a sample curl request for inserting temperature sensor data read at device D1:
$ curl -X POST -H “Content-Type: application/json” -d ‘{“value”:29.7, “context
“:{“lat”:19.07, “lng”:72.87}, “timestamp”:1493817120}’ http://things.ubidots.com/api/v1.6/devices/D1/temperature/values?token=
u31S5yB1GaKnD64DwOJsKWYEcje9nv

{“url”: “http://things.ubidots.com/api/v1.6/values/5909899e7625421b68f86883”, “value”: 29.7, “timestamp”: 1493817120, “context”: {“lat”: 19.07, “lng”: 72.87}, “created_at”: “2017-05-03T07:41:18.226”}
Similarly, create a few more values with different timestamps and temperature values to simulate data being received from the sensor.
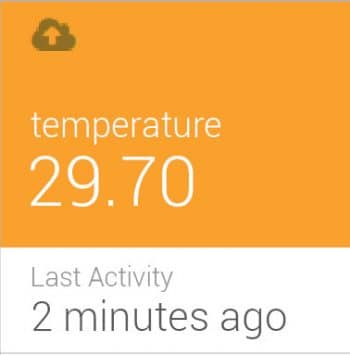
If you visit the Web portal and click on Devices, you will find the value has got recorded, as shown in Figure 6.
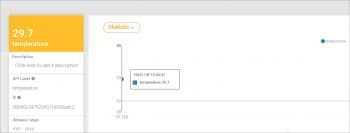
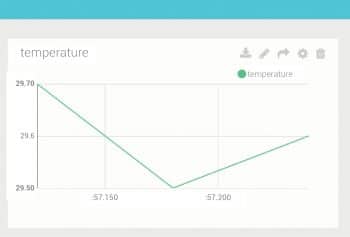
You can even click on the variable, i.e., temperature, to see the details in the graph (Figure 7).
Dashboard
The Ubidots dashboard allows you to create dashboards where you can add graphical widgets to visualise your sensor data from various devices. To create a dashboard, you can go to the Web portal and then click on Dashboard. Simply add a new dashboard, select a chart type from one of the many options offered (for example LineChart), and then select the device and the variable. In our case, it is device D1 and the variable Temperature.
Once you have added that to the dashboard, you can see it as shown in Figure 8.
Events
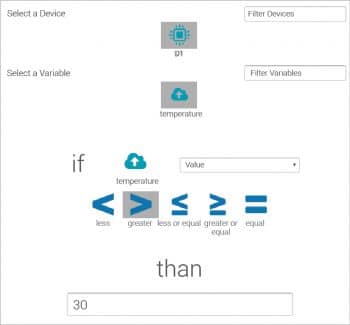
A powerful feature of the Ubidots platform is to set alerts on your sensor data. For example, we can raise an alert in case the temperature goes over 30°C. If that condition is met, we can deliver the alert via email or SMS, invoke a Webhook, etc.
To configure a sample event, you can go to the Web portal and click on Events. Then add a new event, select the device and variable, and define the condition as shown in Figure 9. For example, we have selected the temperature variable for device D1 and set a condition of > 30°C (greater than 30 degrees Centigrade). The graphical configuration is shown in Figure 9.
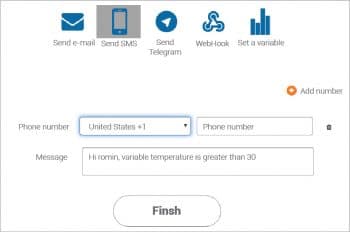
Click on Continue and you will be asked to select the medium via which the alert can be sent. The list of delivery channels is shown in Figure 10.
Click on Finish to create the event, and then the alert will be raised on any sensor value for a temperature that is above 30°C from device D1.
Client libraries
You can integrate the API calls for ingesting data into the system via various client libraries that are made available in Ubidots. Client libraries are available for multiple popular languages like Python, Java, Node.js, Ruby, Android and others. This makes the task of collecting any sensor data from an application straightforward, removing the burden of dealing directly with HTTP request/response handling in your code.
The API methods are not just to save values but also for creating data sources (devices), creating variables, getting values of variables and for the bulk import of variable values.
A sample code in Python for ingesting values is given below:
from ubidots import ApiClient

api = ApiClient(token=’<API_TOKEN>’)

# Get Temperature Variable
my_variable = api.get_variable(‘<VARIABLE_ID’)

# Save Temperature Variable
new_value = my_variable.save_value({‘value’: 29.5})
Ubidots’ pricing
Ubidots has flexible pricing. There are two plans available: Education and Business. The Education plan is free and lets you connect up to a maximum of 20 devices, allows data retention for 30 days and a maximum sensor data ingestion rate of 60 per minute. This should be sufficient for most hobbyists and enthusiasts who want to get started with the platform. The Business plan caters to a greater number of devices, an on-demand ingestion rate and a management suite. The pricing is available on call. You can find out more about the differences between the Education and Business plans on the pricing page.
Ubidots is a powerful hosted IoT platform that provides features to ingest, process and visualise your IoT application data. It is quick to get started with, and provides easy-to-use REST APIs to help you decouple your sensor infrastructure and focus on pushing the data out to the platform, where you can transform it to a higher level application domain. It is an excellent platform to build your IoT proof-of-concept application and take your idea to a wider audience.


