

This article explores NativeScript, which is an open source framework for building native apps using JavaScript. NativeScript also supports Angular, Vue.js and TypeScript. Developers can use it to build apps for Android or iOS platforms with the same code.
Mobile phones or smartphones have already made their way into the average person’s life, with many using their mobile app as their primary device. No matter whether you run a big business or a startup, not having a mobile presence is simply no longer an option.
With the context already set and assuming you are convinced enough to build your next (or very first) app, I would quickly like to touch upon some of the pain points of mobile app development.
- Whether it’s a company launching an app, or a developer doing so, you would want your idea to be accessible to the maximum number of users, but the mobile world, even today, is quite heterogeneous. For example, if you want to target iOS and Android users, using their native technologies, you need a completely different skill set to develop apps for both the platforms. Android native apps are generally built on Java and iOS apps on Swift.
- There are intermediary solutions that allow you to port your Web apps onto mobile devices, but they generally provide a poor user experience as most users prefer the native look and feel of the device’s ecosystem. Besides, the Web app approach does not always provide the best performance, compared to native counterparts.
Introducing NativeScript
NativeScript tries to address many of these issues by allowing developers to build native apps mostly in JavaScript. This is one of the key differentiators between Apache Cordova and NativeScript. The former allows you to write applications in HTML and JavaScript that run inside WebView, and you need to write platform-specific plugins to access native APIs of the device. NativeScript, on the other hand, allows your JavaScript code to natively run on the device providing 0-Day API support for the platform.
So how does NativeScript work?
It is good to know the architectural details if you are an application developer but mostly the NativeScript runtime will take care of most of the low-level complexities for you.
NativeScript uses reflections to build a list of metadata for native APIs of the platform it’s running on, making direct transaction of your JavaScript code to its native equivalents. In simplest terms, the NativeScript runtime acts as a bridge between your JavaScript code and the native APIs.
For example, you can declare a button using the <Button> tag in NativeScript. When this code is executed by NativeScript runtime, it will be mapped to the UIButton on iOS and to the android.widget.Button on an Android phone.
The NativeScript runtime may seem like magic, but it is not — the architecture isn’t all that complex. Everything starts with JavaScript virtual machines, as they’re what NativeScript uses to execute JavaScript commands. Specifically, NativeScript uses V8 on Android and JavaScript Core on iOS. Because NativeScript uses JavaScript VMs, all the native API-accessing code you write still needs to use JavaScript constructs and syntaxes that V8 and JavaScript Core understand.
Building a demo application using NativeScript
With the theory out of the way, let’s get started with a hands-on example. In this demo I’ll cover the following topics.
- Setting up the NativeScript development environment
- Building a very simple RSS reader application that covers most coding aspects of NativeScript
Setting up the NativeScript Development environment
- Install Node.js: NativeScript CLI uses Node.js so you will need it to be installed on your system. Head on to https://nodejs.org/ and install its latest version.
- Install the NativeScript CLI using the admin command prompt or terminal with super user privileges, using the following command:
npm install nativescript -g
c. To build the apps for the platform, you will need a bunch of dependencies like Java, Android SDK, Xcode, etc. Fortunately, the tns command provides quick-start scripts for Windows and macOS to automate the installation and configuration of these dependencies. If you are using a Windows machine, type in the following command using a command prompt with administrator privileges:
@powershell -NoProfile -ExecutionPolicy Bypass -Command “iex ((new-object net.webclient).DownloadString(‘https://www.nativescript.org/setup/win’))”
On the Mac, you can run the following command with super user privileges:
ruby -e “$(curl -fsSL https://www.nativescript.org/setup/mac)”
You can refer to the official installation guide at https://docs.nativescript.org/angular/start/quick-setup.
Note: To build iOS applications, you need a Mac machine. Later in the article, we will look at how to build your code for iOS using the cloud build environment.
Building a very simple RSS reader application that covers most of the coding aspects of NativeScript
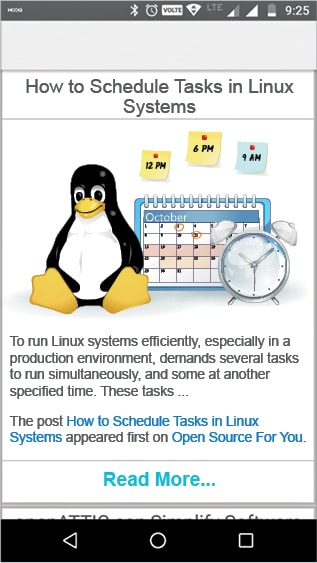
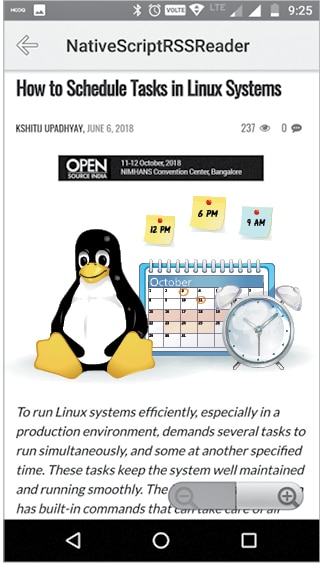
In this sample application, we will create a small RSS reader. The main screen will load the RSS feed from a URL like https://www.opensourceforu.com/feed/, and display the feed and its description on the first screen. On clicking the ‘Read more’ button, it will load the link of the post in a Web view in the second screen. Please note, to keep the demo simple and concise, some liberties in the coding standards might have been taken. Screen shots of the application we will be building are shown in Figures 1 and 2.
- A NativeScript project is necessarily a Node project, and there are sample templates available for JavaScript, TypeScript and Vue.js. In this example, we will create a JavaScript project. Run the following command (RSSReader is the folder name where all the project files will be created):
tns create RSSReader
- You can test your project using the following command:
tns run android --emulator
Please change the environment to iOS if you want it to run on an iPhone, and you can also remove the –emulator flag if you have a physical device connected.
- Now open the project in your favourite editor (I have used Visual Studio Code with the NativeScript plugin installed).
- NativeScript allows you to install Node modules in the project (although not all of them available out there will work). In this example, we will use the nativescript-xml2js plugin for parsing the RSS feed xml. You can install it using the following command:
npm install nativescript-xml2js --save
- NativeScript uses the MVVM pattern for the separation of concerns. The view is what gets rendered as the UI of the application, and NativeScript has its own XML syntax for it (we will also look at how you can generate one, using code). The model is where the data is stored and the view model file is used for gluing it together. NativeScript supports two-way data binding between the view and the model. Open the main-view.xml file and paste the following code:
<?xml version=”1.0” encoding=”UTF-8”?>

<Page xmlns=”http://www.nativescript.org/tns.xsd” loaded=”pageLoaded” class=”page”>

<Page.actionBar>

<ActionBar title=”RSS Reader Home” />

</Page.actionBar>

<GridLayout columns=”*” rows=”*”>

<ListView row=”1” col=”0” items=”{{ feeds }}”>

<ListView.itemTemplate>

<GridLayout class=”listItem” columns=”*” rows=”auto,auto,auto” verticalAlignment=”top”>

<Label class=”listItemHeader” text=”{{ title[0] }}” textWrap=”true” row=”0” col=”0” verticalAlignment=”center” />

<WebView isUserInteractionEnabled=”false” row=”1” col=”0” src=”{{ description[0] }}” />

<Label class=”listItemReadMore” url=”{{ link[0] }}” text=”Read More...” tap=”{{ $parents[‘ListView’].onItemTap }}” row=”2” col=”2” />

</GridLayout>

</ListView.itemTemplate>

</ListView>

</GridLayout>

</Page>
Here we have defined a very simple UI. What is inside the {{}} uses the data-binding capabilities of NativeScript and the named properties defined are ViewModel.
Now open the main-vew-model.js file and enter the following code:
var observableModule = require(“data/observable”);

var frame = require(“ui/frame”);

var webViewModule = require(“ui/web-view”);

var xmlModule = require(“tns-core-modules/xml”);

var actionBarModule = require(“ui/action-bar”);

var pageModule = require(“ui/page”);

var stackLayoutModule = require(“ui/layouts/stack-layout”);

var rssFeedLoader = require(“./rss-services”);

function MainViewModel() {

var viewModel = observableModule.fromObject({

feeds: [],

onItemTap: function(args) {

let url = args.view.url;

frame.topmost().navigate({

context: {

url: url

},

create: generateWebRenderingPage,

transition: {

name: “slide”,

duration: 250,

curve: “easeIn”

}

});

}

});

var loader = new rssFeedLoader();

loader.loadData(viewModel);

return viewModel;

}

module.exports = MainViewModel;

function generateWebRenderingPage() {

var webView = new webViewModule.WebView();

webView.src = this.context.url;

var stackLayout = new stackLayoutModule.StackLayout();

stackLayout.addChild(webView);

var navigationBtn = new actionBarModule.NavigationButton();

navigationBtn.on(‘tap’, function() {

frame.topmost().goBack();

});

navigationBtn.android.systemIcon = “ic_menu_back”;

navigationBtn.text = “back”;

var actionBar = new actionBarModule.ActionBar();

actionBar.navigationButton = navigationBtn;

var page = new pageModule.Page();

page.content = stackLayout;

page.actionBar = actionBar;

return page;

}
In the above code, we have done a couple of things. First, we have defined the imports, then we have created the view model, inside which we have the onItemTap method bound to the click of the read more element. This will get the URL for the post and pass it to the generateWebRenderingPage function. This function defines a new page, purely by using the code (and not xml as we have done in main-view.xml). This is to demonstrate that if you want to declare the view using code, this is how it can be done.
We have also used the frame object to navigate from one page to another and back to the main page by clicking the back button in the second page.
For loading the actual feed from the URL, we have created a module called RSSFeadLoader, which has been used in this file. To define this module, create a file called rss-service.js and paste the following code into it:
var httpModule = require(‘http’);

var parseString = require(‘nativescript-xml2js’).parseString;

function RSSFeadLoader() {

var feeds = [];

this.loadData = function(context) {

httpModule.getString(“https://www.opensourceforu.com/feed”).then((r) =>

{

parseString(r, function(err, result) {

feeds = result.rss.channel[0].item;

context.feeds = feeds;

return feeds;

});

}, (e) => {

console.log(“Error loading RSS Feed”);

});

}

}

module.exports = RSSFeadLoader;
The above code will load the RSS feed from the opensourceforu.com website and bind it to the feed property of the model.
Finally, we have to bind the model’s context with our view that we have declared in the main-view.xml file.
We will do this in the main-page.js file with the following lines of code:
var MainViewModel = require(“./main-view-model”);

var mainViewModel = new MainViewModel();

function pageLoaded(args) {

var page = args.object;

page.bindingContext = mainViewModel;

}

exports.pageLoaded = pageLoaded;
Now head to app-root.xml file and set your default page to main-view.xml by setting the defaultPage property. The property should be set as “defaultPage=” main-page”. This is pretty much all you need for the application. You can now test it using the tns run android or tns run ios command.
The entire code for the application (with better comments) can be found at github.com/shivasaxena/RSSReaderMobileApp, so you can set up the development environment and clone the code from GitHub to try it out.
Tools to try out
- Building the same code for a different platform: In case you are using the Windows platform and want to build for iOS or need support, you can use NativeScript Sidekick. It allows you to have 100 builds/month/user for free. You can check it out at NativeScript Sidekick (https://www.nativescript.org/nativescript-sidekick).
- Quickly trying out NativeScript: If you want to quickly try out NativeScript without any local setup, you can head to https://play.nativescript.org.
- NativeScript documentation: To further explore NativeScript, the official documentation can be found at https://docs.nativescript.org.


Nice Brief about native script Shiva. I think people should really move from Cordova to NativeScript now.