


This article discusses an event-driven networking framework called Twisted Python, with which one can build a Web server, email server, DNS server, IRC bot and client, as well as server protocols.
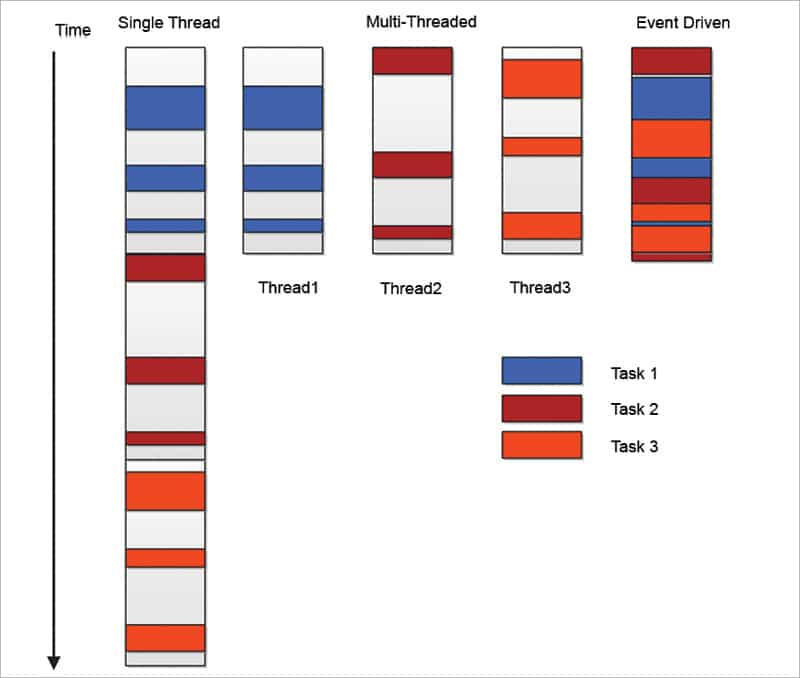
An event-driven program is a programming paradigm in which the flow of the program is determined by various events (user actions, sensor outputs or messages). This is in contrast to other programming paradigms, the most simple probably being a single-threaded synchronous program.
If your program is executed from top to bottom, and if you have an expensive operation like a database query or a network request, then one option is for this program to wait until it gets a response. This may not be time-efficient, but is certainly an easy option. The second option is to spit out this task into different threads of control, which will be managed by the operating system; and hence we get some progress. But this thread operation may be inconsistent in the case of file writing or value updating. In that case, you have to implement some locking mechanism to make sure data is not corrupted. The next option is the event-driven program, which involves single-threaded execution.
An event loop accompanies event-driven programming
An event loop runs the following tasks in a continuous loop:
- Event detection
- Event handler triggering
Whenever the event loop is run, it detects which event has happened. Then, the event loop must determine the event callback and invoke it. The event loop is one thread running inside one process, which means that when an event happens, the event handler runs without interruption. A good choice for an event-driven program is when there are several tasks that can happen, probably independently.
Let us explore some components of Twisted Python.
Reactor: If you have an event-driven model, you need some kind of event loop that handles the listening to and dispatching of events for processing. That event loop is called the reactor in Twisted. The latter handles several kinds of events, such as network events, file events and timers.
Transport: Transport represents the connection between two endpoints communicating over a network. When we think about the OSI layer model, we think about the transport layer protocols, which are TCP, UDP and SSL.
Protocol: In addition to transport, we have a higher level of the protocol too. Once you have received some bytes from the network, protocols describe how to process network events asynchronously. These map to the OSI application layer protocol. Examples are HTTP, IMAP, IRC and DNS.
Twisted is written in Python 2.7; however, some parts of it do not get converted to Python 3.7. In this article, I am going to demonstrate the DNS server, which gives a dynamic response. We are going to use Python 3 to run the code. First, install Twisted in Python by using the following command:
Pip install twisted
If Pip works for Python 2, then you can use the following command:
python3 -m pip install twisted
After installing Twisted in Python 3, run the following code, which is also available at https://github.com/mohitraj/mohitcs/blob/master/dns1.py.
Import the following modules:
from twisted.internet import reactor, defer
from twisted.names import client, dns, error, server
import argparse
The following class calculates the answers to certain queries based on the query type and name:
class DNS_Reslover(object):
def __init__(self, p,ip):
self._pattern = p
self._network = ip
def _dynamicResponseRequired(self, query):
Check the query to determine if a dynamic response is required.
if query.type == dns.A:
labels = query.name.name.split(b’.’)
#import pdb;pdb.set_trace()
if labels[0].startswith(self._pattern.encode()):
return True
return False
The following method calculates the response to the query:
def _doDynamicResponse(self, query):
name = query.name.name
labels = name.split(b’.’)
parts = labels[0].split(self._pattern.encode())
lastOctet = parts[1]
#import pdb;pdb.set_trace()
address=self._network.encode()+b”.”+ lastOctet

answer = dns.RRHeader(
name=name,
payload=dns.Record_A(address))

answers = [answer]
authority = []
additional = []
return answers, authority, additional
The query method checks if the query should be answered dynamically; otherwise, it is dispatched to the fallback resolver.
def query(self, query, timeout=None):
if self._dynamicResponseRequired(query):
return defer.succeed(self._doDynamicResponse(query))
else:
return defer.fail(error.DomainError())
The main() function runs the server:
def main():

factory = server.DNSServerFactory(
clients=[DNS_Reslover(pattern,IP), client.Resolver(resolv=’/etc/resolv.conf’)]
)
protocol = dns.DNSDatagramProtocol(controller=factory)
reactor.listenUDP(53, protocol)
reactor.listenTCP(53, factory)
reactor.run()
The main_arg() function creates the command line arguments:
def main_arg():
version1 = 1.0
parser = argparse.ArgumentParser()
parser.add_argument(‘-o’, nargs=2, help=’First give pattern then IP’)
parser.add_argument(‘-v’, help=”Version Number”,action=’store_const’,const=version1 )

args = parser.parse_args()
try :
if args.o and len(args.o)==2:
pattern, IP= args.o
main(pattern,IP)

elif args.v:
print (“Current Version is “,args.v)
else :
print (“Use -h for the options”)
print (“For more help email to mohitraj.cs@gmail.com”)
except Exception as e :
print (e)

if __name__ == ‘__main__’:
main_arg()
You can run the code as shown in the following command:
Python dns1.py -o workstation123.mohit.com 172.16.2
Let’s convert the above code to .exe, which can be run using Python. To convert Python code to .exe, we will use the Pyinstaller module, which I have at path C:\py3.7. Now copy the code to the directory C:\py3.7 and run the following command:
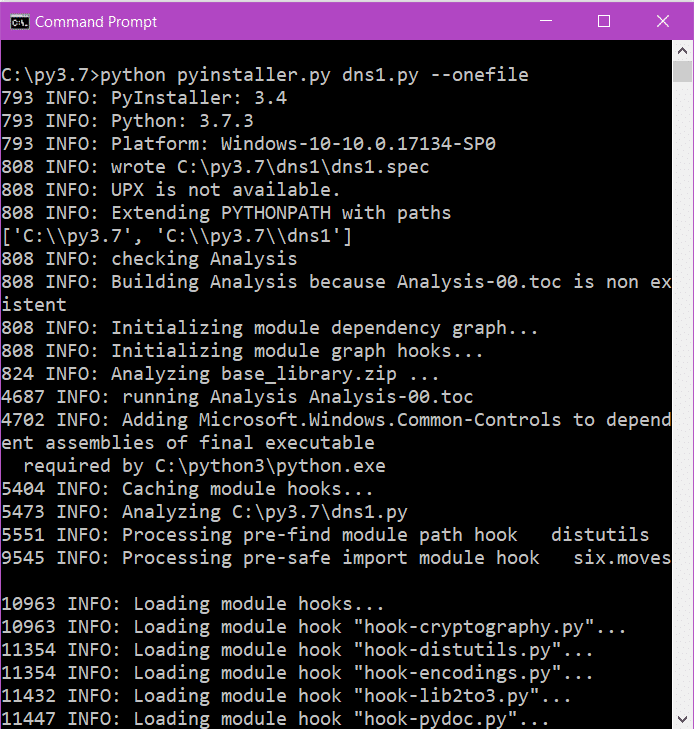
Python pyinstaller.py dns1.py –onefile
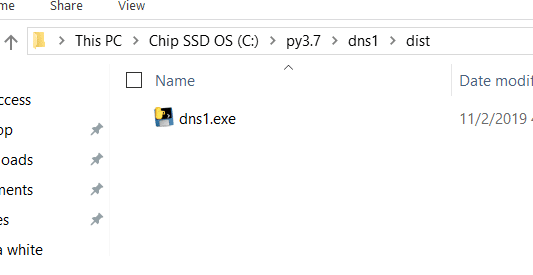
For more help, refer to Figure 2. After successfully running the command you can find the exe file at the path specified in Figure 3.
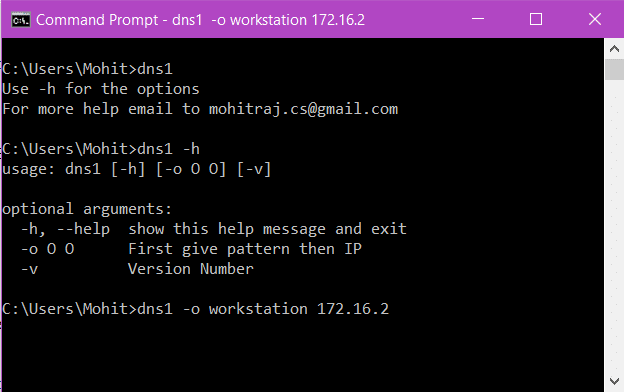
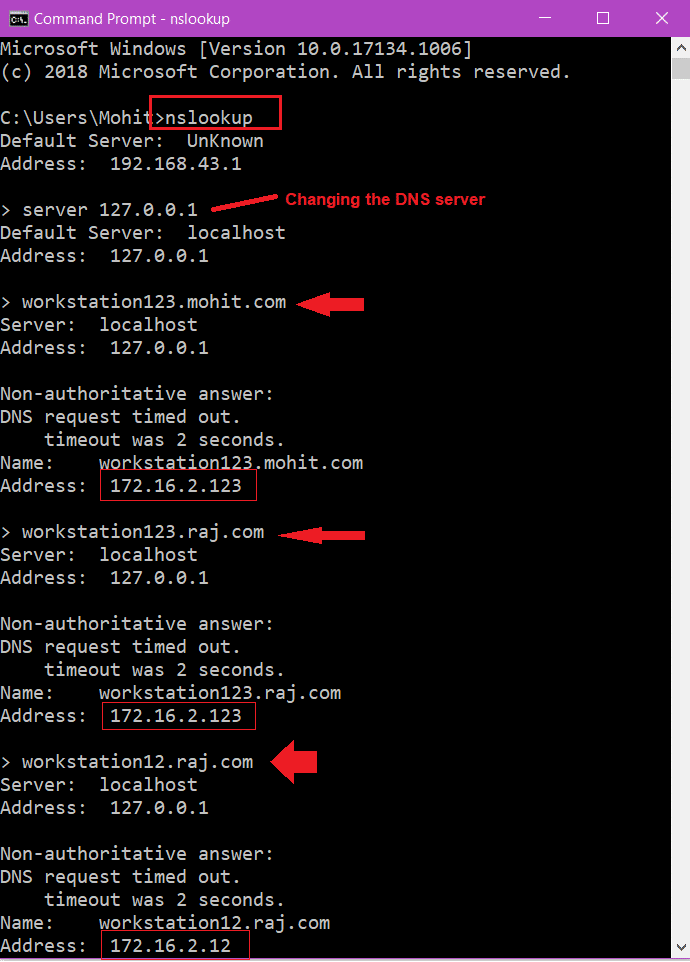
Now copy the exe file dns1.exe to the C:/Windows folder so that it can be used as a command. Next, open the command prompt and execute the command as shown in Figure 4. Your code in the form of exe is running and ready to serve as the dynamic host resolver. Let us fire the DNS queries with the help of NSlookup. Figure 5 shows the queries and how to get the desired responses. In this figure, the red arrows indicate the query typed by the user, and the corresponding IP addresses in rectangles are returned by the Python code.


