

Computer vision imparts human intelligence and instincts to a computer. This field of computer science works on enabling computers to see, identify and process images the same way the human eye does. OpenCV is a great tool to accelerate computer vision in commercial products.
Let us say you and your family went on a vacation and you uploaded a few pictures on Facebook. However, since it takes time to tag the names in each picture, Facebook is intelligent enough to do that for you. How do you think this auto-tag feature works? Well, it works through computer vision.
What is OpenCV?
OpenCV was built to provide a common infrastructure for computer vision applications and to accelerate the use of machine perception in commercial products. This library has more than 2500 algorithms used to detect and recognise human faces, identify images, track moving objects, and extract 3D models of objects.
Installation of OpenCV
To install OpenCV for Python, use the following code in the terminal:
$ python3 -m pip install opencv-python
$ python3 -m pip install opencv-contrib-python
How does a computer read an image?
One look at Figure 2, and we can see that it is a picture of the Times Square in New York. But computers cannot analyse that, since they don’t have any intelligence.
For any image, there are three primary colours — red, green and blue. A matrix is formed for every primary colour, and later, these matrices combine to provide a pixel value for the individual R, G, and B colours. Each element of these matrices provides data pertaining to the intensity of brightness of the pixel. It reads any image as a range of values between 0 and 255.
How are videos and images captured through a camera?
import cv2
cap = cv2.VideoCapture(0)
while True:
ret, frame = cap.read()
cv2.imshow(“Capturing”,frame)
if cv2.waitKey(1) & 0xFF == ord(‘q’):
break
cap.release()
cv2.destroyAllWindows()
As seen in the above piece of code, we need to import the OpenCV library, cv2. VideoCapture() triggers the camera, and cv2.imshow shows what the camera is capturing by opening a new window. cv2.waitKey makes the window static until the user presses a key.

Basic functions of OpenCV
To load images using OpenCV and converting them into grayscale, type:
import numpy as np
import cv2

img = cv2.imread(‘Image123.png’,0) #write the name of an image
cv2.imshow(‘image’,img)
k = cv2.waitKey(0) & 0xFF
if k == 27: # wait for ESC key to exit
cv2.destroyAllWindows()
elif k == ord(‘s’): # wait for ‘s’ key to save and exit
cv2.imwrite(‘Firefox_wallpapergray.png’,img)
cv2.destroyAllWindows()
cv2.imread reads the selected image, and the 0 parameter turns the image into grayscale; cv2.imshow shows the converted image.
Drawing and writing on an image can be done as follows:
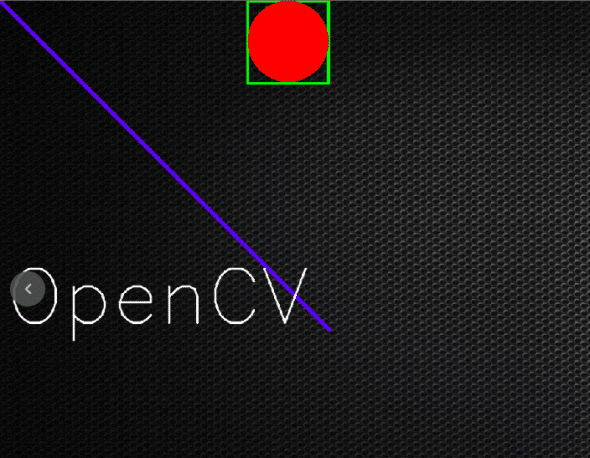
import numpy as np
import cv2
img = cv2.imread(‘black.jpg’,cv2.IMREAD_COLOR)

cv2.line(img,(0,0),(511,511),(255,0,0),5)
cv2.rectangle(img,(384,0),(510,128),(0,255,0),3)
cv2.circle(img,(447,63), 63, (0,0,255), -1)

font = cv2.FONT_HERSHEY_SIMPLEX
cv2.putText(img,’OpenCV’,(10,500), font, 4,(255,255,255),2,cv2.LINE_AA)

cv2.imshow(‘image’,img)
cv2.waitKey(0)
cv2.destroyAllWindows()
cv2.line draws the line with the given coordinates on the image, cv2.rectangle and cv2.circle draw a rectangle and circle respectively, and cv2.putText writes the given text. Here, we have used the Hershey Simpex font. The output is shown in Figure 4.
Feature and template matching
Template matching is basically a part of one image matching another image. The code for this is as follows:
import cv2
import numpy as np
img_bgr=cv2.imread(‘sc1.png’)
img_gray=cv2.cvtColor(img_bgr, cv2.COLOR_BGR2GRAY)

template=cv2.imread(‘sc2.png’,0)
w,h=template.shape[::-1]

res=cv2.matchTemplate(img_gray,template,cv2.TM_CCOEFF_NORMED)
threshold=0.8
loc=np.where(res>=threshold)

for pt in zip(*loc[::-1]):
cv2.rectangle(img_bgr, pt, (pt[0]+w, pt[1]+h), (0,255,255),2)

cv2.imshow(‘detected’,img_bgr)
cv2.waitKey()
cv2.imread reads the selected image, cv2.cvtColor converts the image into grayscale, w and h variables are the positions of x and y-axis, cv2.matchTemplate helps to match the common area of two images with threshold 80 per cent, and cv2.rectangle marks the area that is matching in the image.
The output is shown in Figures 5 and 6.


We can see that the cropped image ‘black ops’ is matched with the portion of the full image, and the area is outlined by a yellow rectangle.
Gradients and edge detection
For detecting gradients and edge, type:
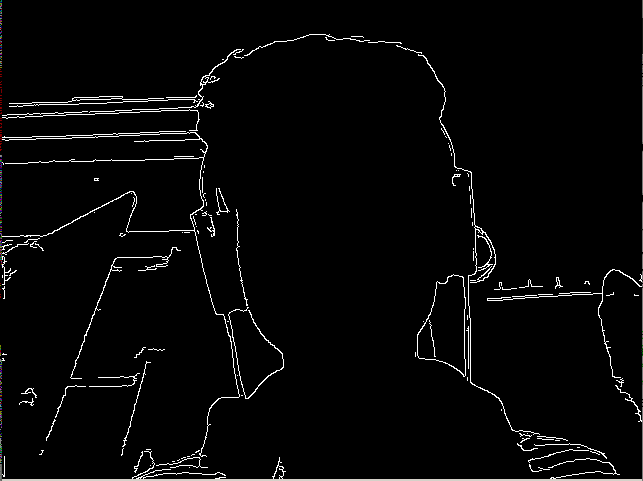
import cv2
import numpy as np
cap=cv2.VideoCapture(0)
while True:
_, frame=cap.read()
a= cv2.Laplacian(frame,cv2.CV_64F)
x= cv2.Sobel(frame,cv2.CV_64F,1 ,0, ksize=5)
y= cv2.Sobel(frame,cv2.CV_64F,0 ,1, ksize=5)
edge= cv2.Canny(frame, 100, 200)
cv2.imshow(‘original’,frame)
cv2.imshow(‘laplacian’,a)
cv2.imshow(‘sobelx’,x)
cv2.imshow(‘sobely’,y)
cv2.imshow(‘edge’,edge)

k=cv2.waitKey(5) & 0xFF
if k == 27:
break
cv2.destroyAllWindows()
cap.release()
cv2.Laplacian converts the image into the gradient, while cv2.Sobel converts it into a horizontal and vertical gradient. We use cv2.CV_64F as a standard label.
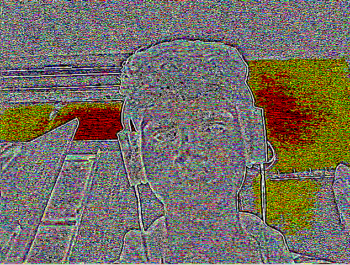
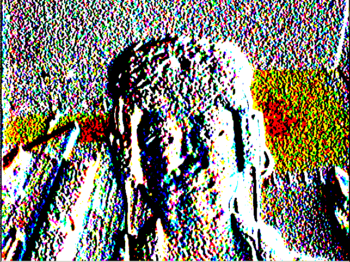
The output is shown in Figure 7.
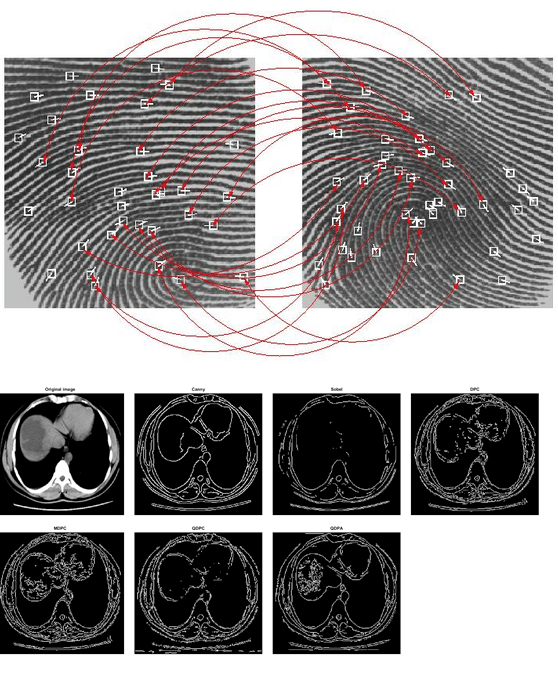
Edge detection is pervasive in many applications such as fingerprint matching, medical diagnoses and licence plate detection. These applications basically highlight the areas where image intensity changes drastically, and ignore everything else.
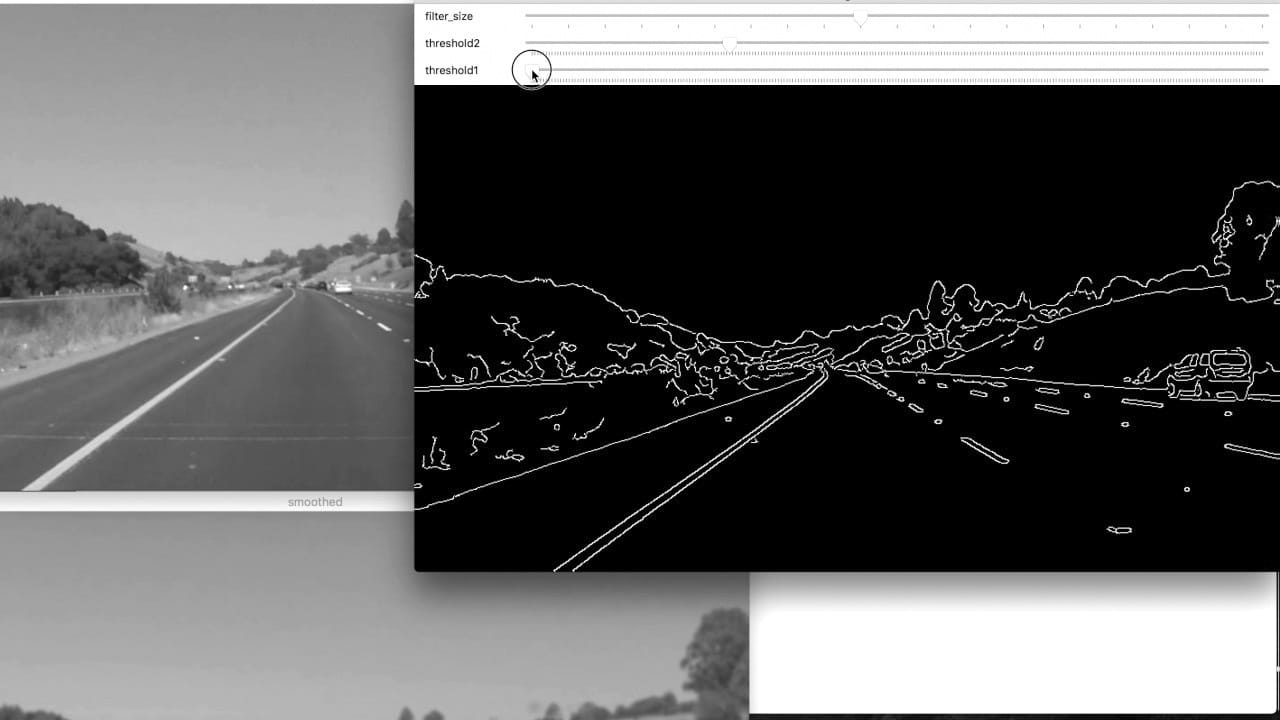
Edge detection is also used in self-driving cars for lane detection.

Other features of OpenCV include motion detection, intrusion detection, homography, corner detection, colour filtering, thresholding, image arithmetic, etc.
Statistical machine learning libraries used by OpenCV include Naive Bayes classifier, K-nearest neighbour algorithm, decision-tree learning, meta algorithm, random forest, support vector machine, and deep and convolutional neural networks.
Some popular applications of OpenCV are:
Driver drowsiness detection (using a camera in a car) by alerting the car driver with a buzz or alarm.
Counting vehicles on highways (can be segregated into buses, cars, trucks) along with their speeds.
Anomaly detection in the manufacturing process (the odd defective product).
Automatic number plate recognition (ANPR) to trace vehicles and count the number of passengers.
OpenCV is also used for data imaging to provide better diagnosis and treatment for a range of diseases.


