


DevOps practices use automation to carry out repetitive tasks, leaving you free to focus on the more challenging but fun parts of building software. This article will explain how to use GitHub Actions, the automation platform baked into all GitHub projects for free.
gitHub Actions makes it easy to automate all the software workflows that you see in your program — from code reviews, branch management and issue triaging, to even a complete CI/CD pipeline.
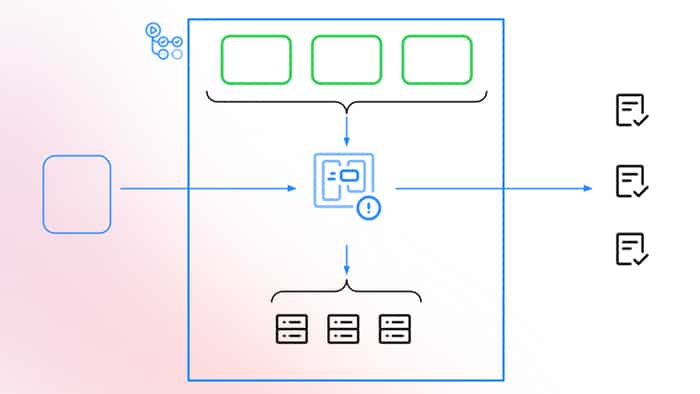
GitHub Actions runs workflows when other events happen in your repository, such as when code is pushed, a pull request is opened or an issue is created. ‘Workflows’ are YAML specs that are defined within the .github/workflows directory in your repository. These workflows contain one or more ‘jobs’ that can be run sequentially or in parallel. Each job will run inside its own virtual machine ‘runner’ or inside a container. Each job has one or more steps that either run a script you define, or run an ‘action’ which is a reusable extension that can simplify your workflow. These actions can be either those that you create yourself, or use for free from the GitHub Marketplace. Figure 1 illustrates how all of this works together in accomplishing the automation that you need.
Let’s understand this better through an example that many of us might have seen in our CI pipelines — when code is pushed, create a build (Figure 2).
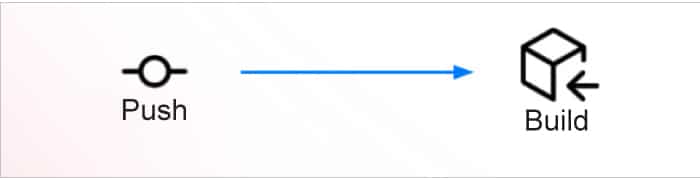
In this example, the ‘event’ that happens in your repository is a ‘push’ event, and you need automation to create a build of your code. To accomplish this, you need to create a workflow YAML file within the .github/workflows directory, and define all the necessary components of jobs, runners and steps necessary for your build to take place.
Workflow files
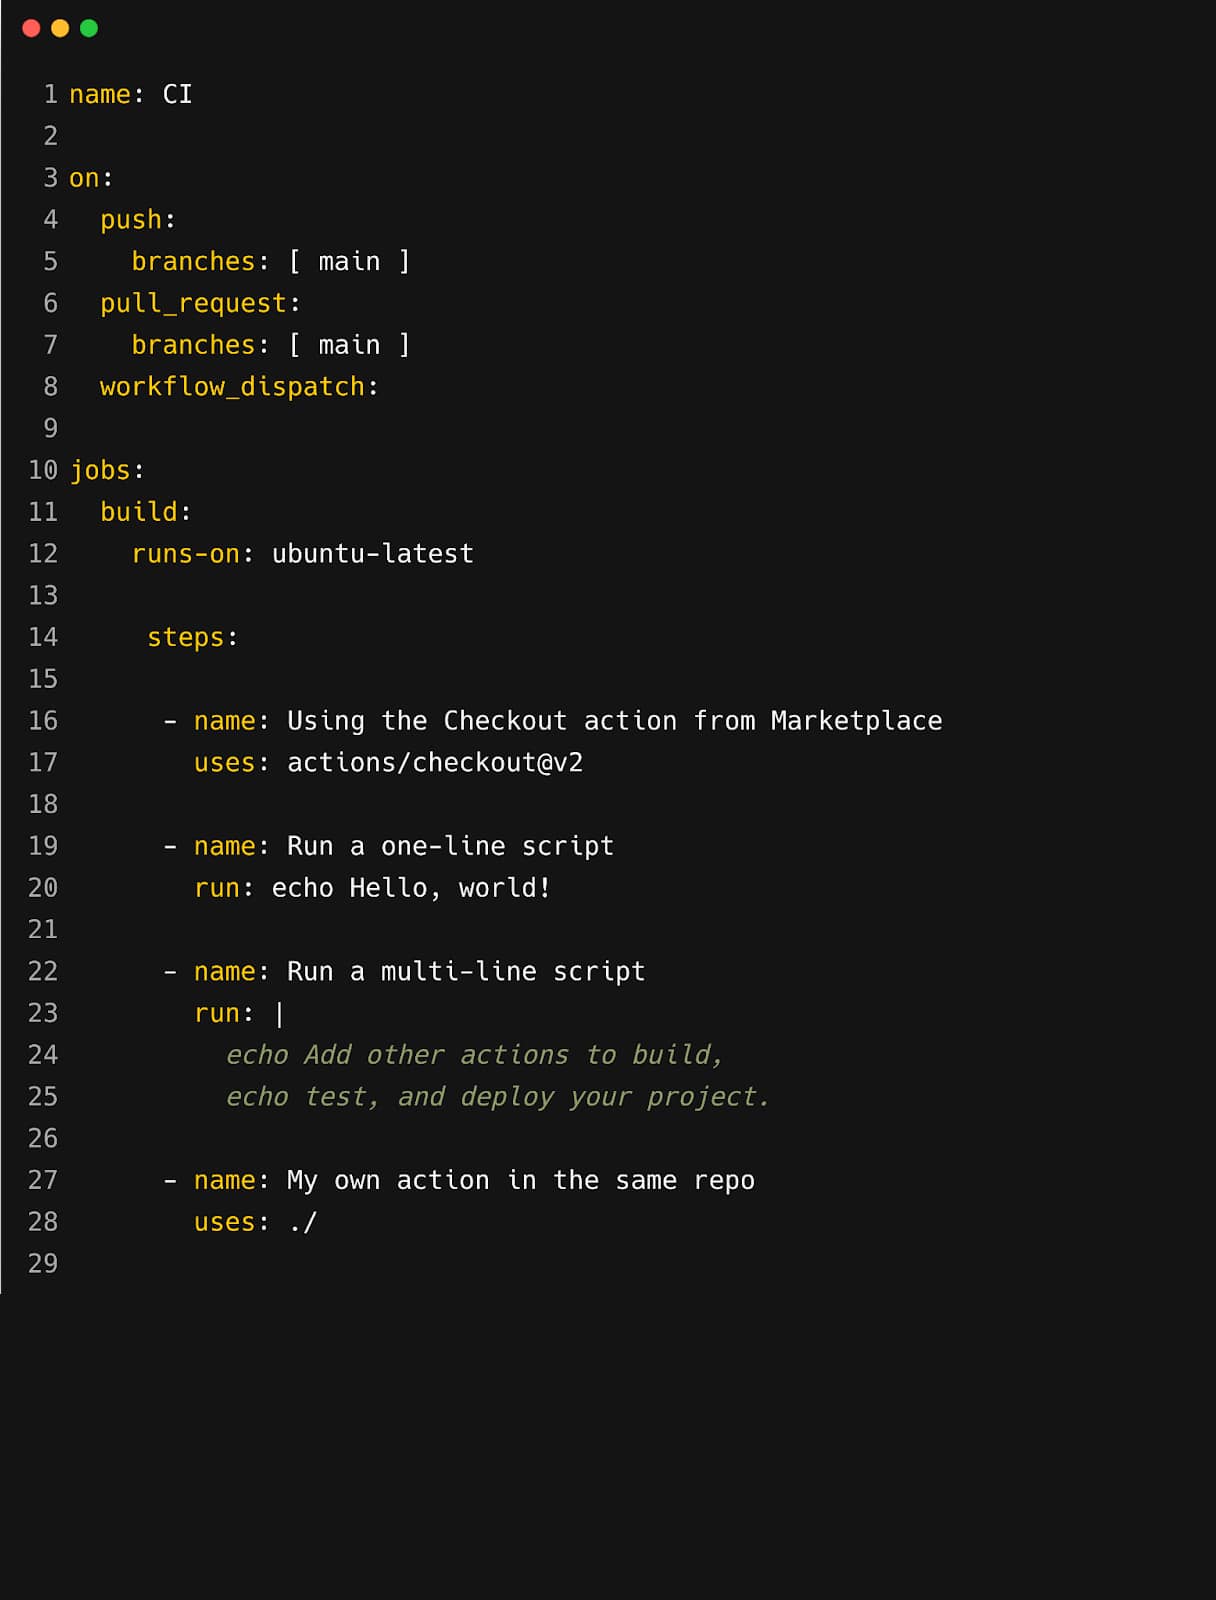
Let’s look at how to write workflows in YAML to define the automation that you need. Figure 3 gives an example of what a workflow file will look like, along with all the elements necessary.
In this example, you can see the ‘on’ key that defines the event in your repository. On clicking this, the workflow is triggered to run automatically using GitHub Actions. Your workflow can have multiple triggers, and even add qualifiers to certain events (like triggering a workflow only when a push event occurs on the main branch).
Followed by this is a ‘jobs’ key that defines all the jobs in the workflow, with a name for each job. In our example, there is only one job named ‘build’ that runs on its own virtual machine runner with the ubuntu-latest image as defined by the runs-on key.
Within the job is a list of steps that need to run in sequence on the same virtual machine in order to accomplish the task of the job. In our example, these might be to do whatever is required in order to create a build.
In Figure 3, the first step uses an ‘action’ from the GitHub Marketplace that does a check of the code; the next two steps run scripts within the shell of the virtual machine runner, and the last step runs a custom action that’s defined in the repository. You can use any combination of these scripts and actions necessary to accomplish the tasks for your job.
Why use GitHub Actions?
GitHub Actions is native to GitHub and integrates well with the common software development workflows you might be familiar with on it. You can accomplish many of your automation needs solely with GitHub Actions, or even combine them with other tools to manage your workflows in a seamless way.
Actions is independent of the language/framework that you use for your project, and you can use it to automate any of your workflows. Whether you want to run simple linting using JS libraries, create a distributable from your code, build a container image, or do anything else in between, you can accomplish it using GitHub Actions.
Since workflow jobs run on virtual machine runners, you can run your workflows on Linux, macOS, Windows or even ARM. You can choose which architecture and OS you want for each of your jobs within your workflow, based on your own use case. These virtual machine runners can be hosted by GitHub, or you can even self-host them. Alternatively, you can choose to skip the virtual machine runner altogether and just run a container image when your workflow gets triggered.
GitHub Actions is used by many developers, open source projects and businesses for their automation needs. If you check out various open source projects on GitHub, you might find that many of them are using Actions for their project management, CI/CD pipelines or other automations. There are more than 12,000 community-powered Actions extensions on the GitHub Marketplace that you can use readily within your own workflows and build on top of.
Lastly, GitHub Actions is completely free for public repositories, and has free limits for private repositories as well.
Why build your own action?
While there are thousands of actions available on the GitHub Marketplace that you could use, there could be scenarios where you might have to create your own action extension for use within your workflows.
First, if you want to perform certain tasks or have some custom logic for which an action extension doesn’t already exist on the Marketplace, it is often useful to write your own action. This helps make your workflow modular, and also enables reuse and sharing within your teams, projects or organisations.
Second, if you want to integrate GitHub and any other services/tools that you might use, you can do this easily by creating a GitHub Action that interacts with the APIs of those services/tools. This makes it easier for you to interact with other tools from within your workflows through GitHub Actions.
One of the main benefits of GitHub Actions being native to GitHub is that it is accessible to the millions of developers using the latter. If an action that you create on your own can be used by other developers as well, you can publish it yourself for free on the GitHub Marketplace and make it available to everyone on GitHub.
How to build your own action
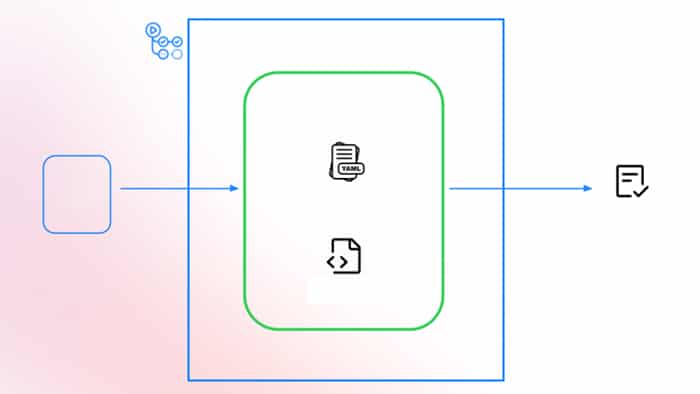
An action has essentially two components (Figure 4). One is a YAML file called action.yml and the other is the source code of your action.
Let us look at what exactly these two components do.
The action.yml file stores the metadata about the action you are building. It stores details like the name of the action, what are the inputs it needs and the outputs it delivers. It also defines whether the source code of the action is in JavaScript that can be run using Node12, or is a Docker image. It also contains information about where to find the JavaScript files or the Docker image to run the action.
The source code part of your action contains the actual logic of it. This can be JavaScript files that can run using Node12, a Dockerfile that you are going to build when an action runs, or it can simply be a Docker image that you refer to. It will have access to the event payload that triggered the workflow and also the context of the workflow run through environment variables (ENV). You can easily call GitHub’s APIs or other APIs from within your source code as a part of your logic, to accomplish the action’s task.
GitHub Actions lets you create your own actions using the millions of open source libraries accessible on GitHub, and allows you to write them in JavaScript or create a container action. It makes software workflow automation easy, which helps you be more productive and eases your development life cycle.
You can automate various use cases by using GitHub Actions, including API management, code quality, support, chat, code review, publishing, deployment, localisation, continuous integration, learning, project management, monitoring, security, dependency management, and others.


