


ChatGPT needs no introduction. You ask it any question and it replies in a flash. But the answer comes in the form of text. What if you could talk with it, just like you do with any voice assistant like Siri?
It’s no secret that ChatGPT has revolutionised the world of AI. Unlike other AI bots, it is able to understand the context of a conversation and respond, and it makes you feel like you are chatting with a human and not a machine.
But as it is still a kind of chatbot, you need to type a question and you get the answer in the form of text. That’s not as exciting as talking to a bot.
This thought gave me the idea of programming ChatGPT so that it could be used as a voice assistant called VoiceGPT. I began by using natural language processing (NLP) to recognise the voice, and then transferring the recognised voice to the ChatGPT engine as a query using the API. After getting an intelligent reply from ChatGPT, I again used NLP to convert it into a human voice.
I needed a good NLP tool for this and OpenAI itself provides one, i.e., Whisper. But due to limited time and space, I ended up using Google Natural Language API.

A step-by-step guide to making VoiceGPT
We need to begin by combining the NLP for the ttX service with ChatGPT. For this we need a machine to run the open API, transfer the query gathered from NLP, and reprocess the answer given by ChatGPT into a human voice using NLP.
You can use any laptop, but I chose the Raspberry Pi to run all this. For capturing the voice for recognition, I attached the voice bonnet; a USB microphone can also be used with Raspberry Pi. However, if you are using a laptop to run the VoiceGPT code, there is no need for a USB microphone; you can use the laptop’s inbuilt microphone.
We now need to create an account and log in to ChatGPT (Figure 2).

Next, we need to get the API key for doing research and experimenting with the ChatGPT code, as shown in Figure 3.
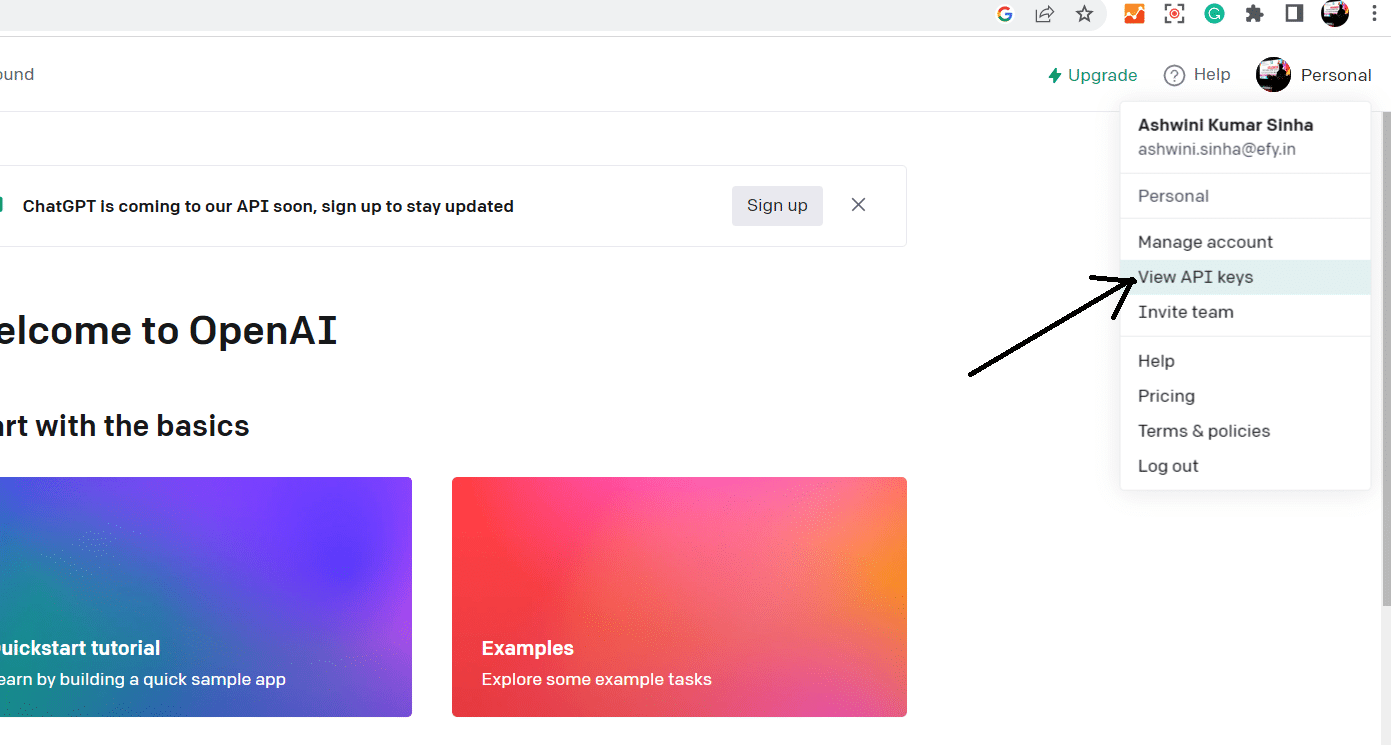
You can create the API key using the right-corner option for API in your OpenAI account (Figure 4).
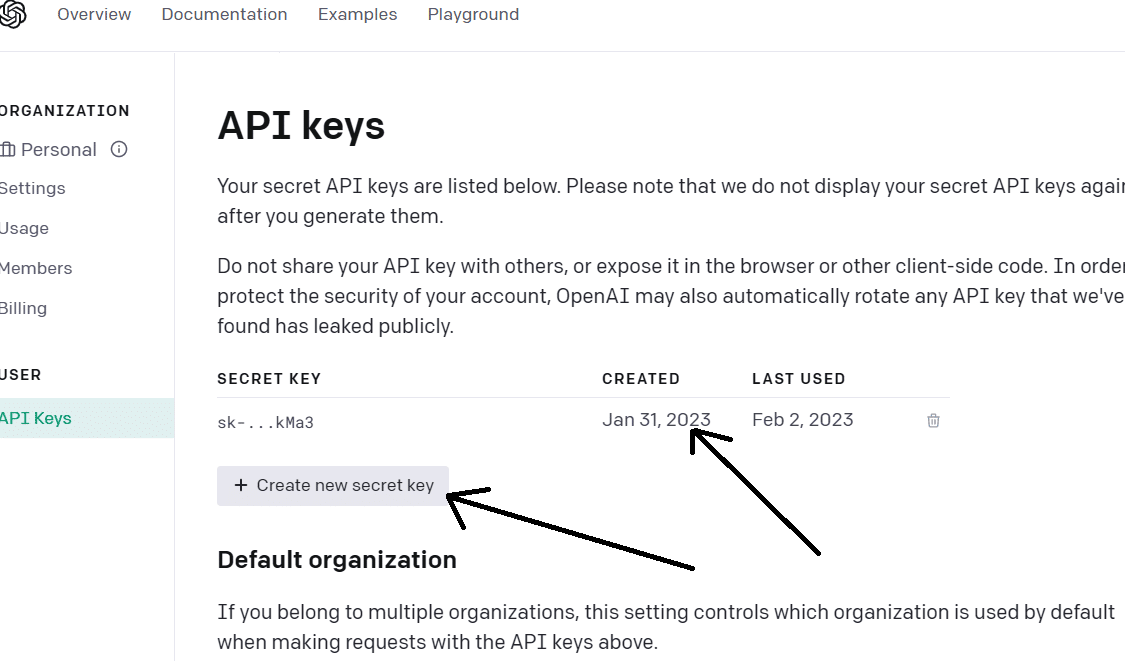
After generating the OpenAI API key, copy it and save it. We need it later in our code for developing VoiceGPT.
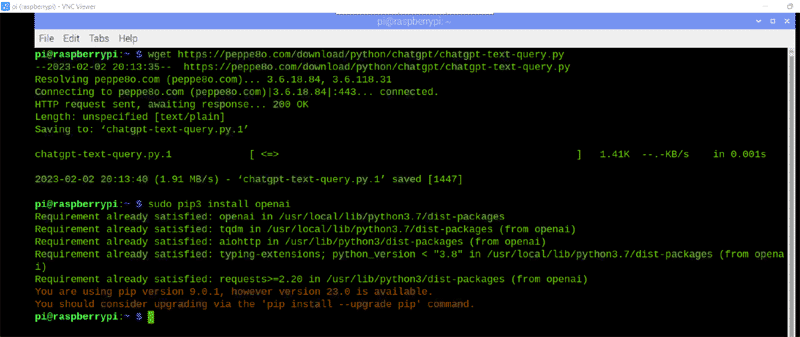
Now we need to install the open AI on the system where we are going to run the VoiceGPT. Here you can use a computer with any Linux version installed. I used Raspberry Pi for it.
Next, open the terminal and install the open AI and other Python modules that help us in natural language processing. Here you can use Whisper from OpenAI or any other NLP module. I used Google NLP and combined it with ChatGPT.
You can install these modules using the following command. After that, you can either create your open custom talking content in OpenAI or use simple chatting in the playground. Here, you can also set the temperature frequency and other parameters for your VoiceGPT assistant.
sudo pip3 install openai
sudo pip3 install SpeechRecognition
sudo pip3 install gTTS
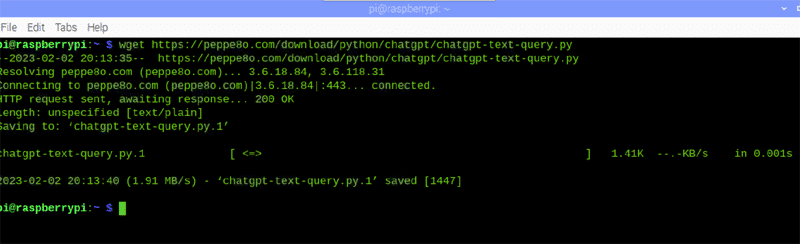
Refer to Figures 5 and 6 to see how to clone the OpenAI ChatGPT and do the setup.
Next, set the temperature, frequency and chat model as shown in Figure 7.
Programming ChatGPT to be used as VoiceGPT
First, we need to import the OpenAI Python module in code to play with OpenAI and carry out an experiment with ChatGPT. Next, we import the modules for NLP. After that, we import pygame to play the file that processed the reply in a human voice using the NLP model.
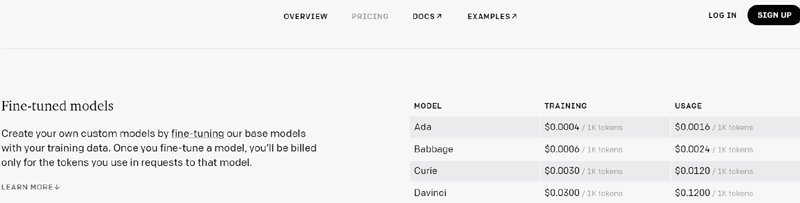
Next, we need to set the ChatGPT model. Here, we can choose from model names like Davinci, Ada, etc. Each model has its own expertise, and the cost of using these models varies. But no worries, because developers get a US$ 18 credit to develop and experiment with OpenAI.
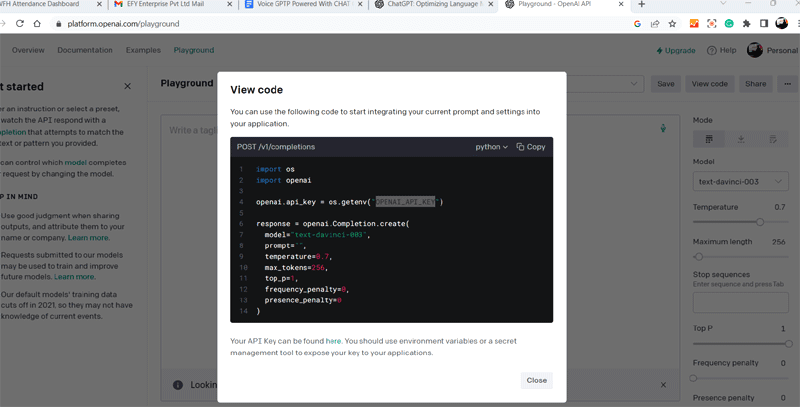
Next, we need to set the API in the code. With that, we have created the function for connecting with ChatGPT to handle the query and get the response from it.
import speech_recognition as sr
import math
import time
import serial
from espeak import espeak
import sys
import openai
import pygame
from gtts import gTTS
pygame.mixer.init()
#model_to_use=”text-davinci-003” # most capable
#model_to_use=”text-curie-001”
#model_to_use=”text-babbage-001”
model_to_use=”text-ada-001” # lowest token cost
r = sr.Recognizer()
openai.api_key=”******Your Key Here*******”
def chatGPT(query):
response = openai. Completion.create(
model-model_to_use,
prompt=query,
temperature=0,
max_tokens 1000
)
return str.strip(response[‘choices’][0][‘text’]), response[‘usage’][‘total_tokens’]
After that, we create the main function and then make a while loop. Here, we use NLP to capture the voice continuously and extract what we said using the NLP model and save it as a query. Then we transfer this query to ChatGPT and receive the response from it.
def main():
print(‘LED is ON while button is pressed (Ctrl-C for exit).’)
while True:
with sr.Microphone() as source:
r.adjust_for_ambient_noise (source)
print(“Say something!”)
audio r.listen(source)
print(“Recognizing Now....”)
command=str(r.recognize_google (audio))
print(“Google Speech Recognition thinks you said + command)
query=command
(res, usage) = chatGPT (query)
print(res)
tts gTTS(text=res, lang=’en’)
tts.save(“good.mp3”)
pygame.mixer.music.load(“good.mp3”)
pygame.mixer.music.play()
#espeak.synth(res)

if __name__ == ‘__main__’:
main()
After this, we again use NLP to convert the reply from ChatGPT into a human voice, and then we play that voice. This whole thing runs in a loop continuously making it look like a real conversation between two humans.
This VoiceGPT gives you the option of customising and selecting models. It allows you to choose from GPT models like Ada, Davinci, or Babbage. It uses a free speech-recognition service that can be customised to offline speech-recognition services like Sphenix.
Testing VoiceGPT
To test the VoiceGPT, run the code in Python, and it will tell you to ask a question or start a conversation. You can ask whatever you want; it recognises your voice, transfers the query to ChatGPT, and then replies to you in a human voice.
So now you can talk to ChatGPT just like you do with Google Assistant, Alexa, or Siri. Enjoy your conversation with VoiceGPT!
| Note: This is the first version of VoiceGPT. I am still experimenting with it and you will get all the new updates very soon on https://www.opensourceforu.com/. |


