


This eleventh article in the AI series begins by providing a brief overview of semi-supervised learning and reinforcement learning. While the series has primarily focused on machine learning based techniques for AI, it is important to discuss classical approaches that do not rely on machine learning to provide a comprehensive understanding of AI. Therefore, this article will explore some of these classical techniques. Later, it will introduce some powerful yet relatively unknown Python libraries and packages that can be used to develop AI based applications.
Besides the commonly used paradigms of supervised and unsupervised learning, there are two other less familiar paradigms in machine learning — semi-supervised learning and reinforcement learning.
First, let us try to understand how semi-supervised learning works. The semi-supervised learning technique lies between supervised learning, which relies solely on labelled data for training, and unsupervised learning, which operates without any labelled data. Semi-supervised learning uses both labelled and unlabelled data to train a model. One of the techniques called label propagation use the known labels to estimate the labels of the unlabelled data points based on their similarity to the labelled data points. In label propagation, the similarity between data points is measured using a similarity function such as the Gaussian kernel. Recall that we have discussed Gaussian kernels in the previous article in this series. Label spreading is a semi-supervised learning algorithm that is similar to label propagation. Python libraries like Keras, TensorFlow, PyTorch, and scikit-learn are all used to implement models based on semi-supervised learning.
Now, let us explore the working of reinforcement learning (RL). While RL is not as well-known as other machine learning approaches we have discussed, its popularity has recently skyrocketed. This is largely due to the success of ChatGPT, a widely-discussed natural language processing model that employed RL, in addition to supervised learning, for fine-tuning. RL is a sub-field of machine learning that focuses on teaching an agent to take actions that maximise its total reward over time within a given environment. RL algorithms are utilised to address decision-making problems that are sequential in nature, where an agent interacts with an environment, takes an action, and receives a reward based on the action taken. The ultimate goal for the agent is to learn a policy that will provide the maximum expected cumulative reward over a sequence of actions. RL problems can be represented as Markov Decision Processes (MDP), which provide a mathematical framework for modelling decision-making problems. RL has been effectively applied to a wide range of problems, including game playing, robotics, autonomous vehicles, and recommendation systems. Some popular RL algorithms include Q-Learning, SARSA, etc.
Although Python libraries such as TensorFlow and Keras can be utilised for developing RL based models, we will focus solely on the features of a relatively unknown standard API called ‘gym’. Gym was originally created by OpenAI, the same company responsible for the development of ChatGPT. Additionally, a fork of gym, called ‘gymnasium’, also exists and is actively developed nowadays. The gym/gymnasium interface is simple and capable of representing general RL problems. The Python script shown below (line numbers are included for ease of explanation), illustrating the working of gym, is a slightly modified version of a script given by the official documentation for gym. For the code to execute successfully, the gym API and some other dependent packages must be installed by running the following three commands in the terminal: pip3 install pygame, pip3 install gym, and pip3 install gym[box2d].
1. import gym
2. env = gym.make(“MountainCar-v0”, render_mode=”human”)
3. observation, info = env.reset( )
4. for _ in range(1000):
5. observation, reward, terminated, truncated, info = env.step(env. action_space.sample( ))
6. if terminated or truncated:
7. observation, info = env.reset( )
8. env.close( )
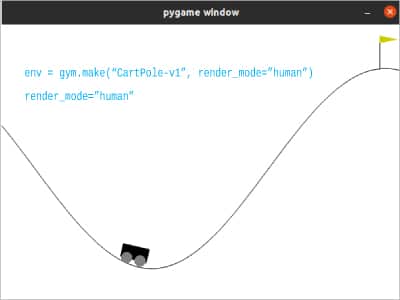
Now, let us briefly go through the code line by line. Line 1 imports the package gym, which provides a collection of environments for reinforcement learning experiments. Line 2 creates an instance of the MountainCar-v0 environment, which simulates a car trying to climb a mountain. The parameter render_mode specifies that the environment should be rendered in human mode, meaning that the environment will be displayed on the screen for human observation. Other environments that can be used here include CartPole-v1 (a control problem where the agent must balance a pole on top of a cart by moving the cart left or right) and LunarLanderContinuous-v2 (a control problem where the agent must control a lunar lander to safely land on the moon’s surface). You can replace Line 2 with the following lines of code to get the effect of these environments: env = gym.make(“CartPole-v1”) and env = gym.make(“LunarLander-v2”, render_mode=”human”). Line 3 resets the environment to its initial state and returns an observation of that state. Line 4 sets up a loop that will run 1000 times. Line 5 takes a step in the environment by choosing an action at random from the action space. Line 6 checks whether the episode is over. If the episode is over, Line 7 resets the environment to its initial state and returns an observation of that state. Finally, Line 8 closes the environment. Overall, the above script runs a loop where it takes random actions in the MountainCar-v0 environment for 1000 steps. Figure 1 shows the environment generated by the above Python script. Please note that in order to enable real learning, you should use RL algorithms like SARSA, Q-Learning, etc. It is important to note that the current example is a toy script and does not demonstrate any significant learning.
A comprehensive understanding of AI and machine learning requires a thorough understanding of RL and the gym/gymnasium library also. However, given the scope of this series, we cannot delve into the details of these topics. If you want to learn more about RL, I recommend referring the textbook ‘Reinforcement Learning: An Introduction’ by Sutton and Barto.
Classical AI techniques
Until now, our conversations about AI have solely focused on machine learning based on neural networks. However, it is important to consider classical techniques beyond machine learning and neural networks. But why do I use the term ‘classical’ techniques? Well, the techniques we are about to discuss are often referred to as ‘classical’ because they have been used in AI since its inception, dating back to the early 1960s when processing power was limited to kilohertz and memory capacity was measured in kilobytes. In the early days of AI, there were differing opinions on how it should be implemented. One school of thought, known as ‘connectionism’, was responsible for the development of neural network based models of AI. The other school of thought, known as ‘symbolic AI’ or ‘GOFAI (Good Old-Fashioned Artificial Intelligence)’, included techniques that attempted to replicate the high-level conscious reasoning used by humans to solve problems. These techniques were quite successful in the initial stages of AI. Although machine learning and deep learning have become the dominant techniques in AI due to their success and the current availability of processing power and memory, it is important not to discount classical techniques, as they may regain relevance in the future.
Discussing non-machine learning based classical techniques of AI raises a dilemma about which techniques should be considered as part of AI. For example, could optimisation techniques, probabilistic reasoning based techniques such as Bayesian networks and heuristic search algorithms, and knowledge based systems such as expert systems and rule based systems be considered AI techniques? While these techniques contain elements of AI, the question of what constitutes AI is a deeply philosophical and debated topic, and we are in no position to provide definitive answers. Therefore, our discussion is limited to logic based AI techniques and biologically inspired AI techniques.
Let us start by discussing logic based AI techniques. In the early days of AI, binary logic was commonly used to develop applications. Prolog, one of the first logic programming languages, was used to develop binary logic based applications. Prolog’s declarative style and logic programming paradigm made it ideal for implementing expert systems, which were some of the earliest applications of AI. We will cover more about Prolog in the next article in this series, where we will discuss non-Pythonic programming languages for AI. Therefore, our focus here is on fuzzy logic, which is a form of multi-valued logic. Unlike binary logic (Boolean logic), where the truth values of variables may only be the integer values 0 or 1, in fuzzy logic the truth values of variables may be any real number between 0 and 1. Python offers several libraries for implementing fuzzy logic, and one of the most popular and widely used one is scikit-fuzzy, which is built on top of NumPy and SciPy. It provides a range of functions for fuzzy inference, membership function generation, and rule optimisation. To install scikit-fuzzy in your system, you can execute the command pip3 install scikit-fuzzy in your terminal. The simple Python script shown below utilises the scikit-fuzzy library to implement fuzzy logic (line numbers are included for ease of explanation).
1. import numpy as np
2. import skfuzzy as fuzz
3. x = np.arange(0, 11, 1)
4. mflow = fuzz.trimf(x, [0, 0, 4])
5. mfmedium = fuzz.trimf(x, [2, 5,
8 ])
6. mfhigh = fuzz.trimf(x, [6, 10, 10])
7. val = fuzz.defuzz(x, np.fmax(mflow, np.fmax(mfmedium, mfhigh)),‘centroid’)
8. print(val)
Now, let us go through the code line by line. Lines 1 and 2 import the libraries NumPy and scikit-fuzzy, respectively. Line 3 creates a NumPy array x containing values from 0 to 10 with a step of 1. Lines 4 to 6 define three fuzzy membership functions, mflow, mfmedium, and mfhigh, using the function trimf( ) provided by the fuzz module of the scikit-fuzzy library. These functions represent triangular membership functions for low, medium, and high values of a variable. A triangular membership function is a fuzzy set membership function used to define the degree of membership of an element in a fuzzy set. It is defined by three parameters: the left, centre, and right boundaries. The triangular membership function takes on values between 0 and 1, with a maximum value of 1 at the centre and linearly decreasing values towards the left and right boundaries. This function is often used in fuzzy logic systems to represent concepts that have a natural range of values, such as temperature, speed, distance, etc. Line 7 calculates the defuzzified value. First, the maximum membership value of each membership function is calculated using the function fmax( ) of NumPy. Then, the overall maximum membership value of all the three membership functions is determined using the function fmax( ) again. Finally, the defuzzified value is calculated using the method centroid( ) and assigned to the variable val. Line 8 prints the calculated defuzzified value. On execution of this Python script, the value 5.0 will be printed on the terminal. Other Python libraries often used for implementing fuzzy logic include fuzzylogic, pyfuzzylite, etc.
There are numerous approaches to explore biologically inspired AI techniques. Among them, swarm intelligence and evolutionary computing stand out as key players in this field. Swarm intelligence is inspired by the collective behaviour of self-organised, decentralised systems observed in social insects and other animal societies. Its focus is on leveraging discovered solutions and refining them to enhance performance. On the other hand, evolutionary computing encompasses a range of computational problem-solving techniques inspired by biological evolution, such as genetic algorithms, genetic programming, evolutionary strategies, and evolutionary programming. The wealth of options in biologically inspired computing can make it challenging to choose a specific approach. After careful consideration, I have decided that the focus of this discussion will be on genetic algorithms, an area that presented significant challenges for me during my postgraduate studies.
Genetic Algorithm (GA) is an optimisation technique that utilises the principles of natural selection and evolution to discover the optimal solution for a problem. GA operates on a population of individuals, each representing a candidate solution to the problem, which evolves through genetic operations like mutation, crossover, and selection. This iterative process of selection, replication, and mutation mirrors the mechanism of natural selection in biological evolution. Organisms with favourable traits are more likely to survive and pass on their genes, whereas those with unfavourable traits are less likely to do so. Similarly, genetic algorithms improve the population over generations, striving to find the optimal solution to the problem. GAs are highly efficient in exploring the search space of a problem and finding a good solution. They have proved useful in various domains, including scheduling, optimisation, and robotics.
Our familiar SciPy provides a wide range of optimisation algorithms, including those based on genetic algorithms. For example, the method scipy.optimize.differential_evolution( ) uses a type of genetic algorithm called differential evolution. However, the most popular Python framework for implementing genetic algorithms is DEAP (Distributed Evolutionary Algorithms in Python). To install the DEAP framework, execute the following command on the terminal: pip3 install deap. After installation, you can import DEAP with the line of code import deap.
A detailed discussion of genetic algorithms and DEAP would require a full article or even more. Remember that neural networks are also a biologically-inspired technique for AI. Additionally, please note that the term ‘soft computing’ is often used as an umbrella term to denote several of the techniques discussed in this section, as well as neural networks. However, the use of this term is now decreasing.
A few Python gems for AI
Whenever AI and Python are discussed, the focus is often on NumPy, SciPy, TensorFlow, Keras, PyTorch, scikit-learn, etc. However, discussions should not be limited to just these libraries. In this section, we will explore several Python libraries and packages that may not be included in any so-called ‘top-ten list of most useful Python libraries for AI’ but are still very powerful and useful.Our discussion starts with PIL (Python Imaging Library) and its fork, Pillow. These libraries offer general image processing functionality and many useful basic image operations, such as resizing, cropping, rotating, and colour conversion, among others. The following Python script, which uses PIL, converts the image file tux.png to grayscale. The Python script is self-explanatory, and the grayscale image that it generates is shown in Figure 2. The original image was taken from the Wikipedia article titled ‘Tux (mascot)’.
from PIL import Image
img = Image.open(“tux.png”)
gray_img = img.convert(“L”)
gray_img.save(“tux_gray.png”)

If you need to store important data or results for later use, the Python module called pickle can be a useful tool. With pickle, you can convert nearly any Python object into a string representation, which can be easily saved or transmitted. This process is known as pickling. When you need to use the data again, you can reconstruct the original object from the string using unpickling. Pickle is a built-in module in Python, so you can use it without installing any additional libraries. The following Python script provides an example of how to pickle and unpickle a list called var1, which contains a mix of integers, strings, and floating-point numbers. The code is self-explanatory and does not require any further explanation. On execution, this Python script will generate a pickle file named ‘list1.pickle’. Furthermore, the content of the list will be printed on the terminal.
import pickle
var1 = [111, 222, ‘333’, ‘AAA’, 123.456, 789.123]
with open(“list1.pickle”, “wb”) as file:
pickle.dump(var1, file)
with open(“list1.pickle”, “rb”) as file:
var2 = pickle.load(file)
print(var2)
Generative AI is a branch of AI that involves creating or generating new content, such as images, music, text, and even videos, using specially designed models. Generative AI is often viewed with a mixture of apprehension and fascination, as exemplified by the deep fake videos that cause fear and the impressive images created by DALL-E 2. Now, we will take a brief look at a Python library called PyOpenGL that can be used for generative AI.
PyOpenGL provides Python bindings to the OpenGL graphics library, which enables developers to create cross-platform graphics applications. It is suitable for various applications, including scientific visualisation, computer-aided design (CAD), and video game development. PyOpenGL can also be employed for generative AI applications that involve graphics processing, such as generating training data for machine learning models or creating generative art. PyOpenGL can be easily installed by using Anaconda Navigator. Now, consider the Python code shown below which uses PyOpenGL (line numbers are included for ease of explanation).
1. from OpenGL.GL import *
2. from OpenGL.GLU import *
3. from OpenGL.GLUT import *
4. import numpy as np
5. def draw( ):
6. glBegin(GL_TRIANGLES)
7. glColor3f(1.0, 0.0, 0.0)
8. glVertex3f(-0.5, -0.5, 0.0)
9. glColor3f(0.0, 1.0, 0.0)
10. glVertex3f(0.5, -0.5, 0.0)
11. glColor3f(0.0, 0.0, 1.0)
12. glVertex3f(0.0, 0.5, 0.0)
13. glEnd( )
14. glFlush( )
15. glutInit( )
16. glutInitWindowSize(250, 250)
17. glutCreateWindow(b”Generative Art”)
18. glutDisplayFunc(draw)
19. glutMainLoop( )
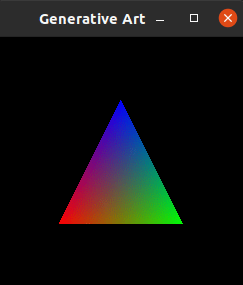
Let us go through the code line by line. Lines 1 to 4 import the necessary modules from the PyOpenGL and NumPy libraries. Line 5 defines a function named draw( ) which draws a triangle. Line 6 starts drawing the triangle. Line 7 sets the colour of the first vertex to red. In OpenGL, a vertex is a point in 3D space that has position denoted by (x, y, z) and other attributes such as colour, texture coordinates, and normal vectors. Line 8 sets the position of this vertex. Lines 9 to 12 do the same thing for the other two vertices of the triangle, with different colours and positions. After defining the vertices, the method glEnd( ) is called to stop drawing triangles (Line 13), and the method glFlush( ) is called to ensure that all commands are executed immediately (Line 14). Line 15 initialises the GLUT (OpenGL Utility Toolkit) library. Line 16 sets the size of the window to 250×250 pixels. Line 17 creates a window with the title ‘Generative Art’. Line 18 sets the function draw( ), defined earlier, to be called for rendering the scene. Finally, Line 19 starts the main loop that handles all the events and rendering. The triangle drawn by this Python script is shown in Figure 3.
Unfortunately, the fascinating field of audio processing did not receive much coverage in this series. Popular Python libraries such as Pydub, PyAudio, Librosa, and Kaldi are used for this purpose. Pydub is a library for audio processing that simplifies the processing of audio files in various formats. It offers features such as slicing, concatenating, filtering, and effects like fading and normalising. Pydub is widely used for tasks such as audio file conversion, editing, and creating snippets for music applications. To install Pydub, execute the command pip3 install pydub in the terminal. Now, let us consider the Python script shown below (line numbers are included for ease of explanation) which utilises Pydub to read an Ogg file (the audio format used by Wikipedia).
1. import pydub
2. import numpy as np
3. import matplotlib.pyplot as plt
4. audio_file = pydub.AudioSegment. from_file(‘file.ogg’, format=’ogg’)
5. audio_data = np.array(audio_file. get_array_of_samples())
6. plt.plot(audio_data)
7. plt.show( )
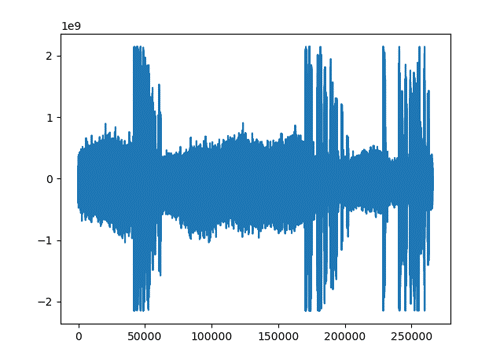
Let us go through the code line by line. Lines 1 to 3 import the necessary libraries. Line 4 uses the method from_file( ) of the class AudioSegment to read the audio data from the Ogg audio file named file.ogg. The parameter ‘format’ is used to specify the format of the audio file as Ogg. Ogg is a free and open format for audio and video which is unrestricted by software patents. Line 5 uses the method get_array_of_samples( ) of the class AudioSegment to extract the audio data as an array of samples and convert it to a NumPy array using the function array( ). Each sample represents the amplitude of the audio signal at a particular point in time. Lines 6 and 7 create a line plot of this audio data and plot it. Figure 4 shows the audio signal generated from the audio clip. I have used the audio clip of the first moon landing in 1969 (Courtesy: Wikimedia Commons). The audio also contains the now-famous quote, ‘that’s one small step for man, one giant leap for mankind’, by Neil Armstrong. There is a lot of static noise in the original audio clip which results in the specific audio signal we obtained. After downloading another audio file in Ogg format without any static noise, rerun the code to see the change in the corresponding audio signal.
The fourth article in this series discussed parallelising Python code using Numba. However, what about concurrent programming in Python? To understand the difference between concurrent and parallel programming, it is important to note that the former allows a program to make progress on multiple tasks simultaneously but not necessarily at the same time. On the other hand, parallel programming refers to executing multiple tasks simultaneously, typically on different processing units or cores to complete the tasks faster than sequential execution.
Asynchronous programming is a specific approach to concurrent programming that allows a program to make progress on multiple tasks without blocking or waiting for the completion of each task. asyncio comes to our aid here. asyncio is a Python library that facilitates concurrent programming for building asynchronous network applications, and it can also be applied in machine learning and AI applications. For instance, if a large data set requires multiple machine learning models to be trained on different parts of the data, asyncio can execute each model’s training algorithm asynchronously on separate parts of the data set, reducing the overall training time for the models. However, it is important to optimise the code and ensure that the asynchronous execution does not introduce errors. To install the library asyncio, execute the command pip3 install asyncio in the terminal. The following Python script demonstrates the use of asyncio (line numbers are included for ease of explanation).
1. import asyncio
2. from art import text2art
3. async def print_number( ):
4. for i in range(1, 3):
5. print(text2art(f”{i}”))
6. await asyncio.sleep(1)
7. async def print_letter( ):
8. alphabet = [‘A’, ‘B’]
9. for letter in alphabet:
10. print(text2art(f”{letter}”))
11. await asyncio.sleep(1)
12. async def main( ):
13. await asyncio.gather(print_ number(), print_letter())
14. asyncio.run(main( ))
Now, let us go through the code line by line. Line 1 imports the library asyncio. Line 2 imports a function called text2art( ) from a library called ‘art’, which is used to convert plain text to ASCII art. To install the library art, execute the command pip3 install art in the terminal. It is worth mentioning that the printing of ASCII art is purely for aesthetic purposes and is not directly linked to asynchronous programming. Line 3 defines an asynchronous function called print_number( ) that will print numbers in ASCII art format. Lines 4 and 5 print the ASCII art representation of the numbers 1 and 2. Line 6 makes the function pause the execution for 1 second. Lines 7 to 11 define an asynchronous function called print_letter( ), similar to the asynchronous function print_number( ), but print_letter( ) will print letters instead of numbers in ASCII art format. Line 12 defines an asynchronous function called main( ) that will call both the asynchronous functions print_number( ) and print_letter( ) concurrently. Line 13 runs both these asynchronous functions concurrently using the function
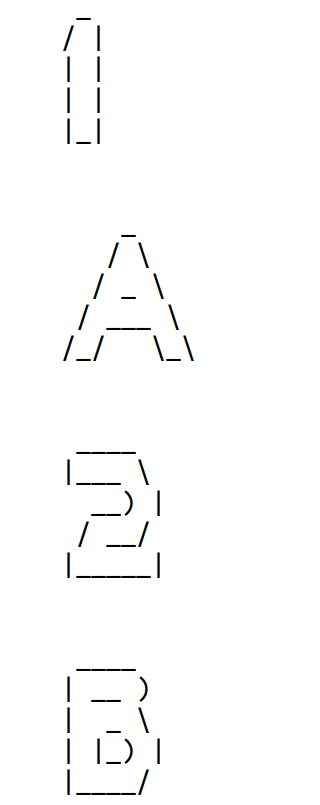
gather( ) of asyncio and waits for them to finish execution. Finally, Line 14 runs the main function using the function run( ) of asyncio. Figure 5 shows the output of this Python script. It can be observed from Figure 5 that the two asynchronous functions are executed in an interleaved fashion.
Having familiarised ourselves with various Python libraries and packages used for AI, it is now time to conclude this discussion. In this article, we have explored some previously uncharted areas of AI and some very useful Python libraries. Undoubtedly, there are numerous Python libraries and packages that are valuable for creating AI applications, which we could have continued discussing in great detail. However, this abundance of options emphasises the importance of making informed choices about our tools early on in an individual’s AI career.
There is still much ground to cover in the final article in this series. Hence, in the next article, we will begin by addressing the important topics that we have either omitted entirely or mentioned only briefly, and we will also provide guidance on how you can independently explore these topics. Throughout this series, our discussions have mainly relied on Python as the programming language of choice. Nonetheless, it is worth noting that Python is not the only language used for developing AI based applications. Therefore, in the final article of this series, we will provide a brief overview of the other popular programming languages used for developing AI based applications.


