


OpenStack is a cloud computing platform that offers a suite of software tools for creating and maintaining both public and private clouds. It gives users the freedom to set up and control an unlimited number of virtual computers, networks, and storage devices. This short tutorial will show us how to set up a private cloud using OpenStack and launch a virtual machine over the deployed environment.
OpenStack architecture contains several components like controller nodes, compute nodes, neutrons, block storage, and object storage. Here’s a brief description of these components (Figure 1).
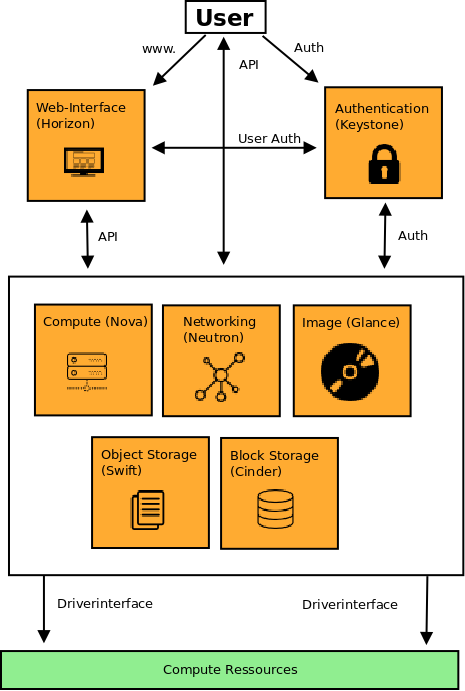
Controller node: This node is responsible for providing most of the OpenStack services such as identity, image store, dashboard, etc.
Compute node (Nova): This is responsible for managing and automating compute instances (VMs) in the OpenStack environment.
Networking (Neutron): This enables networking connectivity and IP addresses for users.
Block storage node (Cinder): This node is used to provide persistent storage for the instances running at OpenStack.
Object storage (Swift): This is used for ensuring redundant, scalable, and fault-tolerant storage in the server cluster.
Minimum hardware requirements to set up OpenStack
The minimum hardware requirements for installing OpenStack may vary depending on the specific components and services you want to deploy, as well as the scale of your intended deployment. However, a general guideline for the minimum hardware requirements for an OpenStack deployment is given in Table 1.
Table 1: Minimum hardware requirements to set up OpenStack
| Component | CPU (cores) | RAM | Storage hard disk | Number of NICs |
| Controller node | Dual-core processor | 8GB | 100GB | 2 NICs |
| Compute node | Dual-core processor | 8GB | 100GB | 2 NICs |
| Block storage node | Dual-core processor | 4GB | 100GB | 1 NIC |
| Object storage node | Dual-core processor | 4GB | 100GB | 1 NIC |
Steps to install OpenStack on Ubuntu server
The seven key steps required for successful installation of OpenStack on an Ubuntu server are briefly listed below.
Update the system: Make sure your Ubuntu Linux system is up-to-date before installing OpenStack. To update your system’s repositories, you can use the following command from your root account:
$ sudo apt-get update && sudo apt-get upgrade
Install the prerequisites packages: Now, you need to install Python and other required dependencies for the OpenStack setup.
$ sudo apt install -y python3-dev python3-pip libffi-dev libssl-dev
Install the OpenStack packages: Give the following command to install these packages:
$ sudo apt install -y software-properties-common
$ sudo add-apt-repository cloud-archive:wallaby
$ sudo apt update
$ sudo apt install -y openstack-dashboard
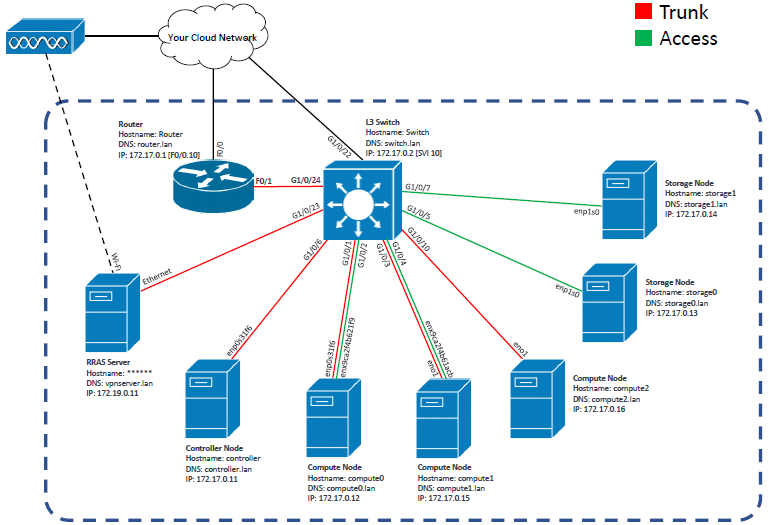
Configure networking: You may need to configure your networking settings based on your OpenStack deployment requirements. This involves setting up network bridges, configuring network interfaces, or other network-related settings. The following command is executed for configuration:
$ sudo dpkg-reconfigure openstack-dashboard
The networking configuration of our deployed OpenStack architecture is shown in Figure 2.
Configure authentication: OpenStack uses authentication mechanisms such as Keystone for managing users and roles. You’ll need to configure authentication settings based on your deployment requirements, including setting up users, roles, and authentication backends.
Start OpenStack services: Give the following command to start OpenStack services:
$ sudo systemctl enable apache2
$ sudo systemctl start apache2
$ sudo systemctl enable memcached
$ sudo systemctl start memcached
$ sudo systemctl enable uwsgi
$ sudo systemctl start uwsgi
$ sudo systemctl enable horizon
$ sudo systemctl start horizon
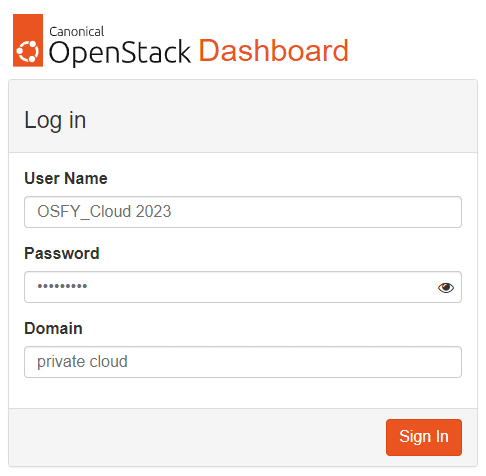
Access OpenStack dashboard: You can now access the OpenStack dashboard by navigating to http://<your-server-ip>/dashboard in your web browser. This will direct you to the OpenStack login page, as shown in Figure 3.
Creating a virtual machine on the deployed OpenStack setup
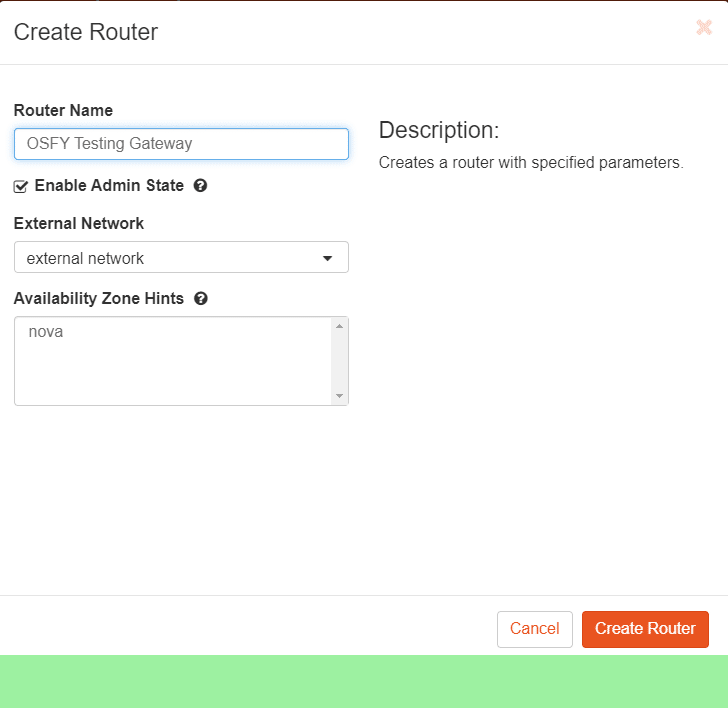
Create router with the required parameters: After logging into the OpenStack dashboard, click on network> routers>create a router. As shown in Figure 4, provide the router name (OSFY Testing Gateway) and select the external network.
Configure the network: In this step, configure the network, subnet, and IP address for the deployed VM instance. In the subnet tab, provide a subnet name, network address, and gateway IP.
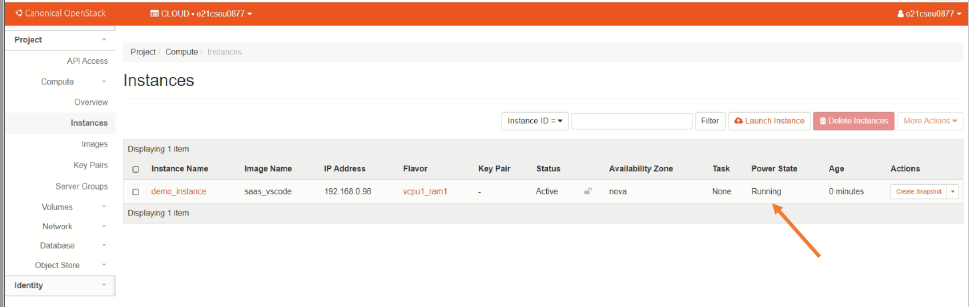
Launch instance: Finally, from the compute->instance option, launch the instance. After some time, the deployed instance will start running, as shown in Figure 5.
OpenStack is a popular choice for building private clouds due to its open source nature, flexibility, and modular architecture. It is widely used by organisations and cloud service providers to build and manage private, public, and hybrid clouds, as it offers a flexible and extensible solution for building scalable and interoperable cloud computing environments.


