Consider this: You’re on vacation in the Maldives, when your office calls, with an urgent request for some files and information. These happen to be on your laptop, which is at home! If you’ve had a holiday ruined like this, here are some simple steps that help you connect to your remote laptop securely, if you have left it on and connected to the Internet — or if someone at home can switch it on for you.
For clarity, we have used a scenario where you have a smartphone running Google Android, and will use that to access your laptop, which is running Ubuntu Lucid. The laptop is connected to the Internet via a broadband connection, and the phone has some wireless access (Wi-Fi, 3G, GPRS, etc) to the Internet. The basic idea in this article can, however, be extended to different operating systems and client devices.
So let’s go through the steps in the procedure to set up remote access in this scenario.
Get a DNS name for your home network
- You can have someone at home determine the external IP address (assigned by your ISP to your broadband modem/router) using a website like whatismyip.com. However, handling IP addresses is somewhat more difficult, compared to using hostnames — say,
laila.dyndns-server.com. Also, some ISPs often automatically reset your dynamic IP address, even without you rebooting your router. Tracking the changing IP in this case becomes a challenge. Is there a simple workaround to this problem? Yes! With dynamic DNS update services, such as DynDNS, you can create a free account, and assign a unique host-name to your external IP address. This way, you don’t need to juggle IP addresses. To update the free DNS service with the latest-assigned IP address, a scheduled job should run on a machine in your home network, at intervals you specify (an hour or so, perhaps). - In our scenario, we created and placed a dyndns file in the
/etc/cron.hourly/directory. The script, along with detailed instructions on setting up and working with DynDNS, is available on this article.
Set up the router for external access
Each machine in your home network will usually be assigned a unique, private IP address that is not directly accessible from the Internet. To allow incoming requests from the Internet to reach your laptop, you need to do some configuration on the router, which is the gateway between your private network and the Internet. This is done in the administrative interface for the router.
Some routers have it under the Network Address Translation (NAT) tables for the router, some in other pages. You could look up the documentation for your router to learn how to set up a port forwarding rule; before you can set it up, you need to have the following configuration done, so you know the target internal IP address and port number for the rule.
Static IP address for the laptop
Most home networks use IP addresses that are automatically assigned by the DHCP service on the broadband router. In this case, depending on the order in which systems are started up, the IP address assigned to your laptop could change, which means your port-forwarding rule will direct incoming connections to the wrong computer. Thus, it is important to give your laptop a static IP address.
In our scenario, we will set a static IP address in Ubuntu using simple command-line methods, as the UI-based Network Manager in Lucid is reported to have several issues. See this article for detailed instructions on how to do this.
While following the procedure, we recommend that you assign a high address number for your laptop, to ensure that the DHCP-served (by the ADSL router) addresses (which start at the lower end of the range) do not create an IP address conflict with another system. In our scenario, we have used the IP address 192.168.1.250.
SSH server on the laptop
This is one of many services that enable remote connection to your system. We installed OpenSSH for Ubuntu Lucid, with the following command:
$rg@laila: sudo apt-get install openssh-server
The SSH service on the laptop was left at the default configuration, listening on port 22, since it is on a private network and not directly accessible to the Internet.
Firewall configuration on the laptop
If you have a firewall set up on the laptop, remember to allow access to the SSH service, using iptables or other equivalent but more friendly options. We use the ufw (uncomplicated firewall) command in Ubuntu to open the SSH port, 22:
$rg@laila: sudo ufw allow 22
   Sample result:
Rule updated
Choose an external port number for the router
While the easy approach might be to use the same SSH port 22 in the forwarding rule as the port to connect to on the router’s public (Internet) interface, this is a bad idea. Crackers and others routinely have automated probes checking well-known ports such as 22, 80, 3306, etc, to see if they are open, and then attempt various attacks on them. To avoid this happening to your home network, choose a non-standard arbitrary high number for the port (ours is 10102).
Set up a port-forwarding rule on the router
With the above configuration done, you now know the information required to set up the port-forwarding rule, so go ahead and do that.
Install client software on an Android phone
In our case, we installed ConnectBot, which is a simple-to-install SSH client for Google Android-powered phones. After installation, ConnectBot appears as a nice desktop icon, with fancy shortcuts, and maintains a command history.
One of the most useful features is its support for SSH key-based authentication, which is inherently far more secure than password-based authentication. Here’s how you set up this feature (details are very well illustrated here):
- Using ConnectBot, create a public key to be used with the remote (laptop) SSH server, with an algorithm such as 1024-bit RSA.
- Copy the public key that’s stored in the Android phone’s memory.
- Connect to the SSH server using your regular username and password.
- In your home folder, create the folder
.ssh, if it does not exist. In the.sshfolder, copy the public key file, renaming it toauthorized.keys, and set its permissions to be readable and writeable only by the owner (your login). - Test the connection by logging out of the SSH session, and reconnecting. If the key setup is fine, you will not be prompted for the username or password.
- Once this is working, disable password-based authentication for the SSH service: run
sudo gedit /etc/ssh/sshd_config. In the editor window, search for a commented line,#PasswordAuthentication yes. Make a copy of this line just below it, delete the leading#to uncomment it, and change the Yes to No:PasswordAuthentication no
After this, restart the SSH service on your laptop, and once again check that you can log in to the laptop from the phone. Disabling password authentication is good since even if you have a weak password for your regular login, scripted ‘dictionary’ attacks will no longer work.
Test the remote access!
Finally, you must test your setup by actually accessing your home network machine from a different network, to ensure there are no unexpected connection problems. You could test from your office or coffee-shop Wi-Fi connection, or over your mobile service provider’s data connection (3G or GPRS, for example).
Transferring files
The main reason for this setup is to let you remotely access your laptop, and send the urgently required files to your office. There are multiple ways to achieve that; you could copy the files to your Android phone and mail them to the office, or transfer the files directly from your laptop to your office network.
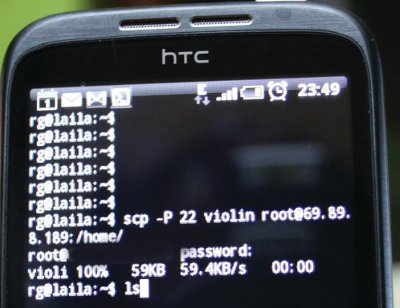
In our case, we used the scp (secure copy utility) to copy the files from the laptop directly onto a publicly-accessible Linux SSH server in the office (the last two octets of the address are obscured on purpose):
$rg@laila: scp -P 22 violin root@69.89.xx.xx:/
Illustrations
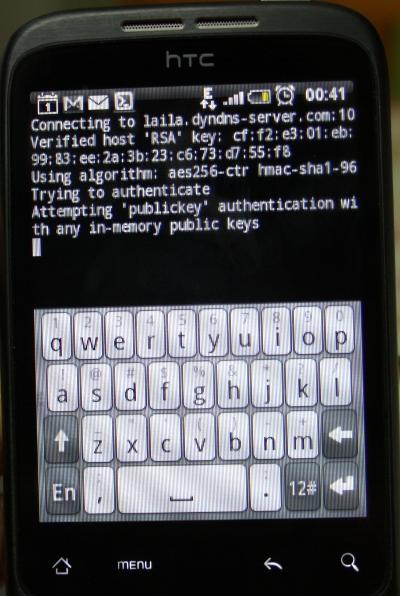
Figure 1 shows the connection to the DynDNS hostname laila.dyndns-server.com, to the non-standard port 10102 we configured as the external port on the router, by using key-based authentication. Thus, no username or password is seen.

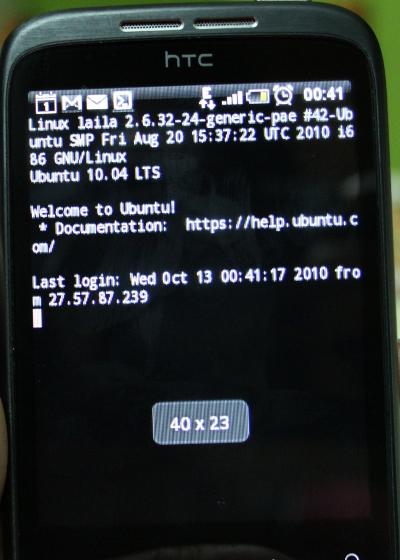
Figure 2 shows a successful login to the remote (laptop) SSH server.

Figure 3 shows that the scp command was used to copy a file to the office network (the publicly-accessible Linux server 69.89.xx.xx).


