When I first began using computers, I was amazed. It required just a mouse-click to play songs, movies or games to entertain every age. It was like magic to me! Over time, I learnt about compiled programs, and source code. My curiosity very soon made source code my passion. Even though compiled software packages are easily available, I love compiling from source. And that is just what I do for QEMU.
QEMU is one of the best emulators out there. Still, very few people use its full capabilities. Though we deal with the basics in this article, look forward to some interesting stuff later in the series!
Building QEMU from source
The first thing is to download the QEMU source code; the current version as of this writing is 0.14 and you’ll find it here. Extract the tar ball and go to the extracted directory:
$ tar -zxvf qemu-0.14.0.tar.gz
$ cd qemu-0.14.0
Run the configuration script. We will build QEMU for i386. (It can be built for other architectures too, like ARM, PPC, SPARC, etc.) Let’s install the Ubuntu distro in the virtual machine — that’s the reason we’ve chosen to build QEMU for the i386 architecture:
$ ./configure –target-list=i386-softmmu
Hopefully, you will not run into any trouble during the configure script run. If there’s any issue, it will probably be some missing library or header files, which you can look for, and install.
Once you are done with the configure script, compile the source code with the make command. After compilation, QEMU binaries should be installed in their proper locations. On my Fedora system, I used the su command to get the necessary root privileges and install the binaries using make install.
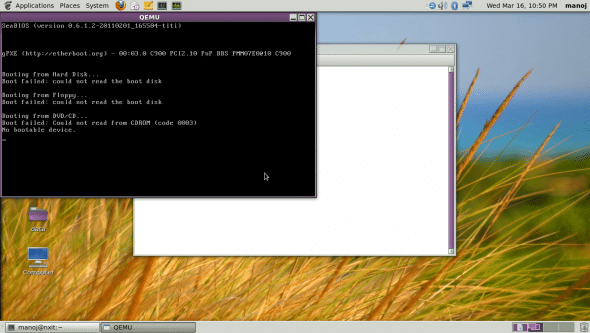
To confirm that QEMU has been successfully installed, run qemu, and a pop-up window like what appears in Figure 1 will confirm the successful installation of QEMU.

Creating a new virtual machine
If you are familiar with other virtualisation software, you might wonder how to go about creating a new VM. The first step is to create the hard disk image for the VM. So let’s install the Ubuntu 9.10 OS in the VM; a disk image of 10 GB is sufficient for this purpose. To create it, run the following commands:
$ qemu-img create ubuntu.img 10G
$ ls -lh ubuntu.img
-rw-r--r--. 1 root root 10G Mar 11 11:54 ubuntu.img
The next step is to install Ubuntu (I already have a downloaded Ubuntu 9.10 (Karmic) ISO image in my current working directory):
$ qemu -hda ubuntu.img -boot d -cdrom ./ubuntu-9.10-desktop-i386.iso -m 512
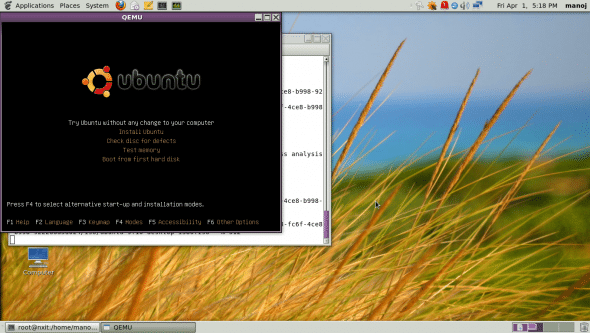
In the above command, the -hda option specifies the disk image file; and -cdrom is the CD-ROM or ISO image to use as the “optical drive” for the VM. The -m option specifies how much RAM this virtual machine will be given to use (in this case, I have allocated 512 MB of RAM; your choice should be based on your needs and hardware). Finally, we instruct QEMU to boot the VM from the ISO image by using the -boot d option. Once you run the above command, the VM will boot up and present the Ubuntu boot menu (see Figure 2).

Follow the same installation steps you would use on a real machine. Once installed, you can boot the VM from the disk image with the following commands:
$ qemu -m 512 -hda ubuntu.img
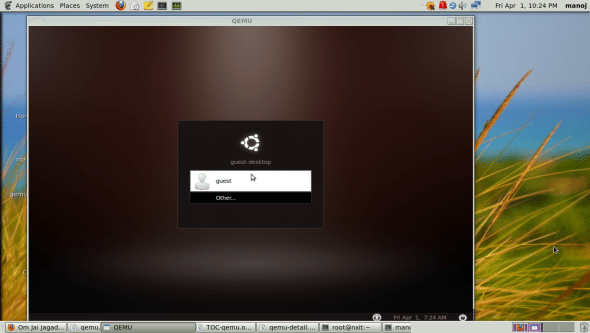
Figure 3 shows the VM running after booting from the virtual hard disk.

The next thing we need to do is set up networking.
QEMU networking
Setting up networking on QEMU is tricky work. Let’s make use of the virtual network kernel devices TAP and TUN, which are different from hardware Ethernet devices; TAP and TUN are supported only in the kernel (i.e., only in software). TAP operates at the data-link layer, and TUN at the network layer.
QEMU can use the TAP interface to provide full networking support to the guest operating system. Before this, we need to install the VPN (Virtual Private Network) package on the host machine, and set up a bridge between the host and guest OS. Install the openvpn and bridge-utils packages:
# yum install openvpn
# yum install bridge-utils
Now, we will create two scripts for qemu—qemu-ifup and qemu-ifdown, as given below:
#qemu-ifup
/sbin/ifconfig eth1 down
/sbin/ifconfig eth1 0.0.0.0 promisc up
openvpn --mktun --dev tap0
ifconfig tap 0 0.0.0.0 up
brctl addbr br0
brctl addif br0 eth1
brctl addif br0 tap0
brctl stp br0 off
ifconfig br0 10.10.10.2 netmask
255.255.255.0
This script will be used to start QEMU networking. In the first line, the Ethernet device is disabled. For the interface to be a part of a network bridge, it must have an IP address of 0.0.0.0, which is what we have done in the second line. In lines 3 and 4, we create and bring up the TAP device/interface tap0. In the next few steps, a bridge is created with eth1 and tap0 as parts of this bridge. Finally, we assign an IP address to this bridge.
Following is what the qemu-ifdown script looks like:
#qemu-ifdown
ifconfig eth1 down
ifconfig eth1 -promisc
ifup eth1
ifconfig br0 down
brctl delbr br0
openvpn --rmtun --dev tap0
This script will be used to shutdown QEMU networking; it is almost self-explanatory, shutting down both the interfaces, deleting the bridge, and the tap0 device.
Copy these two files to your /etc directory, and test them:
# /etc/qemu-ifup
Wed Apr 6 15:53:50 2011 TUN/TAP device tap0 opened
Wed Apr 6 15:53:50 2011 Persist state set to: ON

# ifconfig br0
br0       Link encap:Ethernet HWaddr 00:25:11:74:5B:0C
          inet addr:10.10.10.2 Bcast:10.10.10.255 Mask:255.255.255.0
          inet6 addr: fe80::225:11ff:fe74:5b0c/64 Scope:Link
          UP BROADCAST RUNNING MULTICAST MTU:1500 Metric:1
          RX packets:0 errors:0 dropped:0 overruns:0 frame:0
          TX packets:29 errors:0 dropped:0 overruns:0 carrier:0
          collisions:0 txqueuelen:0
          RX bytes:0 (0.0 b)  TX bytes:7539 (7.3 KiB)

#ifconfig tap0
tap0      Link encap:Ethernet HWaddr C2:10:27:8C:B8:35
          UP BROADCAST MULTICAST MTU:1500 Metric:1
          RX packets:0 errors:0 dropped:0 overruns:0 frame:0
          TX packets:0 errors:0 dropped:0 overruns:0 carrier:0
          collisions:0 txqueuelen:100
          RX bytes:0 (0.0 b)  TX bytes:0 (0.0 b)
The virtual device tap0 and bridge br0 are up, so our script is working fine. Now bring it down, using the qemu-ifdown script:
# /etc/qemu-ifdown
Error: Connection activation failed: Device not managed by NetworkManager
Wed Apr 6 15:56:44 2011 TUN/TAP device tap0 opened
Wed Apr 6 15:56:44 2011 Persist state set to: OFF
Everything is set up correctly; now it’s time to boot the Ubuntu VM with full networking support. Start the networking (as root), and boot the VM (as an ordinary user):
# /etc/qemu-ifup
$ qemu -m 512 -hda ubuntu.img -net nic -net tap,ifname=tap0,script=no
When the machine boots up, assign an IP address to the eth0 interface inside the VM:
$ sudo ifconfig eth0 10.10.10.100 netmask 255.255.255.0
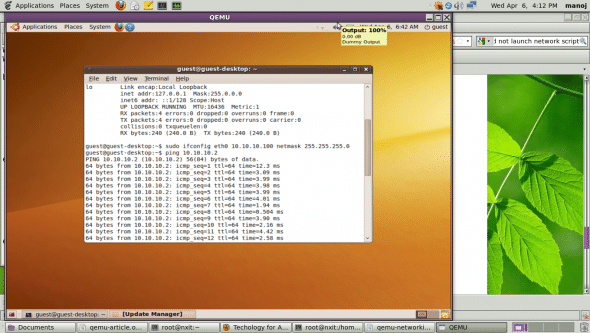
Now try to ping the bridge IP (results are shown in Figure 4):
$ ping 10.10.10.2

The network is working fine in the VM, now experiment with it. Try setting up a proxy server on the host OS, and connect to the Internet from the guest OS.
This was just an introduction to QEMU. You can look forward to a lot more in subsequent articles on how to use QEMU for embedded systems development.


Great article,
Gets everyone who’d like to use qemu started up.
You could also tell us if it is better than virtual box and (or) vmware player for virtualization.
Keep up the great work.
Eagerly looking for your next article.
hi
im a newbie to qemu, when i executed the second step ie “qemu -hda ubuntu.img -boot d -cdrom ./ubuntu-9.10-desktop-i386.iso -m 512” it displays VNC server running on `127.0.0.1:5900 and the terminal got hanged … i dnt know what is the problem… please help me out .
Hello, how did you solve this problem? I’m having the same problem here. thank you.
^ anand
you need a vnc client to see qemu’s output….
install vncviewer & try the following command
vncviewer 127.0.0.1:5900
you must install libsdl-dev
sudo apt-get install libsdl-dev
and again configure.
this sounds exciting two thumbs up !!
The command $ ./configure -target-list=i386-softmmu must be changed to $ ./configure –target-list=i386-softmmu on my system to work. I downloaded http://download.savannah.gnu.org/releases/qemu/qemu-0.14.1.tar.gz
notice the double minus “–” in front of “target-list”
Hi Anil,
When i executed the second step ie “qemu -hda ubuntu.img -boot d -cdrom ./ubuntu-9.10-desktop-i386.iso -m 512” it displays VNC server running on `127.0.0.1:5900 and the terminal got hanged … i dnt know what is the problem… please help me out .
Thanks
Suresh
SDL enabled….
Hi I followed the steps but on bootup of qemu it hangs at “Stopping configure virtual network devices, waiting for network configuration” and when it times up, it enters bootup and I do not have eth0. I am wondering what could possibly cause this?
please tell me quuery to run qemu on ubuntu 12.04.
turn all y into all j and all j into all dz and those non-anglosaxon names will be written properly, just like hallelujah or handy
Without `-enabel-kvm`, it is really slow: http://askubuntu.com/questions/419958/why-am-i-getting-a-black-screen-when-booting-vm-using-qemu
when trying to install ubuntu on the image, it tells me that the command qemu was not found, despite having installed qemu
May I request the author provide some clarification on one little point for future use.
The scripts for qemu-if{up|down} “assume” a device of eth1 without an explaination of what eth1 is and if there actually is one or should have another name. (i.e. use “myInterface=eth1” with a reason why it might be different.
” For the interface to be a part of a network bridge, it must have an IP address of 0.0.0.0, which is what we have done in the second line.”
can you elaverate that? does “0.0.0.0” refer to all sources of interfaces of the hosts? I thought my host interfaces must have a static ip to communicate to a local network, meaning this how I have the access to the internet. If you assign 0.0.0.0, I should not able to connect to the internet.