Common complaints from prosumers and small business owners with respect to storage systems are: a server or hard disk tends to crash when it matters most; one often runs out of storage space at the wrong time; and the challenges in selecting the best storage solution from myriad options. Eventually, many users end up choosing an inappropriate storage solution for their needs.
This article guides you on how to select an appropriate storage solution. It also describes an easy way to build a complete storage system using inexpensive hardware and Rockstor, a CentOS based Linux distro.
By the end of this article:
1. Prosumers will learn how to build a storage system using Rockstor.
2. Small and medium business users will be able to determine whether a Linux based DIY NAS or a dedicated NAS server (Rockstor Pro 8) is appropriate for their needs.

Hardware requirements for building a storage system
When it comes to building your Linux based storage system, there are three approaches you could take:
1. Assemble a NAS from components
2. Build on top of pre-built servers or old hardware, or even a hypervisor
3. Buy a pre-built Linux NAS box from a Linux NAS distro provider
Assembling a DIY NAS from components: This approach is recommended for prosumers who are tinkerers at heart and like to experiment, build and break stuff. The advantage of this approach is its low cost, a high degree of control and the thrill of building a NAS. The disadvantages of this approach are that its time consuming and needs some degree of technical expertise.
If you decide to take this approach, the following are some of the components youll need:
1. Case (e.g., SilverStone DS380B)
2. Power supply unit (e.g., SS-350FE)
3. Motherboard and CPU combo (e.g., ASrock MB C2550D4I and the Intel Avoton C2550 or C2750 quad-core processor)
4. RAM (e.g., Kingston 8GB 1600MHz DDR3LDIMM)
5. Boot drive (a USB or a PCIemSATA)
6. HDDs (e.g., Western Digital hot pluggable 8.89cm HDDs or 6.35cm HDDs)
Building NAS on pre-built servers: This approach is recommended for prosumers or SMBs. The advantage of this approach is its cost-effectiveness and flexibility in the choice of hardware (as long as it meets the minimum system requirements) or hypervisors.
You can use any of the following four options to build your storage system:
1. Old hardware such as an old laptop or an old server
2. Appliances such as Intel NUC, Asus Vivo PC, HP Proliant, etc
3. Hypervisors such as KVM, Proxmox or VirtualBox
4. A combination of virtualisation and appliances
A note on minimum system requirements: Each of the Linux NAS distros will have specific system requirements depending on the underlying file system.
With Rockstor, you’ll need the following:
- 64-bit Intel or AMD processor
- 2GB RAM or more (recommended)
- 8GB hard disk space for the OS
- One or more additional hard drives for data (recommended)
- Ethernet interface (with Internet access, for updates)
- A UPS system (if desired) that is supported by Network UPS Tools
- DVD drive and a blank DVD, or a USB port and minimum 1GB USB key (for the installation media)
Buying a complete NAS solution from an open source Linux NAS distro provider: This solution is recommended for SMBs or even prosumers who would like to save time and dont mind paying the extra cost. The advantage of this solution is its plug-and-play nature. Rockstor Pro 8 DIY NAD Build is one such solution with BTRFS at its core.
This solution is superior to other Linux based solutions available in the market as users have access to advanced features at a fraction of the cost. Some of these features are:
- Simple and secure browser based management
- Supports different sized HDDs and has online capacity scaling. Adds more drives as and when you need them
- Bitrot protection, checksums, compression and other advanced file system (BTRFS) features
- Efficient Copy-on-Write (CoW) snapshots of shares (on demand or on schedule)
- File sharing and access from Linux, Mac, Windows and mobile devices (Android and iOS)
- Must have prosumer apps for media streaming (Plex), backup (ownCloud) and file synchronisation (Syncthing)
- Apps for developers and small businesses such as JenkinsCI, Gitlab, Discourse, etc
- Privacy and productivity enhancing apps for everybody
- Efficient Rockstor ->Rockstor replication for backup and data recovery
Building a NAS storage system using bare metal hardware and Rockstor 3.8-12
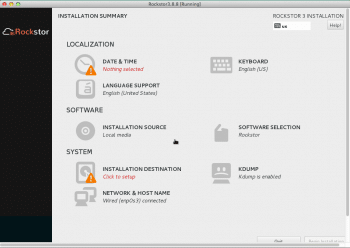
I am going to focus on building a NAS on a pre-built server (option 2 mentioned earlier) and use a HP Proliant server with 4x1TB HDDs. Ive used a USB as a boot drive to install Rockstor 3.8-12, but you can also use a PCI-Express mSATA III boot drive. You need to prepare a bootable USB with the Rockstor3.8-12.iso. Instructions on Rockstor documentation are available at http://rockstor.com/docs/quickstart.html#minsysreqs. Then proceed to install Rockstor in the HP Proliant server. The instructions are given at http://rockstor.com/docs/quickstart.html#installation.
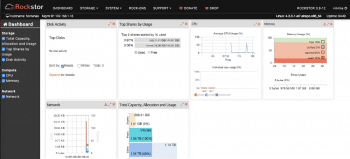
Once Rockstor 3.8-12 is installed, youve set up a basic storage system, and are now ready to add or remove disks, create a pool (BTRFS volume), create shares (BTRFS sub-volume) and use advanced BTRFS features. I will briefly describe these features.
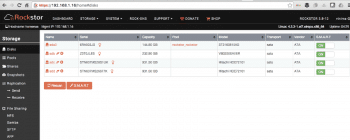
Disks: Rockstor supports whole disks, not partitions. My HP Proliant box has 4x1TB HDDs that you can see on the Rockstor Web UI, under the Storage tab.
I can add additional space by connecting USB and external hard drives to my box. I cannot add more HDDs as there are no empty bays, but if your case has empty bays, you could add more disks. Also, note that disk sda3 has the system-created rockstor_rockstor pool containing the OS. Its recommended that this pool is not touched except for small shares, and even that, only if absolutely necessary. Resizing, compression or deletion of the rockstor_rockstor pool is not permitted.
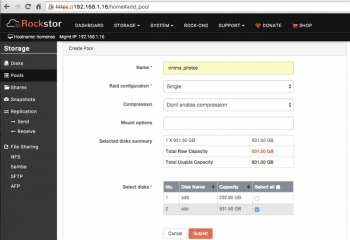
Pool: A pool is space carved out of a disk or disks. You can use multiple disks to create a single pool. Pools can be resized in capacity by adding or removing disks. One of the advantages of BTRFS over other file systems is that pools can be created by combining disks of different sizes, but these disks have to be whole (not partitioned). To create a pool using the Web UI, go to Storage->Pools. Click on Create Pools and specify the Name, RAID Configuration and Select Disks that should be the part of this pool. Click Submit to create the pool. Advanced users can also apply different compression and BTRFS mount options while creating a pool (or afterwards). You can see the pool vinima_photos in Figure 5.
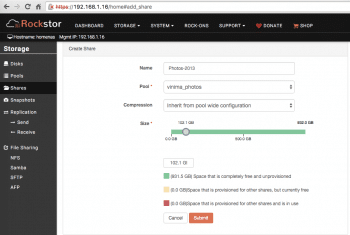
Share: A share is a space carved out of a pool and provides storage for user generated data. It behaves similar to a directory in a file system and can be exported using protocols like Samba/CIFS, AFP, SFTP, NFS, etc, from a Rockstor machine. A share can be resized, cloned and deleted. To create a share using the Rockstor Web UI, go to Storage->Shares and click Create Share. Specify the Name, Pool and Size, and then click Submit. Similar to a pool, advanced users can apply compression options. You can see the Photos-2013 share in Figure 6.
Advanced features: Rockstor leverages other Linux technologies, such as Docker, to go beyond the NAS paradigm. Rockstor provides an app, also called the Rock-ons hosting framework. Using Rock-ons, media content can be streamed from Rockstor, files from various smart devices can be synchronised or backed up to Rockstor, etc. Almost any containerised application can be deployed to take advantage of the solid storage platform provided by Rockstor. As discussed earlier, Rock-ons are Docker-based applications that help extend functionality and run applications like syncing and streaming. The installation procedure for all Rock-ons is similar.
I hope that most readers now have a basic understanding on how to choose or build their own storage system. Please refer to Rockstor documentation to understand a range of applications that can be run on your storage system (https://rockstor.com/docs).


