


DevOps, formed by combining the words ‘development’ and ‘operations’, is a software development process. Its area of focus is the communication and collaboration between product management, software development and operations professionals. This article is the sixth in the series.
In this article, we will install Jenkins using Ansible and set up a continuous integration (CI) build for a project that uses Git. Jenkins is free and open source automation server software that is used to build, deploy and automate projects. It is written in Java and released under the MIT licence. There are a number of plugins available to integrate Jenkins with other tools such as version control systems, APIs and databases.
Setting it up
A CentOS 6.8 virtual machine (VM) running on KVM will be used for the installation. Internet access should be available from the guest machine. The Ansible version used on the host (Parabola GNU/Linux-libre x86_64) is 2.3.0.0. The ansible/ folder contains the following files:
ansible/inventory/kvm/inventory

ansible/playbooks/configuration/jenkins.yml

ansible/playbooks/admin/uninstall-jenkins.yml
The IP address of the guest CentOS 6.8 VM is added to the inventory file as shown below:
jenkins ansible_host=192.168.122.120 ansible_connection=ssh ansible_user=root ansible_password=password
An entry for the Jenkins host is also added to the /etc/hosts file as indicated below:
192.168.122.120 jenkins
Installation
The playbook to install the Jenkins server on the CentOS VM is given below:
---

- name: Install Jenkins software

hosts: jenkins

gather_facts: true

become: yes

become_method: sudo

tags: [jenkins]

tasks:

- name: Update the software package repository

yum:

name: ‘*’

update_cache: yes

- name: Install dependencies

package:

name: “{{ item }}”

state: latest

with_items:

- java-1.8.0-openjdk

- git

- texlive-latex

- wget

- name: Download jenkins repo

command: wget -O /etc/yum.repos.d/jenkins.repo http://pkg.jenkins-ci.org/redhat/jenkins.repo

- name: Import Jenkins CI key

rpm_key:

key: http://pkg.jenkins-ci.org/redhat/jenkins-ci.org.key

state: present

- name: Install Jenkins

package:

name: “{{ item }}”

state: latest

with_items:

- jenkins

- name: Allow port 8080

shell: iptables -I INPUT -p tcp --dport 8080 -m state --state NEW,ESTABLISHED -j ACCEPT

- name: Start the server

service:

name: jenkins

state: started

- wait_for:

port: 8080
The playbook first updates the Yum repository and installs the Java OpenJDK software dependency required for Jenkins. The Git and Tex Live LaTeX packages are required to build our project github.com/shakthimaan/di-git-ally-managing-love-letters. We then download the Jenkins repository file and import the repository GPG key. The Jenkins server is then installed, port 8080 is allowed through the firewall, and the script waits for the server to listen on port 8080. The above playbook can be invoked using the following command:
$ ansible-playbook -i inventory/kvm/inventory playbooks/configuration/jenkins.yml -vv

Configuration
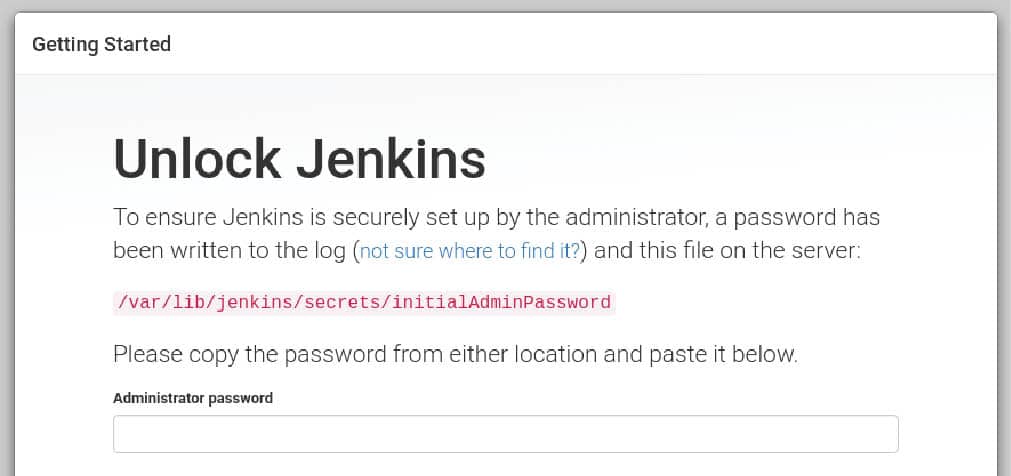
You can now open http://192.168.122.120:8080 in the browser on the host to start configuring Jenkins. The Web page will prompt you to enter the initial administrator password from /var/lib/jenkins/secrets/initialAdminPassword to proceed further. This is shown in Figure 1.
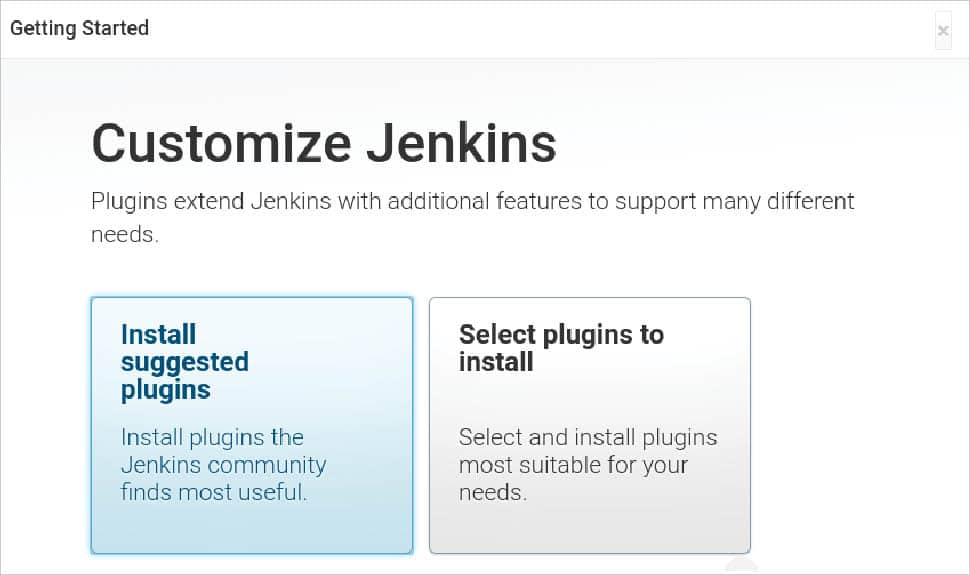
The second step is to install the plugins. For this demonstration, you can select the ‘Install suggested plugins’ option, and later install any of the plugins that you require. Figure 2 displays the selected option.
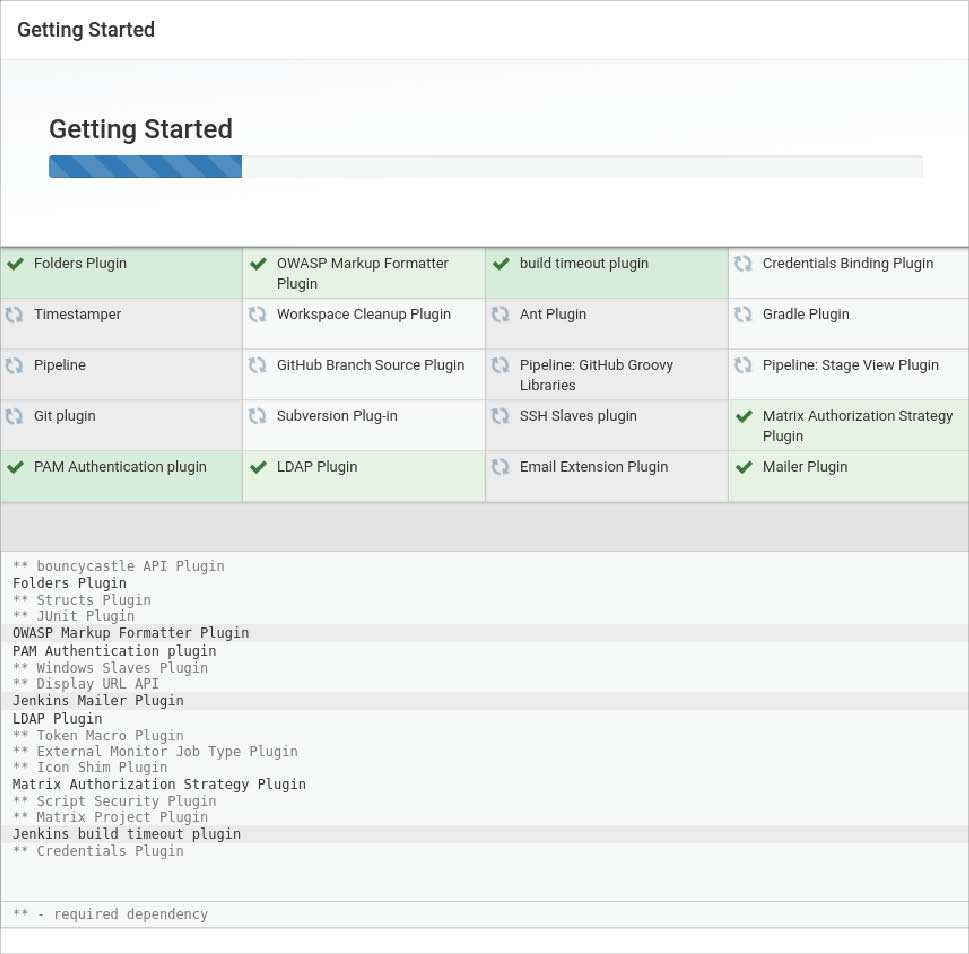
After you select the ‘Install suggested plugins’ option, the plugins will get installed as shown in Figure 3.
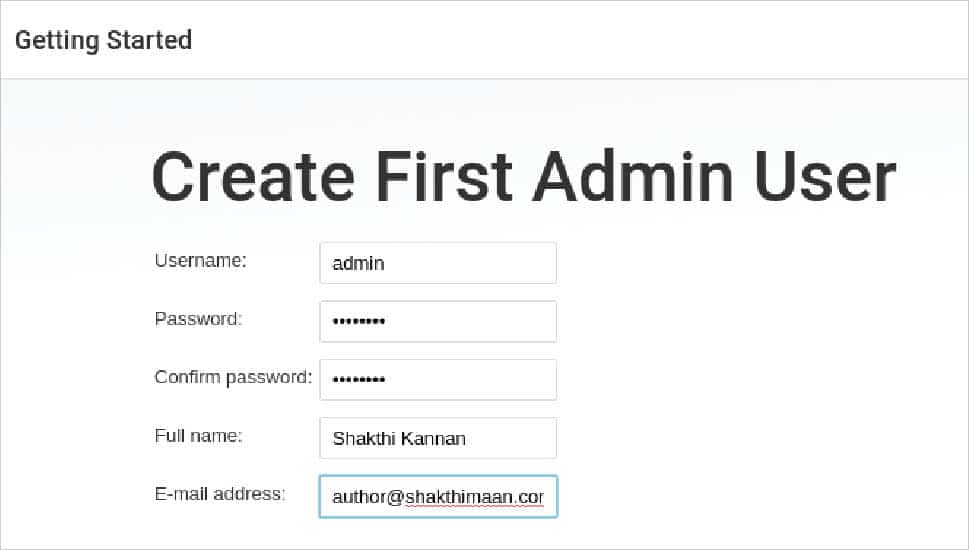
An admin user is required for managing Jenkins. After installing the plugins, a form is displayed for you to enter the user name, password, name and e-mail address of the administrator. A screenshot of this is shown in Figure 4.
Once the administrator credentials are stored, a ‘Jenkins is ready!’ page will be displayed, as depicted in Figure 5.
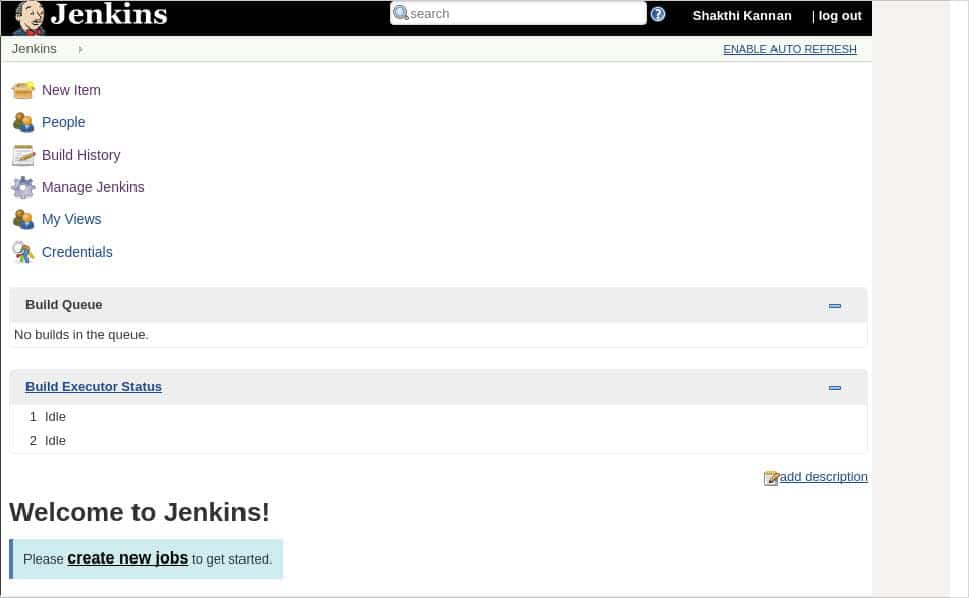
You can now click on the ‘Start using Jenkins’ button to open the default Jenkins dashboard shown in Figure 6.
An example of a new project
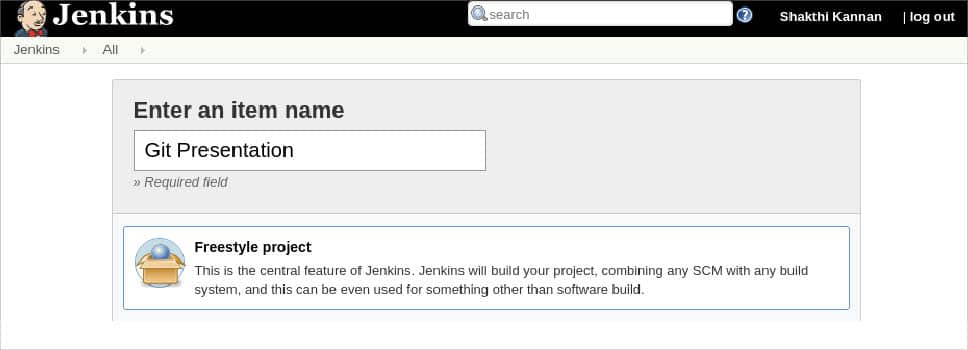
Let’s now create a new build for the github.com/shakthimaan/di-git-ally-managing-love-letters project. Provide a name in the ‘Enter an item name’ text box and select the ‘Freestyle project’. Figure 7 shows the screenshot for creating a new project.
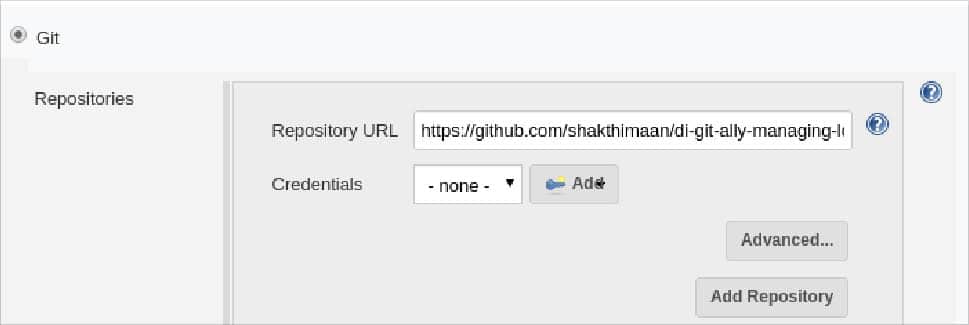
The next step is to add the GitHub repo to the Repositories section. The GitHub HTTPS URL is provided as we are not going to use any credentials in this example. By default, the master branch will be built. The form to enter the GitHub URL is shown in Figure 8.
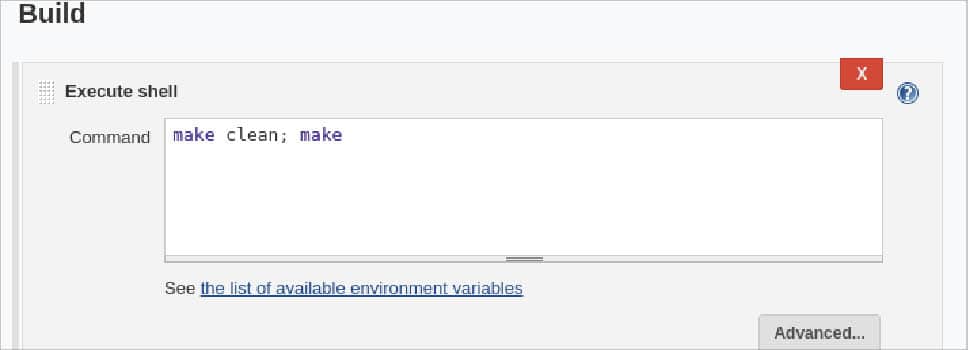
A Makefile is available in the project source code, and hence we can simply invoke make to build the project. The Execute shell option is chosen in the Build step, and the make clean; make command is added to the Build step, as shown in Figure 9.
From the left panel, you can click on the Build Now link for the project to trigger a build. After a successful build, you should see a screenshot similar to Figure 10.

Uninstalling
An uninstall script to remove the Jenkins server is available in the playbooks/admin folder. It is given below for reference:
---

---

- name: Uninstall Jenkins

hosts: jenkins

gather_facts: true

become: yes

become_method: sudo

tags: [remove]

tasks:

- name: Stop Jenkins server

service:

name: jenkins

state: stopped

- name: Uninstall packages

package:

name: “{{ item }}”

state: absent

with_items:

- jenkins
The script can be invoked as follows:
$ ansible-playbook -i inventory/kvm/inventory playbooks/admin/uninstall-jenkins.yml


