Keras is a high-level API for neural networks. It is written in Python and its biggest advantage is its ability to run on top of state-of-art deep learning libraries/frameworks such as TensorFlow, CNTK or Theano. If you are looking for fast prototyping with deep learning, then Keras is the optimal choice.
Deep learning is the new buzzword among machine learning researchers and practitioners. It has certainly opened the doors to solving problems that were almost unsolvable earlier. Examples of such problems are image recognition, speaker-independent voice recognition, video understanding, etc. Neural networks are at the core of deep learning methodologies for solving problems. The improvements in these networks, such as convolutional neural networks (CNN) and recurrent networks, have certainly raised expectations and the results they yield are also promising.
To make the approach simple, there are already powerful frameworks/libraries such as TensorFlow from Google and CNTK (Cognitive Toolkit) from Microsoft. The TensorFlow approach has already simplified the implementation of deep learning for coders. Keras is a high-level API for neural networks written in Python, which makes things even simpler. The uniqueness of Keras is that it can be executed on top of libraries such as TensorFlow and CNTK. This article assumes that the reader is familiar with the fundamental concepts of machine learning.
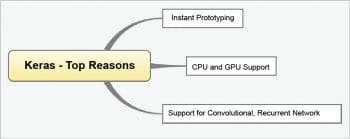
The primary reasons for using Keras are:
- Instant prototyping: This is ability to implement the deep learning concepts with higher levels of abstraction with a ‘keep it simple’ approach.
- Keras has the potential to execute without any barriers on CPUs and GPUs.
- Keras supports convolutional and recurrent networks — combinations of both can also be used with it.
Keras: The design philosophy
As stated earlier, the ability to move into action with instant prototyping is an important characteristic of Keras. Apart from this, Keras is designed with the following guiding principles or design philosophy:
- It is an API designed with user friendly implementation as the core principle. The API is designed to be simple and consistent, and it minimises the effort programmers are required to put in to convert theory into action.
- Keras’ modular design is another important feature. The primary idea of Keras is layers, which can be connected seamlessly.
- Keras is extensible. If you are a researcher trying to bring in your own novel functionality, Keras can accommodate such extensions.
- Keras is all Python, so there is no need for tricky declarative configuration files.

Installation
It has to be remembered that Keras is not a standalone library. It is an API and works on top of existing libraries (TensorFlow, CNTK or Theano). Hence, the installation of Keras requires any one of these backend engines. The official documentation suggests a TensorFlow backend. Detailed installation instructions for TensorFlow are available at https://www.tensorflow.org/install/. From this link, you can infer that TensorFlow can be easily installed in all major operating systems such as MacOS X, Ubuntu and Windows (7 or later).
After the successful installation of any one of the backend engines, Keras can be installed using Pip, as shown below:
$sudo pip install keras
An alternative approach is to install Keras from the source (GitHub):
#1 Clone the Source from Github

$git clone https://github.com/fchollet/keras.git

#2 Move to Source Directory

cd keras

#3 Install using setup.py

sudo python setup.py install
The three optional dependencies that are required for specific features are:
- cuDNN (CUDA Deep Neural Network library): For running Keras on the GPU
- HDF5 and h5py: For saving Keras models to disks
- Graphviz and Pydot: For visualisation tasks

The way Keras works
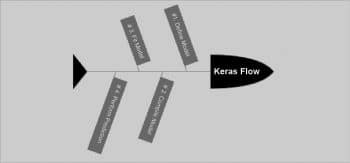
The basic building block of Keras is the model, which is a way to organise layers. The sequence of tasks to be carried out while using Keras models is:
- Model definition
- Compilation of the model
- Model fitting
- Performing predictions
The basic type of model is sequential. It is simply a linear stack of layers. The sequential model can be built as shown below:
from keras.models import Sequential

model = Sequential()
The stacking of layers can be done with the add() method:
from keras.layers import Dense, Activation

model.add(Dense(units=64, input_dim=100)) model.add(Activation(‘relu’))

model.add(Dense(units=10))

model.add(Activation(‘softmax’))
Keras has various types of pre-built layers. Some of the prominent types are:
- Regular Dense
- Recurrent Layers, LSTM, GRU, etc
- One- and two-dimension convolutional layers
- Dropout
- Noise
- Pooling
- Normalisation, etc
Similarly, Keras supports most of the popularly used activation functions. Some of these are:
- Sigmoid
- ReLu
- Softplus
- ELU
- LeakyReLu, etc
The model can be compiled with compile(), as follows:
model.compile(loss=’categorical_crossentropy’, optimizer=’sgd’,

metrics=[‘accuracy’])
Keras is very simple. For instance, if you want to configure the optimiser given in the above mentioned code, the following code snippet can be used:
model.compile(loss=keras.losses.categorical_crossentropy, optimizer=keras.optimizers.SGD(lr=0.01, momentum=0.9, nesterov=True))
The model can be fitted with the fit() function:
model.fit(x_train, y_train, epochs=5, batch_size=32)
In the aforementioned code snippet, x_train and y_train are Numpy arrays. The performance evaluation of the model can be done as follows:
loss_and_metrics = model.evaluate(x_test, y_test, batch_size=128)
The predictions on novel data can be done with the predict() function:
classes = model.predict(x_test, batch_size=128)
The methods of Keras layers
The important methods of Keras layers are shown in Table 1.
| get_weights() | This method is used to return the weights of the layer |
| set_weights() | This method is used to set the weights of the layer |
| get_config() | This method is used to return the configuration of the layer as a dictionary |
Table 1: Keras layers’ methods
MNIST training
MNIST is a very popular database among machine learning researchers. It is a large collection of handwritten digits. A complete example for deep multi-layer perceptron training on the MNIST data set with Keras is shown below. This source is available in the examples folder of Keras (https://github.com/fchollet/keras/blob/master/examples/mnist_mlp.py):
from __future__ import print_function

import keras

from keras.datasets import mnist

from keras.models import Sequential

from keras.layers import Dense, Dropout

from keras.optimizers import RMSprop

batch_size = 128

num_classes = 10

epochs = 20

# the data, shuffled and split between train and test sets

(x_train, y_train), (x_test, y_test) = mnist.load_data()

x_train = x_train.reshape(60000, 784)

x_test = x_test.reshape(10000, 784)

x_train = x_train.astype(‘float32’)

x_test = x_test.astype(‘float32’)

x_train /= 255

x_test /= 255

print(x_train.shape[0], ‘train samples’)

print(x_test.shape[0], ‘test samples’)

# convert class vectors to binary class matrices

y_train = keras.utils.to_categorical(y_train, num_classes)

y_test = keras.utils.to_categorical(y_test, num_classes)

model = Sequential()

model.add(Dense(512, activation=’relu’, input_shape=(784,)))

model.add(Dropout(0.2))

model.add(Dense(512, activation=’relu’))

model.add(Dropout(0.2))

model.add(Dense(num_classes, activation=’softmax’))

model.summary()

model.compile(loss=’categorical_crossentropy’,

optimizer=RMSprop(),

metrics=[‘accuracy’])

history = model.fit(x_train, y_train,

batch_size=batch_size,

epochs=epochs,

verbose=1,

validation_data=(x_test, y_test))

score = model.evaluate(x_test, y_test, verbose=0)

print(‘Test loss:’, score[0])

print(‘Test accuracy:’, score[1])
If you are familiar with machine learning terminology, the above code is self-explanatory.

Image classification with pre-trained models
An image classification code with pre-trained ResNet50 is as follows (https://keras.io/applications/):
from keras.applications.resnet50

import ResNet50 from keras.preprocessing

import image from keras.applications.resnet50

import preprocess_input, decode_predictions

import numpy as np

model = ResNet50(weights=’imagenet’)

img_path = ‘elephant.jpg’

img = image.load_img(img_path, target_size=(224, 224))

x = image.img_to_array(img)

x = np.expand_dims(x, axis=0)

x = preprocess_input(x)

preds = model.predict(x)

# decode the results into a list of tuples (class, description, probability) # (one such list for each sample in the batch)

print(‘Predicted:’, decode_predictions(preds, top=3)[0])

# Predicted: [(u’n02504013’, u’Indian_elephant’, 0.82658225), (u’n01871265’, u’tusker’, 0.1122357), (u’n02504458’, u’African_elephant’, 0.061040461)]
The simplicity with which the classification tasks are carried out can be inferred from the above code.
Overall, Keras is a simple, extensible and easy-to-implement neural network API, which can be used to build deep learning applications with high level abstraction.


