Kubernetes is a portable, extensible, open source platform for managing containerised workloads and services that facilitate both declarative configuration and automation. Kubernetes provides you with a way to run distributed systems resiliently. K8S takes care of self-healing, scaling, load balancing, and failover of your applications. Helm is an open source tool used for packaging and deploying applications on Kubernetes, and does away with the latter’s complexities.
Kubernetes simplifies your application workflows; it comes with its own complexities. While it is an effective container orchestration tool, one should also note that it has a steep learning curve and complexity in deployment. This is where Helm comes into the picture.
Helm
Helm is an open source tool used for packaging and deploying applications on Kubernetes, and has been widely adopted by the Kubernetes community and Cloud Native Computing Foundation (CNCF) graduated projects.
Helm is designed as a package manager specifically for Kubernetes. It supports operations like install, remove, upgrade, rollback and downgrade for Kubernetes applications. Helm simplifies deployment of applications by abstracting many complexities. This allows easier adoption and enables teams to be more productive.
Kubernetes applications can be defined using declarative resource files for different Kubernetes objects like Deployment, Services, ConfigMaps, PersistentVolumeClaims and so on. Distributing and managing Kubernetes applications is difficult, but Helm makes it easier as packages all Kubernetes resource files into a format called charts.
A chart can be considered a Kubernetes package. This packaging format contains information about resource files, dependencies and metadata.
Installing Helm
Any Kubernetes installation tool like Vanilla Kubernetes, Minikube, Kind, Red Hat OpenShift, EKS, and Azure KS can be used for installing Helm. Installing Kubernetes cluster is beyond the scope of this article.
You can install Helm on Windows, Linux and macOS.
On Windows, you can use Chocolatey:
> choco install kubernetes-helm
On macOS, you can use Homebrew:
$ brew install helm
On Linux, you can use package managers like yum, dnf, snap or apt:
$ apt install helm
You can also use direct download links for Helm GitHub repository (https://github.com/helm/helm/releases):
$ wget https://get.helm.sh/helm-v3.2.1-linux-amd64.ttar.gz
$ tar xvzf helm-v3.2.1-linux-amd64.tar.gz
$ mv linux-amd64/helm/usr/local/bin/helm
You can verify the Helm installation by running:
$ helm version
version.BuildInfo{Version:”v3.2.1”, GitCommit:”fe51cd1e31e6a202cba7dead9552a6d418ded79a”, GitTreeState:”clean”, GoVersion:”go1.13.10”}
Helm environment variables
Helm allows configuring the following variables:
HELM_BIN
HELM_NAMESPACE
HELM_DEBUG
HELM_PLUGINS
HELM_KUBEAPISERVER
HELM_REGISTRY_CONFIG
HELM_KUBECONTEXT
HELM_REPOSITORY_CACHE
HELM_KUBETOKEN
HELM_REPOSITORY_CONFIG
You can read more about these configurations in the Helm Official documentation at https://helm.sh/docs/.
You can configure Helm environment variables by exporting variables using the export command:
$ export HELM_DEBUG=True
$ helm env
Basic commands
Managing upstream chart repositories:
Helm downloads charts from remote or local repositories. You can manage repositories’ operations using commands such as:
- add: To add a repository
- list: To list chart repositories
- remove: To remove chart repository
- update: To update available chart information
Adding chart repository:
Chart repositories are required to install charts. You can add a chart repository by using the following command:
$ helm repo add <REPO_NAME> <REPO_URL>
Listing chart repositories:
The following command can be used to list all installed chart repositories:
$ helm repo list
Updating chart repositories:
You can check chart updates from the given repositories by issuing the following command:
$ helm repo update
Removing chart repository:
You can remove a repository by using the following command:
$ helm repo remove <REPO_NAME>
Installing chart
Let us now install chart. In this case, we will be installing WordPress chart as an example.
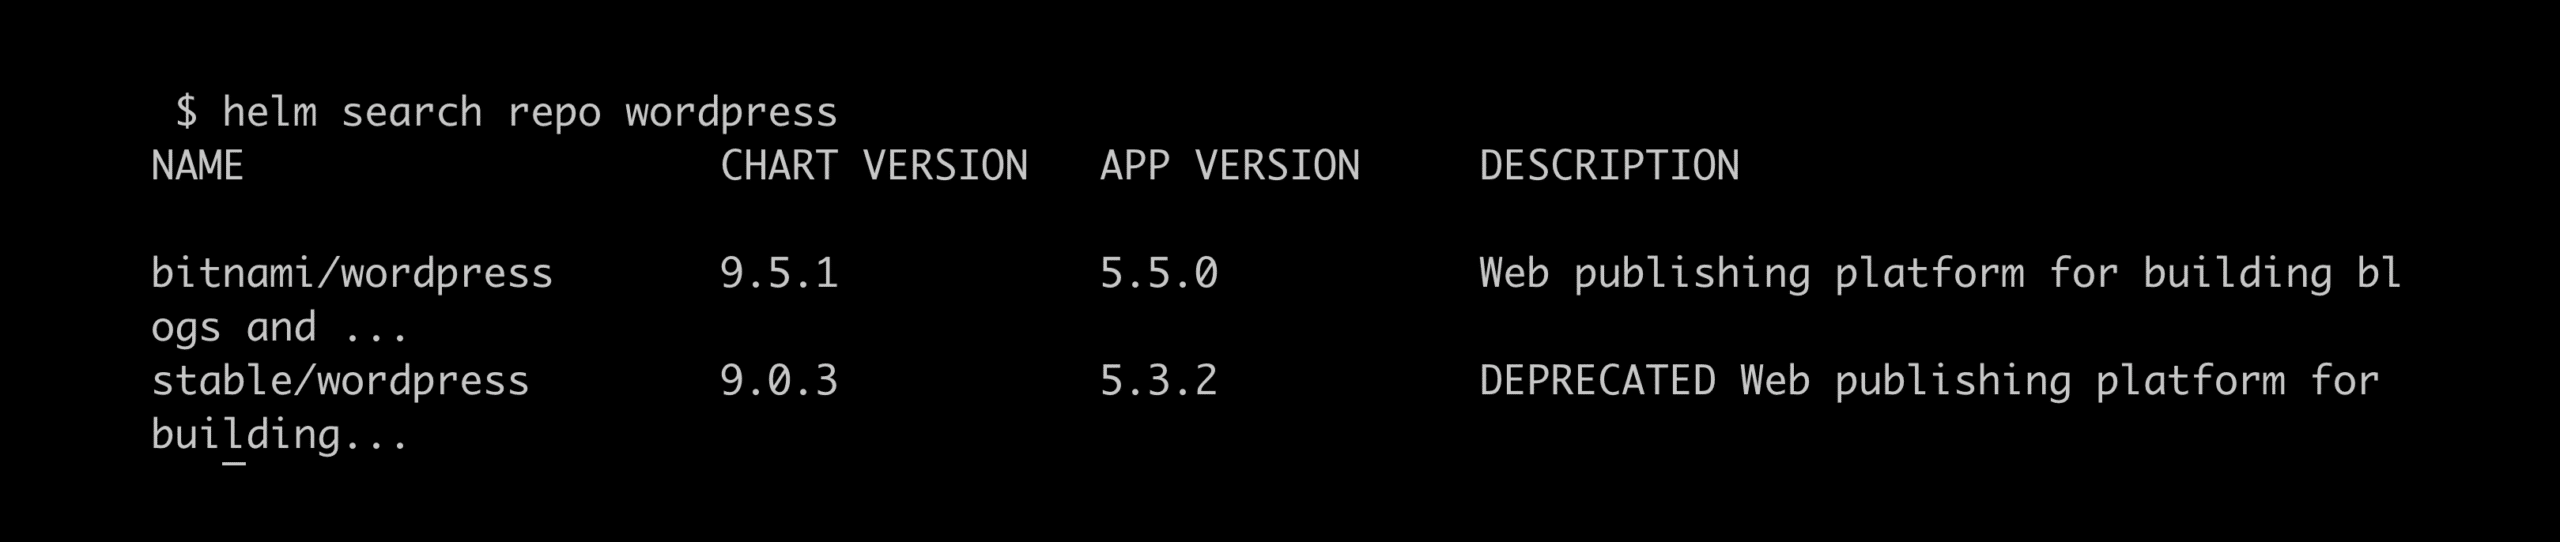
You can search for chart using the helm search command:
You can configure chart using image parameters. You can check accepted values for such parameters by specifying the following command:
$ helm show values bitnami/WordPress
You can override the values by creating a values file. Let us create a new file called values.yml and specify the required values as a dictionary. A sample values.yml looks like this:
wordpressUsername: admin
wordpressPassword: mySkert@123
wordpressEmail: admin@example.org
wordpressFirstName: admin
wordpressLastName: helm_user
wordpressBlogName: My Helm Chart
service:
type: NodePort
You can install the desired chart using the helm install command given in Figure 2.
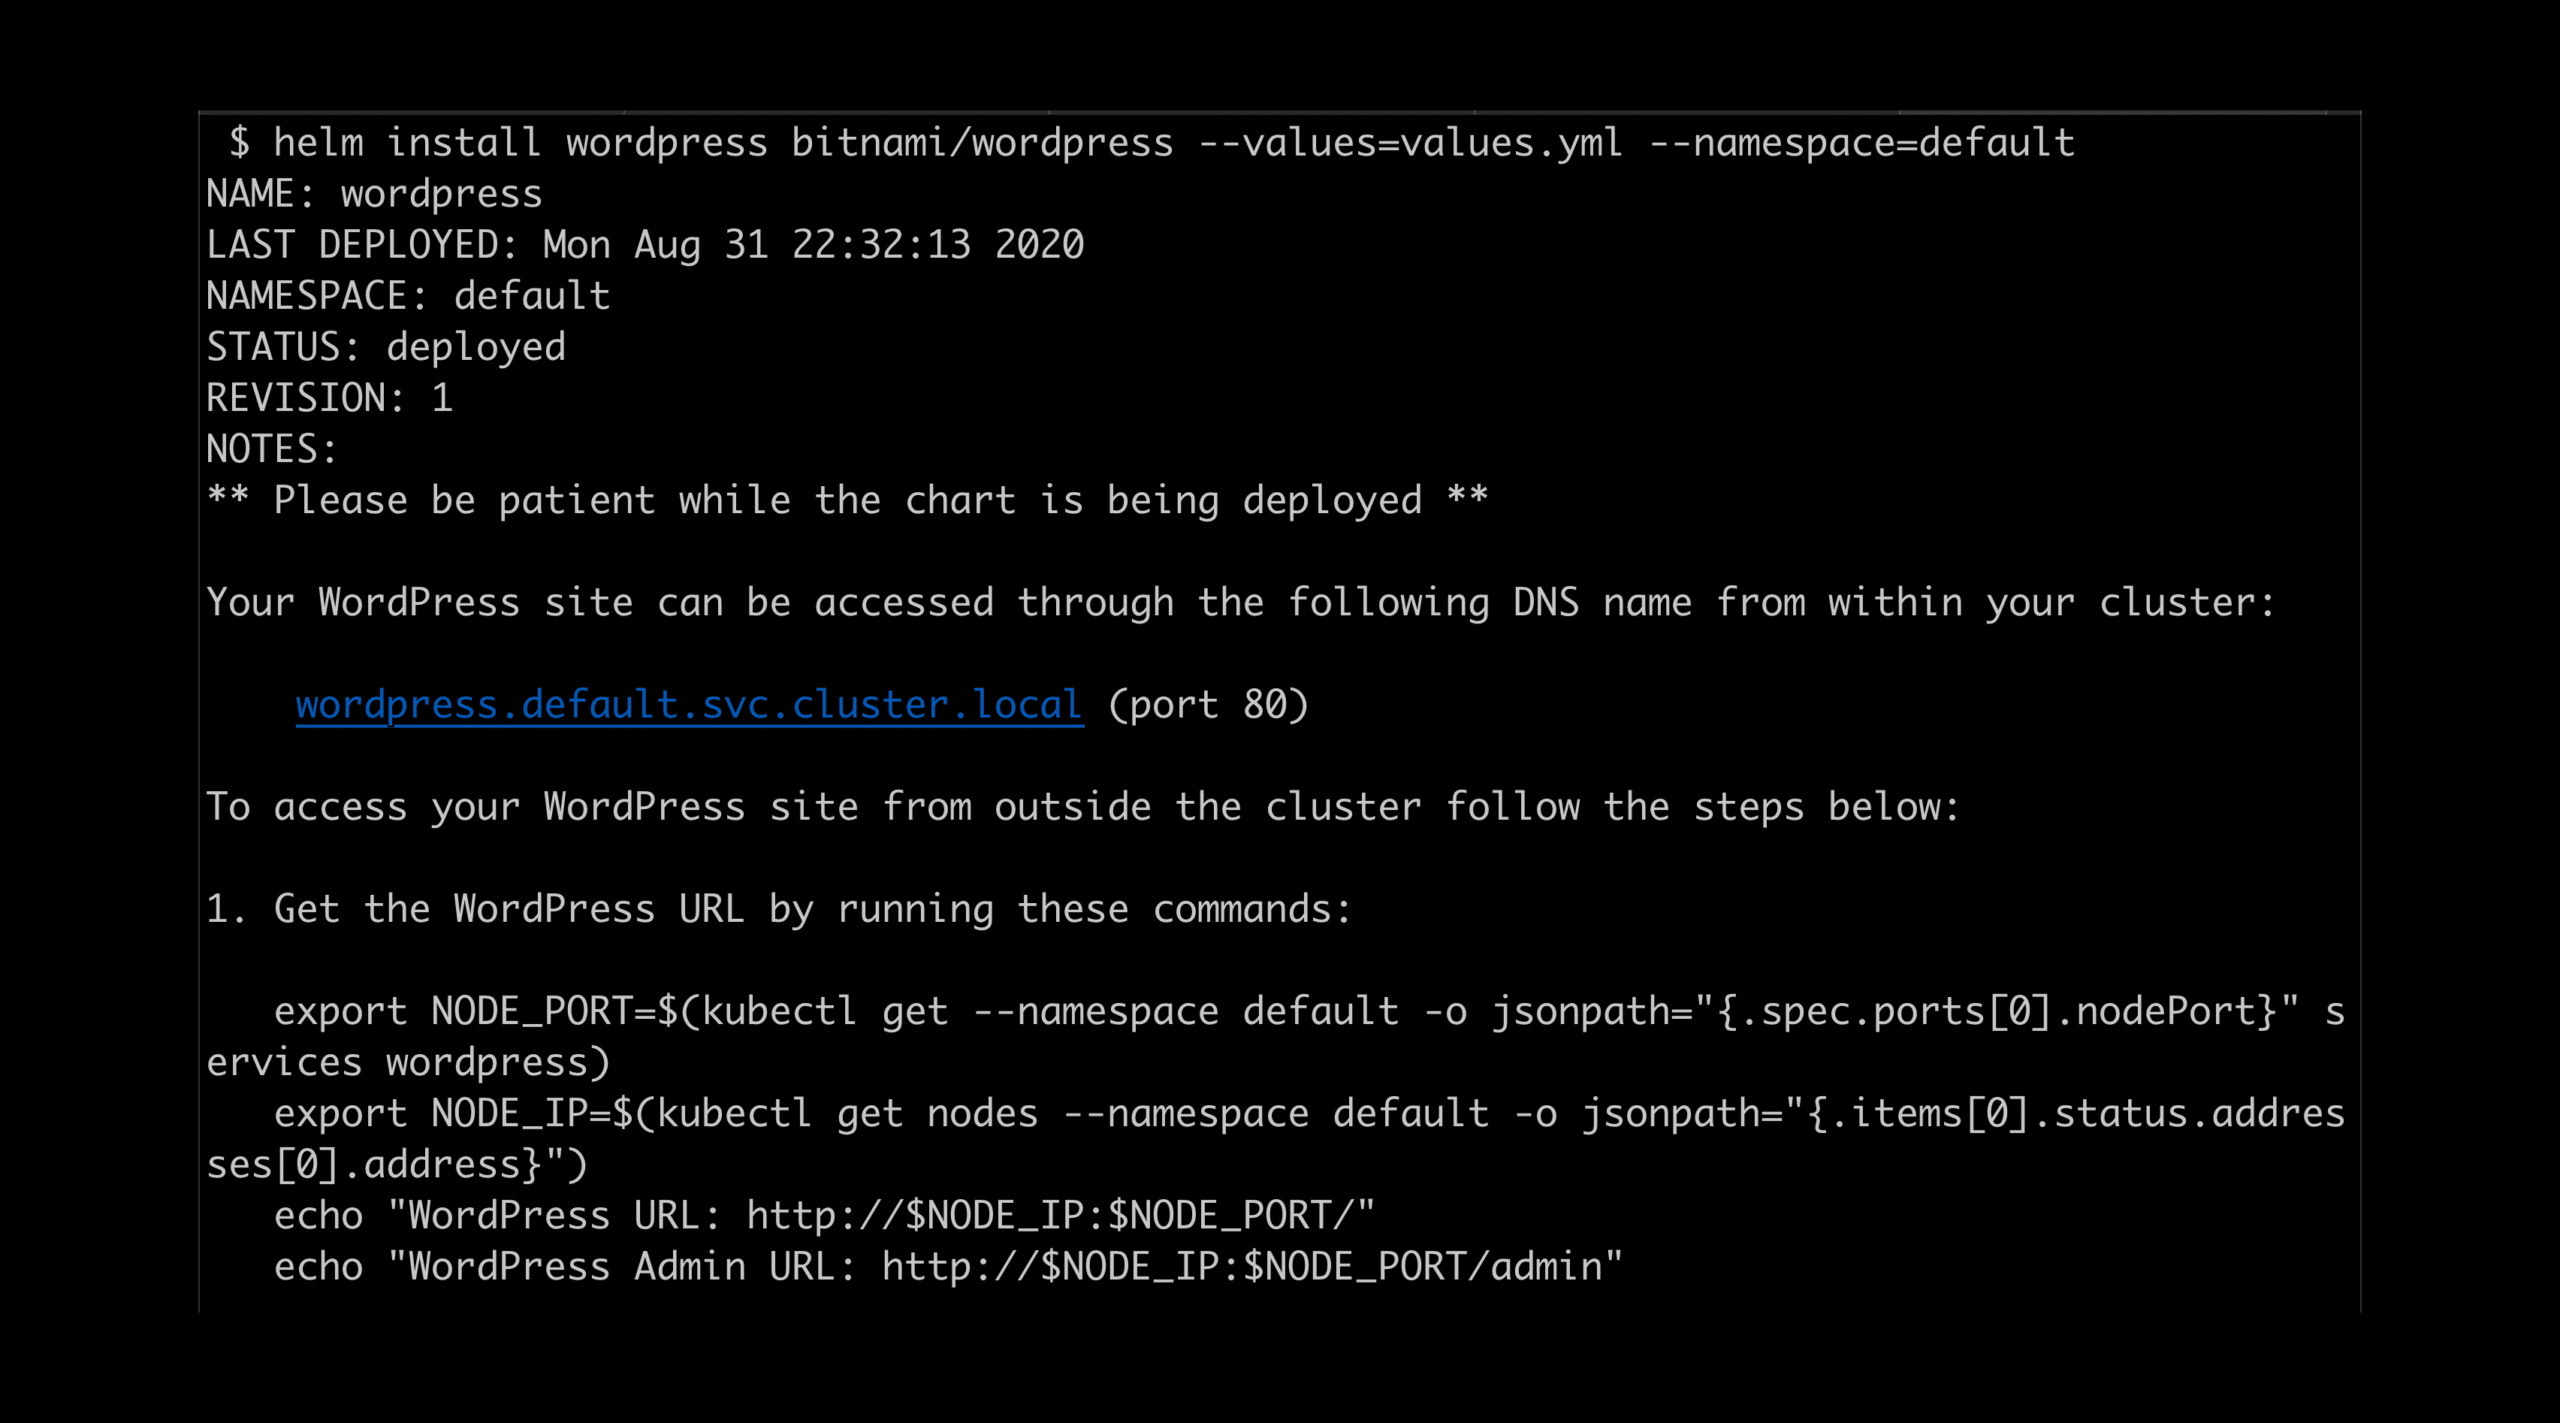
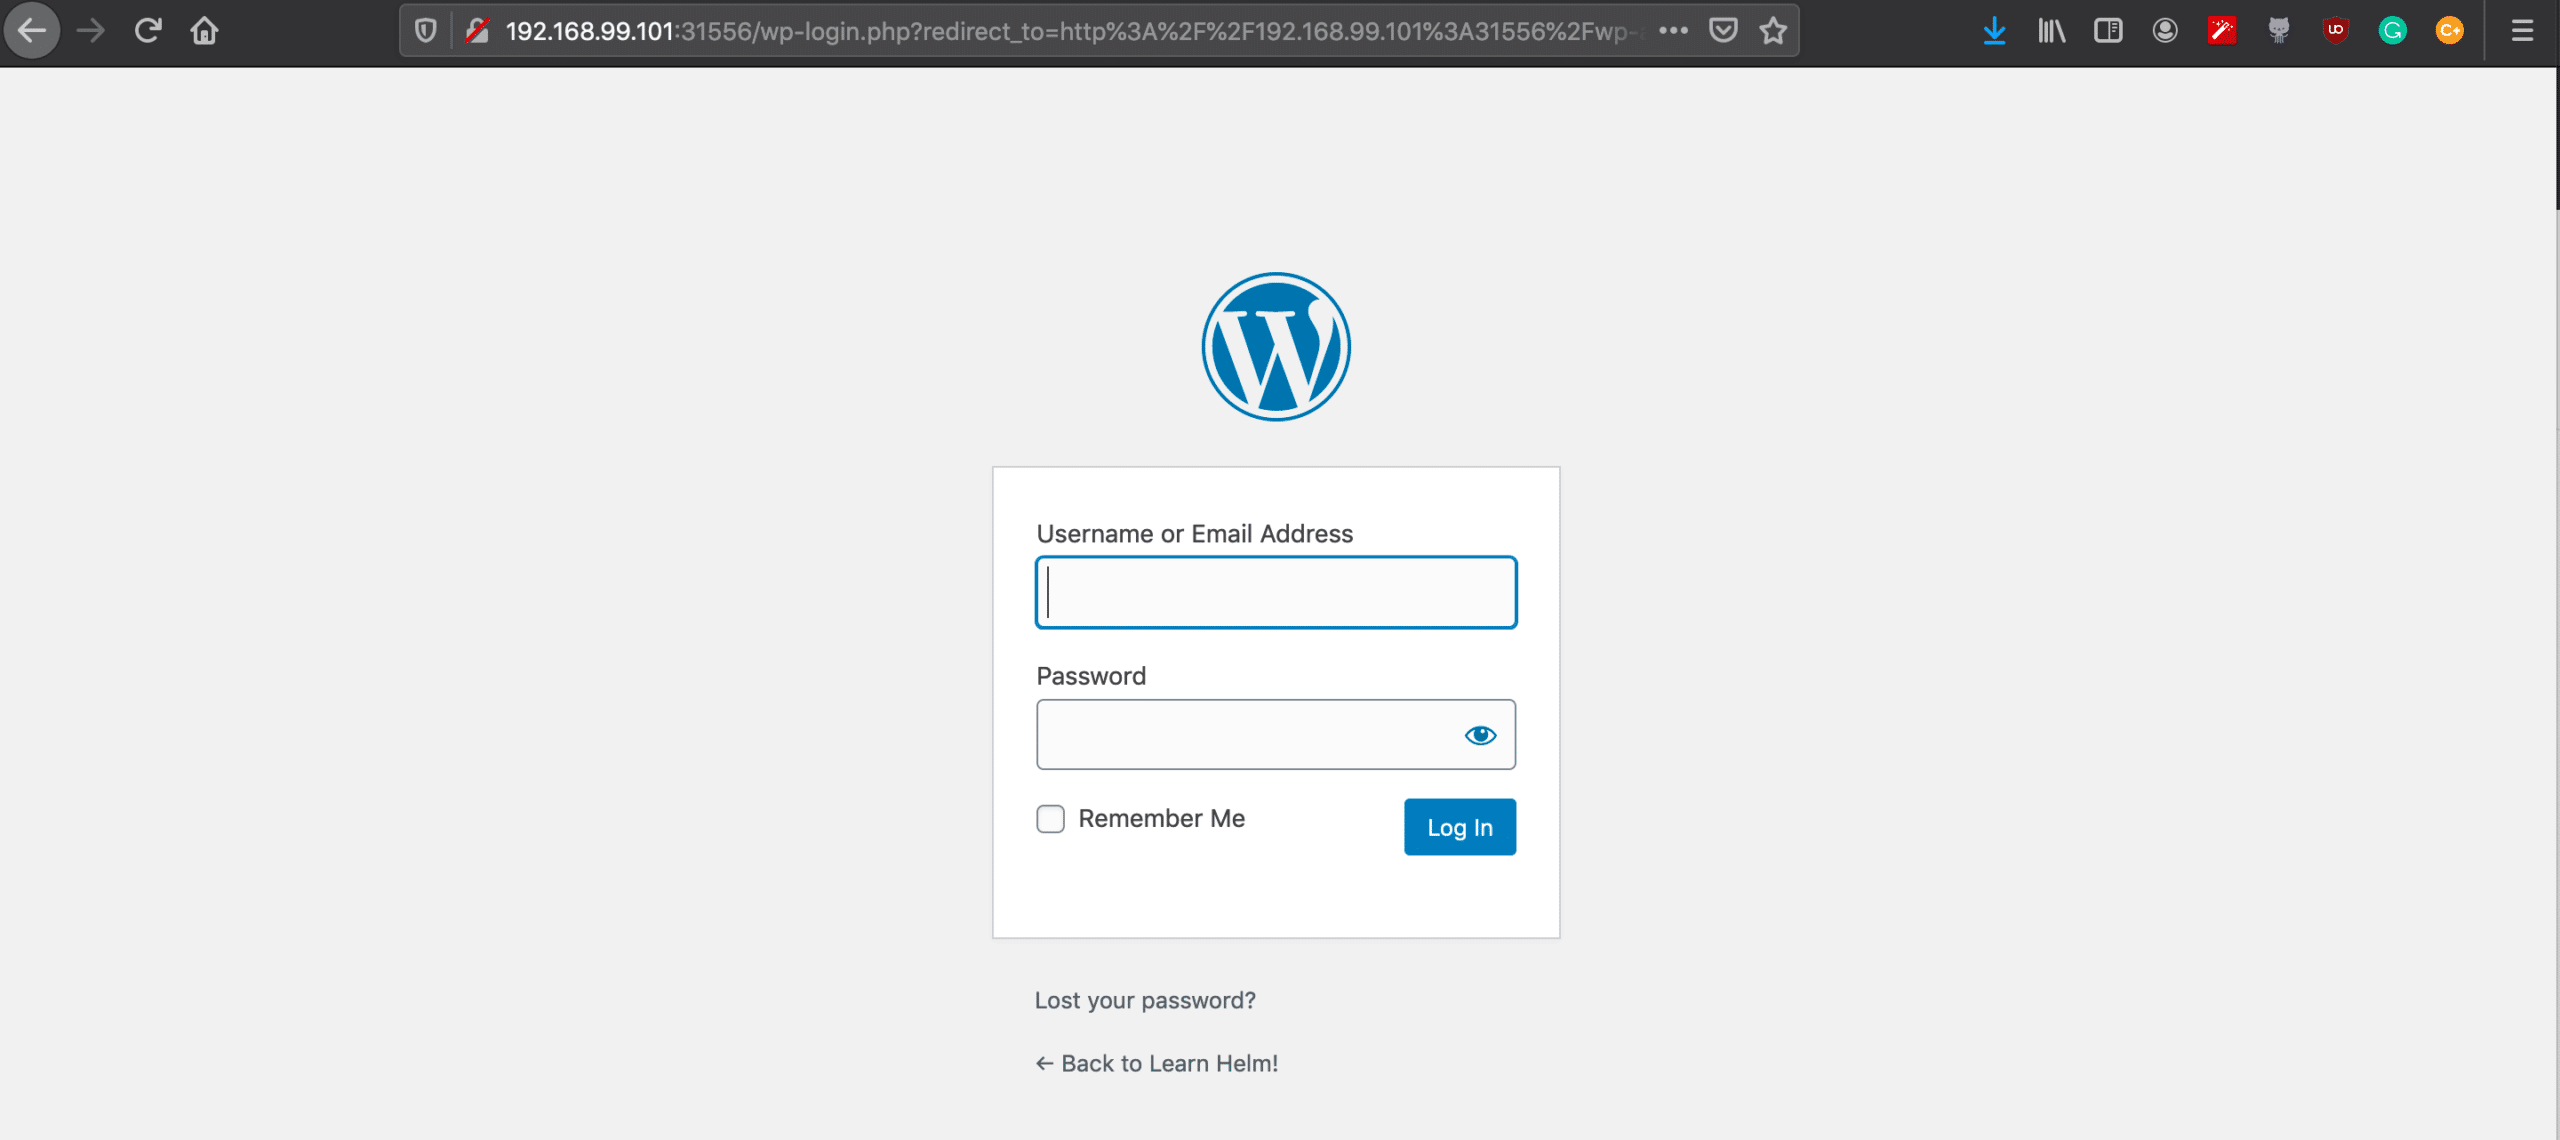
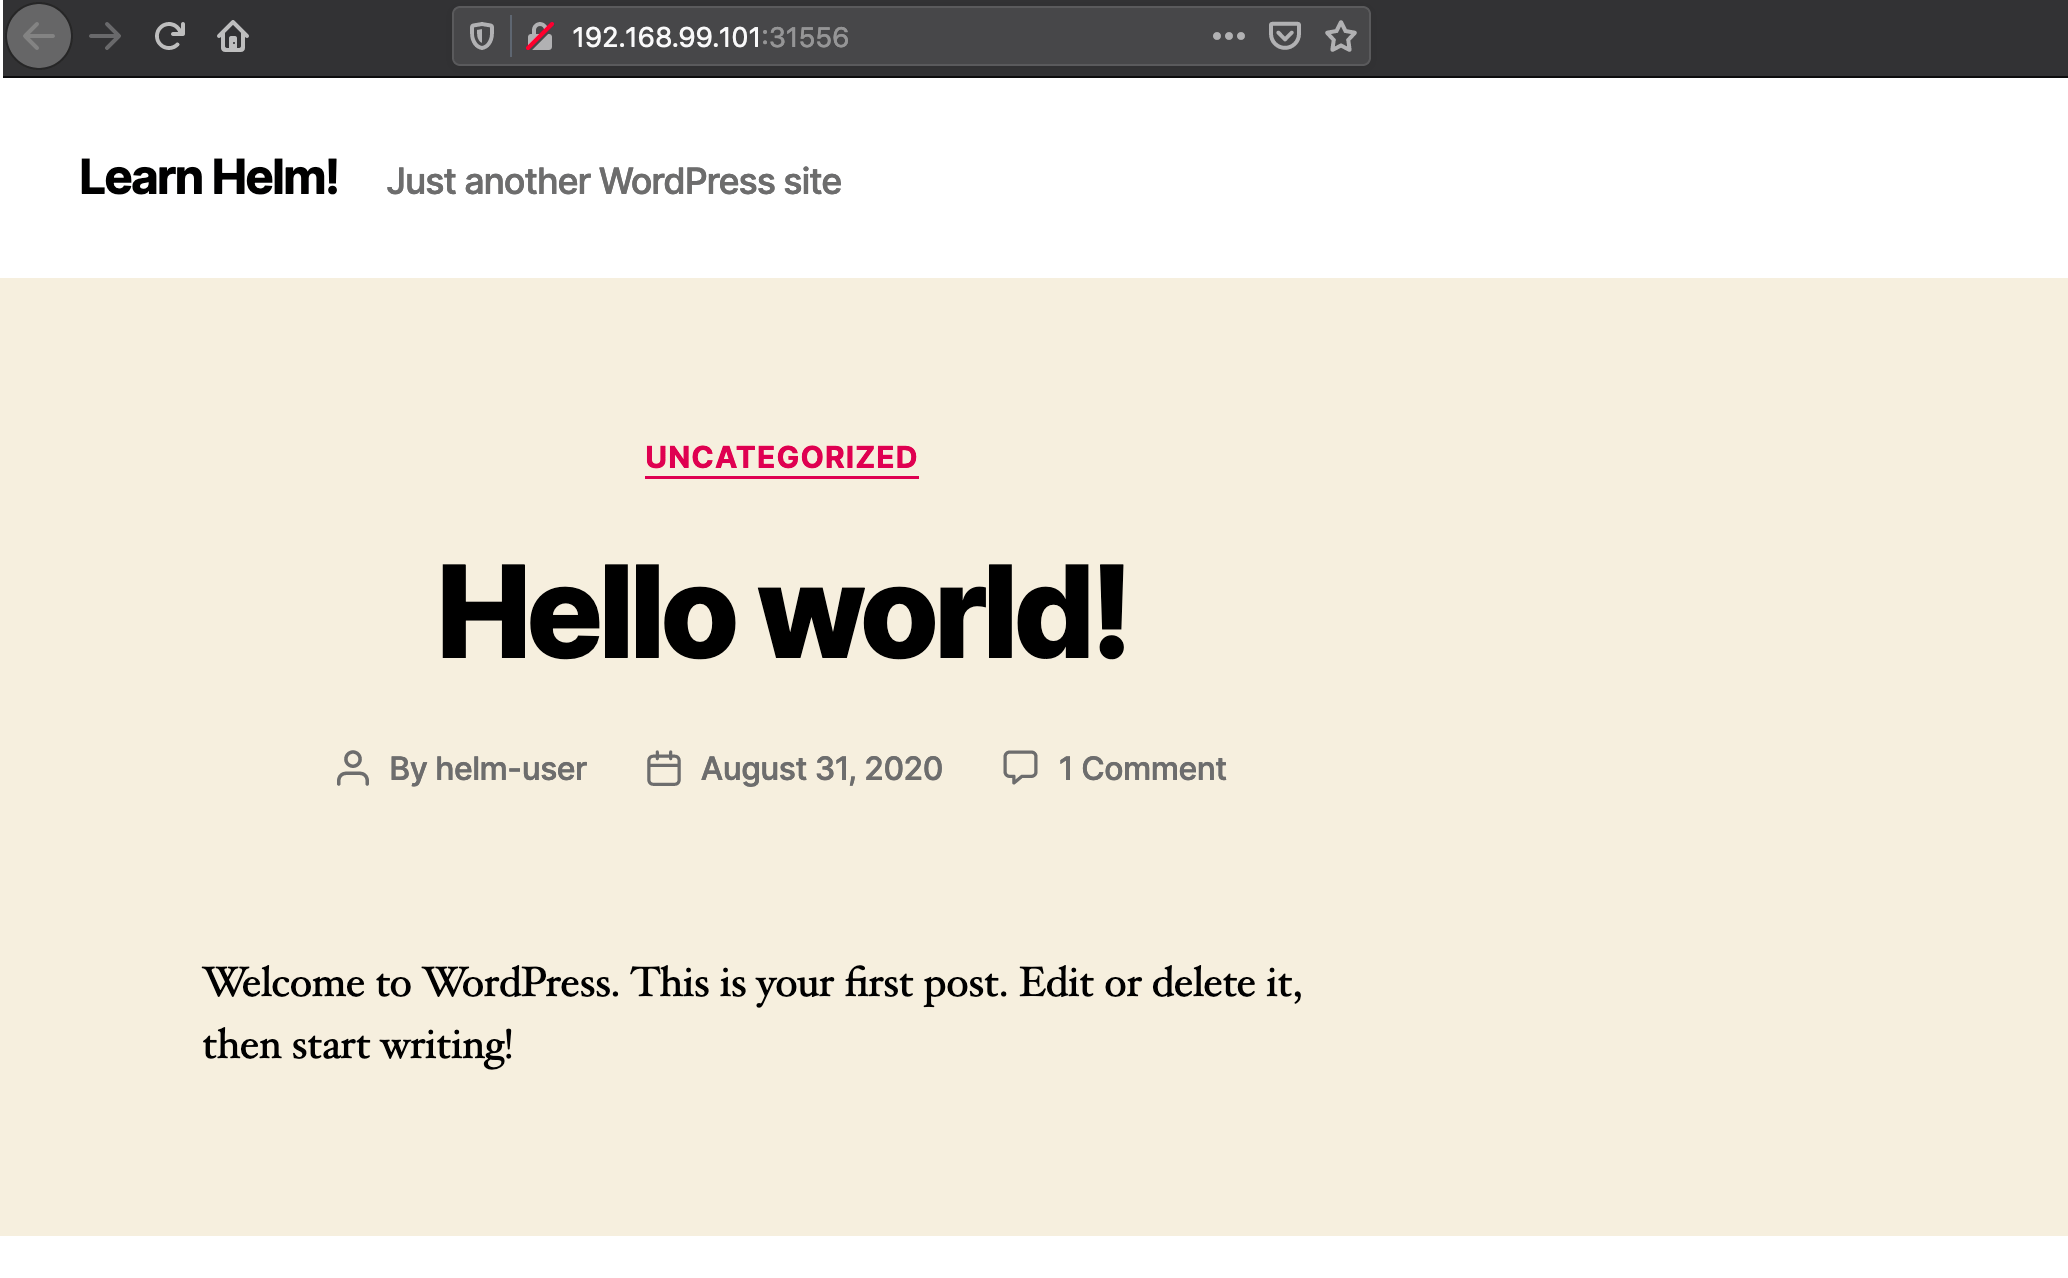
Figure 3 shows how to access your newly installed WordPress app.
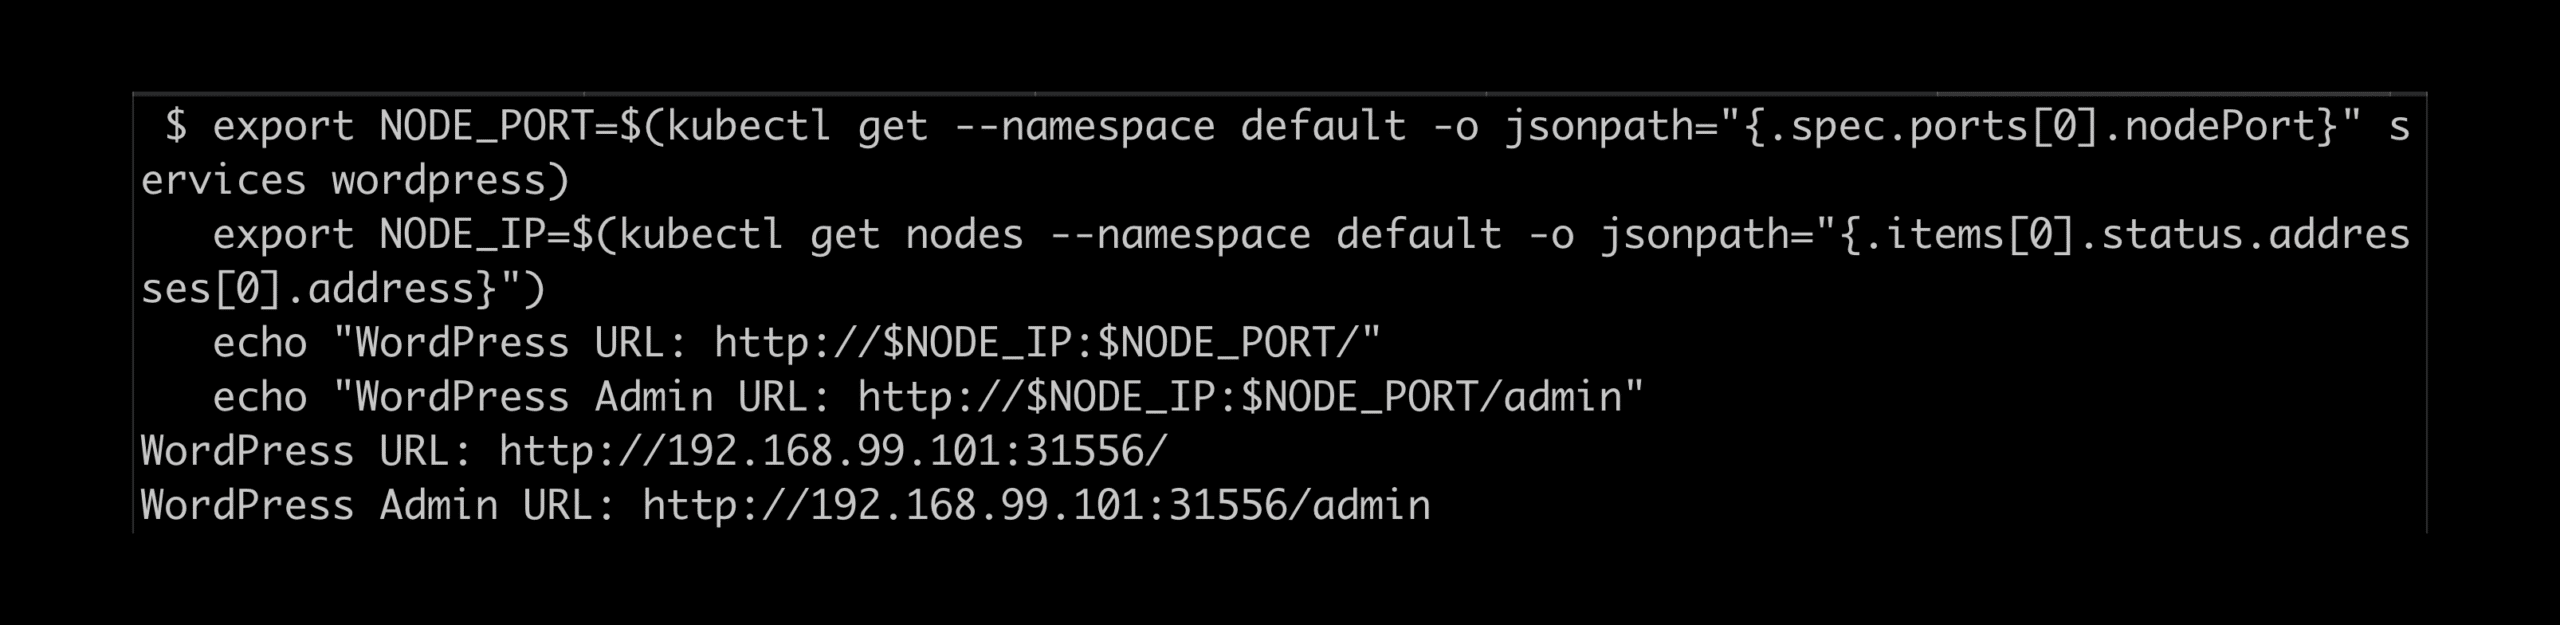
Paste the URL presented at the end, as shown in Figure 4.
You can access the WordPress admin page using a second URL in the echo command (Figure 5).