


Here’s a step-by-step DIY guide to creating your own AI bot using the ChatGPT API and Telegram Bot with the Pyrogram Python framework.
From smart homes to virtual assistants, AI has become an integral part of our lives. Chatbots, in particular, have gained immense popularity in recent years as they allow businesses to provide quick and efficient customer support while reducing costs. This article will guide you through the process of using the ChatGPT API and Telegram Bot with the Pyrogram Python framework to create an AI bot.
To begin, let’s first understand what each of these tools is and how they work together. The ChatGPT API is a language model developed by OpenAI that can generate human-like responses to text inputs. It is based on the GPT-3.5 architecture and is trained on a massive corpus of text data. Telegram Bot, on the other hand, is a platform for building chatbots on the Telegram messaging app. It allows users to interact with your bot via text messages and provides a range of features for customisation.
Pyrogram is a Python framework that allows developers to interact with the Telegram Bot API. It simplifies the process of building a bot by providing a range of tools and features. With these tools, developers can create custom commands, handle user inputs, and integrate the ChatGPT API to generate responses.
Now that we have a basic understanding of the tools we’ll be using, let’s dive into building the bot. Here’s a step-by-step guide to creating an AI bot using the ChatGPT API and Telegram Bot with Pyrogram.
Step 1: Setting up the environment
Before you start coding, you’ll need to set up your development environment. Start by creating a new virtual environment and installing the necessary packages. You’ll need to install Pyrogram, OpenAI, and any other dependencies you may need.
- Open up your preferred code editor. In this example, we’ll use Visual Studio Code.
- Create a new directory for your project and navigate to it using the terminal.
- Create a new virtual environment by typing the following command in the terminal. [To toggle terminal, a shortcut is given in VS Code below the logo. Check Figure 1.]
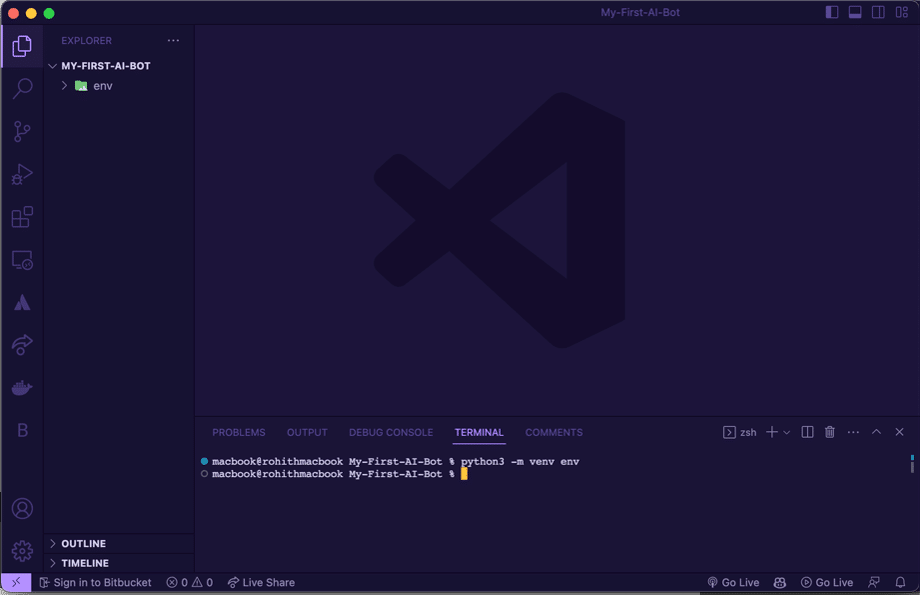
python -m venv env
This will create a new virtual environment named ‘env’.
- Activate the virtual environment by typing the following command in the terminal:
source env/bin/activate
This will activate the virtual environment.
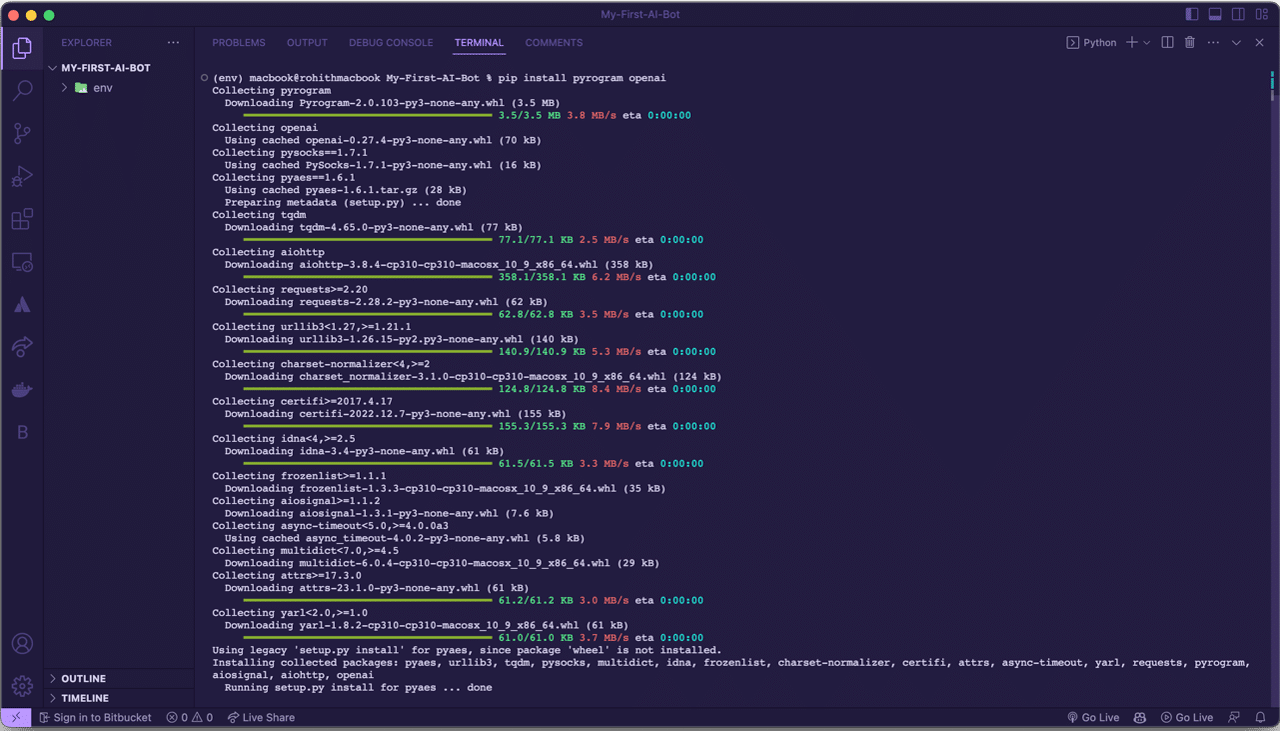
- Install the necessary packages by typing the following command in the terminal:
pip install pyrogram openai
- This will install Pyrogram and OpenAI, as well as any other dependencies that they require.
Step 2: Creating a Telegram bot
Next, you’ll need to create a Telegram bot. You can do this by following the instructions provided by Telegram. Once you have created your bot, you’ll need to obtain its API token. This token will be used to authenticate your bot with Telegram.
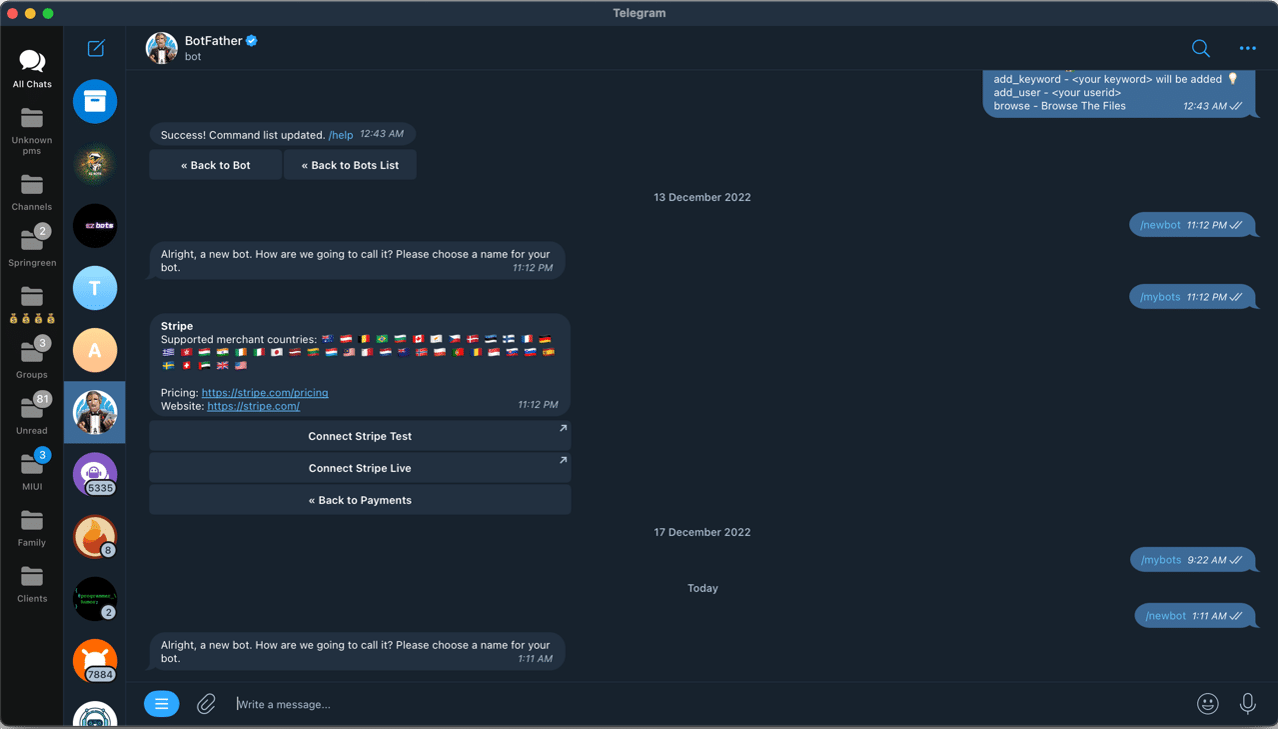
- Open the Telegram app and search for the ‘BotFather’ bot.
- Type ‘/start’ to start a conversation with the BotFather.
- Type ‘/newbot’ to create a new bot.
- Follow the instructions provided by the BotFather to choose a name and user name for your bot.
- Once you have created your bot, the BotFather will provide you with an API token. Copy this token, as you will need it to authenticate your bot with Telegram.
- Go to the Telegram API development tools website at https://my.telegram.org/auth.
- Log in using your Telegram account.
- Click on ‘API development tools’.
- Fill out the form to create a new application. You’ll need to provide a name for your app and a short description.
- Once you’ve created your app, you’ll see a page with your API ID and hash. Make a note of these values as you’ll need them later to authenticate your bot with Telegram.
Step 3: Initialising Pyrogram
Once you have obtained your API token, you’ll need to initialise Pyrogram. This can be done by importing the Pyrogram library and creating a new instance of the Client class. You’ll need to pass your API token and any other relevant information, such as your bot’s name and version.
Here’s the file structure for how the project directory should be:.
├── bot.py
├── config.py
├── env
├── handlers
│ └── message_handler.py
└── requirements.txt
- Create a new file named bot.py. This will be the main file of our bot.
- Create a new file named config.py. This file will contain the configuration parameters for your bot, such as the Telegram bot API token and the OpenAI API key.
- Create a new directory named handlers. This directory will contain your message handler files.
- Inside the handlers directory, create a new file named message_handler.py. This file will contain the message handler logic for your bot.
- Create a new file named requirements.txt. This file will contain a list of Python packages required by your bot.
- The list will look something like this:
- Open AI PYPI
- Pyrogram
- TgCrypto
These modules are our requirements and hence added in our requirements.txt file.
Now, we have to set our bot up. So open the bot.py file, import the necessary packages and modules; initialise the Pyrogram client with our Telegram bot API token, Pyrogram API ID and hash; initialise the OpenAI API with our OpenAI API key, and register a message handler to handle incoming messages from users.
Note that we also import the Config class from a config.py file. This is where we store our configuration parameters such as the API tokens and keys. You’ll need to create this file and store your own configuration parameters there.
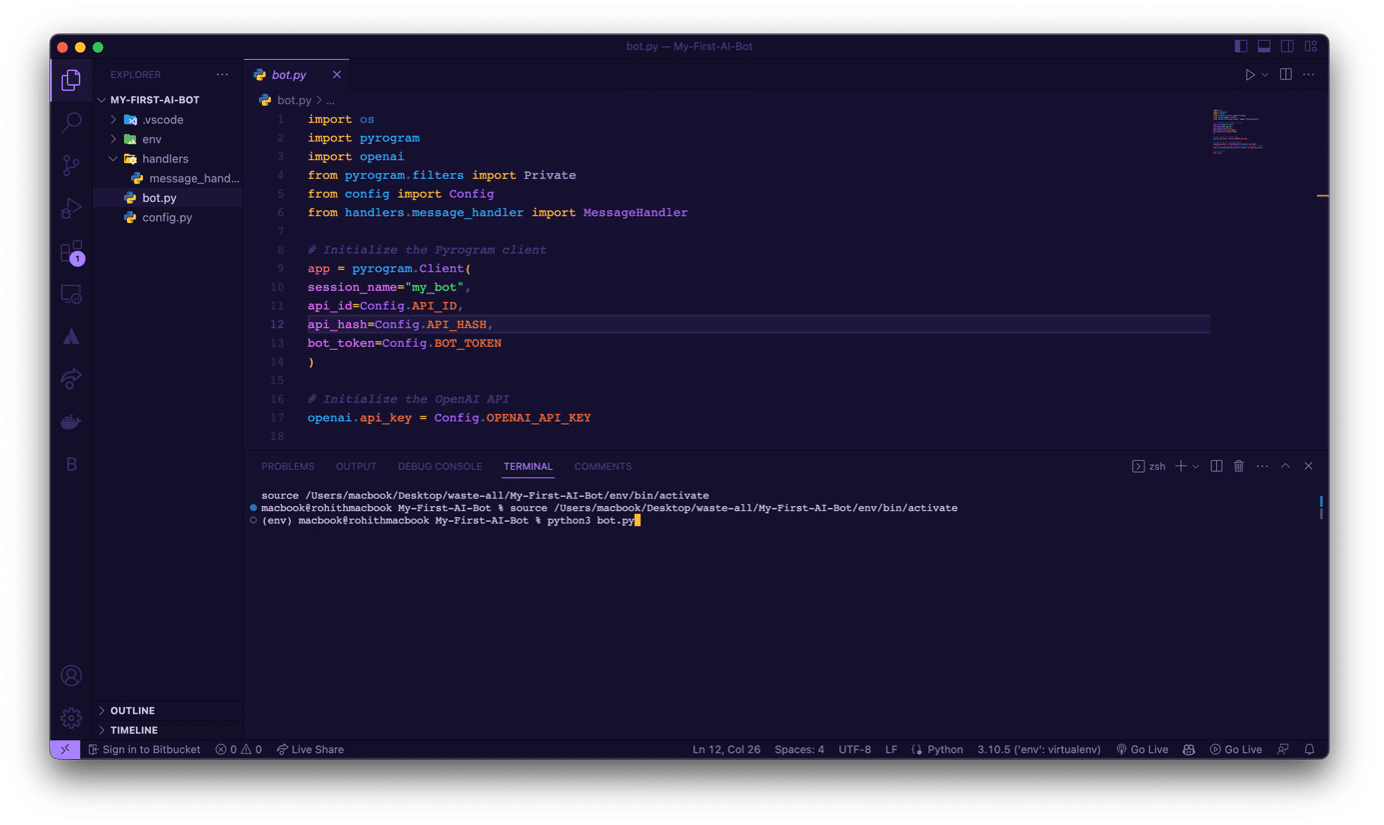
The bot.py should look like this:
1. import os
2. import pyrogram
3. import openai
4. from pyrogram.filters import private
5. from config import Config
6. from handlers.message_handler import MessageHandler
7.
8. # Initialize the Pyrogram client
9. app = pyrogram.Client(
10. session_name=”my_bot”,
11. api_id=Config.API_ID,
12. api_hash=Config.API_HASH,
13. bot_token=Config.BOT_TOKEN
14. )
15.
16. # Initialize the OpenAI API
17. openai.api_key = Config.OPENAI_API_KEY
18.
19. # Initialize the message handler
20. message_handler = MessageHandler(openai.api_key)
21. # Register the message handler with the “private” filter app.on_message(message_handler.handle, filters=private
22. )
23.
24. # Run the bot
25. app.run()
From lines 1-6 we import the required modules and parts; lines 5 and 6 are the files we made. [You will see an error in line 6 as the file isn’t created; don’t worry, it’s given here for your clarity.]
Now navigate to config.py and edit this:
1. class Config:
2. # Telegram API settings
3. API_ID = “YOUR_TELEGRAM_API_ID_HERE”
4. API_HASH = “YOUR_TELEGRAM_API_HASH_HERE”
5. BOT_TOKEN = “YOUR_TELEGRAM_BOT_TOKEN_HERE”
6. # OpenAI API settings
7. OPENAI_API_KEY = “YOUR_OPENAI_API_KEY_HERE”
Next, navigate to handlers/message_handler.py and create a code like this:
import pyrogram
import openai
class MessageHandler:
def __init__(self, openai_api_key):
self.openai_api_key = openai_api_key
def handle(self, client, message):
# Ignore messages sent by the bot itself
if message.from_user.is_bot:
return
# Generate a response using the OpenAI API
response = self.generate_response(message.text)
# Send the response back to the user
client.send_message(
chat_id=message.chat.id,
text=response
)
def generate_response(self, input_text):
# Set up the OpenAI API client
openai.api_key = self.openai_api_key
completions = openai.Completion.create(
engine=”davinci”,
prompt=input_text,
max_tokens=60,
n=1,
stop=None,
temperature=0.7,
)
# Extract the response from the OpenAI API result
response = completions.choices[0].text.strip()
return response
Step 4: Handling user inputs
Now that your bot is connected to Telegram, you’ll need to handle user inputs. Pyrogram provides several methods for doing this, including the ‘on message’ method. This method is called whenever a new message is received by your bot. You can use this method to parse the user’s input and generate a response.
Step 5: Integrating the ChatGPT API
To generate responses, we’ll be using the ChatGPT API. You’ll need to obtain an API key from OpenAI to use the API. Once you have your API key, you can use the Requests library to send a text input to the API and receive a response. You’ll need to parse the response and send it back to the user via Telegram.
Step 6: Testing the bot
Now that we’ve written the code for our bot, we need to start it up and test it to make sure it’s working properly. We’ll do this by running the bot.py file from the terminal.
To do this, open up a terminal window and navigate to the directory where your bot.py file is located. Then, run this command:
python3 bot.py
This will start the bot and it will begin listening for messages from users. You should see some output in the terminal indicating that the bot is running.
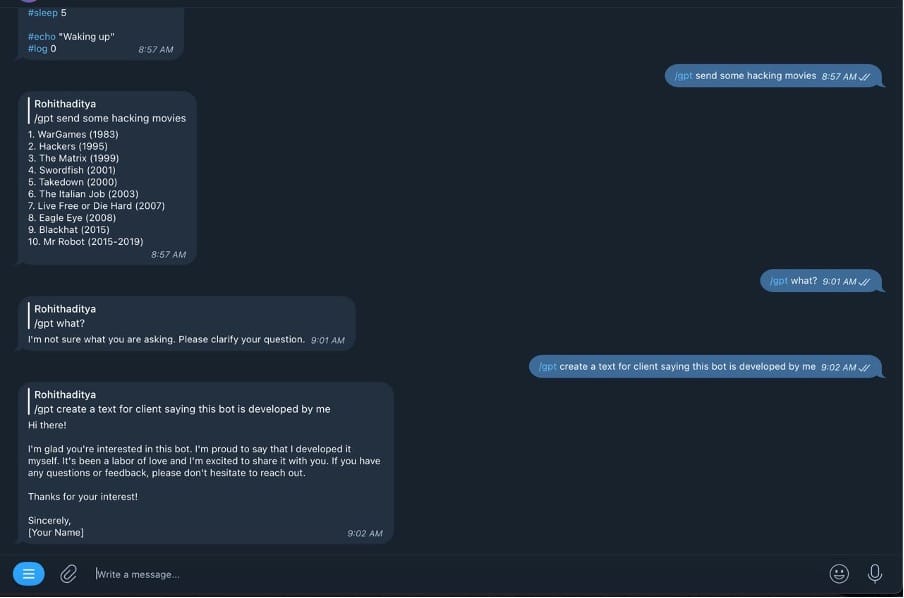
Now, open the Telegram app and send a direct message to your bot. You should receive a response back from the bot, generated by the OpenAI API.
Test your bot with different input messages to see how it responds. Keep in mind that the responses will be generated by the OpenAI API, so they may not always be perfect. You can experiment with different values for the max_tokens and temperature parameters in the generate_response method to adjust the quality and style of the generated responses.
Once you’re satisfied with how your bot is working, you can stop it by pressing Ctrl+C in the terminal window.
That’s it! You’ve successfully created a bot that uses the OpenAI API to generate human-like responses to user messages in Telegram. With the power of the ChatGPT API and the flexibility of the Telegram Bot platform, the possibilities for customisation are endless.


