



















































This hands-on guide will take you through how open source helps to build and deploy user-friendly interactive shells that run on Raspberry Pi Pico boards, making it easier to work with MicroPython.
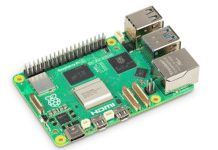
MicroPython is a popular firmware for programming Raspberry Pi Pico boards but is not easy to work with — it is not beginner-friendly and lacks flexibility. There’s always been a need for a user-friendly interactive shell to play with and develop on Pico boards. There are various free and open source solutions for building and deploying user-friendly shells that run on these boards. The tools presented in this article are tested on an Ubuntu LTS distribution, and we will run them on Docker containers. The Docker engine running on your test machine is the only requirement to try these tools.
Getting started
We’ll use various free and open source firmware and/or shell layers to flash the Pico boards. So let’s first prepare a few tools required for serial terminal access and file transfer.
First, create the Dockerfile_MinicomScreen and build a container image from it using the docker build -f Dockerfile_ MinicomScreen . -t minicomscreen command:
FROM alpine:3.22

SHELL [“/bin/ash”, “-o”, “pipefail”, “-c”]

WORKDIR /tmp

RUN apk add --no-cache minicom screen \

&& mkdir /etc/rpipico

WORKDIR /etc/rpipico
Next, create Dockerfile_Mpremote and build another container image using the docker build -f Dockerfile_Mpremote . -t mpremote command:
FROM python:3.14-alpine

SHELL [“/bin/ash”, “-o”, “pipefail”, “-c”]

WORKDIR /tmp

RUN wget https://github.com/micropython/micropython/archive/refs/heads/master.zip \

&& unzip master.zip \

&& cp -r micropython-master/tools/mpremote /usr/local/bin/ \

&& rm -rf master.zip micropython-master \

&& pip install -r /usr/local/bin/mpremote/requirements.txt \

&& ln -s /usr/local/bin/mpremote/mpremote.py /usr/local/bin/mpr \

&& mkdir /etc/rpipico

WORKDIR /etc/rpipico

ENTRYPOINT [“mpr”]

CMD [“--help”]
We now have all the necessary Docker images to move further to the next sections.
Quick programming shell
Our first shell is pshell, which provides an interactive environment with the filesystem, vim and C compiler. This shell is provided as a firmware to flash the Pico boards. Download its latest tarball from the releases link provided in the ‘Reference’ section at the end of this article. Now untar the downloaded .tgz and you should be able to see various .uf2 firmware files in the directory to flash your Pico board. The firmware files ending with _usb.uf2 will be connected to the Pico board using the minicom serial terminal.
To kick things off, flash your Pico board by connecting its USB cable to your computer. Press the BOOTSET button while inserting the cable into the microUSB port of the Pico board. You should see the Pico board mounted as a USB device on your computer. Just copy the appropriate usb.uf2 firmware downloaded to the mounted Pico drive. You’ll see the uf2 file disappearing from the mounted Pico drive once programming of the new firmware is complete. Now your Pico device will automatically reset and be ready for use. Next, connect your Pico board over a serial link by executing the command docker run -it –rm –device=/dev/ttyACM0:/dev/ttyACM0 minicomscreen minicom -D /dev/ttyACM0 on your machine. Please note, the port may not be /dev/ttyACM0, depending upon the other Pico boards connected to your machine. So adjust for that number in the command issued. The command should present a screen similar to the one shown in Figure 1. Just press Enter and you should see all the commands provided by the pshell.
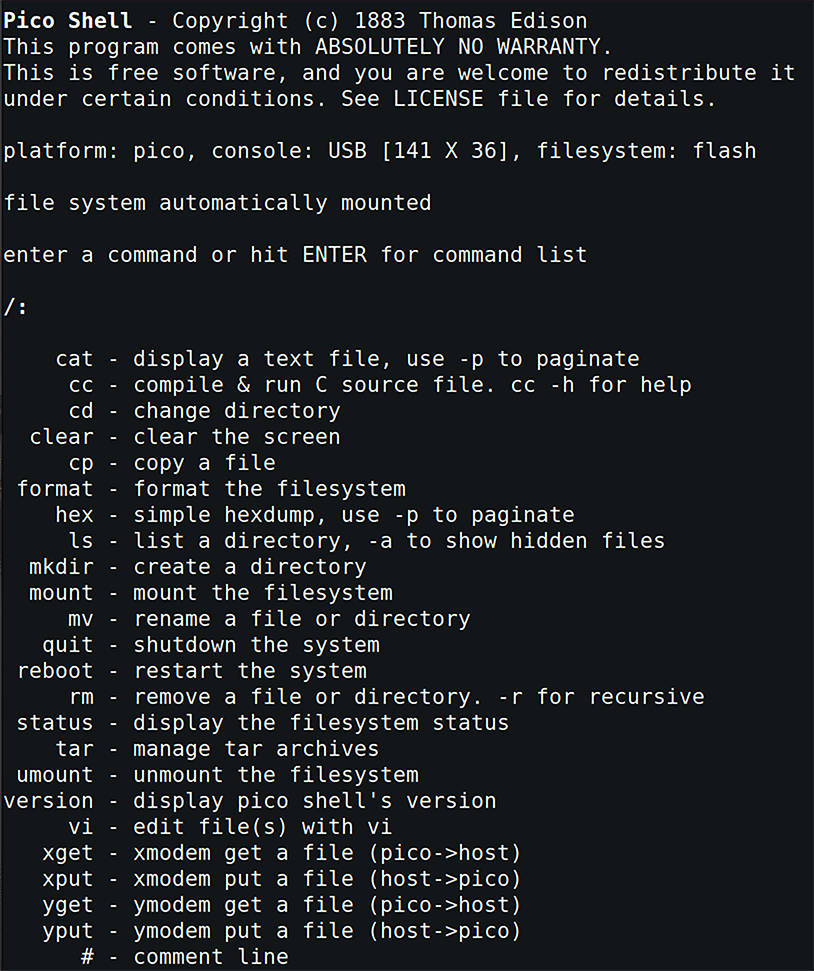
The pshell provides an autocomplete feature, and you can execute a clear command anytime to keep your shell looking tidy. Execute the status command to see the Pico storage, memory and console statistics. For *IX command line users, the cat, cd, cp, ls, mkdir, mv, rm, etc, commands should be familiar. The reboot command is helpful whenever there is a need to start your shell from a clean slate.
It’s time to see the programming powers of pshell through the official examples provided. Execute the command vi blink.c and save after entering the C code given below:
/* --- Start of blink.c --- */

int main() {

int led_pin = PICO_DEFAULT_LED_PIN;

gpio_init(led_pin);

gpio_set_dir(led_pin, GPIO_OUT);

int tic = 0;

for (;;) {

gpio_put(led_pin, tic ^= 1);

if (getchar_timeout_us(500000) == 3)

break;

}

gpio_put(led_pin, 0);

return 0;

}

/* --- End of blink.c --- */
Now, execute the command cc blink.c to blink the LED on your Pico board. Can the C programming for a Pico board be simpler than this? You can interrupt the LED blink execution by pressing the Ctrl and C keys. Executing the command cc -h will dump all the options and libraries supported by it. Quickly try to execute the umount command, and the ls command will show no files. Executing the mount command followed by the ls command will show your created files again.
Let’s move ahead and have some fun with your Pico board PWM (pulse width modulation) functionality. Create fade.c and execute it to see the onboard LED fading and lighting up alternately.
int fade, slice, going_up;

void on_pwm_wrap() {

pwm_clear_irq(slice);

if (going_up) {

if (++fade > 255) {

fade = 255;

going_up = false;

}

} else {

if (--fade < 0) {

fade = 0;

going_up = true;


}

}

pwm_set_gpio_level(PICO_DEFAULT_LED_PIN, fade * fade);

}

int main() {

fade = 0;

going_up = 0;

gpio_set_function(PICO_DEFAULT_LED_PIN, GPIO_FUNC_PWM);

slice = pwm_gpio_to_slice_num(PICO_DEFAULT_LED_PIN);

pwm_clear_irq(slice);

pwm_set_irq_enabled(slice, true);

irq_set_exclusive_handler(PWM_IRQ_WRAP, on_pwm_wrap);

irq_set_enabled(PWM_IRQ_WRAP, true);

struct {

int csr, div, top;

} config;

memcpy((int)&config, (int)pwm_get_default_config(), sizeof(config));

pwm_config_set_clkdiv((int)&config, 4.0);

pwm_init(slice, (int)&config, true);

while (1) {

wfi();

if (getchar_timeout_us(500000) == 3)

break;

}

irq_set_enabled(PWM_IRQ_WRAP, false);

pwm_set_irq_enabled(slice, false);

return 0;

}
Lightweight UNIX-style shell
Our next tool is a lightweight, real-time command-line interface (CLI) for the Raspberry Pi Pico W 2 (RP2350 dual-core), built entirely in MicroPython. This shell provides useful commands for Wi-Fi networking with persistent config, telnet daemon, file system create/read/delete/navigate, script runner and file downloader, memory/clock speed/device information, and overclocking tools.
First, flash your Pico W board with the appropriate MicroPython firmware. Now create the Dockerfile_PicoShell shown below and build a container image that has all the artifacts required by using the docker build -f Dockerfile_PicoShell . -t picoshell command. Next, execute the commands sequence given below on your machine to transfer the necessary files to your Pico board (adjust for the correct port on which your Pico board connected to your machine).
FROM mpremote

SHELL [“/bin/ash”, “-o”, “pipefail”, “-c”]

RUN wget https://github.com/patrickp02/PicoShell/archive/refs/heads/main.zip \

&& unzip main.zip \

&& rm main.zip

WORKDIR /etc/rpipico/PicoShell-main

for f in {boot,main,utils}.py telnet docs config.txt

do

docker run --rm --device=/dev/ttyACM1:/dev/ttyACM1 \

picoshell connect auto fs cp -r “${f}” :

done
Now restart and connect to your Pico W board over a serial link, as we did earlier. You should be presented with a colourful shell prompt. Executing the help command on the shell should dump a help screen as shown in Figure 2.
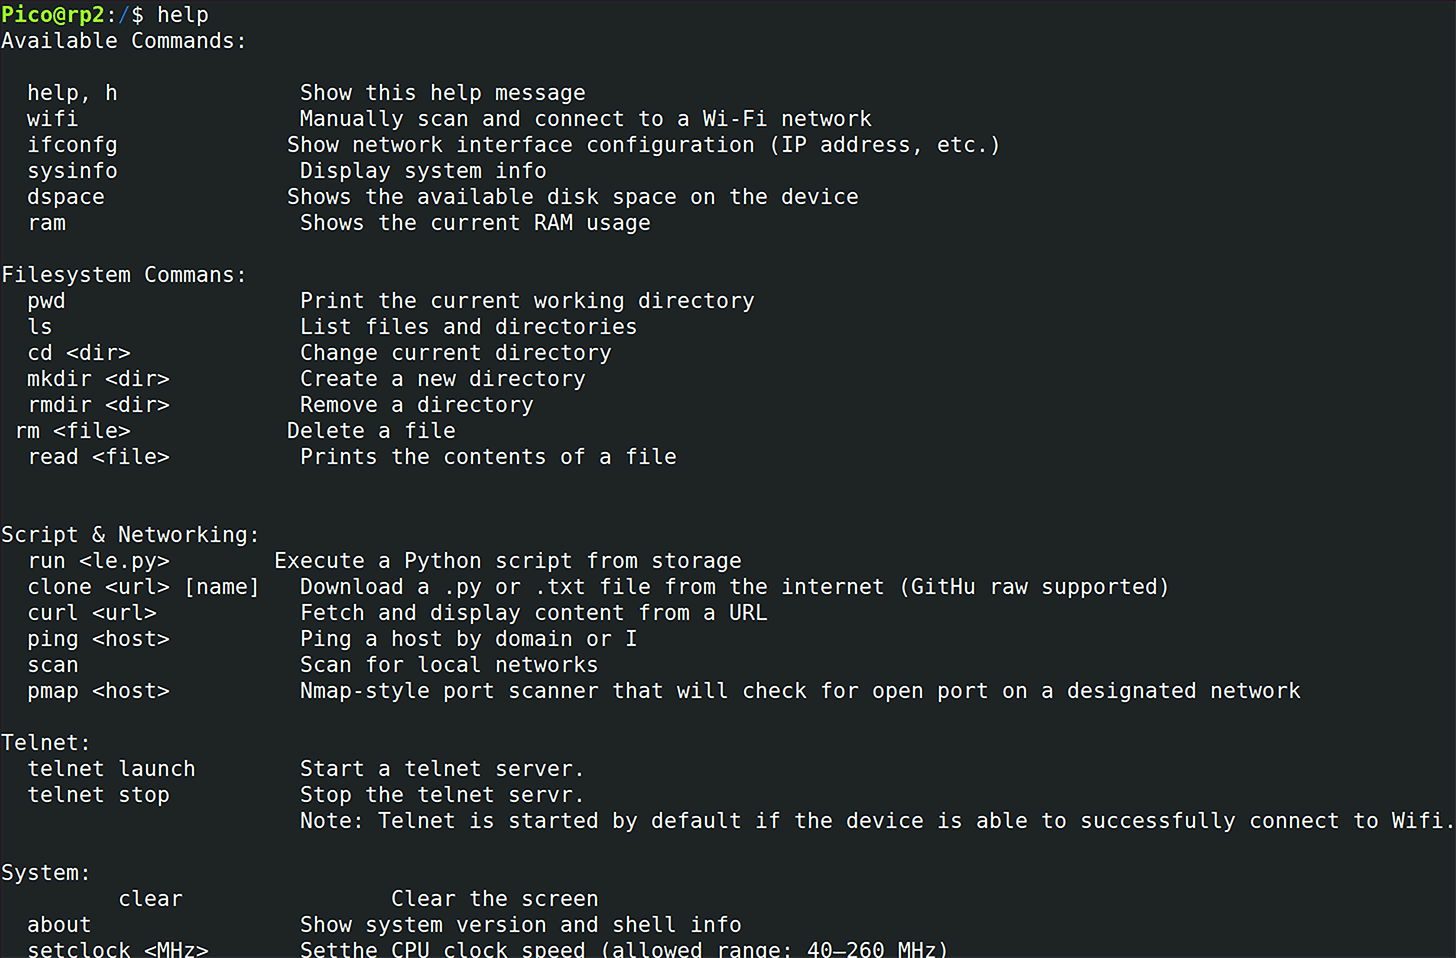
The blink command flashes your Pico W onboard LED a few times. You can dump board level information through the ram, dspace and sysinfo commands. Executing the scan command will show up the 2.4GHz Wi-Fi networks available around your board. To connect with a wireless network, enter the wifi command and give the network ID and password. You could dump the internal onchip temperature reading using the temp command. The ls command dumps the listing of files and directories on your Pico W board root. The PicoShell also provides file system commands to create/delete directory, remove file and read file. You can find the current clock speed using the clock command and set it with the command setclock. You can download a Python or text file with the clone command and run Python scripts from storage using the run command. Popular curl, ping and pmap commands are also provided by PicoShell.
Issuing the exit command drops you to the MicroPython REPL prompt. Running the code chunk from machine import soft_reset;soft_reset() on the MicroPython prompt relaunches the PicoShell. Adding more commands in the PicoShell is easy. Just add your Python routines in utils.py, update main.py for linking the commands with routines, copy the updated utils.py, main.py to the board and restart your board. PicoShell is definitely a handy tool in your Pi Pico journey.
Getting retro with a DOS-like shell
Are you ready to experience the good old classic computing days? PyDOS-shell is a Python layer created over Circuit/MicroPython covering multiple microcontroller boards. I used a Pi Pico 2 W board to play with the PyDOS as it packs many utilities that require more memory to run than available on Pi Pico 1 boards. But no worries in case you only have the Pico 1 board as you can cut the additional utilities then. Without further ado let’s add a DOS-like shell running with all the functions of a 1981 IBM PC on a Pi Pico.
I found the PyDOS working out of the box better with the CircuitPython firmware on the Pico 1/2 boards. So first flash your Pico board with an appropriate .uf2 file downloaded from the official CircuitPython site. Your board should appear as a mounted flash volume on your machine after the correct flashing. Now directly copy the PyDOS files (ignore the cpython folder on MicroPython firmware or mpython folder on the CircuitPython firmware to save flash space) to the mounted Pico board after downloading its zip from the official GitHub project page and uncompressing it. If you are trying with a less memory Pico 1 board or have limited flash space, the PyDOS.py program will run standalone to launch the shell. So you can simply copy only PyDOS.py to your microcontroller to begin with. After copying the necessary file(s), just power cycle the board so that the file system is configured to allow the microcontroller to have read/write access. When you do this, the host computer will no longer be able to write to the microcontroller mounted drive.
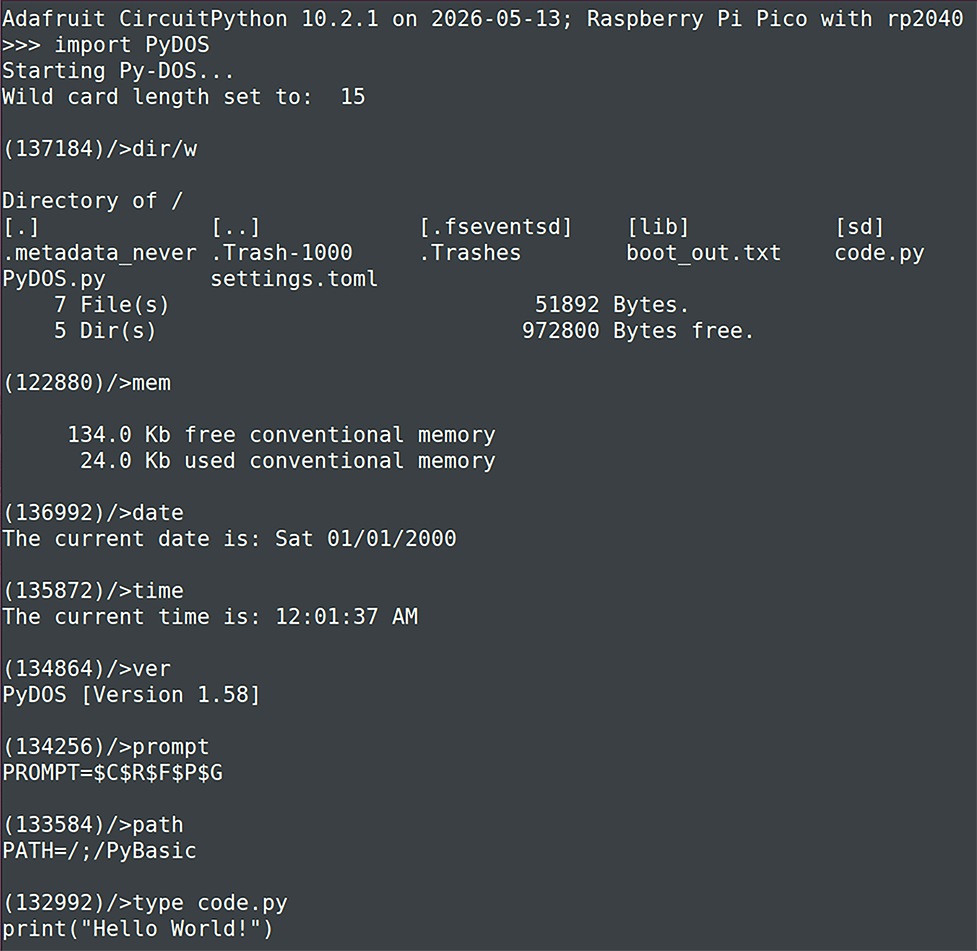
Now connect to the board over the serial terminal as we did in the last sections. If you are not going for the full setup then the board will boot to the CircuitPython prompt. Type import PyDOS on the CircuitPython prompt and the DOS shell will start running with a prompt showing the available RAM amount. Now type the dir/w command to show the directories and files listing in wide columns mode. Entering the mem command shows the available RAM and performs a garbage collection operation. The date and time commands are self-explanatory. You can change the shell prompt to something more interesting using the prompt command. Entering the type command displays contents of a file.
The DOS-shell provides more commands, which enable you to create DOS-style batch file scripts. The PyDOS project page has nice documentation to cover all the commands provided. A terminal session running the DOS shell after copying only the PyDOS.py to a Pico 1 board is shown in Figure 3. Typing the exit command on the DOS-shell will drop you to the CircuitPython prompt.
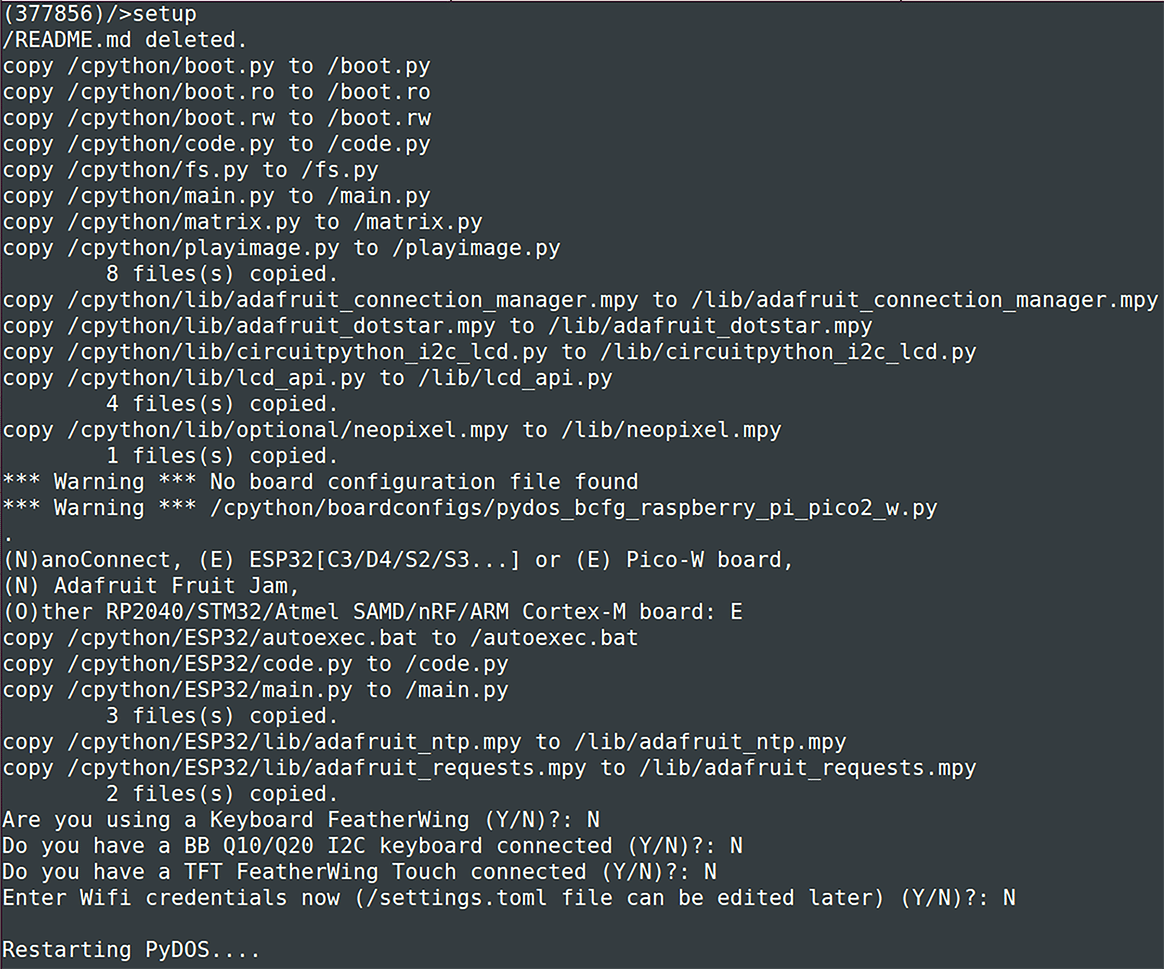
Next, let’s install the PyDOS in its full glory on a Pico 2 W board. Just copy all the PyDOS files (you can choose MicroPython over CircuitPython) and power cycle the board. You should boot directly into the DOS-shell when connected over the serial link. The setup command will install and configure everything PyDOS on the board. The setup sequence will prompt you for a few responses including board type, Wi-Fi ID/password, etc. The DOS-shell prompt reappears once the PyDOS is configured in its full glory. The setup sequence on my Pico 2 W is shown in Figure 4.
We are now ready to explore the additional functionality through the external programs we copied. Execute the command blink to start with onboard LED blinking and terminate its execution by typing q. Type temperature to keep printing the onchip sensor value and type q to stop the command. To scan the board I2C bus and display any device addresses you found, use the i2cscan command. To launch Python programs that require more memory than is available while running PyDOS, use the runvm command. Typing bounce will take you to the retro TUI animation days. You can configure a Wi-Fi ID/password (if skipped during the setup) with the setup command.
The full DOS-shell also provides various programming tools. You can launch a line editor or a full screen editor using the edlin and edit commands, respectively. A Python REPL in the shell can be launched using the virtrepl command. You can enjoy programming in good old Basic by executing pybasic commands. The full DOS-shell provides many other utilities including playing sound through the Pico GPIO, mounting an SD card to the file system, etc. Readers are encouraged to go through the PyDOS documentation to experience the full power of the DOS-shell.
To conclude, the pshell is good for quickly programming Pico boards in C. The PicoShell is a MicroPython layer that provides rich shell functionality with many useful commands. The PyDOS goes one step further to create popular classic DOS-like full environments on Pico boards. All of them are very useful for enhancing the end user experience with Pico boards.