While Sensu is a free and open source monitoring and telemetry tool, Uchiwa provides the free and open source dashboard for Sensu. This article covers the Ansible deployment of Sensu and Uchiwa.
Sensu Core is a free and open source monitoring and telemetry solution. You can use it to monitor services, an application’s health, servers and important KPIs. It is primarily a monitoring event pipeline which allows you to filter or amend incoming events, and send alerts and notifications. It uses JSON for all its configuration files and integrates well with automation tools. Uchiwa is a free and open source dashboard for Sensu, written in the Go programming language. It also requires Node.js for front-end assets and JavaScript. Both Sensu Core and Uchiwa are released under the MIT licence.
Setting them up
A CentOS 7 (x86_64) guest virtual machine (VM) using KVM/QEMU will be used to set up Sensu.
The host system is a Parabola GNU/Linux-libre x86_64 system and Ansible is installed using the distribution package manager. The version of Ansible used is 2.6.0 as indicated below:
$ ansible --version

ansible 2.6.0

config file = /etc/ansible/ansible.cfg

configured module search path = [‘/home/guest/.ansible/plugins/modules’, ‘/usr/share/ansible/plugins/modules’]

ansible python module location = /usr/lib/python3.6/site-packages/ansible

executable location = /usr/bin/ansible

python version = 3.6.5 (default, May 11 2018, 04:00:52) [GCC 8.1.0]
The Ansible inventory, playbook and configuration files are created on the host system as follows:
ansible/inventory/kvm/

/playbooks/configuration/

/files/
The inventory/kvm/inventory file contains the following:
sensu ansible_host=192.168.122.43 ansible_connection=ssh ansible_user=centos ansible_password=centos123

A ‘centos’ user is created in the guest VM and sudo access is provided for this user using the ‘visudo’ command. SELinux needs to allow access to port 3000 for the Uchiwa dashboard. You should also add an entry in the /etc/hosts file for the CentOS VM as shown below:
192.168.122.43 sensu
You can now test connectivity from Ansible to the CentOS 7 VM using the following command:
$ ansible -i inventory/kvm/inventory sensu -m ping

sensu | SUCCESS => {

“changed”: false,

“ping”: “pong”

}
Installing the repositories
The first step is to install the repositories required for Sensu. The Extra Packages for Enterprise Linux (EPEL) repository is added. The sensu.repo also needs to be created in the guest VM, whose file contents are shown below:
[sensu]

name=sensu

baseurl=https://sensu.global.ssl.fastly.net/yum/$releasever/$basearch/

gpgcheck=0

enabled=1
The Ansible playbook for setting up the pre-requisite repositories is given below:
---

- name: Repository setup

hosts: sensu

become: yes

become_method: sudo

gather_facts: yes

tags: [repo]

tasks:

- name: Install epel-release

yum:

name: epel-release

state: present

- name: Create sensu.repo

copy:

src: ../../files/sensu.repo

dest: /etc/yum.repos.d/sensu.repo
The above playbook can be invoked using the following command:
$ ansible-playbook -i inventory/kvm/inventory playbooks/configuration/sensu.yml --tags repo -vv -K
The –vv represents the verbosity in the Ansible output. You can use up to four v’s for a more detailed output. The -K option prompts for the sudo password for the centos user account.

Redis
The Redis in-memory database is used as a data store and for transport. You can install it using the YUM tool. In the following example, the protected-mode in Redis configuration is disabled as we are in development mode and the server is started. We wait for the Redis server to run on port 6379. The Ansible playbook for installing, configuring and starting Redis is as follows:
- name: Install Redis

hosts: sensu

become: yes

become_method: sudo

gather_facts: true

tags: [redis]

tasks:

- name: Install Redis

yum:

name: redis

state: present

- lineinfile:

path: /etc/redis.conf

regexp: ‘^protected-mode yes’

line: ‘protected-mode no’

- name: Start Redis

systemd:

name: redis

state: started

- wait_for:

port: 6379
The above playbook can be executed as follows:
$ ansible-playbook -i inventory/kvm/inventory playbooks/configuration/sensu.yml --tags redis -vv -K
Sensu
You can now proceed to install Sensu and the Uchiwa dashboard. The jq tool is used to process JSON data in the command line. The Sensu config.json file contents specify the Redis transport and API access information as shown below:
{

“transport”: {

“name”: “redis”

},

“api”: {

“host”: “127.0.0.1”,

“port”: 4567

}

}
The client.json file sets the environment to ‘development’ and the subscription name to ‘linux’ as shown below:
{

“client”: {

“environment”: “development”,

“subscriptions”: [

“linux”

]

}

}
The Uchiwa dashboard configuration file is given by uchiwa.json, which includes information on Sensu as well as the host and port where Sensu should run. The uchiwa.json file contents are as follows:
{

“sensu”: [

{

“name”: “sensu”,

“host”: “127.0.0.1”,

“port”: 4567,

“timeout”: 10

}

],

“uchiwa”: {

“host”: “0.0.0.0”,

“port”: 3000,

“refresh”: 10

}

}
The above configuration files are copied to the /etc/sensu directory in their respective locations. The firewall rule to allow port 3000 for the Uchiwa dashboard is then enabled. The sensu-{api, client, server} and the Uchiwa dashboard services are then started. The Ansible playbook for the above tasks is provided below for reference:
- name: Install sensu, uchiwa

hosts: sensu

become: yes

become_method: sudo

gather_facts: true

tags: [sensu]

tasks:

- name: Install sensu and packages

yum:

name: “{{ item }}”

state: present

with_items:

- sensu

- uchiwa

- jq

- name: Create config.json

copy:

src: ../../files/config.json

dest: /etc/sensu/config.json

- name: Create client.json

copy:

src: ../../files/client.json

dest: /etc/sensu/conf.d/client.json

- name: Create uchiwa.json

copy:

src: ../../files/uchiwa.json

dest: /etc/sensu/uchiwa.json

- file:

path: /etc/sensu

owner: sensu

group: sensu

recurse: yes

- firewalld:

port: 3000/tcp

state: enabled

- name: Start services

systemd:

name: “{{ item }}”

state: started

with_items:

- sensu-server

- sensu-api

- sensu-client

- uchiwa
The execution output for installing Sensu and Uchiwa is shown below:
$ ansible-playbook -i inventory/kvm/inventory playbooks/configuration/sensu.yml --tags sensu -K

SUDO password:

PLAY [Repository setup] *************************************

TASK [Gathering Facts] **************************************

ok: [sensu]

PLAY [Install Redis] ****************************************

TASK [Gathering Facts] **************************************ok: [sensu]

PLAY [Install sensu, uchiwa] ********************************

TASK [Gathering Facts] **************************************

ok: [sensu]

TASK [Install sensu and packages] ***************************

changed: [sensu] => (item=[‘sensu’, ‘uchiwa’, ‘jq’])

TASK [Create config.json] ************************************

changed: [sensu]

TASK [Create client.json] ***********************************

changed: [sensu]

TASK [Create uchiwa.json] ***********************************

changed: [sensu]

TASK [file] **************************************************

changed: [sensu]

TASK [firewalld] *********************************************

changed: [sensu]

TASK [Start services] ***************************************

changed: [sensu] => (item=sensu-server)

changed: [sensu] => (item=sensu-api)

changed: [sensu] => (item=sensu-client)

changed: [sensu] => (item=uchiwa)

PLAY [Enable checks] ****************************************

TASK [Gathering Facts] **************************************

ok: [sensu]

PLAY RECAP **************************************************

sensu : ok=11 changed=7 unreachable=0 failed=0
You can now verify that Sensu is running fine by querying the API for clients using the Curl command and parsing the output using jq, as follows:
$ curl -s http://127.0.0.1:4567/clients | jq .

[

{

“name”: “localhost.localdomain”,

“address”: “192.168.122.164”,

“environment”: “development”,

“subscriptions”: [

“linux”,

“client:localhost.localdomain”

],

“version”: “1.4.3”,

“timestamp”: 1533722644

}

]
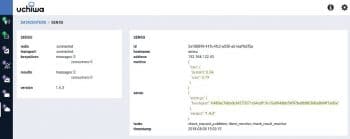
The Uchiwa dashboard is available at http://192.168.122.43:3000 in the host system, and you can view the Sensu client Web interface as shown in Figure 1.
The Sensu data center view is shown in Figure 2.

Checks
The monitoring checks for CPU, disk and memory can be set up on the guest VM and viewed in the Uchiwa dashboard. The sensu-install command is used to install the Ruby script checks that will be run periodically. The check configurations for CPU, disk and memory are copied to the /etc/sensu/conf.d directory and provided below for reference:
Listing 6.1: check_cpu_linux.json

{

“checks”: {

“check-cpu-linux”: {

“command”: “/opt/sensu/embedded/bin/check-cpu.rb -w 80 -c 90 “,

“interval”: 60,

“subscribers”: [

“linux”

]

}

}

}

Listing 6.2: check_disk_usage_linux.json

{

“checks”: {

“check-disk-usage-linux”: {

“command”: “/opt/sensu/embedded/bin/check-disk-usage.rb -w 80 -c 90”,

“interval”: 60,

“subscribers”: [

“linux”

]

}

}

}

Listing 6.3: check_memory_linux.json

{

“checks”: {

“check_memory_linux”: {

“command”: “/opt/sensu/embedded/bin/check-memory-percent.rb -w 90 -c 95”,

“interval”: 60,

“subscribers”: [

“linux”

]

}

}

}
Finally, the Sensu services are restarted. The Ansible playbook to install the checks is given below, for reference:
- name: Enable checks

hosts: sensu

become: yes

become_method: sudo

gather_facts: true

tags: [checks]

tasks:

- name: Install checks

command: “sensu-install -p {{ item }}”

args:

chdir: /opt/sensu/embedded/bin

with_items:

- cpu-checks

- disk-checks

- memory-checks

- name: Create check json files

copy:

src: “../../files/{{ item }}.json”

dest: “/etc/sensu/conf.d/{{ item }}.json”

with_items:

- check_cpu_linux

- check_disk_usage_linux

- check_memory_linux

- name: Restart services

systemd:

name: “{{ item }}”

state: restarted

with_items:

- sensu-server

- sensu-api

- sensu-client

- uchiwa
The above playbook can be invoked using the following command:
$ ansible-playbook -i inventory/kvm/inventory playbooks/configuration/sensu.yml --tags checks -vv -K
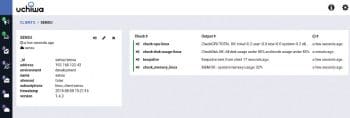
The Sensu dashboard will now have the installed checks as shown in Figure 3.

The results of the check output are also available in the dashboard as shown in Figure 4.
You are encouraged to read the Sensu Core documentation available at https://docs.sensu.io/sensu-core/1.4/ to learn more about the framework and its usage.


