


This article gives an overview of how to deploy and manage a private email server on Linux using Carbonio Community Edition and its dedicated Admin Panel.
Sending and receiving confidential information is a normal part of any business. Many companies send this information through public email servers, which means they have little control over who can run, use and manage the email system. This exposes them to spam, phishing, and data breaches. Having a private server is a big step towards email security; plus, it keeps those creepy online ads away. Here is an easy way to deploy and manage your own private email server on Linux using Carbonio Community Edition and its dedicated Admin Panel.
What is Carbonio Community Edition?
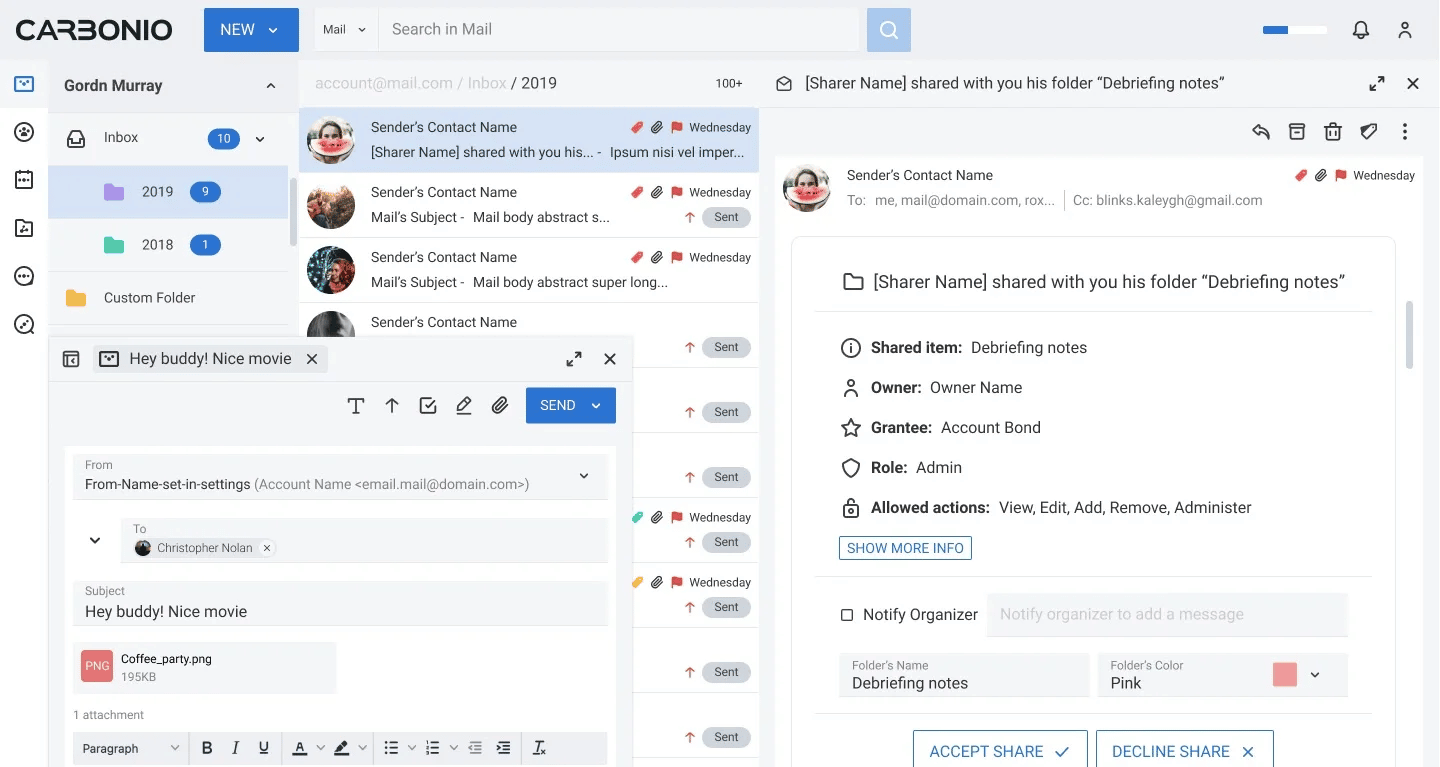
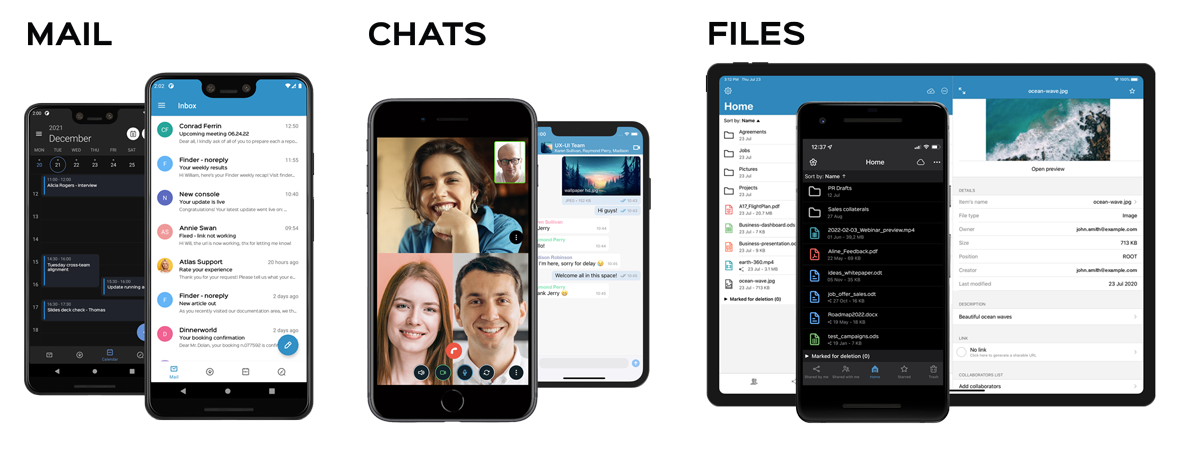
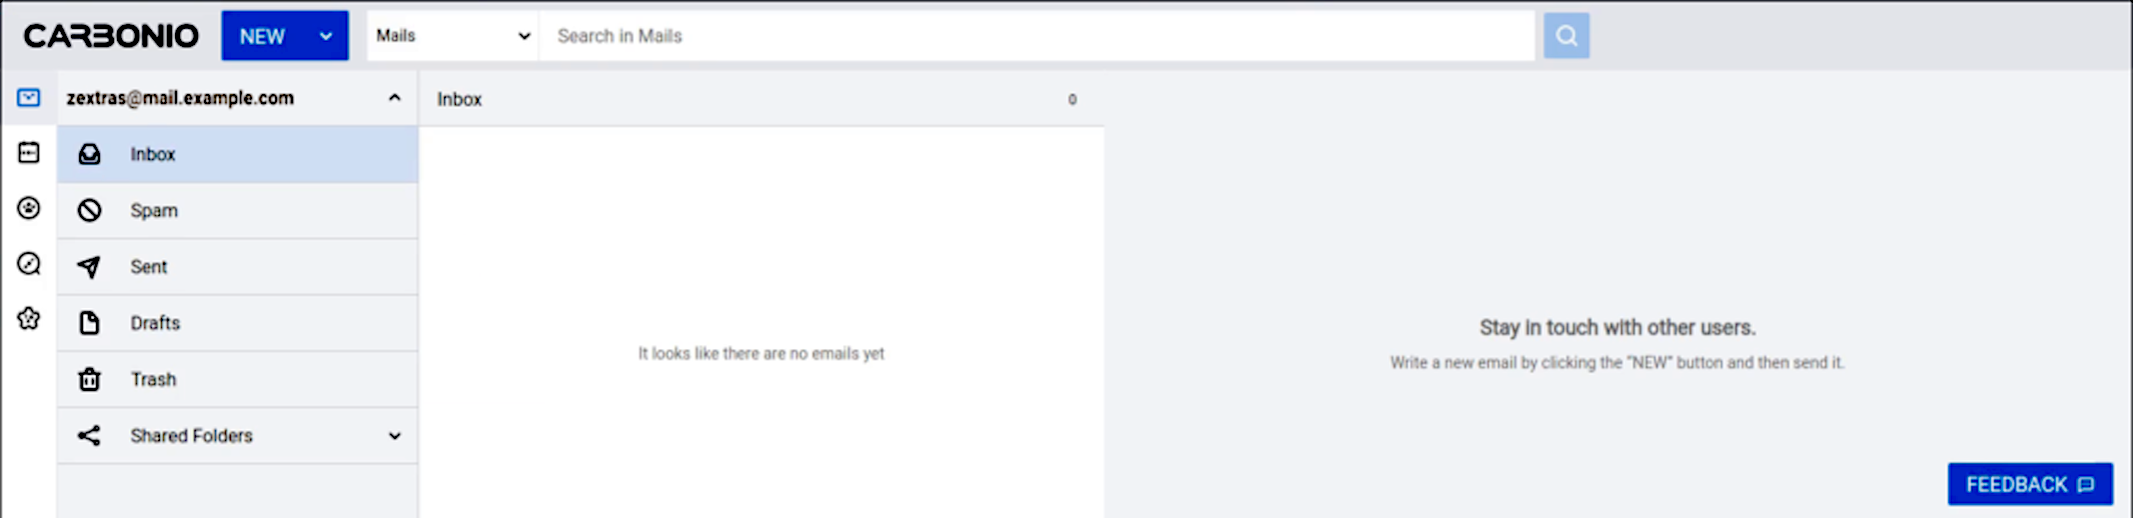
Carbonio CE is a relatively new open source email server and collaboration platform by Zextras. It comes with an all-inclusive web client that contains a variety of tools for the common workplace tasks, such as files, calendars, chats, and video meetings; plus, a dedicated anti-spam and anti-virus feature.
Why Carbonio Community Edition?
Carbonio CE is free, open source, and multi-platform. It can boost teamwork and save time that is often wasted because of inefficient communication between team members. It is also available for mobile devices to facilitate communication even further, being accessible anywhere and at any time.
Carbonio CE focuses on enabling data sovereignty for enterprises by utilising self-hosted servers on the company’s premises.
Quick installation
Installation of Carbonio CE is very straightforward. There are some requirements that should be met beforehand including:
- 1.5GHz 64-bit CPU
- 8GB of RAM
- 40GB of disk space
- FQDN (fully qualified domain name) such as https://mail.example.com
- Valid A and MX records for the server and domain
- Ubuntu 20.04 LTS Focal Fossa
Fill out the form by going to the Carbonio Community Edition web page. An email listing simple steps for adding the repository to your operating system will shortly be sent to you. After adding the repository successfully, just follow the on-screen instructions.
Add your local IP address and host name to your hosts file:
echo “$LOCAL_IP $HOSTNAME.$DOMAIN” >> /etc/hosts
Install some necessary packages as the root user:
apt install service-discover-server \
carbonio-directory-server \
carbonio-proxy \
carbonio-webui carbonio-files-ui \
carbonio-admin-login-ui \
carbonio-mta \
carbonio-appserver carbonio-logger \
carbonio-user-management \
carbonio-files-ce carbonio-files-db \
carbonio-storages-ce \
carbonio-preview-ce \
carbonio-docs-connector-ce carbonio-docs-editor \
carbonio-admin-ui carbonio-admin-console-ui \
postgresql-12
You will configure your server using carbonio-bootstrap in this phase:
screen carbonio-bootstrap
Congratulations! You’re done and your private Carbonio CE server has been successfully deployed.
Users can now access the web client via the IP address or the domain such as:
- https://mail.example.com/
- https://yourIP/
If you have any problem during the installation you can read the official documentation for more information.
Bonus feature: Carbonio CE Admin Panel
As said before, Carbonio CE focuses on data sovereignty more than anything else. To do that, it uses self-hosted servers on the premises of the company. On-premises servers require more attention from systems administrators, which demonstrates the significance of an administrative console in making sysadmins’ tasks easier.
In October 2022, Zextras launched a centralised and graphical interface for managing administrative operations, that is, the Admin Panel for Carbonio Community Edition.
Sysadmin-specific software evolves like all software, but at a much slower pace. Carbonio CE Admin Panel can be thought of as an evolution to classical admin tools, but more efficient. It has the important advantage of providing an overview of the whole system, all in one place. Monitoring and managing are all bundled into the panel, so you can view and make changes based on what you see. It can also be accessed remotely; after all, having gone through Covid we have all realised how important remote access is.
Let’s be clear here though: what you can do on the Carbonio CE Admin Panel can also be done using the CLI, but it will in no way be as plain and intuitive. Plus, you will be able to view real-time analytics on your system and save time as every action will need only a simple click.
Overview of Carbonio CE Admin Panel
Carbonio CE Admin Panel offers a condensed, practical, and understandable interface that aims to provide the most convenient management of domains, users, and classes of service in Carbonio CE. It is available on port 6071 of the server’s domain name. For instance,
https://mail.example.com:6071/login.
Admin Panel follows the same design system used in Carbonio CE, and is available both in light and dark modes.
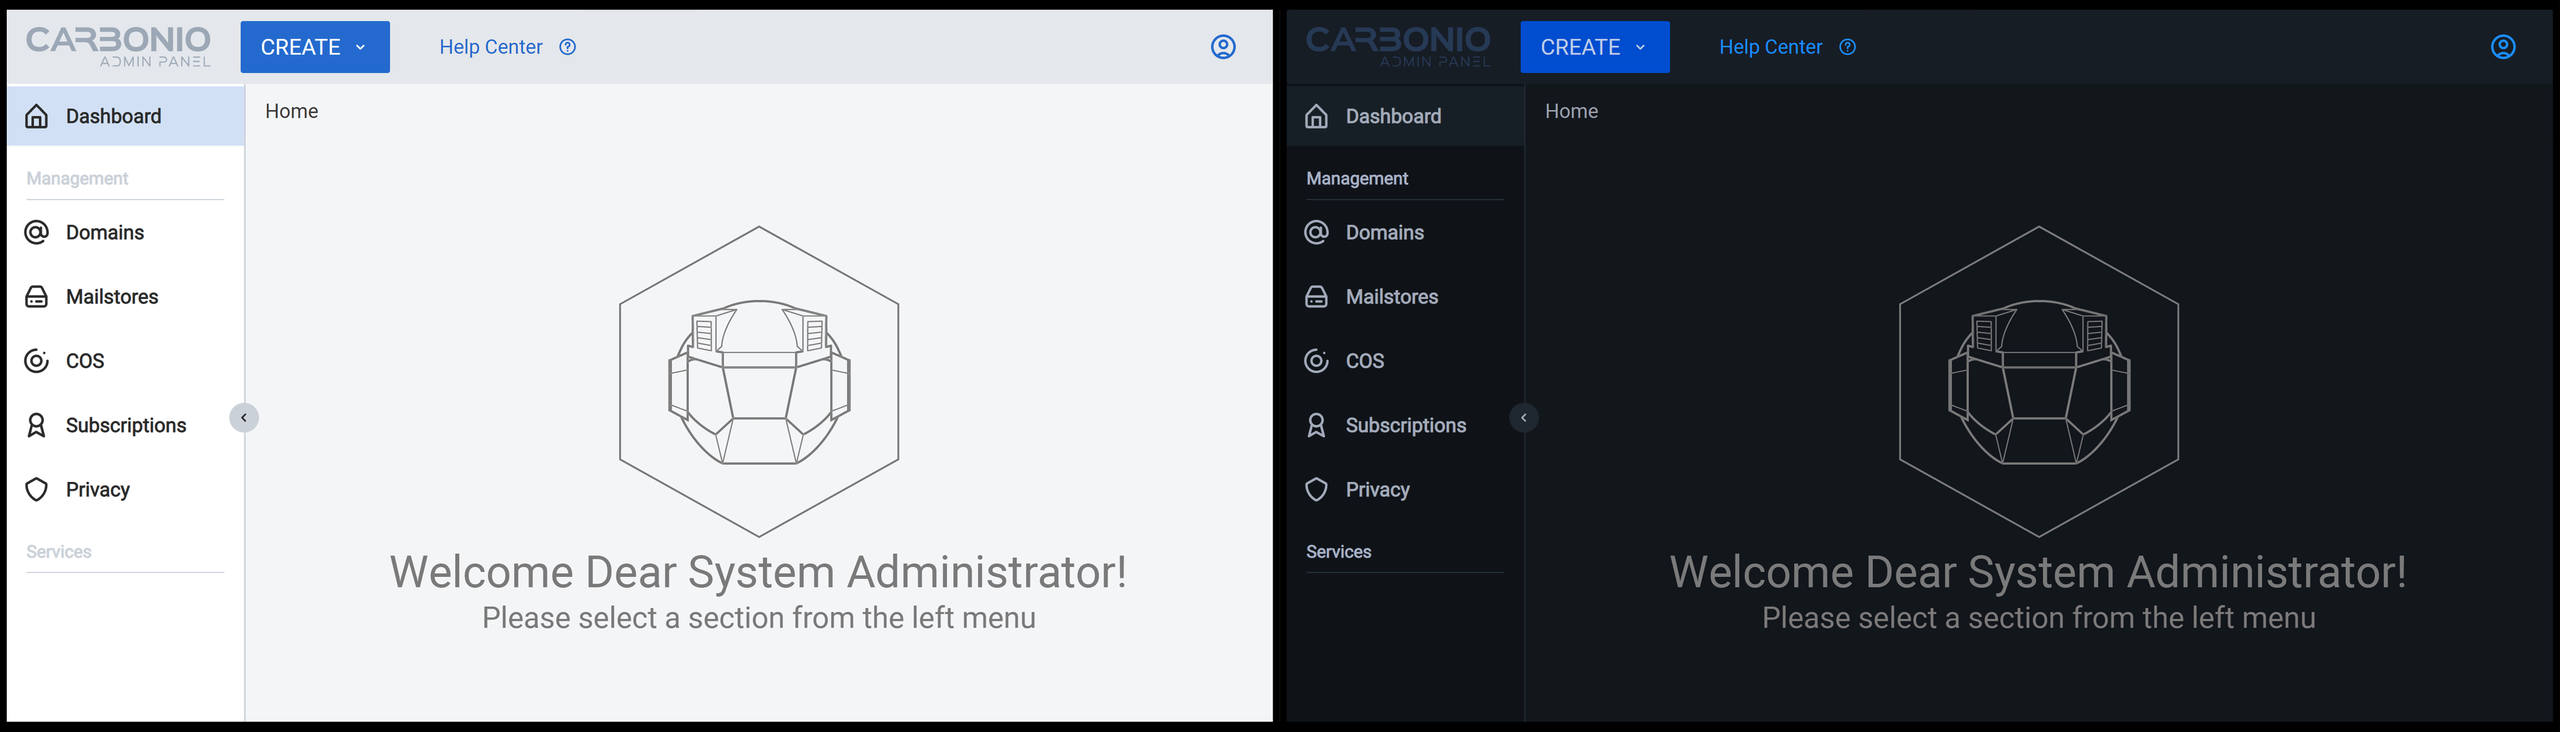
The primary bar on the side of the UI includes the essential categories to configure a Carbonio CE server, which are:
- Domain management: Tools for creating, editing, and removing domains are available in this area. Additionally, there are options for adding, changing and removing user accounts.
Mailstore management: Information on the mailstores and servers that are part of the infrastructure is given in this section, along with the configuration tools used to set them up. - Class of service management: Tools for configuring classes of service on the server are available in this area for creation, deletion, and modification.
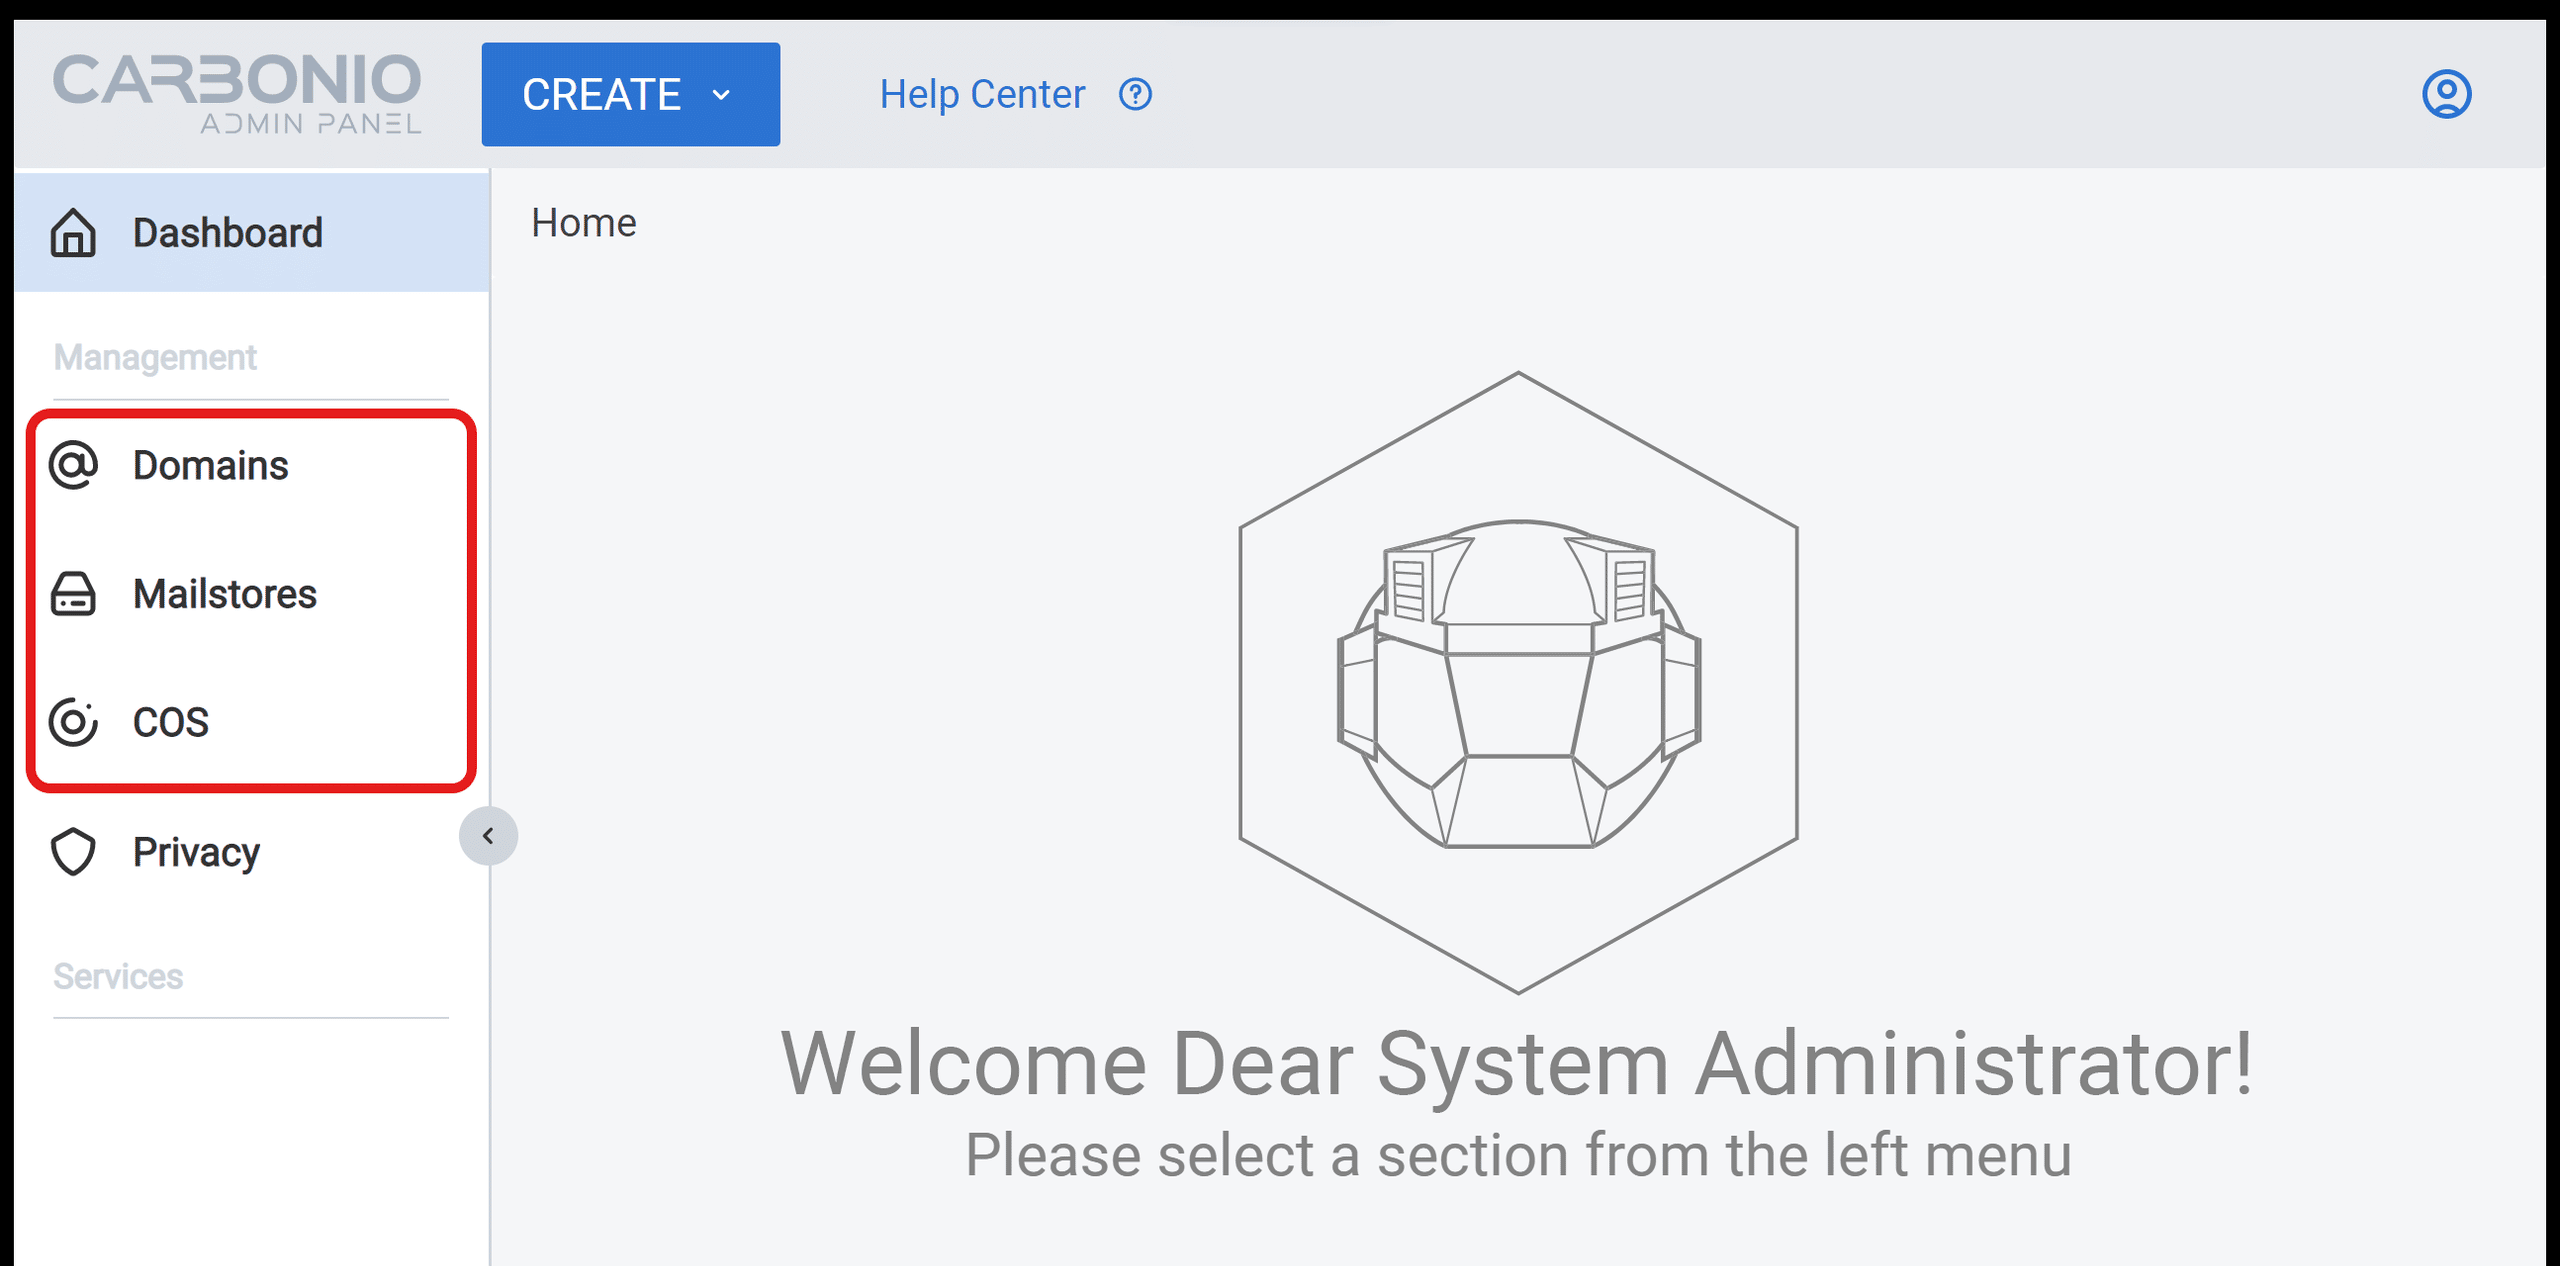
Figure 5: Carbonio CE server configuration menu
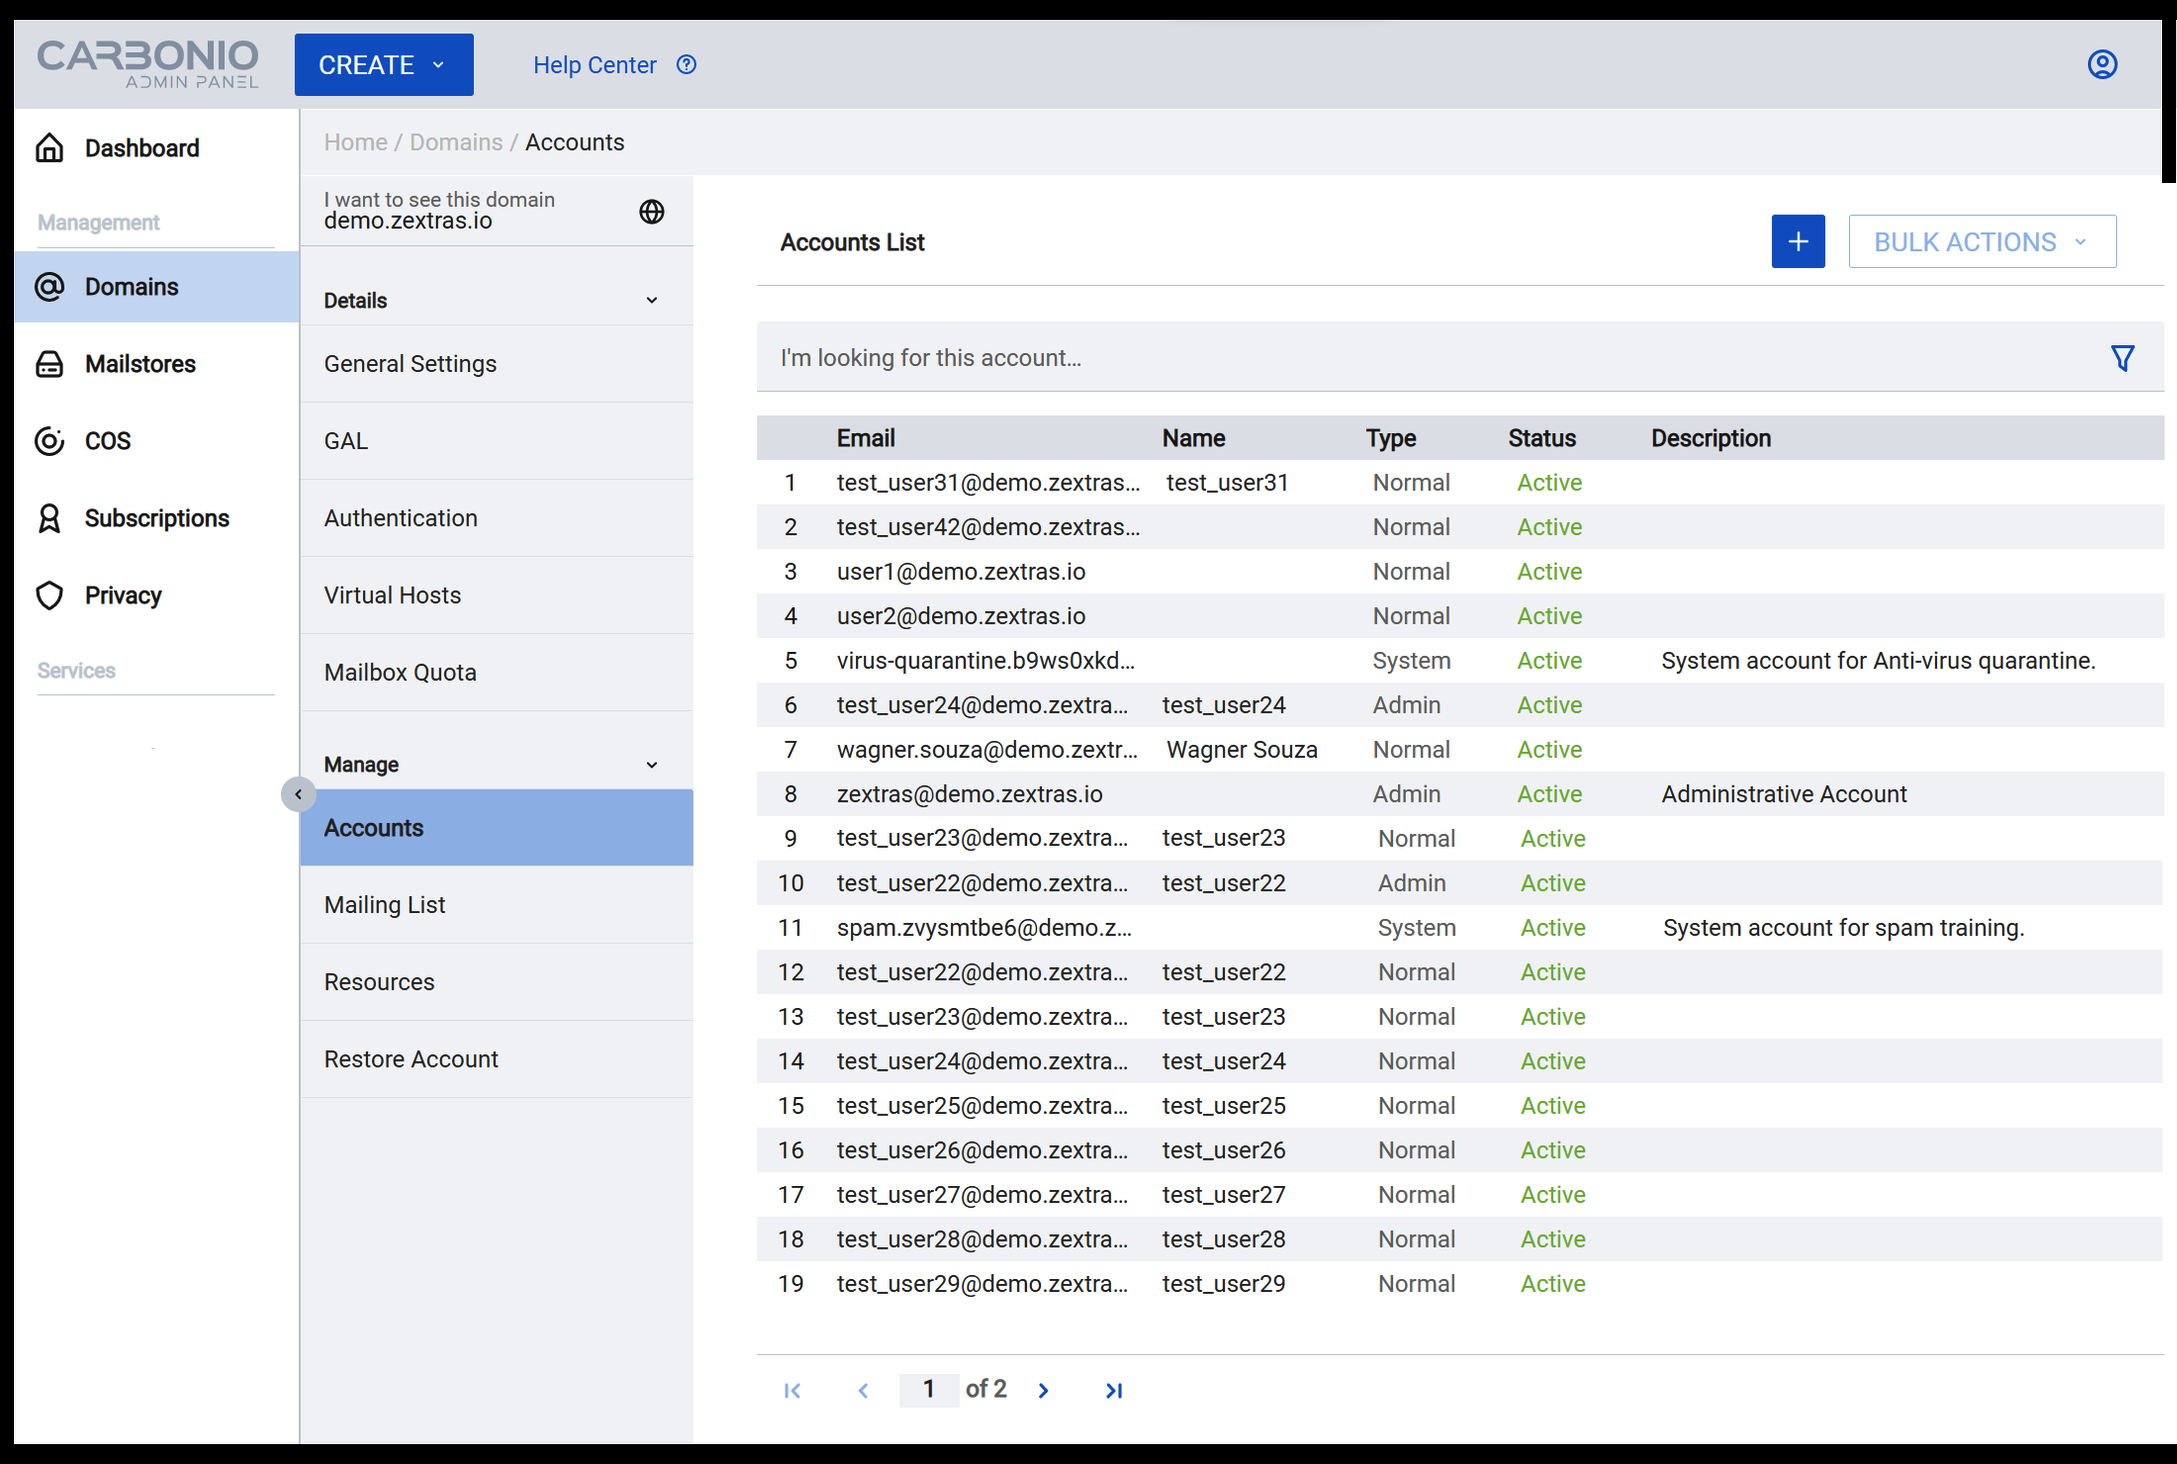
Carbonio CE Admin Panel tries to simplify the most frequent tasks done by system administrators on email servers. For instance, managing accounts is one of a system administrator’s most common activities. This is only a few clicks away using the Admin Panel — Domain > Select Domain > Accounts.
There you have it! You can now enjoy your private email and collaboration platform, and manage it easily through its dedicated admin panel.


