


This is an exploration of ReactPy, a Python library that helps create interactive user interfaces without JavaScript dependency. It’s simple to use for those new to web development, and helps integrate back-end and front-end technologies.
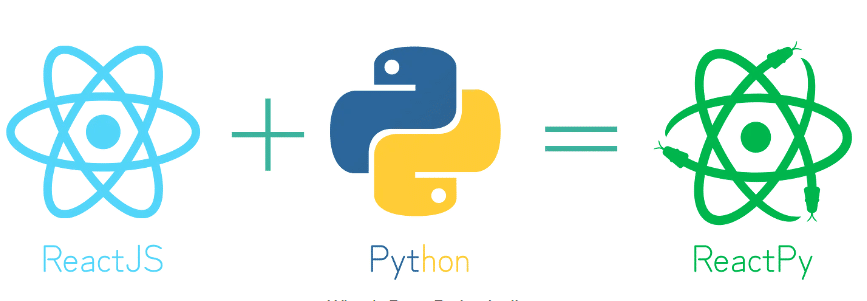
ReactPy is a contemporary Python library that enables developers to create dynamic and interactive user interfaces, resembling the functionalities of ReactJS, while eliminating the need for JavaScript dependency (as shown in Figure 1). It offers a seamless way to create captivating front-end experiences using Python and leveraging components that resemble those found in React. The library strikes an optimal balance by providing a straightforward approach for individuals new to web development, while also offering the necessary robustness for scaling projects. Whether you are a Python enthusiast looking to improve your front-end skills or a developer seeking smooth integration between back-end and front-end technologies, ReactPy is a highly valuable asset to have in your toolkit. Let’s dive in a comprehensive exploration of its capabilities, empowering you to effortlessly develop user interfaces for applications with simplicity and benefiting from the accessibility and robustness it offers.
Setting up the virtual environment
First, we install virtualenv to create a virtual environment:
$ pip install virtualenv
After installation, we will create a virtual environment:
$ virtualenv -p /usr/bin/python3.10 venv
This will create a new directory called venv.
I am using Python 3.10 here; you can use Python 3.8 or 3.9. Now, activate the virtual environment as shown here:
ht@ext:~/sambashare/rajni$ source venv/bin/activate

(venv) ht@ext:~/sambashare/rajni$ python

Python 3.10.12 (main, Jun 7 2023, 12:45:35) [GCC 9.4.0] on linux
Type “help”, “copyright”, “credits” or “license” for more information.
If you want to deactivate the virtual environment, simply write the command in the terminal as:
(venv) ht@ext:~/sambashare/rajni/venv/code$ deactivate
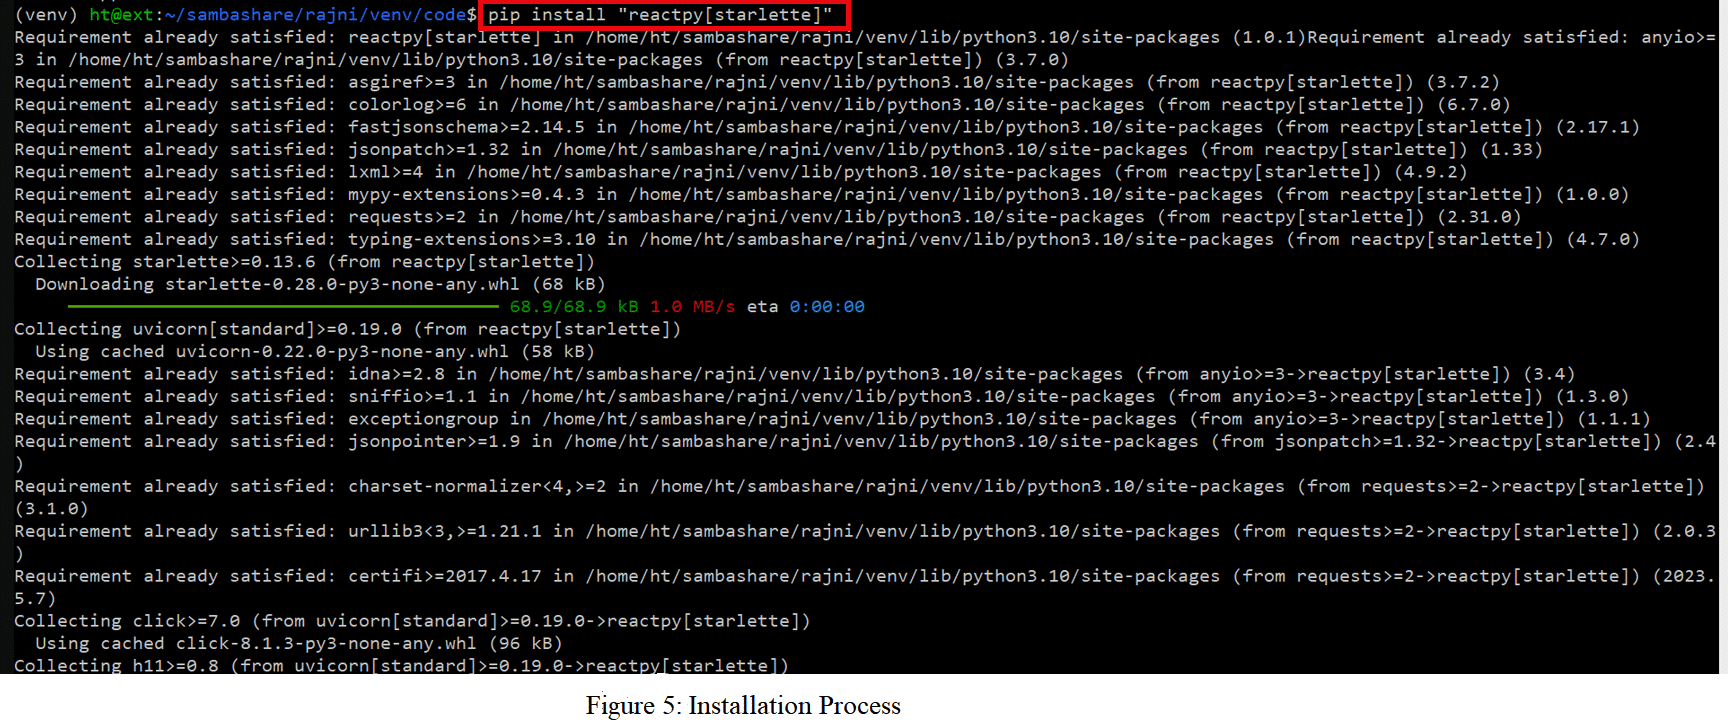
ReactPy is typically installed using pip along with one of the back-ends that it comes natively supported with. You can execute ReactPy as shown in Figure 2 if you want to use Starlette as the back-end.
Let’s take a simple example of ReactPy as shown below:
1 from reactpy import component, html, run
2 @component
3 def Show ():
4 return html.hl(“Hello, world!”)
5 run (Show,host=”192.168.11.19”,port=7000)
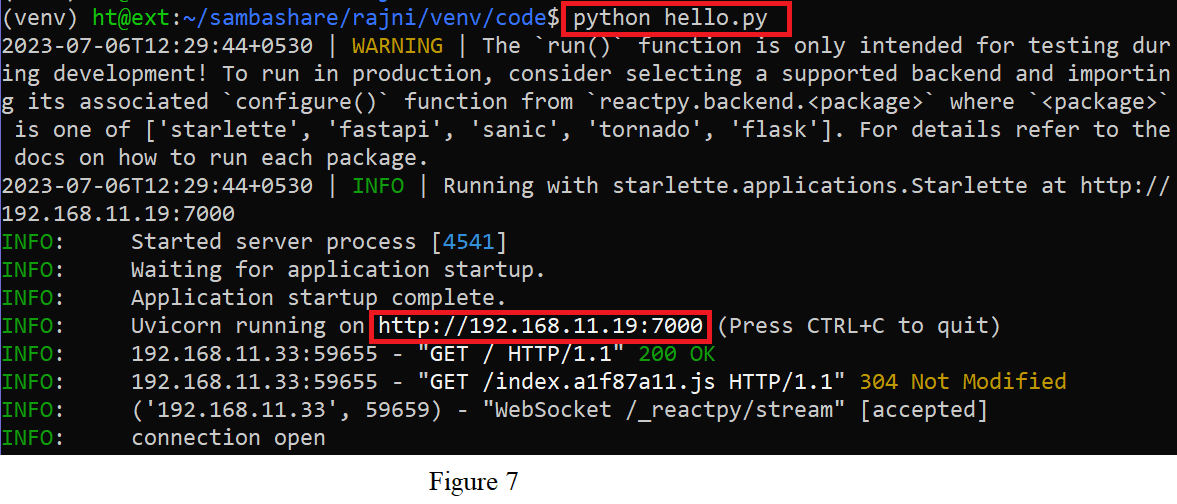
You can run this code using the Sublime editor or just the usual Python script. Save the content to hello.py and execute it with the following command:
$ python hello.py
Figure 3 shows how your output should appear.
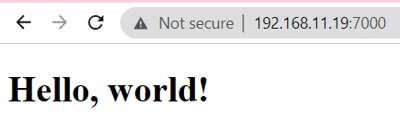
Enter the web address http://192.168.11.19:7000 into your browser. As shown in Figure 4, the ‘Hello world’ message is visible. If an error has occurred, change a small portion of the code, such as:
$ run(Show, host=”0.0.0.0”, port=7000)
…or:
$ run(Show)
If you cannot mention the host and port, then the application is running at the default IP address.
I’ll break down what each line does here.
- The first line, ‘from reactpy import component, html, run’, imports the required components from the ‘reactpy’ library. ‘html’ offers functions to create HTML elements, ‘component’ is a decorator used to define React components, and ‘run’ is used to execute the React application.
- The decorator ‘@component’ designates the ensuing function as a React component.
- ‘def Show():’ declares the ‘Show’ function, which symbolises a React component.
- The line that reads ‘return html.h1(“Hello, world!”)’ specifies the return value for the ‘Show’ component. It creates an HTML heading element (‘h1>’) with the text ‘Hello, world!’ using the ‘html.h1’ function from the ‘html’ module.
- The React application is launched with the command ‘run(Show, host=“192.168.11.19”, port=7000)’. The application is launched using the ‘run’ function from the ‘reactpy’ library. The root component of the application is passed as the ‘Show’ component. The IP address and port number on which the application will be hosted are specified by the ‘host’ and ‘port’ arguments. In this instance, it will be accessible via port 7000 and IP address ‘192.168.11.19’.
The code above creates a straightforward React component called ‘Show’ that renders an HTML heading element with the text ‘Hello, world!’ After that, the React application is launched and hosted at the given IP address and port.
Creating a ‘To-do List’ application
We can create a ‘To-do List’ application with the help of ReactPy as follows:
from reactpy import component, html, run
@component
def DataList(items, filter_by_priority=None, sort_by_priority=False):
if filter_by_priority is not None:
items = [i for i in items if i[“priority”] <= filter_by_priority]
if sort_by_priority:
items = sorted(items, key=lambda i: i[“priority”])
list_item_elements = [html.li({“key”: i[“id”]}, i[“text”]) for i in items]
return html.ul(list_item_elements)
@component
def TodoList():
tasks = [
{“id”: 0, “text”: “Read a book”, “priority”: 0},
{“id”: 1, “text”: “Meet Geet”, “priority”: 0},
{“id”: 2, “text”: “Hit the gym”, “priority”: 2},
{“id”: 3, “text”: “Buy egg”, “priority”: 1},
{“id”: 4, “text”: “Clean the house”, “priority”: 2},
{“id”: 5, “text”: “organize office”, “priority”: 2},
{“id”: 6, “text”: “Do some coding”, “priority”: 1},
{“id”: 7, “text”: “Read a book”, “priority”: 1},
]
return html.section(
html.h1(“My Todo List”),
DataList(tasks, filter_by_priority=1, sort_by_priority=True),
)
run(TodoList, host=”192.168.11.19”,port=7000)
The output of the To-do List application is shown in Figure 5.

Let’s move on to something more challenging. You can add images, titles, and captions, and combine them into one function by using various HTML elements:
from reactpy import component, html, run
@component
def Title(title):
return html.h1(title)
@component
def Photo():
return html.img(
{
“src”:”https://cdn.media.amplience.net/i/epammarketplace/open_source_license_header?version=1684831857337”,
“style”: {“width”: “40%”},
}
)
@component
def PhotographerName(caption):
return html.h4(caption)
@component
def PhotoViewer():
return html.section(
Title(“Picture of the day”),
Photo(),
PhotographerName(“Visos Banner”)
)
run(PhotoViewer, host=”192.168.11.19”,port=7000)
The result is displayed in Figure 6.

You can see that your code is reusable. So, for example, you can define a new function that has the photo and photographer name, and after that use that function multiple times, specifying only the URL and name itself. This is enough for making something like a gallery website.
ReactPy back-end
ReactPy supports the following back-end implementations:
- FastAPI
- Flask
- Sanic
- Starlette
- Tornado
To install ReactPy back-end, run the following command; you can install more than one option by separating them with commas.
$ pip install “reactpy[fastapi,flask,sanic,starlette,tornado]”
As can be seen, with ReactPy, building dynamic user interfaces is a breeze.


