


Docker Scout shifts container security from a static, point-in-time check to a dynamic, continuous process.
In modern software development, just scanning a container image once before deployment isn’t enough. New security vulnerabilities (CVEs) are discovered daily, and an image that was ‘safe’ on Monday could be a critical risk by Tuesday.
This is the problem Docker Scout is designed to solve. It’s an image analysis service that moves beyond static, one-time scans to provide dynamic, real-time security insights. It extracts a detailed software bill of materials (SBOM) and other metadata from your images and continuously evaluates this information against new and updated security advisories.
How Docker Scout works
Docker Scout operates in two distinct modes, each serving a different purpose in your development lifecycle.
- One-off local analysis: When you analyse an image locally using the Docker CLI or Docker Desktop, Scout performs a scan, gives you the results, and moves on. It doesn’t store any data about your image. This is perfect for quick checks during development.
- Continuous platform analysis: This is where Scout’s true power lies. When you activate Docker Scout on a repository (like on Docker Hub or another integrated registry), it saves a metadata snapshot of your pushed images.
This snapshot allows for dynamic evaluation. When a new vulnerability is disclosed, Docker Scout recalibrates the security status of your existing images using this saved metadata. You get real-time security updates for all your tagged images in the dashboard without ever needing to re-push or re-scan them.
How to analyse your images: Two key workflows
You can interact with Docker Scout from your registry (for continuous monitoring) or right from your local machine (for development and CI).
Registry-based analysis (the continuous method): This method is ideal for production workflows. Once you activate Scout on a repository, any new image you push is automatically analysed.
To trigger an analysis, simply push your image to the configured repository. For the most detailed and ‘fine-grained’ results, it is highly recommended to build your image with flags that attach ‘build attestations’ (like SBOM and provenance):
# Build and push the image, attaching SBOM and provenance data
docker build --push --tag <your-org>/<image:tag> \
--provenance=true \
--sbom=true .
After pushing, the image and its analysis results will appear on the ‘Images’ page in the Docker Scout dashboard.
Local analysis (for development and CI): You can get immediate feedback on images residing on your local machine using either Docker Desktop or the CLI.
When using Docker Desktop:
- Pull or build the image you want to analyse.
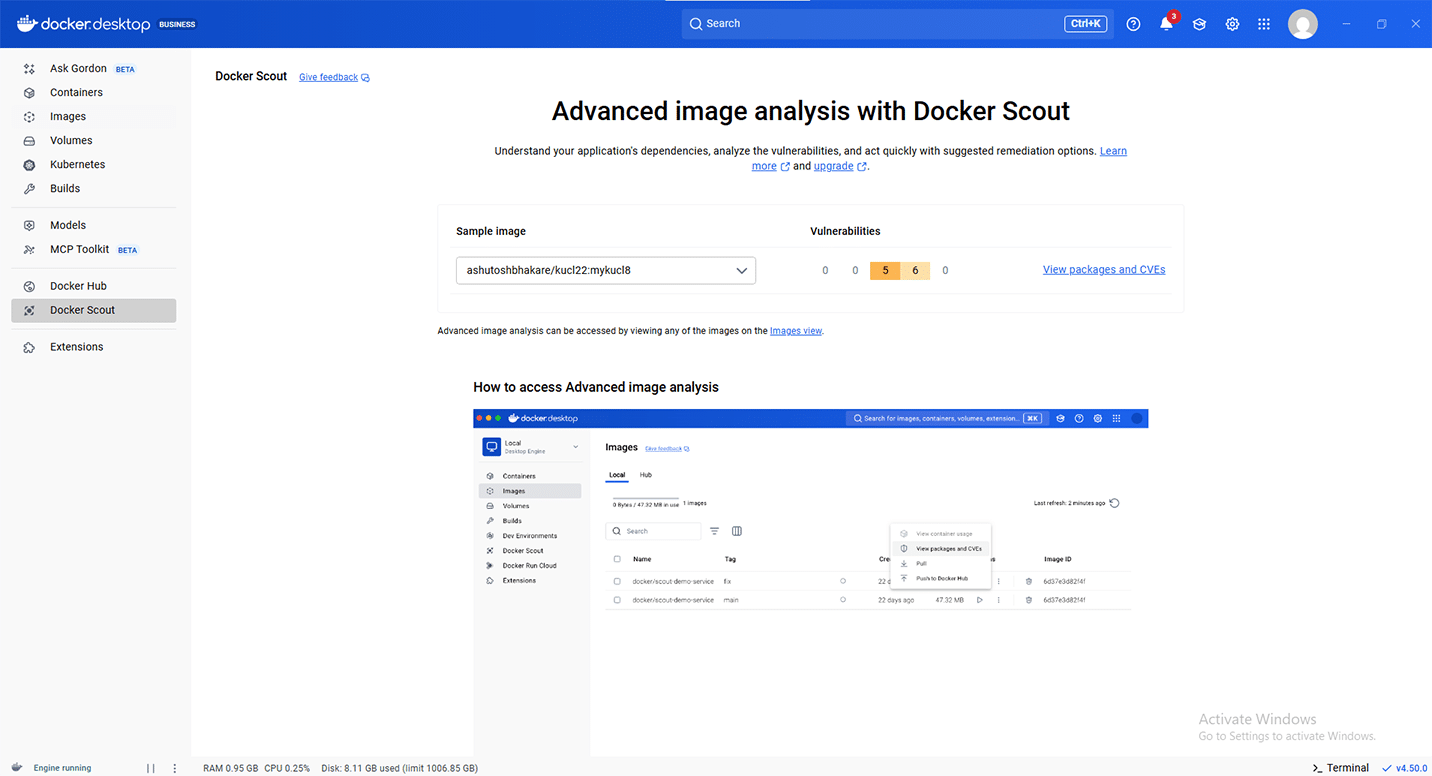
- Go to the ‘Images’ view in the Docker Dashboard.
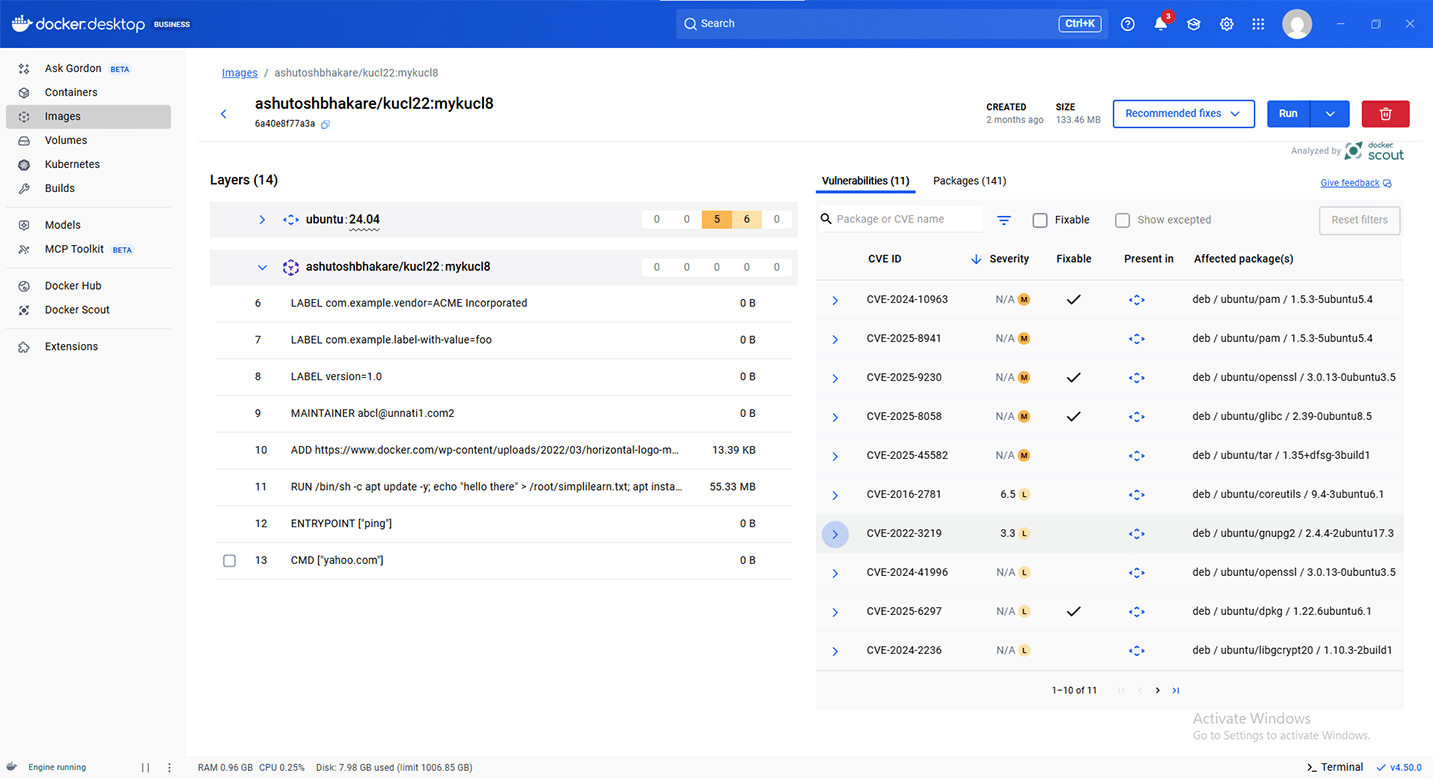
- Select your image from the list to open the ‘Image details’ view, as shown in Figure 1. This view provides a full breakdown of the packages, layers, and vulnerabilities found by Docker Scout.
When you use the CLI, the docker scout commands offer powerful terminal-based tools.
- docker scout quickview: This command provides a high-level summary of your image and its base image. Its most powerful feature is comparing your current base image to a ‘refreshed’ version or an updated tag (like ‘stable’), showing you exactly how many vulnerabilities you could fix with a simple update.
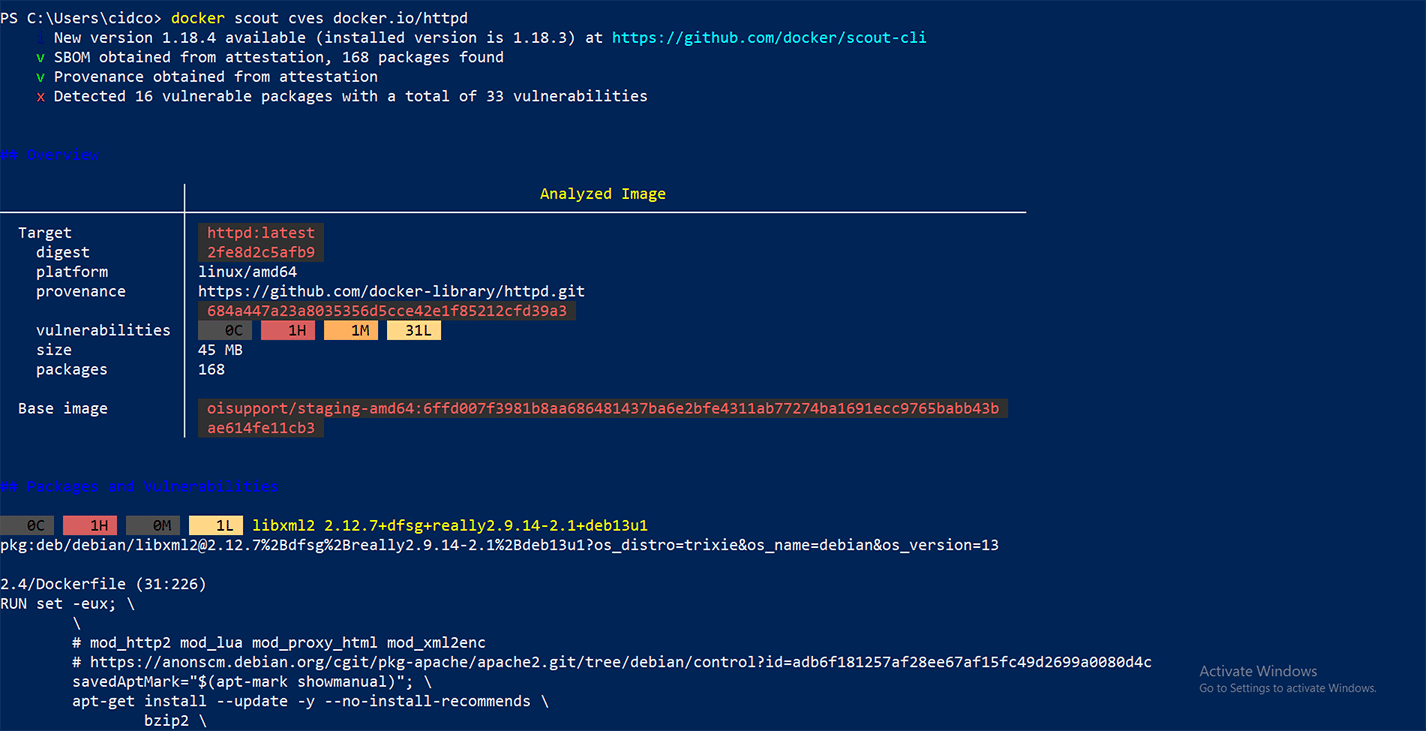
- docker scout cves: This gives you a complete, detailed list of all CVEs in the image. You can use flags to filter the results, for example, to see only critical vulnerabilities in production packages:
# Find only critical vulnerabilities in non-dev packages

docker scout cves --only-severity critical --only-vuln-packages <image:tag>
You can also export these results to structured formats like SARIF for integration with other tools.
Interpreting vulnerability reports: Severity vs CVSS
Understanding how Scout ranks vulnerabilities is crucial. Docker Scout aggregates data from multiple advisory sources but prioritises the severity rating from the package’s maintainer. For example, for an OS package in a Debian image, the severity assigned by the Debian security team is prioritised over a generic CVSS score from a national database. This can sometimes lead to a confusing result, but this is by design.
For instance, you might see a vulnerability rated ‘LOW’ severity but with a 9.8 (Critical) CVSS score. This happens when the preferred advisory (e.g., the OS maintainer) rates the vulnerability as LOW but doesn’t assign a CVSS score. Docker Scout will then also display the CVSS score from a fallback advisory, which might be 9.8. Scout’s official severity rating, however, will correctly reflect the preferred source’s LOW assessment.
Vulnerabilities that have no CVSS score in any source are marked as ‘Unspecified’ (U). Most advisories follow the standard CVSS v3.0 mapping:
| CVSS score | Severity rating |
| 9.0 – 10.0 | Critical (C) |
| 7.0 – 8.9 | High (H) |
| 4.0 – 6.9 | Medium (M) |
| 0.1 – 3.9 | Low (L) |
Getting started: Activation and limits
To activate Docker Scout:
- You must have an Editor or Owner role in your Docker organisation.
- Docker Hub repositories are integrated by default, but third-party registries must first be integrated with your Docker organisation.
- Go to Repository settings in the Docker Scout dashboard, select your repositories, and click on Enable image analysis.
Subscriptions and limits of Docker Scout are:
- The ‘Docker Personal’ plan includes one Scout-enabled repository. You can upgrade your subscription for additional repositories.
- Image analysis (both on the platform and via Docker Desktop’s background indexing) has a maximum image size of 10GB.
This limit is waived for images that are pushed with an SBOM attestation (using the –sbom=true flag).
By saving image metadata and constantly recalibrating against new threat intelligence, Docker Scout ensures your security posture is always up-to-date, giving you the power to find and fix vulnerabilities before they become critical problems.


